In IGEL OS 12 you can enable smart card authentication to Microsoft Azure Virtual Desktops (AVD) by leveraging Microsoft Entra Certificate-Based Authentication (CBA). This article guides you through the necessary configurations. You can also see the blog post for an overview: https://www.igel.com/blog/authentication-to-windows-365-with-igel-smart-card/.
For more information on the Common Access Card (CAC) / Personal Identity Verification (PIV) smart cards and Yubikey PIV supported by IGEL, see https://www.igel.com/blog/cac-piv-smart-cards-yubikey-and-more-insider-tips-on-how-igel-os-use-both/ .
Prerequisites
-
IGEL OS Base System version 12.6.0 or higher
-
IGEL AVD App verison 1.3.0 or higher
US Military / Government customers need to contact their regional IGEL representative for the complete configuration.
Process Overview
-
If you are a US Military / Government customer, contact the regional IGEL representative for configuration support.
-
Configure Microsoft Entra ID Certificate Based Authentication as described in https://learn.microsoft.com/en-us/entra/identity/authentication/concept-certificate-based-authentication .
-
Configure Smart Card Middleware in IGEL OS.
-
Configure AVD in IGEL UMS Web App.
-
Test the authentication on the IGEL OS endpoint device.
Configure Smart Card Middleware
IGEL has a built-in OpenSC that you can use as middleware, or you can choose a middleware from the IGEL App Portal.
Built-in OpenSC as Middleware
If no Smart Card middleware from the IGEL App Portal is installed, the built-in OpenSC middleware is enabled by default.
It is possible to use the OpenSC middleware in parallel with a Smart Card middleware from the IGEL App Portal, but this is not recommended. If you still want to use both middlewares in parallel, edit the configuration as follows:
-
In the profile configurator, go to System > Registry > scard > pkcs11 > use_opensc
-
Enable the parameter.
Smart Card Middleware from the IGEL App Portal
-
Go to the IGEL App Portal.
-
Open the Smartcard category.
-
Choose an app and import to the IGEL UMS.
-
Install the app on the IGEL OS endpoints according to your app distribution process.
-
Reboot the endpoint devices.
The middleware will become active automatically.
Configure the AVD Session in IGEL UMS Web App
-
Import the AVD app from the IGEL App Portal to your UMS.
Use version 1.3.0 or higher.
-
Create a new profile. For details, see How to Create and Assign Profiles in the IGEL UMS Web App.
-
Select OS 12 (shown only if there are OS 11 devices registered in the UMS) and enter the name of the profile.
-
Click Select Apps and select IGEL Azure Virtual Desktop.
-
Click Save.
-
Go to Apps > AVD > AVD Sessions.
-
Click + to create a new session and add a Session Name.
-
Go to the Advanced Options of the session.
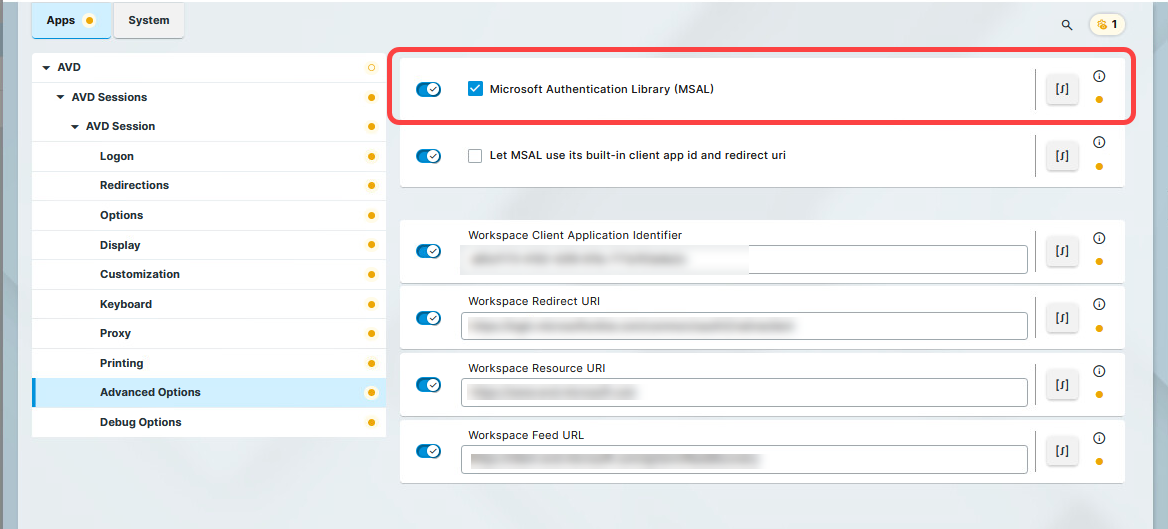
-
Enable Microsoft Authentication Library (MSAL)
-
Go to System > Registry.
-
Go to the registry key scard.scwatchd.enable and enable Smart Card Insert and Removal Actions.
This will allow executing commands when a hardware event is triggered by inserting or removing the smart card from the reader.
-
Go to scard.scwatchd.insert_action and set the following command as the value:
export avduser=$(pkcs11getloginname | grep "^Login:" | sed -e "s/^Login://"); su -c "appwrap avd0 avd" user
This will read out the User Principal Name (UPN) on smart card insert and start the session.
-
Go to scard.scwatchd.removal_action and set the following command as the value:
export avduser=""; killall -9 igelrdp3-avd; killall -9 igelrdp3-msal-auth
This will reset the ‘avduser’ variable and hard kill the running processes to disconnect from the Windows 365 session.
-
Go to app.avd.sessions.avd0.options.cmd_ext and set the following command as the value:
--username $avduser
This will tell the IGEL AVD App to set the username to the previously retrieved UPN during the card insert.
Test Authentication
Once the configurations are applied, you should test the authentication process on the endpoint device.
You should get a similar experience as in the below demo video: