Overview
This document describes, in exemplary fashion, the following Single Sign-On (SSO) scenario: The user logs on to Microsoft Active Directory/Kerberos via a smartcard that is connected to an IGEL OS endpoint device. Later on, the Firefox browser or the Zoom VDI client connects to a remote site via a proxy. This proxy offers NTML authentication as the only authentication method.
Because NTLM requires a password, and the non-interactive logon via smartcard does not provide a password, a replacement password has to be acquired. Both the Kerberos system of Active Directory and the endpoint device must be configured appropriately; Kerberos must send supplemental NTLM credentials encapsulated in a Kerberos service ticket, and the endpoint device must acquire and decrypt an appropriate service ticket at logon.
Environment
-
Endpoint devices with IGEL OS 11.06 or higher
-
IGEL Universal Management Suite (UMS) 6.08 or higher
-
Smartcard reader
-
Microsoft Active Directory
-
Proxy with NTML authentication
Applications that Can Use the NTLM
-
Firefox browser
-
Zoom VDI client
Instructions
Creating a User Account in Active Directory
-
Create an Active Directory user account with a random logon name, e.g. "igelendpoint".
-
Set the following options for this account;
-
"Password never expires"
-
"This account supports Kerberos AES 256 bit encryption."
-
Mapping the Service Principal Name (SPN) and Creating a Keytab
With the following procedure, you map the Service Principal Name Host/igelendpoint.dev.test to the user igelendpoint@DEV.TEST, set the password for the user igelendpoint to a randomized string, and export a keytab with an AES256-SHA1 key:
-
Open the command-line shell (
cmd.exe) as Administrator. -
Enter the following command:
ktpass –out igelendpoint-dev-test.keytab -mapUserigelendpoint@DEV.TEST+rndPass –mapOp set +DumpSalt –crypto AES256-SHA1 –ptype KRB5_NT_PRINCIPAL –princ HOST/igelendpoint.dev.test@DEV.TEST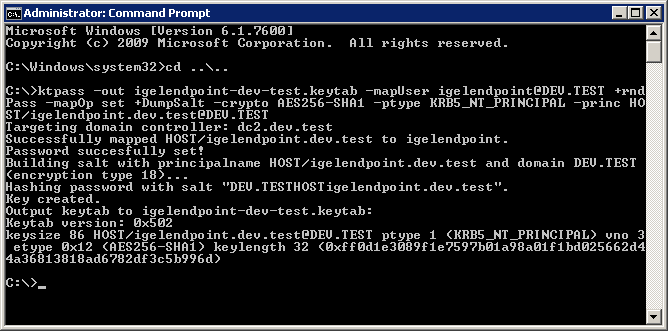
-
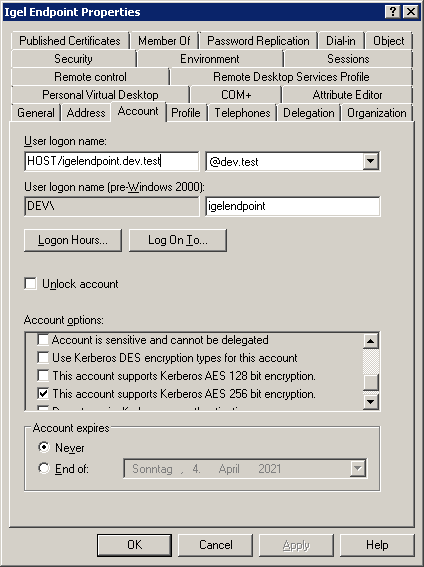
Check the properties of your new AD user; the User logon name should have changed to the SPN name:
Encoding the Keytab in Base64
To transfer the binary key tab file to the UMS, you must encode it in Base64.
With the following procedure, you encode the binary keytab file igelendpoint-dev-test.keytab to igelendpoint-dev-test-keytab.txt with Windows PowerShell:
-
Open Windows PowerShell.
-
Enter the following command:
[Convert]::ToBase64String([IO.File]::ReadAllBytes(‘C:\igelendpoint-dev-test.keytab’)) | Out-File ‘C:\igelendpoint-dev-test-keytab.txt’)
Transferring the keytab to the UMS
-
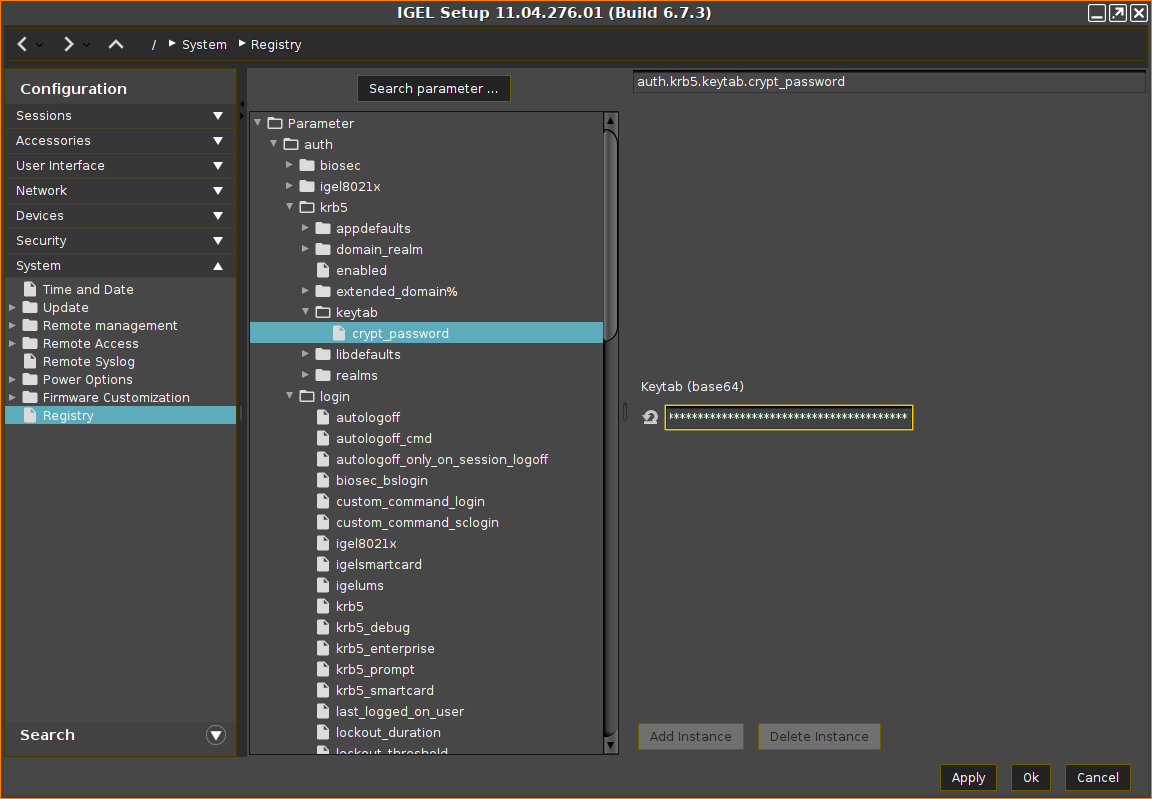
Open the UMS configuration dialog or the local Setup of your device and go to System > Registry > auth > krb5 > keytab > crypt_password.
-
Open the Base64 encoded keytab file (in our example:
igelendpoint-dev-test-keytab.txt) with a text editor. -
Copy the content of the file from the text editor and paste it to Keytab (base64).
-
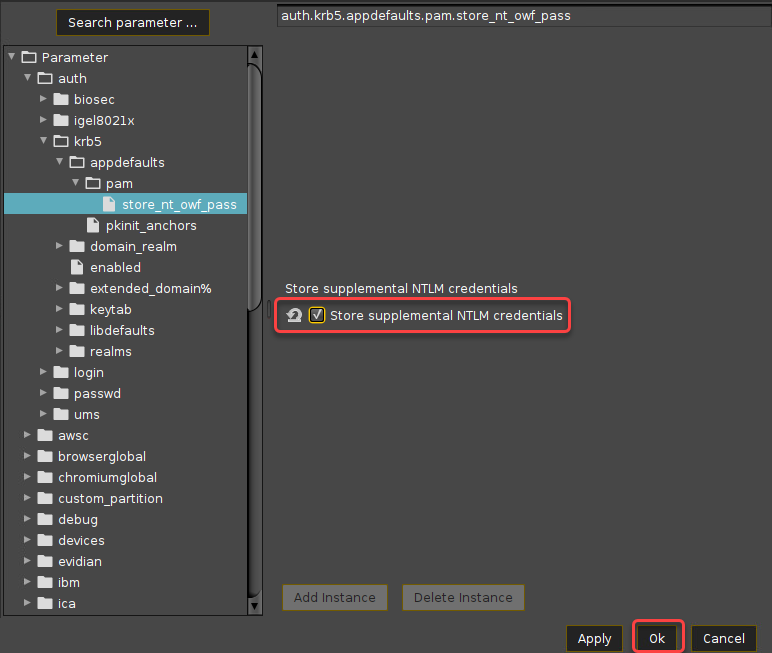
Go to System > Registry > auth > krb5 > appdefaults > pam > store_nt_owf_pass and enable Store supplemental NTLM credentials. and click Ok
-
Check if the NTLM passthrough authentication works as expected.