Assigning Permissions
After the AD users have been imported, they can access the UMS with their Active Directory credentials.
As UMS administrators, the users still need individual access rights.
The logon to the UMS is not possible via the 'pre Windows 2000 logon name' ('DOMAIN\logon name'), but only via the format 'logon name@DOMAIN'.
For example, in order to be able to change the configuration of a thin client, a user requires authorization to browse the thin client's directory path and configure the thin client itself.
To assign these rights, proceed as follows:
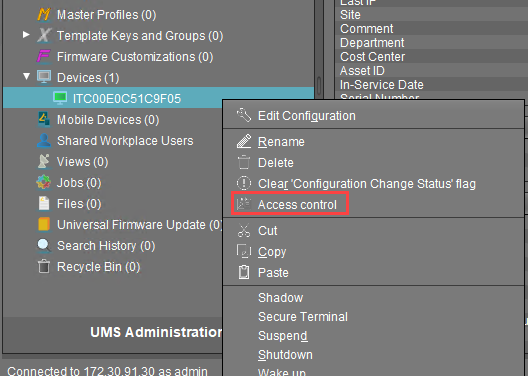
In the structure tree of the UMS console choose the Devices node or a subgroup of devices or a single client.
Click Access Control in the context menu of your selection.

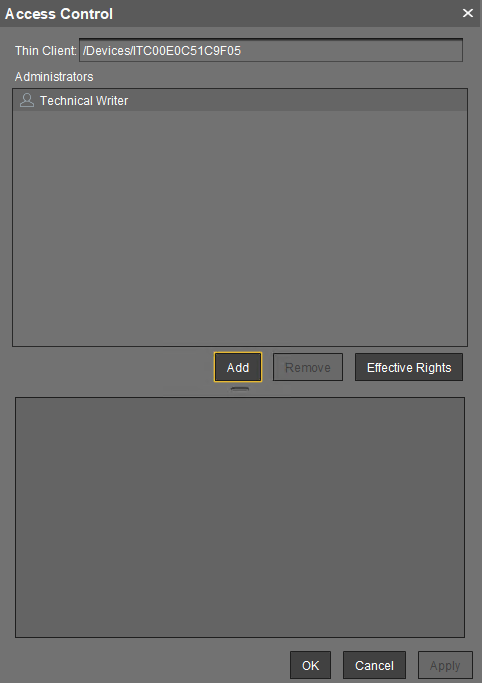
The Access Control window opens.

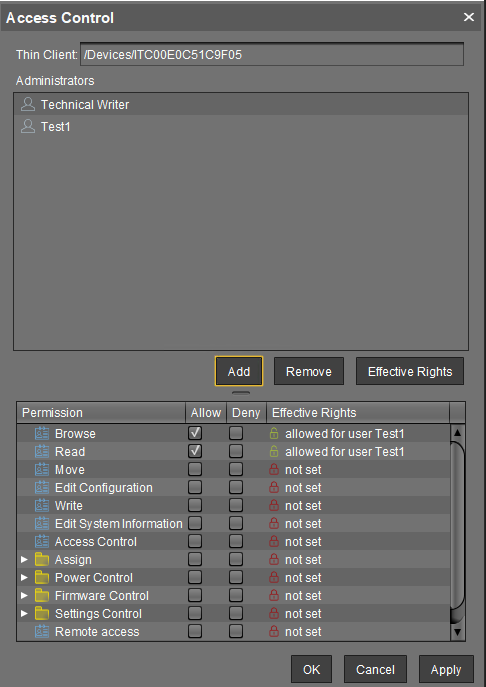
Click Add to select your new user/group.
The corresponding Effective Rights will be listed in the lower part of the mask.

Allow or Deny the rights of the selected group or user for access to the selected devices.
Confirm the settings with OK.
Click the Refresh button of the console to apply the changes in the UMS.
If you have changed the rights of registered users they only take effect after a refresh.
For further details about authorization rules see our How-To IGEL UMS: User Authorization Rules.
Access rights to objects or actions within the IGEL UMS are attached to the administrator accounts and groups. The rights of the database user account cannot be restricted. They are created during installation or when setting up the data source. The account always has full access rights in the UMS.
