Citrix Netscaler: Example Configuration as Reverse Proxy in IGEL UMS with SSL Offloading
This article describes a possible configuration of the IGEL Universal Management Suite (UMS) and Citrix Netscaler for SSL offloading.
General compatibility is tested with the configurations described in this article. There could be different ways to do the configuration.
As the reverse proxy is an external software we cannot provide full support for each version.
Requirements
Requirements for UMS and certificate configuration for reverse proxy are summarized in Configure the UMS to Integrate Reverse Proxy with SSL Offloading.
Process Overview
The configuration tasks of the reverse proxy are:
UMS / ICG configuration and certificate export as described in Configure the UMS to Integrate Reverse Proxy with SSL Offloading.
UMS server backend configuration
Virtual Server configuration
SSL policy configuration for client certificate forwarding
UMS Server Backend Configuration (SSL)
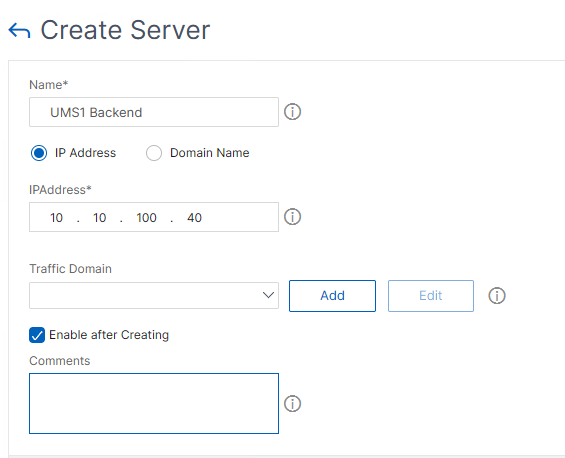
Create Server
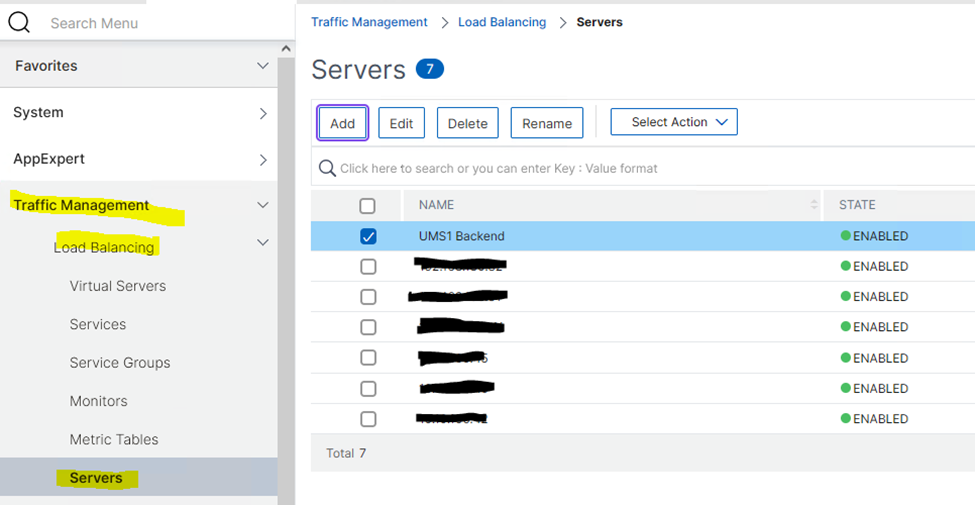
Add a server configuration under Traffic Management > Load Balancing > Servers.
Add Load Balancing Service and Monitor
The UMS server backend must be configured as Service under Traffic Management > Load Balancing > Services.

Click Add.
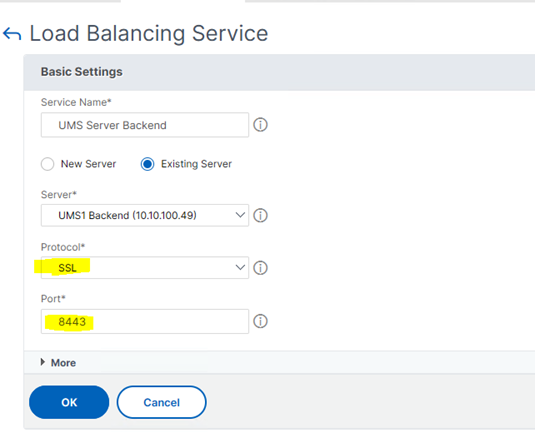
Set the following:
Select the previously created Server definition.
Set Protocol to SSL.
Set Port to UMS Web Port (8443).
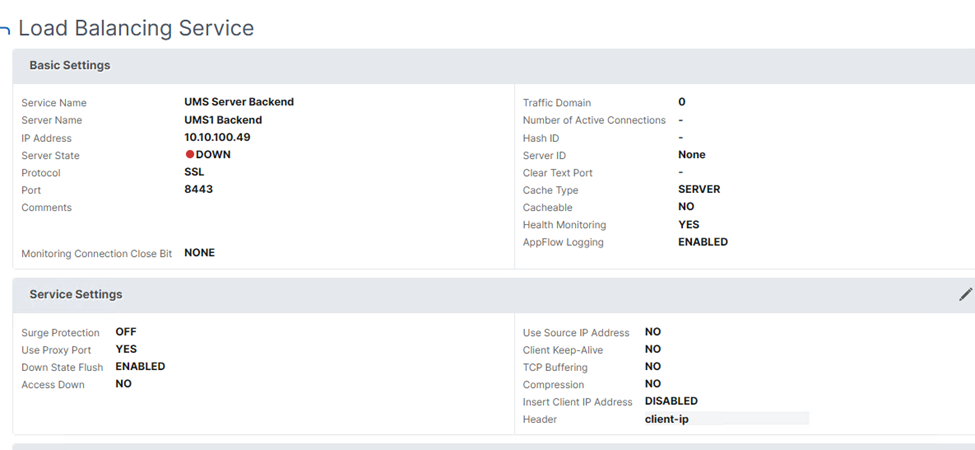
Click OK and check the settings in the Load Balancing Service details dialog.
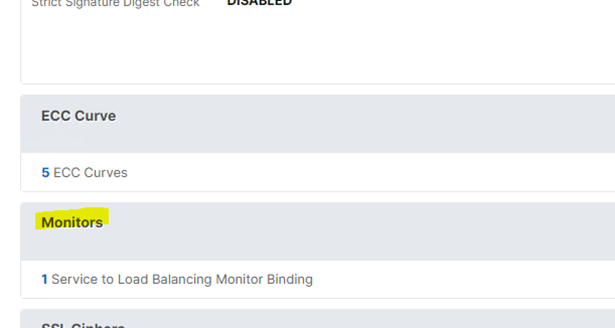
In the Load Balancing Service configuration add a monitor for UMS service.
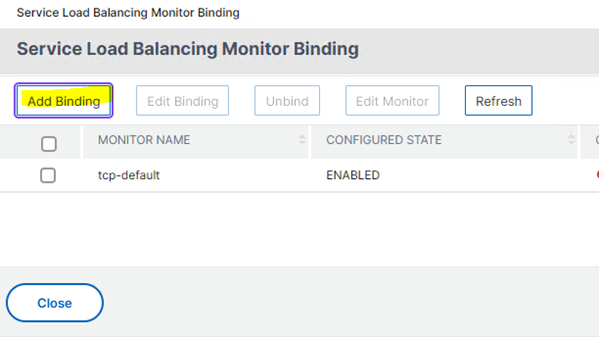
Click Add Binding.
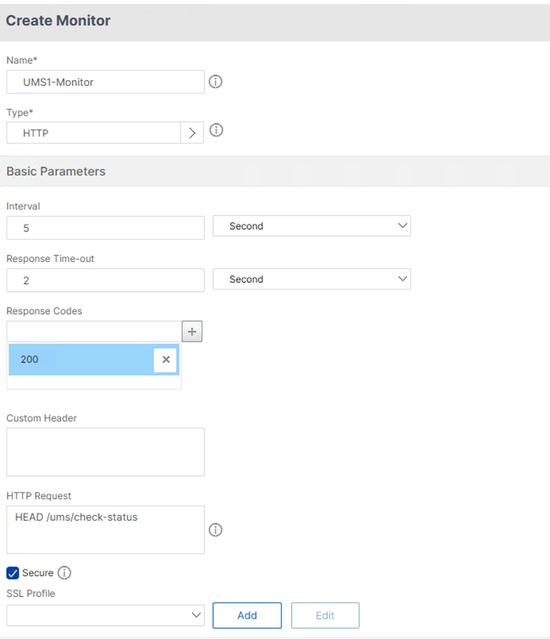
Set the following monitor settings:
Type to HTTP.
Response Code to 200.
HTTP Request:
HEAD /ums/check-status.Enable Secure.
Under SSL Profile click Add.
The SSL Profile configuration dialog opens.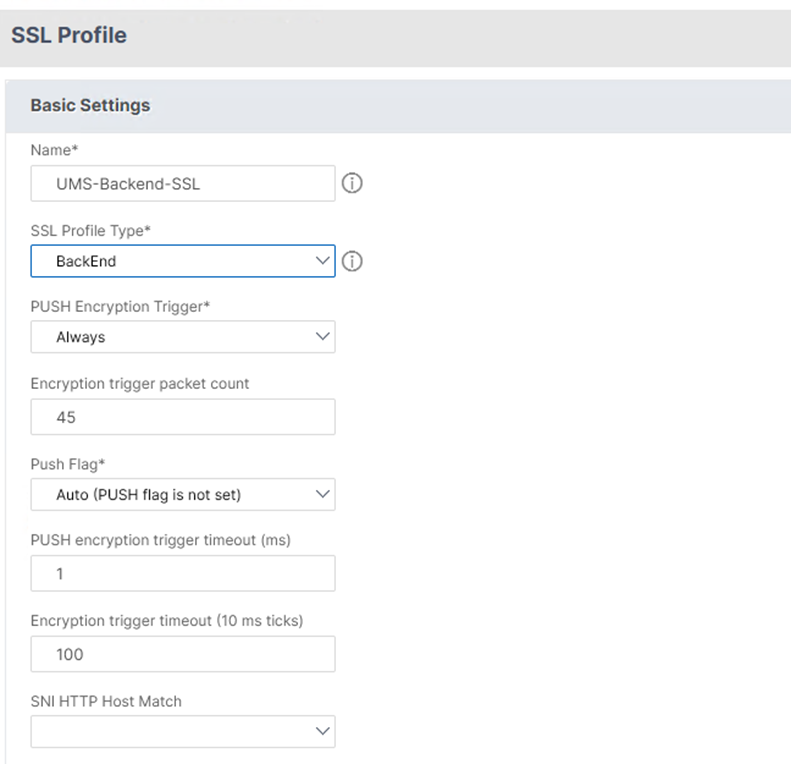
Set SSL Profile Type to BackEnd.
When the backend configuration is successful the Server State is listed as up in the Load Balancing Service details dialog.
Add a Service Group
The backend server can be grouped to Service Groups.
Go to Traffic Management > Load Balancing > Service Groups.
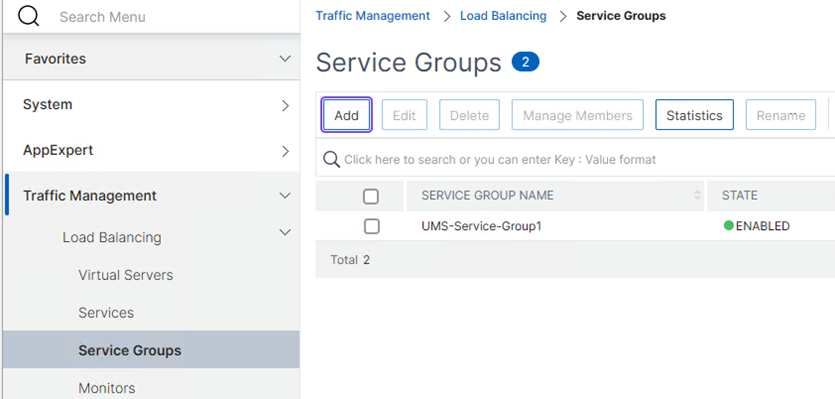
Click Add.
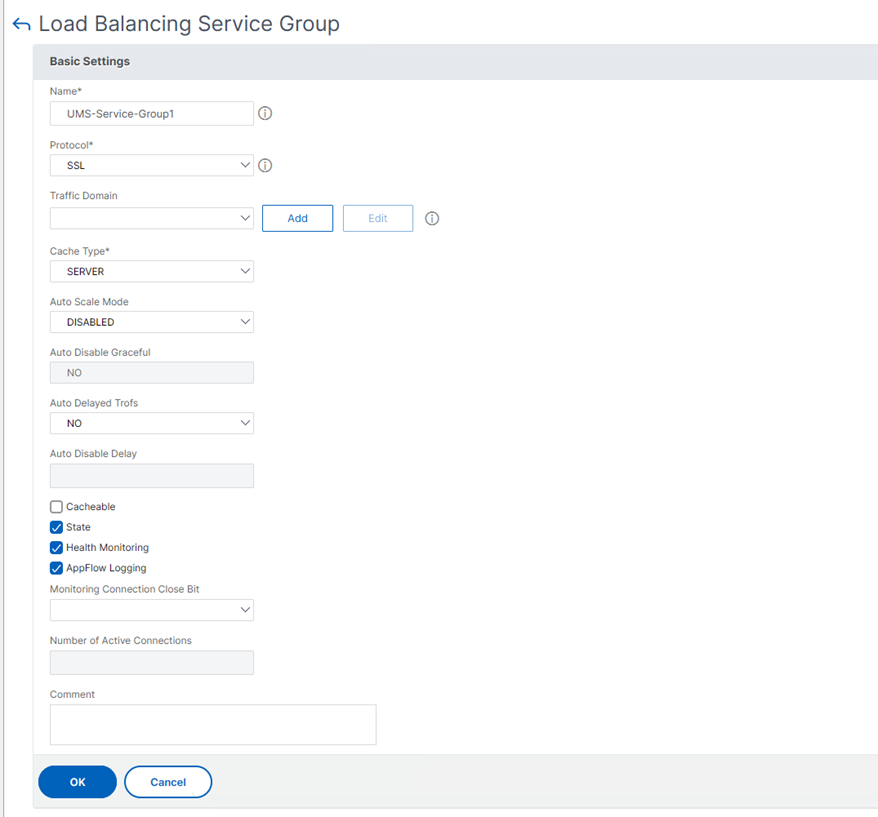
Set the Protocol to SSL and click OK.
The Backend Server must be added to Service Group Members.

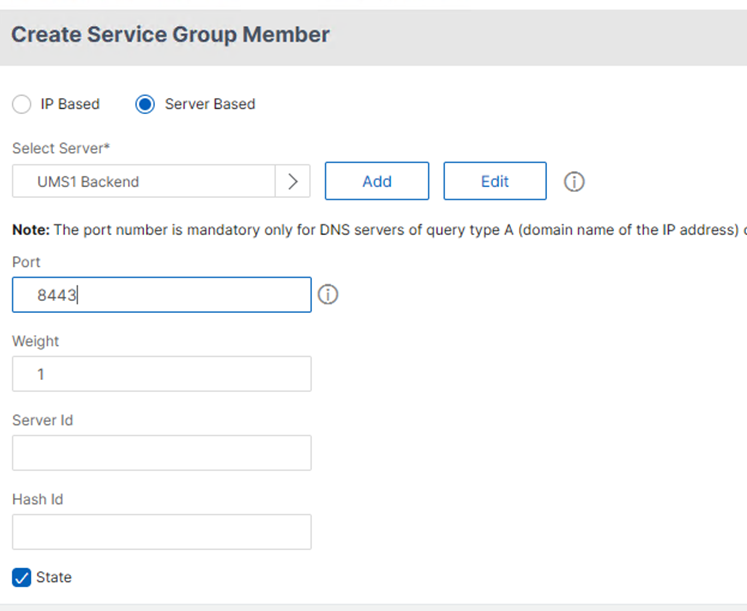
In the Create Service Group Member dialog, set the following:
Select the radio button Server Based.
Under Select Server, select the created service (UMS server) definition.
Add 8443 under Port.
Virtual Server Configuration
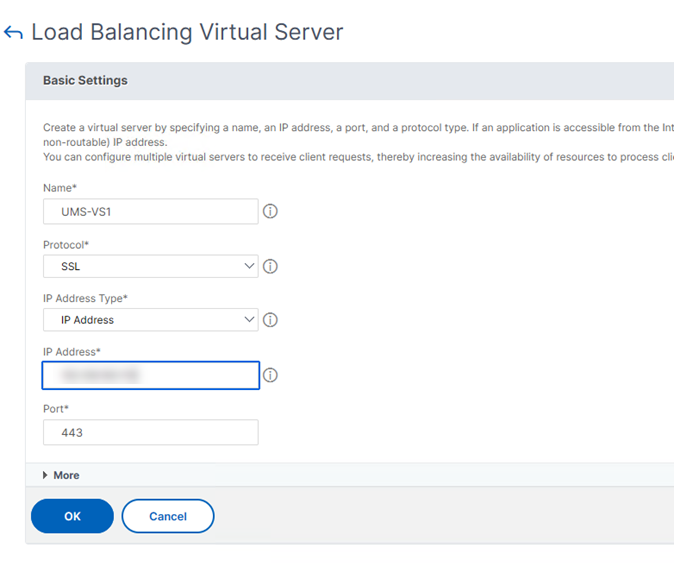
The Netscaler Listener is called a Virtual Server and can be configured under Traffic Management > Load Balancing > Virtual Servers.
Add a Virtual Server.
Set the following:
Protocol to SSL
IP Address
Port to 443
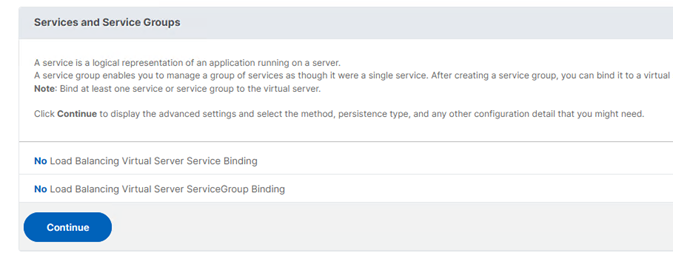
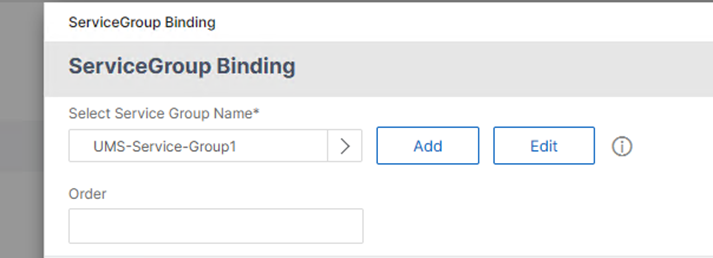
Under Services and Service Groups add the previously created Service Group.
Add Certificates
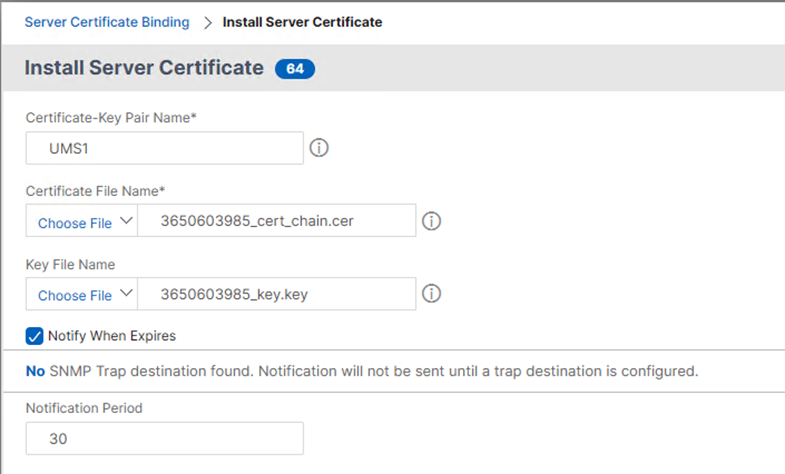
Under Certificate add a Server Certificate. For details on how to get the certificate chain and key, see Configure the UMS to Integrate Reverse Proxy with SSL Offloading.
The SSL Offloading requires the UMS Web / ICG Server certificates / keys for the SSL termination.
Select first the Web/ICG Certificate Chain file and add the Web/ICG key file.
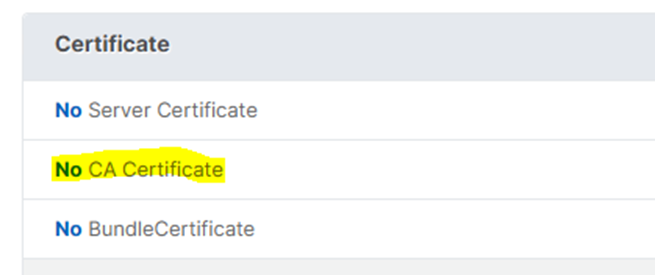
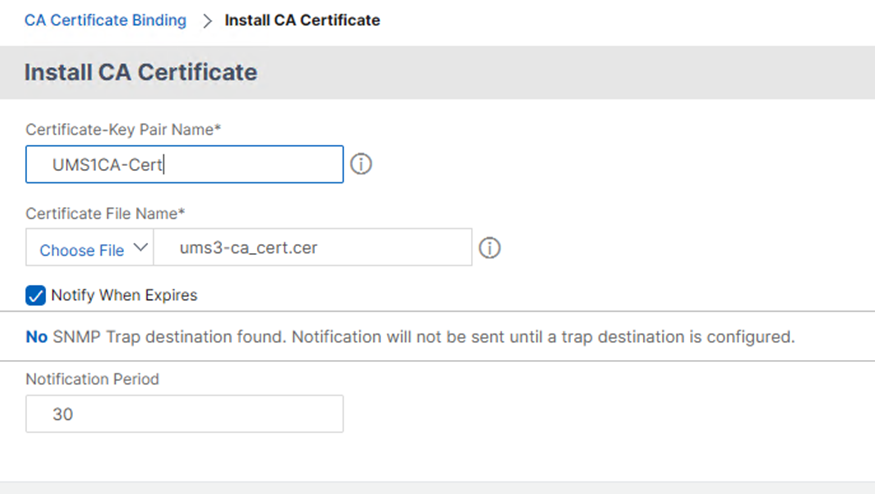
Add the Client Certificate Chain.
The exported EST CA Client Certificate must be added as CA Certificate.
Under SSL Ciphers, add TLSv1.3
The device connection requires TLSv1.3.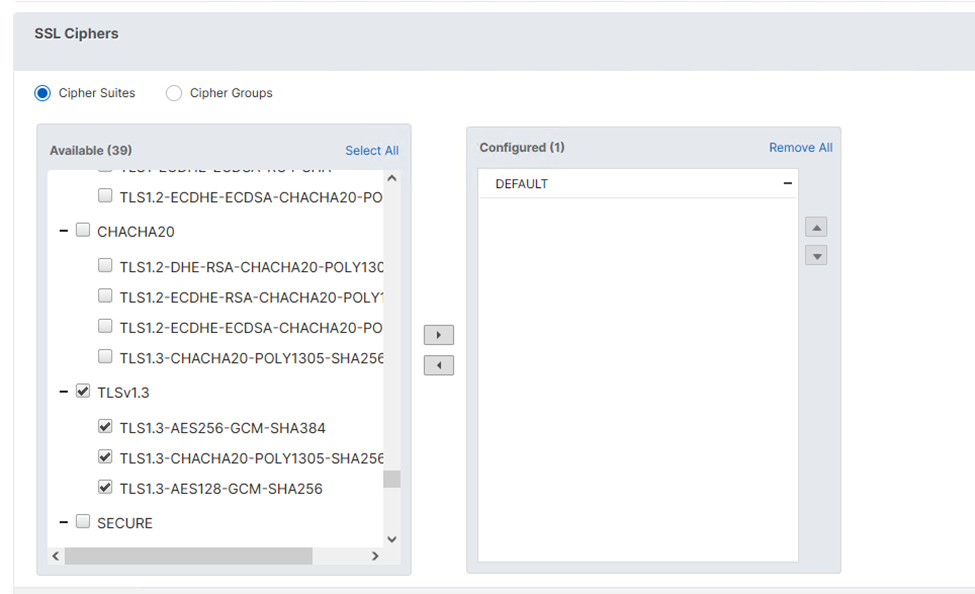
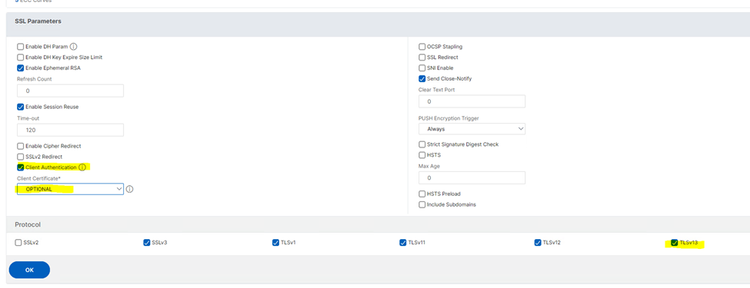
Under SSL Parameters, set the following:
Enable Client Authentication
Set Client Certificate to Optional
Activate TLSv13 under Protocol
Configure SSL Policy for Client Certificate Forwarding
Add a Rewrite Action and Policy under AppExpert > Rewrite:
Add a Rewrite Action.
Set the following parameters:
Type to INSERT_HTTP_HEADER
Header Name in correspondance to the UMS configuration

The expression for the action is used to set the correct Client Certificate value. The forwarded certificate must be URL encoded and contain correct line break information:
CLIENT.SSL.CLIENT_CERT.TO_PEM.REGEX_REPLACE(re! \s*!,"\n",ALL).REGEX_REPLACE(re!\bBEGIN\nCERTIFICATE\s*\b!,"BEGIN CERTIFICATE",ALL).REGEX_REPLACE(re!\bEND\nCERTIFICATE\s*\b!,"END CERTIFICATE",ALL).URL_RESERVED_CHARS_SAFE
This expression is an example and requires the Insert Certificate Space parameter to be activated in Traffic Management > SSL Settings > Change advanced SSL settings.
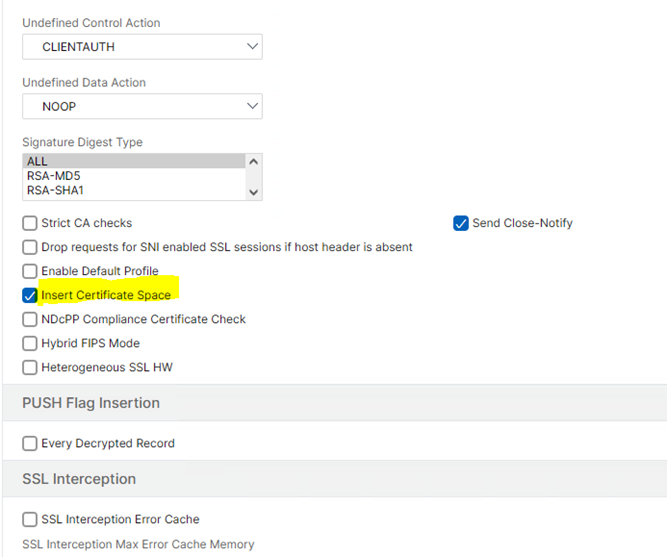
Add a Rewrite Policy.
Under Action select the previously configured action to bind it to the policy.
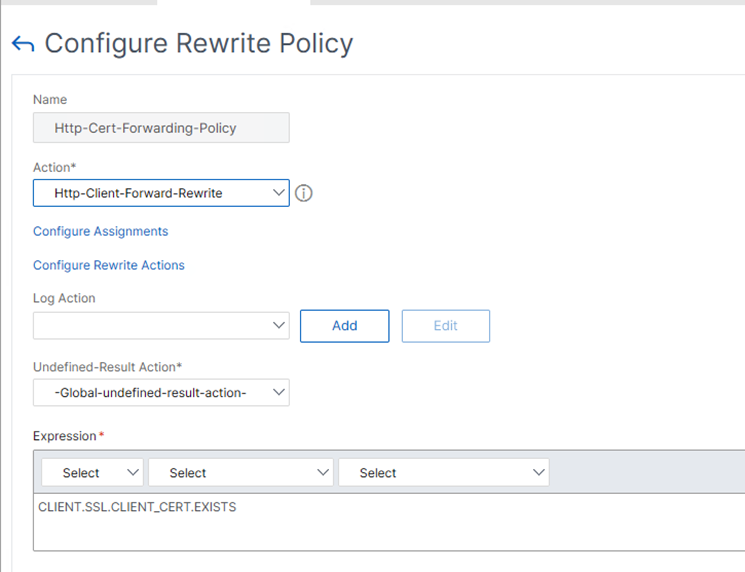
Set the expression to:
CLIENT.SSL.CLIENT_CERT.EXISTS
The policy expression checks if the Client Certificate is available.Add the Rewrite Policy to the Load Balancing Virtual Server under Policy Binding.
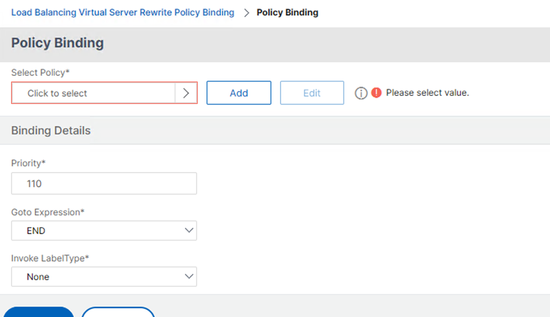
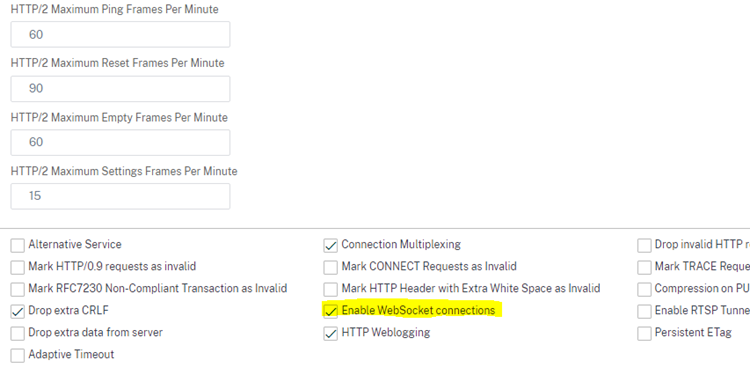
Under Profiles, select HTTP-WebSocket under HTTP Profile and click Add.

Activate Enable WebSocket connections.
