Installing the Distributed IGEL UMS
This article describes how to install the Distributed IGEL Universal Management Suite (UMS). Detailed information on the Distributed UMS can be found under IGEL UMS Installation. The following instructions can be used:
if you plan a new installation of the Distributed UMS
if you already have a standard UMS installation but want to switch to the Distributed UMS
For load distribution, DNS-Round-Robin load balancing of the server IP address should be used. The DNS-Round-Robin for igelrmserver should point to all servers.
New Installation of the Distributed UMS
To install the Distributed UMS, proceed as follows:
Install the first UMS Server. For the instructions, see IGEL UMS Installation under Windows or IGEL UMS Installation under Linux.
In the UMS installer, select Distributed UMS.
Configure an external database, see Connecting External Database Systems.
Add this database as a data source in the UMS Administrator > Datasource > Add and activate it. See How to Set Up a Data Source in the IGEL UMS Administrator.
Open the UMS Console and go under UMS Administration > UMS Network > Server to check that the server is up and running.
Install other UMS Servers (select Distributed UMS in the UMS installer) and connect them to the same database.
If you activated the Distributed UMS feature and have multiple UMS Servers, take care in case you decide to disable the feature. If the Distributed UMS feature is deactivated but more than one UMS Server is using the same database, no synchronization will be done between the UMS Servers.
Switching from the Standard UMS to the Distributed UMS
If you want to extend your existing standard UMS installation to the Distributed UMS, proceed as follows:
If you have a standard UMS installation with an external database: Start with step 4.
If you have a standard UMS installation with an embedded database: Create a new external database (see Connecting External Database Systems) and add this database as a data source in the UMS Administrator > Datasource > Add (see How to Set Up a Data Source in the IGEL UMS Administrator).Copy the embedded database to the new external data source, see Copying a Data Source, and activate the new data source.
Open the UMS Console and go under UMS Administration > UMS Network > Server to check that the server is up and running.
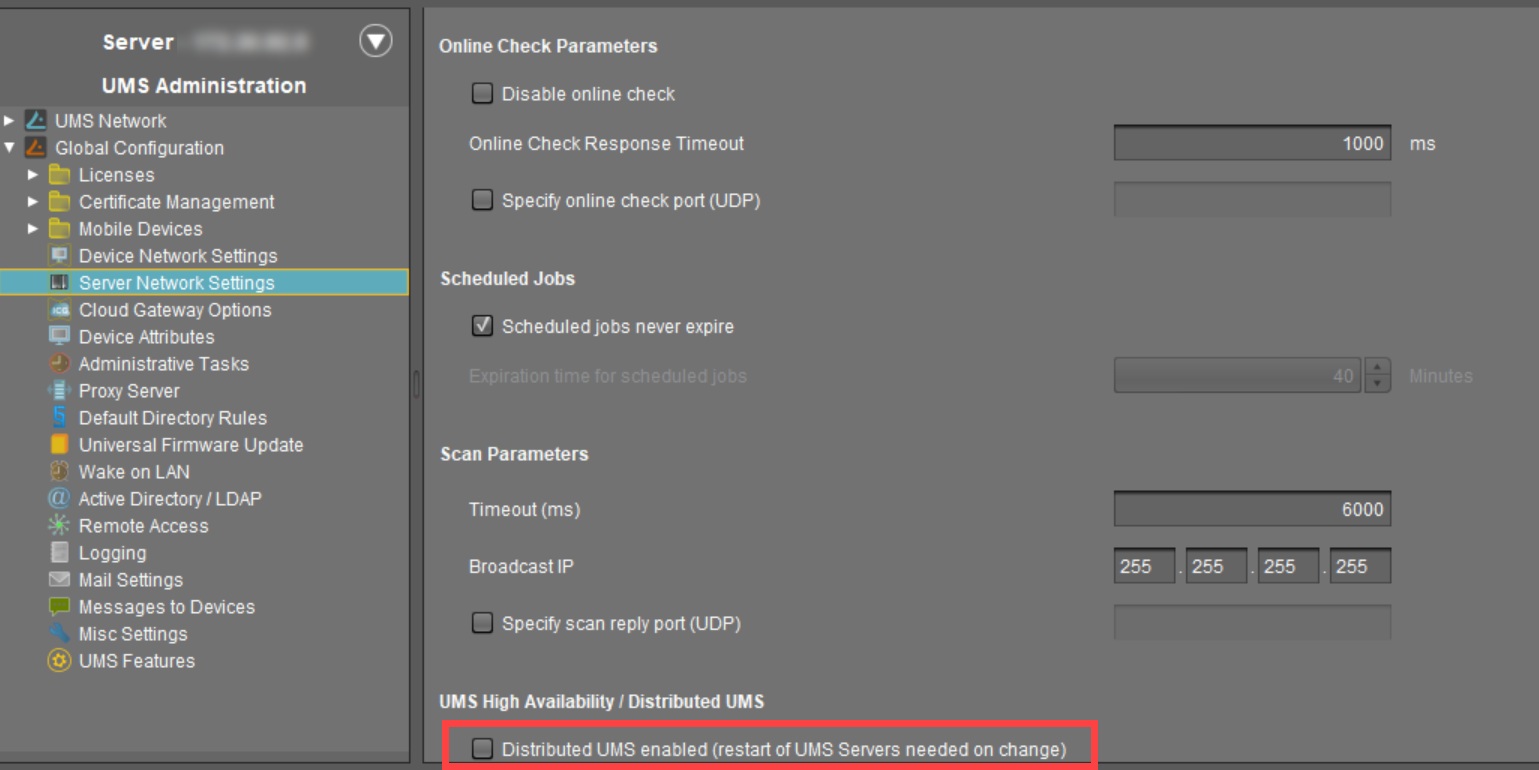
Go under UMS Administration > Global Configuration > Server Network Settings and activate Distributed UMS enabled.
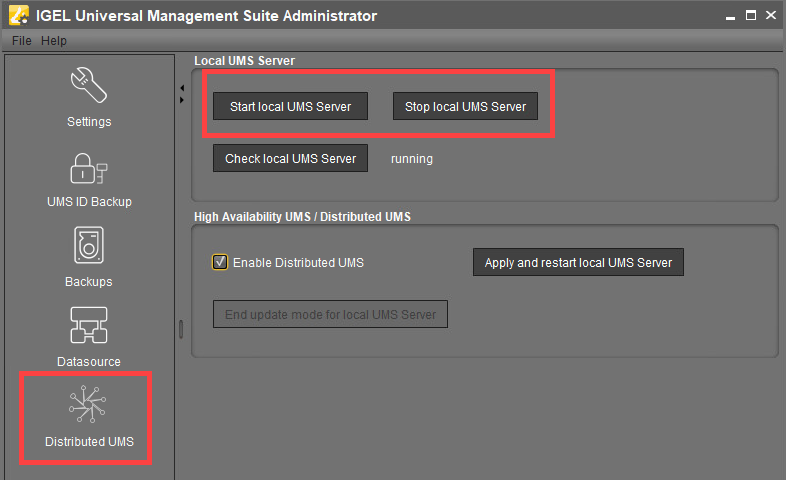
Restart the UMS Server service, e.g. via UMS Administrator > Distributed UMS. For detailed instructions on how you can restart services, see IGEL UMS HA Services and Processes.
Install other UMS Servers (select Distributed UMS in the UMS installer) and connect them to the same database.

If you activated the Distributed UMS feature and have multiple UMS Servers, take care in case you decide to disable the feature. If the Distributed UMS feature is deactivated but more than one UMS Server is using the same database, no synchronization will be done between the UMS Servers.