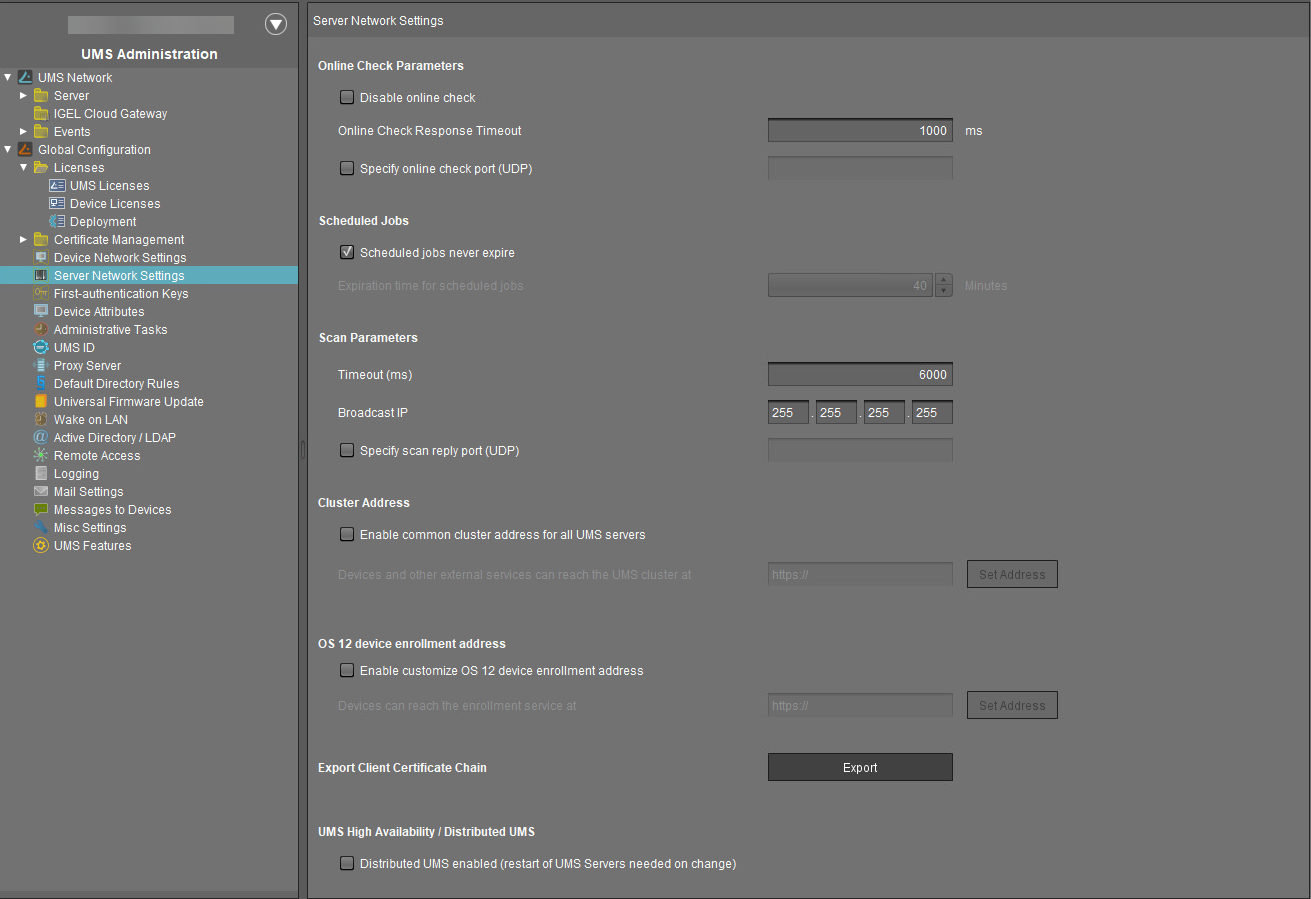
Server Network Settings in the IGEL UMS
In this area of the IGEL Universal Management Suite (UMS) Console, you can configure settings for the online check for your devices, parameters for the device scan, activate the Distributed UMS feature, specify the Cluster Address for the load distribution of specific device requests, etc.
Menu path: UMS Console > UMS Administration > Global Configuration > Server Network Settings
Online Check Parameters
Disable online check
☑ The online check is disabled.
☐ The online check is enabled. (Default)
Online Check Response Timeout
Specifies how long in milliseconds the system will wait for a response to an online status query message. The UMS attempts to contact all devices that are currently visible in the UMS Console. Each device in this area must respond to the status query in the specified time or will otherwise be flagged as “offline”. Minimum: 100; maximum: 10000; default: 1000.
Changed Values on Update
The maximum and minimum value and the new default value have been introduced with UMS 6.04.100. If you update to version 6.04.100 from an older version, the value will be handled as follows:
If the value was between 100 and 10.000, it remains unchanged.
If the value was lower than 100, it is changed to 100.
If the value was the old default value of 100, it is changed to the new default value 1.000.
If the value was higher than 10.000, it is changed to 10.000.
Specify online check port (UDP)
☑ You specify the port to which the devices respond if the UMS checks their online status.
☐ The UMS will select any free port. (Default)
Scheduled Jobs
Scheduled jobs never expire
☑ No time limit for scheduled jobs. (Default)
Expiration time for scheduled jobs
Time in minutes after which a scheduled job will expire. (Default: 40)
Scan Parameters
Timeout (ms)
Specifies how long in milliseconds the UMS will wait for a response to scan packages. (Default: 6000)
Broadcast IP
Broadcast address that is used for scan packages. It is only used for scanning the local network. If IP ranges are used, the UDP packets will be sent to each client within the IP range. (Default: 255.255.255.255)
Specify scan reply port (UDP)
☑ You specify the port to which the devices respond if the UMS scans for devices.
☐ The UMS will select any free port. (Default)
Cluster Address
In the IGEL UMS High Availability (HA) and Distributed UMS installations, you can use Cluster Address to balance the incoming traffic. If no Cluster Address is set, the Public Address is used for HTTPS requests from devices (if defined). For more information on the Public Address, see Server - View Your IGEL UMS Server Information.
The Cluster Address is only for communication via the web server port (default: 8443).
SSL can be terminated at the reverse proxy / external load balancer or at the UMS Server. For more on Reverse Proxies, see IGEL Universal Management Suite Network Configuration.
Enable common cluster address for all UMS servers
☑ The address and port defined by clicking Set Address are used for the following HTTPS requests from devices:
file transfer from the UMS to IGEL OS 11 devices
onboarding and device communication of IGEL OS 12 devices
app download for IGEL OS 12 devices if Download from UMS is set in the UMS Web App > Apps > Settings
 > UMS as an Update Proxy
The Cluster Address does NOT affect:
download of firmware updates for IGEL OS 11 devices
device communication with the UMS Servers (IGEL OS 11 devices)
internal communication between the UMS Servers (incl. the WebDAV synchronization between the UMS Servers)
IGEL Cloud Gateway communication, i.e. devices connected to the UMS via ICG do not use the Cluster Address
☐ The Cluster Address is not used. (Default)
Devices and other external services can reach the UMS cluster at
The address defined by the following parameters. The parameters appear in a dialog when you click Set Address:
FQDN or IP
FQDN of your external load balancer / reverse proxy such as NGINX, Citrix Netscaler, etc. The maximal length is restricted to 255 characters.
When a reverse proxy / load balancer is assigned to the cluster address, it can handle both external and internal network traffic. For information on Cluster Address and FQDNs, see also Troubleshooting: Error 38 during the Onboarding of an IGEL OS 12 Device.
Port
Port of your external load balancer / reverse proxy
If you have a UMS HA or Distributed UMS installation and configured the Cluster Address, you must define a web certificate for all servers:
The certificate must contain the cluster address and all server addresses
The certificate must be assigned to all servers
To define a web certificate for all servers, proceed as follows:
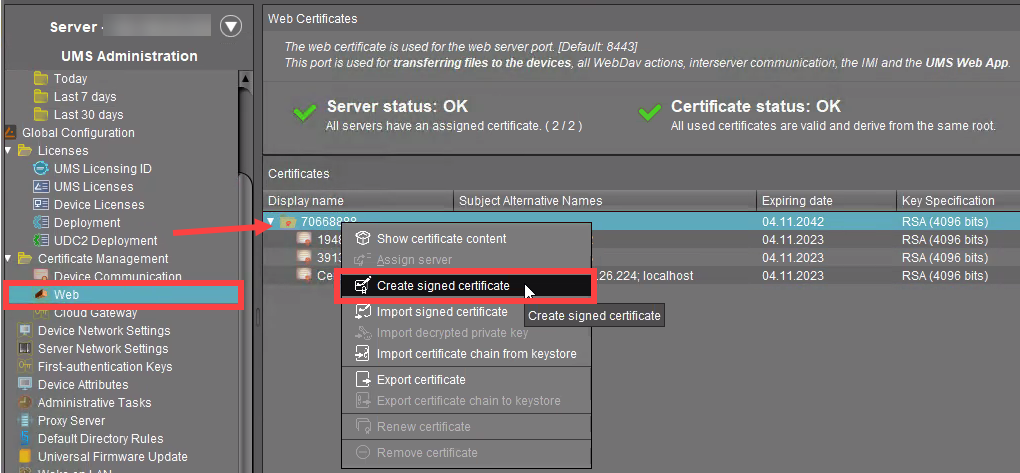
In the UMS Console > UMS Administration > Global Configuration > Certificate Management > Web, select the root certificate and click Create signed certificate in the context menu.
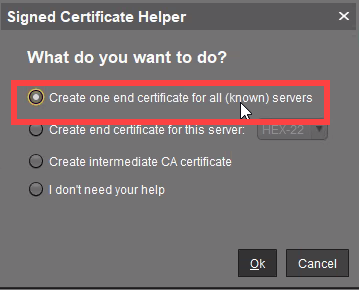
In the Signed Certificate Helper dialog, select Create one end certificate for all (known) servers.
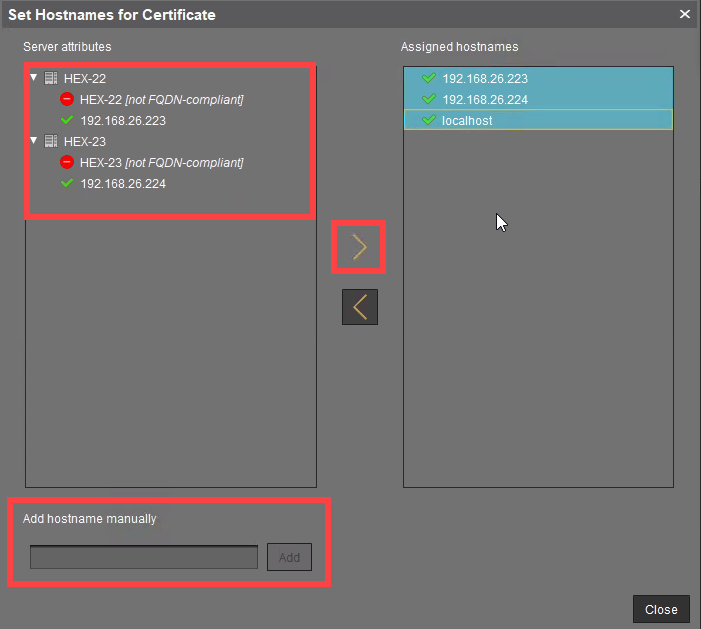
In the Create signed certificate dialog, click Manage hostnames.
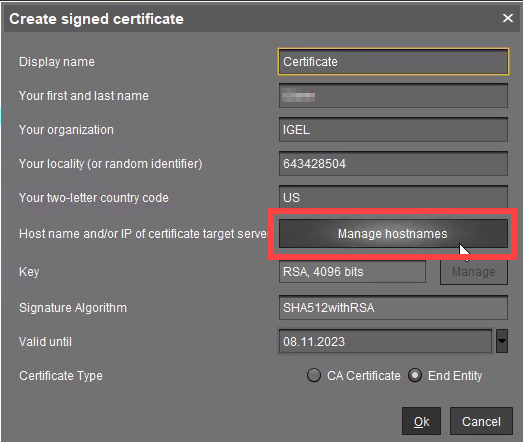
In the dialog Set Hostnames for Certificate, check if Cluster Address, "localhost", all IP addresses, and FQDNs (Fully Qualified Domain Names) under which your servers are reachable are displayed under Assigned hostnames. If not, add the missing IP addresses and FQDNs under Add hostname manually.
Close the dialog Create Signed Certificate with Ok.
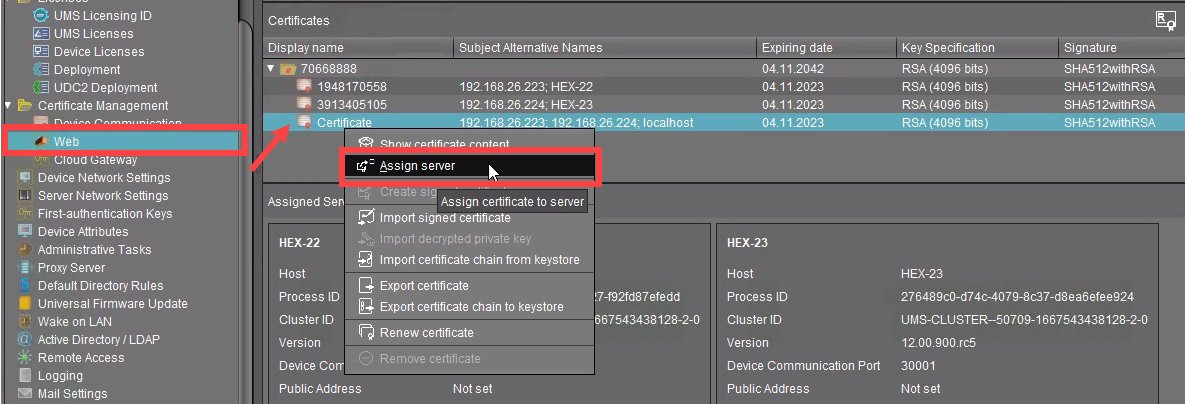
The signed server certificate is created.Select the created certificate and click Assign server in the context menu.
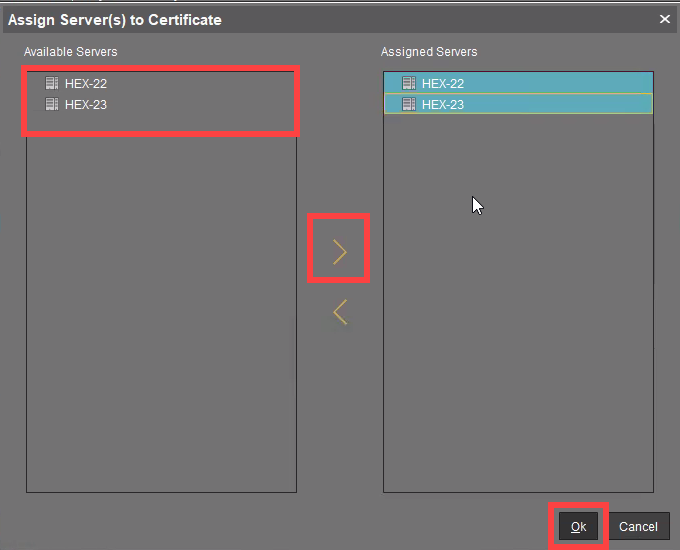
Assign the certificate to all servers.
OS 12 Device Enrollment Address
This configuration allows the separation of the device onboarding endpoint from the Websocket (Management) endpoint. This option can be required for implementing a reverse proxy / external load balancer without optional Client Certificate verification option, like Azure Application Gateway. For more information, see Azure Application Gateway: Example Configuration as Reverse Proxy in IGEL UMS with SSL Offloading.
Enable customize OS 12 device enrollment address
☑ The address and port defined by clicking Set Address are used for device onboarding.
☐ The Cluster Address is used for device onboarding in the reverse proxy / external load balance configuration. (Default)
Devices can reach the enrollment service at
The address defined by the parameters accessed by clicking Set Address:
FQDN or IP
FQDN of the configured listener for device onboarding.
Port
Port of the configured listener for device onboarding.
Path Prefix
Path Prefix to the EST service. The defined path in the EST protocol is ".well-known/est". This prefix should be used to customize it. For example: /device-connector/device/.well-known/est
This value must only be set when the Path was customized. Default is empty.
Export Client Certificate Chain
Click Export to export the Client Certificate Chain.
You need the Client Certificate Chain to configure the reverse proxy / external load balancer. For more information, see IGEL Universal Management Suite Network Configuration.
UMS High Availability / Distributed UMS
Distributed UMS enabled (restart of UMS Server needed on change)
☑ The standalone UMS Servers will work just as if they were installed as a High Availability environment if connected to the same external database. Messages between the UMS Servers will be transferred via database entries. For detailed information on the Distributed UMS, see IGEL UMS Installation.
For how to install the Distributed UMS or extend an existing standard UMS installation to the Distributed UMS, see Installing the Distributed IGEL UMS.
If you have a UMS High Availability installation, the checkbox Distributed UMS enabled (restart of UMS Server needed on change) will not be present.
☐ The Distributed UMS is disabled. (Default)
If you activated the Distributed UMS feature and have multiple UMS Servers, take care in case you decide to disable the feature. If the Distributed UMS feature is deactivated but more than one UMS Server is using the same database, no synchronization will be done between the UMS Servers.