How to Use Your Own Certificates for Communication over the Web Port (Default: 8443) in IGEL UMS
For all communication that is taking place over the Web Port (default: 8443, see also IGEL UMS Communication Ports), a specific self-signed certificate chain comes with the UMS on installation. Nevertheless, you can use a certificate chain of your own.
See also Web in the UMS Reference Manual.
This article describes how to deploy a certificate chain with a corporate CA certificate or a public certificate:
Deploying a Self-Signed Corporate Certificate Chain (recommended)
We recommend using a self-signed corporate certificate chain. Of course, a self-signed certificate must be made known to the browsers first, otherwise, the browsers will display warning messages.
Deploying a Self-Signed Corporate Certificate Chain
Prerequisites
You have a self-signed root CA certificate that serves as a trusted “root” certificate company-wide.
Your self-signed root CA certificate has been applied to all relevant trust stores within your company.
You have an intermediate CA certificate that is signed by your root CA certificate and a corresponding private key.
Importing the Root Certificate
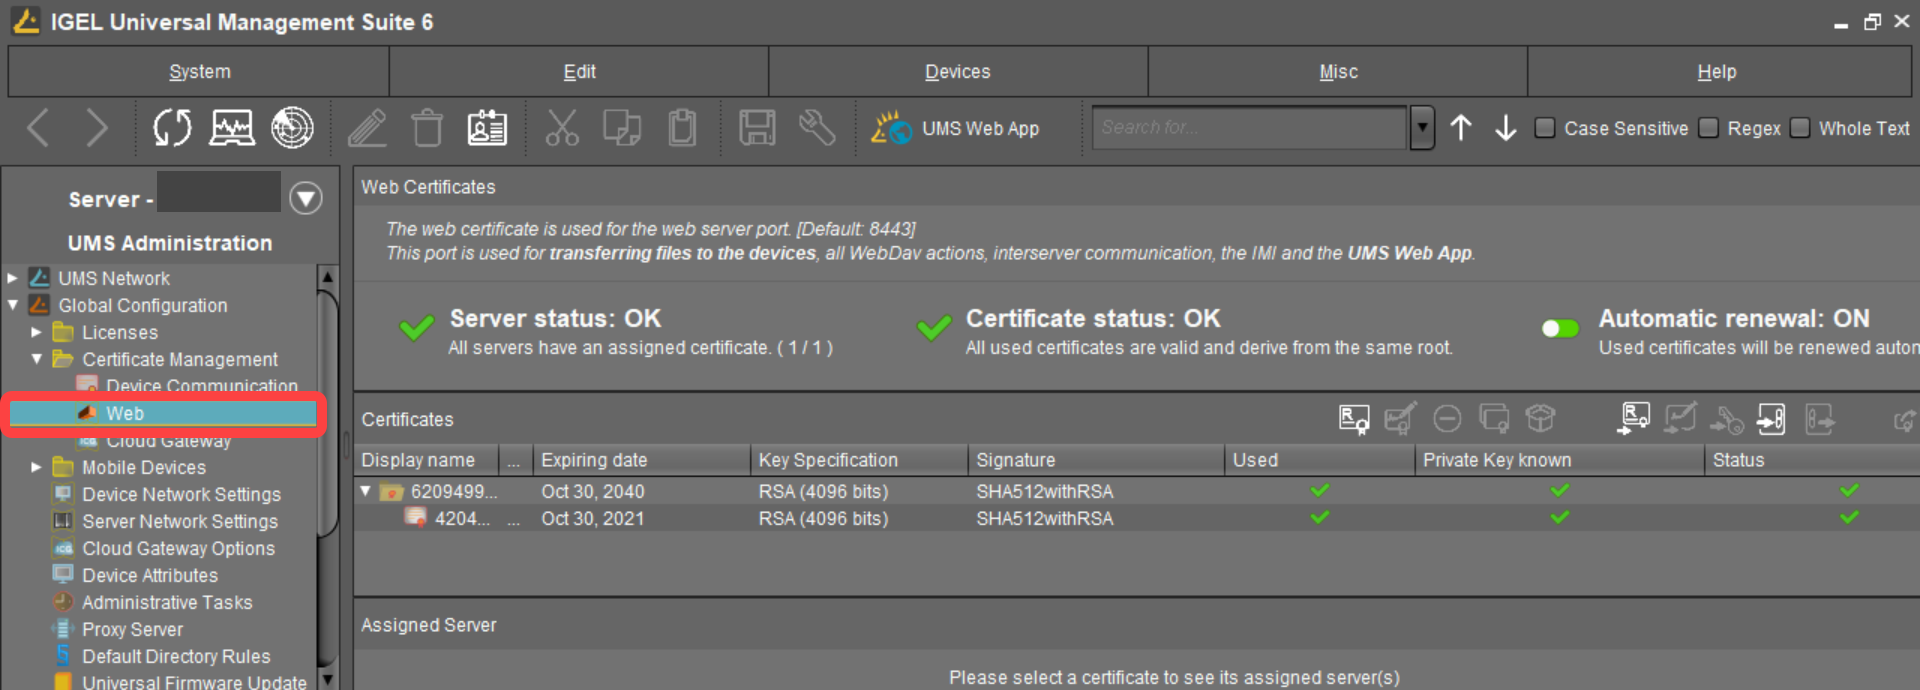
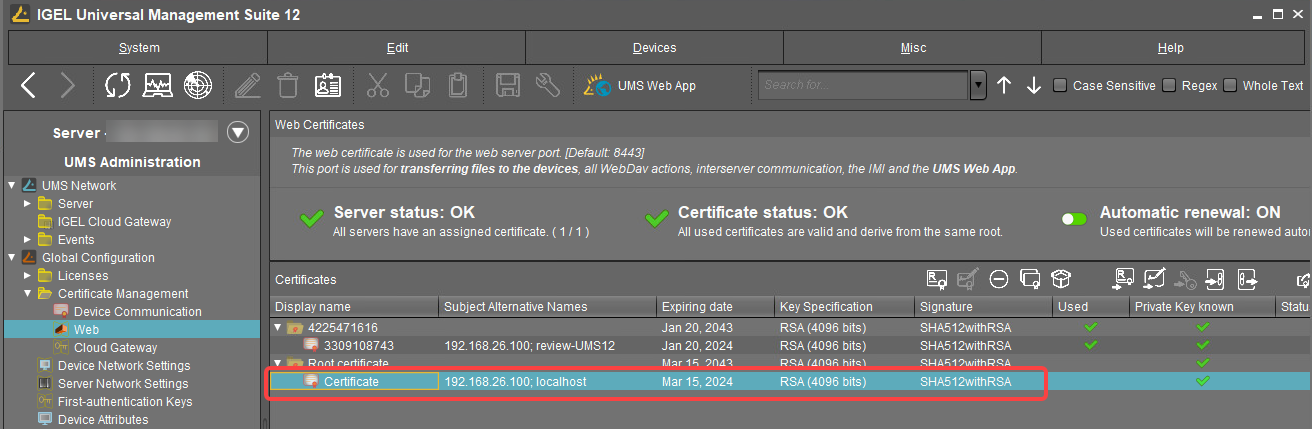
In the UMS Console, go to UMS Administration > Global Configuration > Certificate Management > Web.
Click
 select the root certificate file, and click Open.
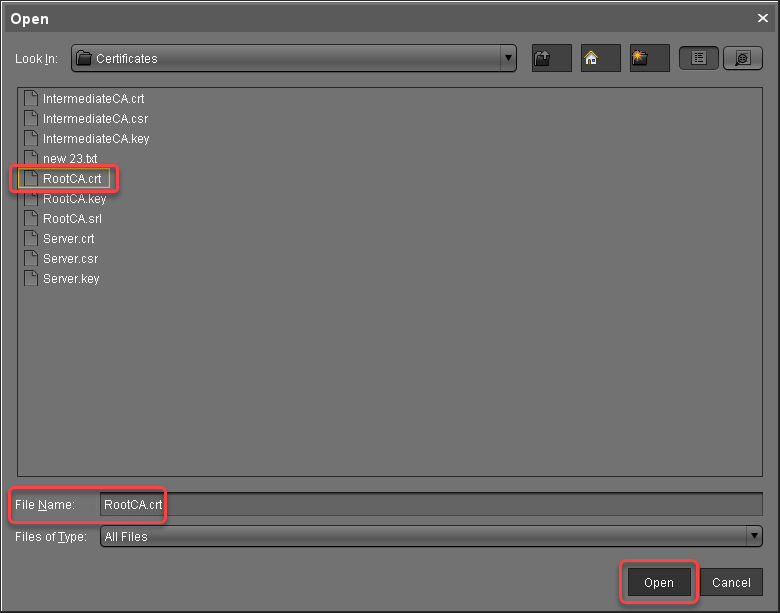
The root certificate is imported.
Importing the Intermediate Certificate
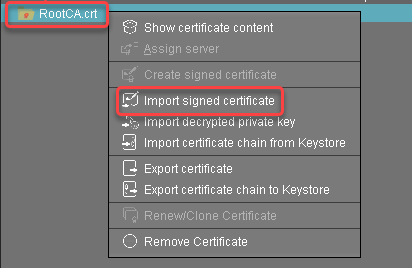
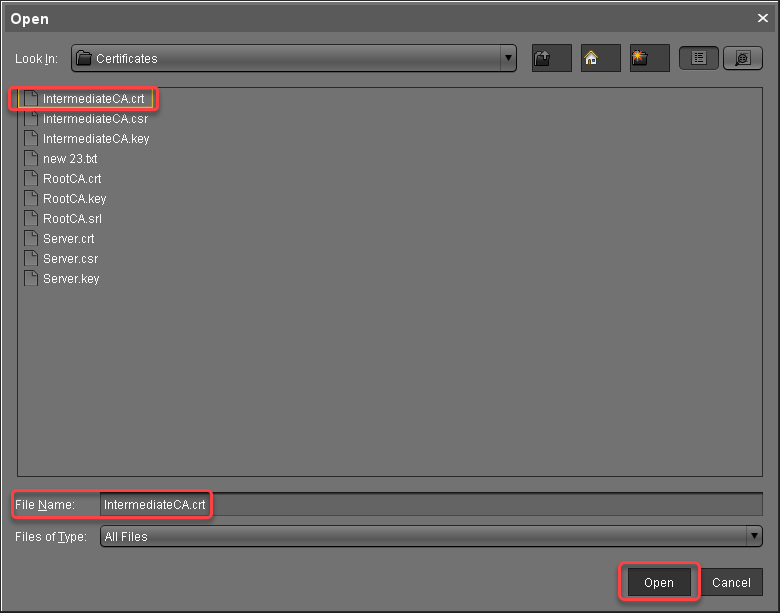
Select the root certificate, open the context menu, and select Import signed certificate.
Select the intermediate certificate file and click Open.
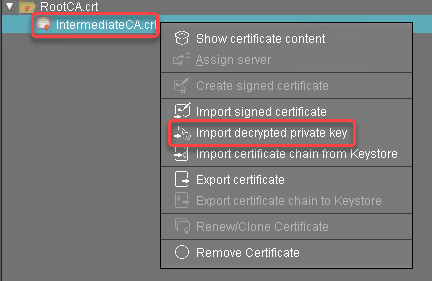
The intermediate certificate is imported.Select the intermediate certificate, open the context menu, and select Import decrypted private key.
Select the private key file of the intermediate certificate and click Open.
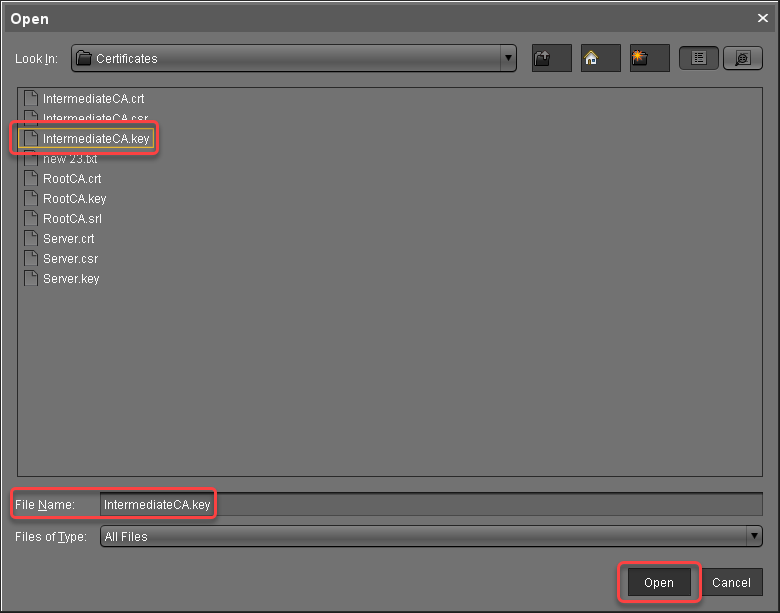
The private key of the intermediate certificate is imported.
The private key is encrypted again when saved into the UMS Database.
Continue with Creating the End Certificates.
Creating the End Certificates
Repeat the following steps for each server in your UMS environment:
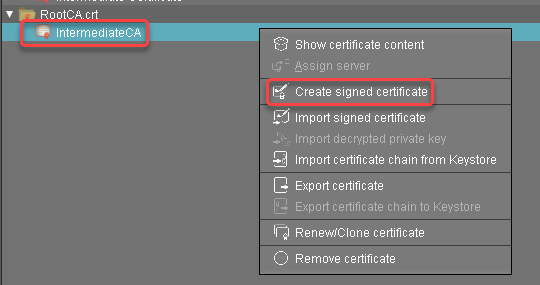
Select the intermediate certificate, open the context menu, and select Create signed certificate.
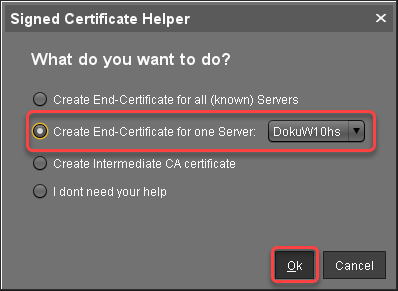
In the Signed Certificate Helper, select Create end certificate for one server and select the server which is to be assigned to the certificate.
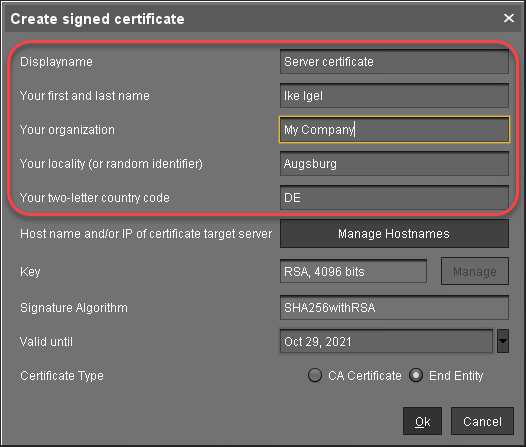
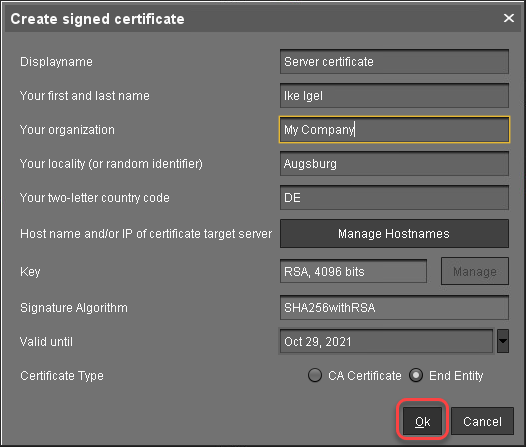
In the dialog Create Signed Certificate, fill in the data as required.
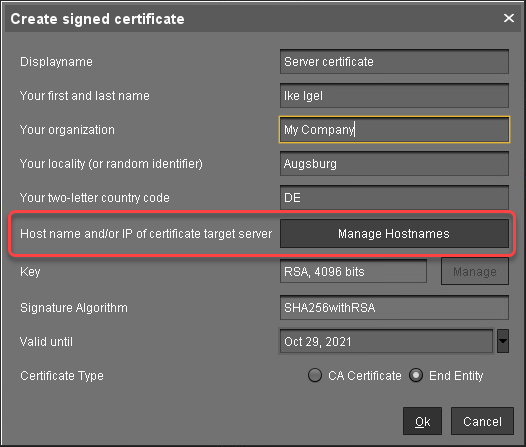
Click Manage hostnames.
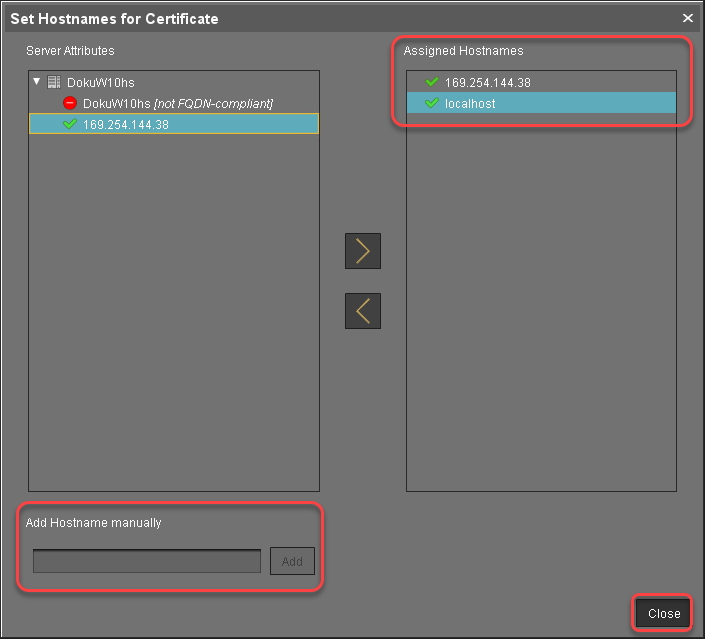
In the dialog Set Hostnames for Certificate, check if "localhost" and all IP addresses and FQDNs (Fully Qualified Domain Names) under which your server is reachable are displayed under Assigned hostnames. If not, add the missing IP addresses and FQDNs under Add hostname manually.
Close the dialog Create Signed Certificate with Ok.
The signed server certificate is created.Continue with Assigning the Certificate to All Servers.
Assigning All Servers to the Certificate
Repeat the following steps for each server in your UMS environment:
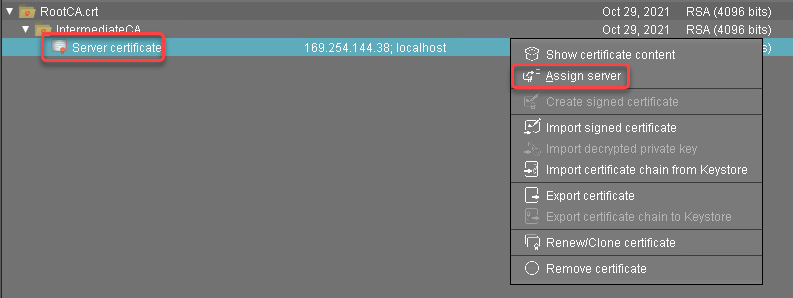
Select the server certificate, open the context menu, and select Assign server.
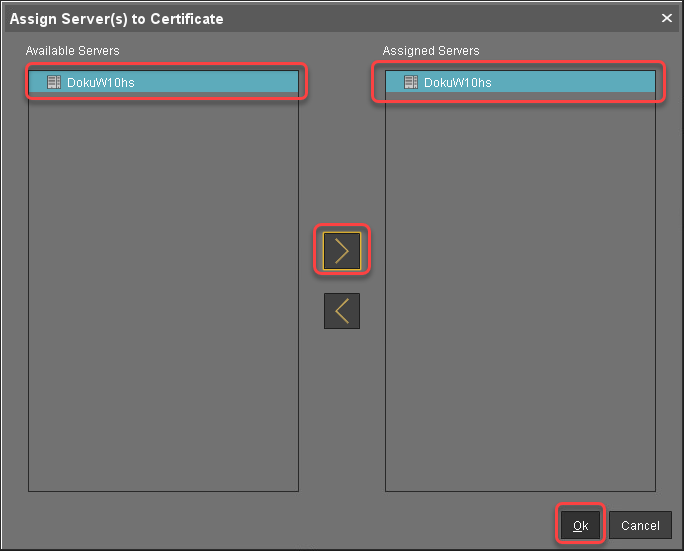
Assign the server to the certificate as appropriate.
If you are managing IGEL OS 12 devices, see If You Exchange a Root Web Certificate for IGEL OS 12 Devices.
If you are using the UMS Web App: To avoid warning messages from browsers, you must make the new certificates known to the browsers. For instructions, see Troubleshooting: Browser Displays a Security Warning (Certificate Error) when Opening the UMS Web App.
Deploying a Certificate Chain with a Public Root CA
Prerequisites
You have a public certificate that is able to serve as a CA.
All UMS Servers follow the same naming scheme, e.g. “something.ums.mycompany.de” if the company name is "mycompany.de".
Importing the Root Certificate
In the UMS Console, go to UMS Administration > Global Configuration > Certificate Management > Web.

Click
 , select the root certificate file, and click Open.
The root certificate is imported.
Importing the Intermediate Certificate
Select the root certificate, open the context menu, and select Import signed certificate.
Select the intermediate certificate file and click Open.
The intermediate certificate is imported.Select the intermediate certificate, open the context menu, and select Import decrypted private key.
Select the private key file of the intermediate certificate and click Open.
The private key of the intermediate certificate is imported.
The private key is encrypted again when saved into the UMS Database.
Creating End Certificates
Repeat the following steps for each server in your UMS environment:
Select the intermediate certificate, open the context menu, and select Create signed certificate.
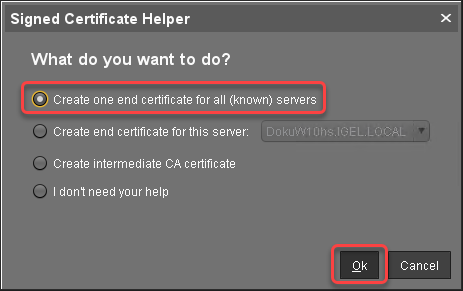
In the Signed Certificate Helper, select Create one end certificate for all (known) servers.
In the dialog Create Signed Certificate, fill in the data as required.
Click Manage hostnames.
In the dialog Set Hostnames for Certificate, adjust the settings as follows:
Check if "localhost" and all IP addresses and FQDNs (Fully Qualified Domain Names) under which your server is reachable are displayed under Assigned hostnames. If not, add the missing IP addresses and FQDNs under Add hostname manually.
Remove all IP addresses and FQDNs you do not want to be part of the certificate.
Close the dialog Create Signed Certificate with Ok.
The signed server certificate is created.Continue with Assigning all Servers to the Certificate.
Assigning All Servers to the Certificate
Select the server certificate, open the context menu, and select Assign server.
Assign all servers to the certificate.
If you are managing IGEL OS 12 devices, see If You Exchange a Root Web Certificate for IGEL OS 12 Devices.
If You Exchange a Root Web Certificate for IGEL OS 12 Devices
New root web certificates are deployed to IGEL OS 12 devices on reboot.
For IGEL OS 12 devices, you can view which devices will no longer trust the UMS and will be unmanageable when you assign a new root certificate:
Select the certificate you want to be used under UMS Console > UMS Administration > Global Configuration > Certificate Management > Web.
Click
 or select Assign server in the context menu.
In the dialog Assign Servers(s) to Certificate, assign the required server(s) and click Next.

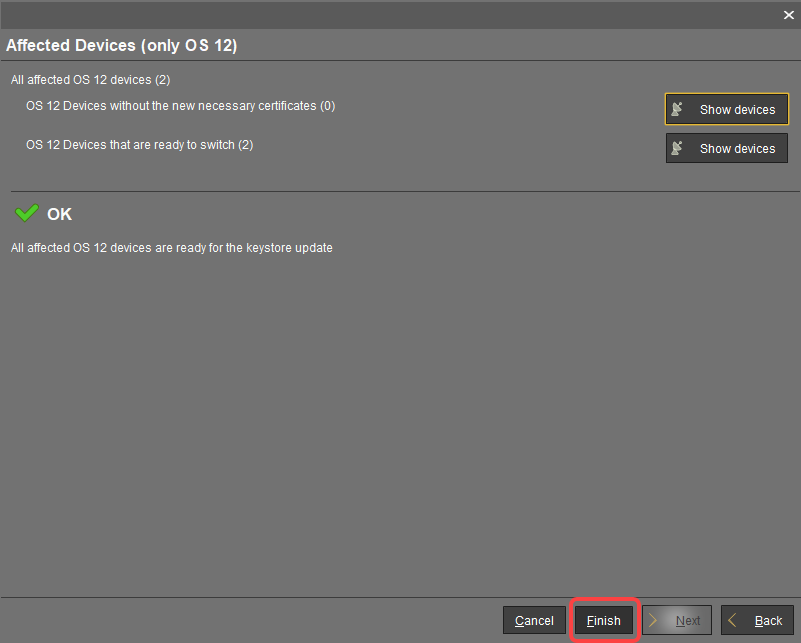
For IGEL OS 12 devices, you will see the Affected Devices dialog. Review it:
If the OS 12 devices without the new necessary certificates number = 0 and there is no warning dialog, you can complete the assignment. The devices will safely switch to the new certificate.
If the OS 12 devices without the new necessary certificates number > 0, click Show devices to create a view that collects the affected devices: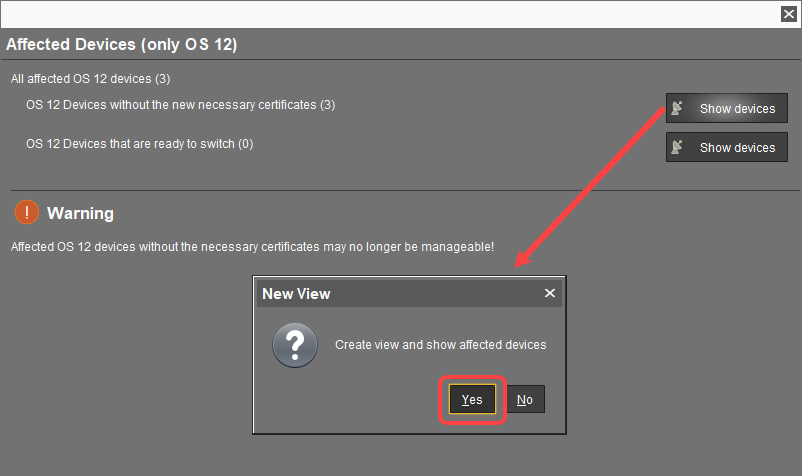
The view is created, and the UMS Console switches to the newly created view.
Now, it is necessary to restart the affected devices. On reboot, the devices will receive all certificates from the UMS; afterward, they are ready to switch to the new certificate.
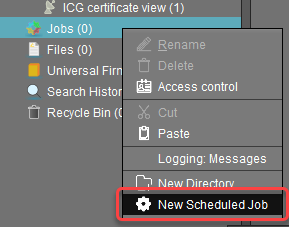
To restart all affected devices at a defined time, it makes sense to create a scheduled job.Go to Jobs, open the context menu, and select New Scheduled Job.
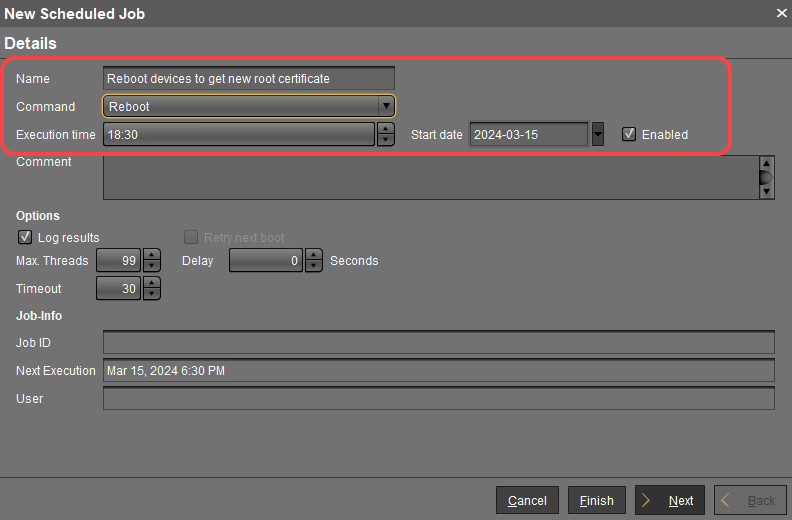
In the New Scheduled Job window, change the settings as follows and click Next:
Name: A name for the job
Command: Select "Reboot"
Execution time: Select the time at which the restart should take place.
In the next step, leave the settings as they are and click Next.
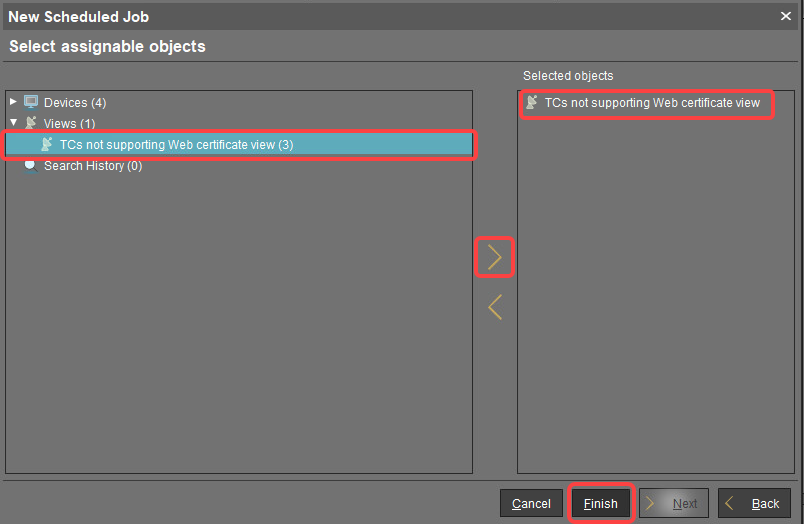
Assign the view created beforehand to the job and click Finish.
After the reboot, complete the assignment: Under UMS Administration > Global Configuration > Certificate Management > Web, select the required certificate and click
 or Assign server in the context menu.
If the output in the Affected Devices dialog is like this, click Finish. The devices will safely switch to the new certificate.