Perform the following steps to set up the connection between the UMS and the Active Directory of your company:
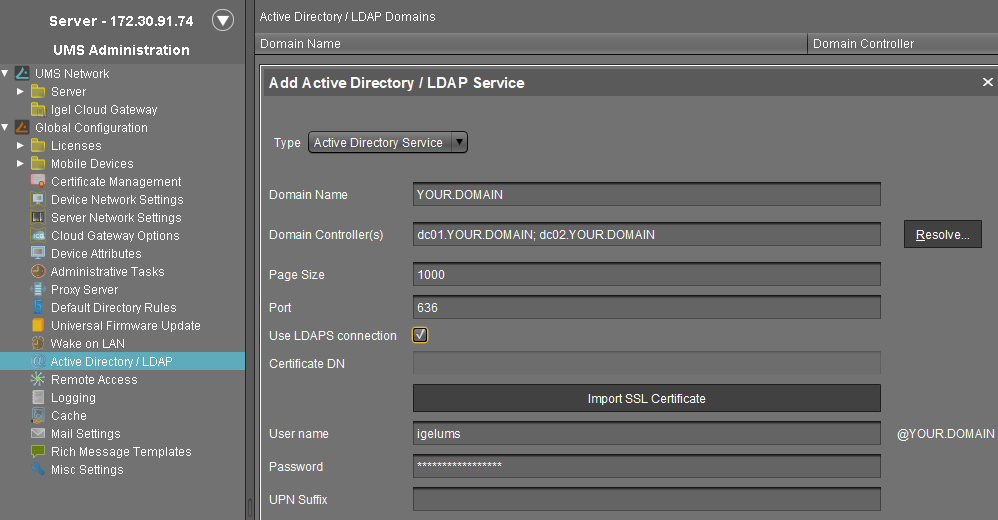
Click Add (+) under UMS console > UMS Administration > Global Configuration > Active Directory / LDAP. The Add Active Directory / LDAP Service dialog opens.
Select Active Directory Service as Type.
Enter the Domain Name.
Several Active Directories can be linked. You should therefore ensure that you provide the correct domain when logging in (e.g. to the UMS console).
Enter the Domain Controller(s) manually or click Resolve... for the automatic search. To separate domain controllers, use a semicolon.
Enter Page Size. The Page Size property sets the maximum number of items in each page of results that will be returned by a search. It affects query performance, but not the number of overall results. The standard value is "1000". Change this value in line with your server configuration.
Activate Use LDAPS connection to secure the connection with the provided certificate. The Port changes automatically to default "636".
Click Import SSL Certificate to configure the certificate and to verify the Certificate DN.
Since the name of the Domain Controller is checked against the certificate, they must correspond. If more than one domain controller is used, the root certificate of the domain must be configured. See Problems When Configuring an Active Directory with LDAP over SSL.
The supported certificate formats are .cer, .pem and .der
Under User name and Password, enter your user credentials.
Enter UPN Suffixes (aliases) if you have defined any (semicolon separated list). Example: domain.local;test.local
The settings must correspond to the configuration of the Active Directory. If there are registered UPN suffixes in the AD, they should be known also by the UMS.
Click on Test Connection to check that you have entered a valid configuration.
Click Ok to confirm your settings. The Active Directory domain is listed under Active Directory / LDAP Domains.