Importing Active Directory Users
Users can be imported from the Active Directory to the UMS console in three steps:
Logging in to the Active Directory
Selecting the users to be imported and starting the import
Logging the import process
To import users from the Active Directory to the UMS console, proceed as follows:
Launch the UMS console's import dialog via System > Administrator Accounts > Import.
Log in to the AD/LDAP service.
The connection process is described under Linking Active Directory / LDAP. When importing user accounts, only connected ADs are available for selection.Click on Continue.
The Active Directory browser will open.Select individual users or groups from the navigation tree of your AD.
The highlighted users/groups can be added to or removed from the selection to be imported via the context menu or using drag and drop. The users/groups found in the Found AD Accounts hit list can be transferred to the Selected Accounts list using the symbols.
Multiple users and groups can be selected.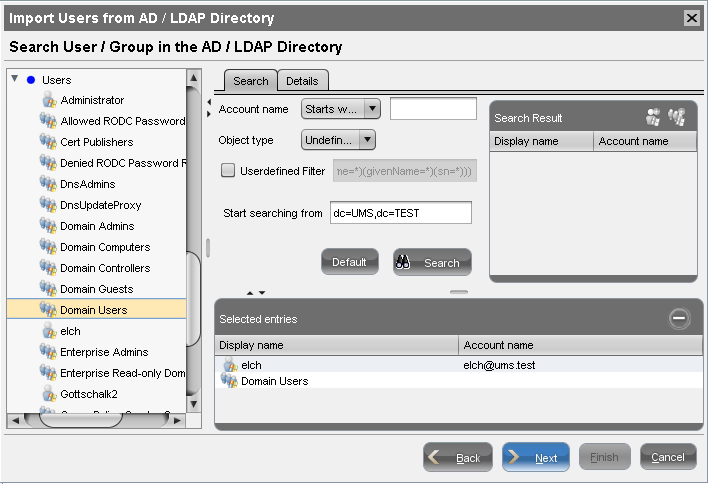
As an alternative to navigating in the navigation tree, you can also highlight and add users or groups to the selection via the Search function.Click on Continue to start the import.
A confirmation window will appear.
Once a user has been successfully imported, this action cannot be undone. A UMS administrator set up by mistake must be deleted manually via the administrator account management system. The IGEL UMS uses the account as the name of the AD user imported.