Installing IGEL UMS on Microsoft Azure
This article describes a standard IGEL Universal Management Suite (UMS) single server installation (not High Availability) along with IGEL Cloud Gateway (ICG). The database is reachable via Azure or is hosted in Azure.
High Availability (HA)
IGEL UMS Server HA is not supported in cloud environments like Azure / AWS as they do not allow broadcast traffic within their networks.
IGEL Requirements
Microsoft Azure account
UMS 6.07.100 or higher
Creating a Virtual Machine for the IGEL UMS
Log in to Microsoft Azure.
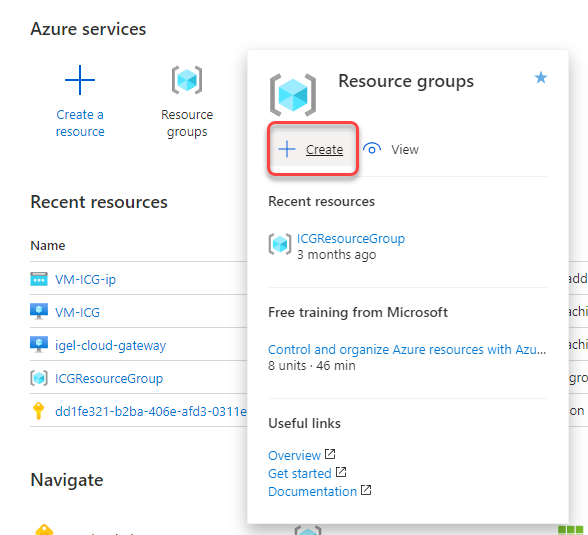
Hover over Resource groups and select Create.
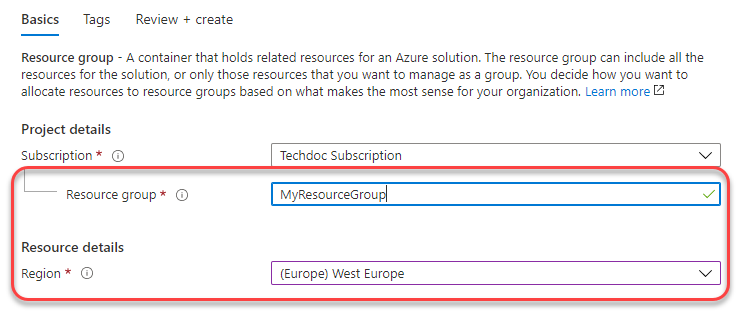
Edit the data as follows:
Resource group: Enter a name for the resource group, e.g. "MyResourceGroup".
Region: Select a region, according to your preferences.
Click
 .
.
Your resource group is validated.Click
 .
.
Your resource group is created.Click Home to get to the overview.
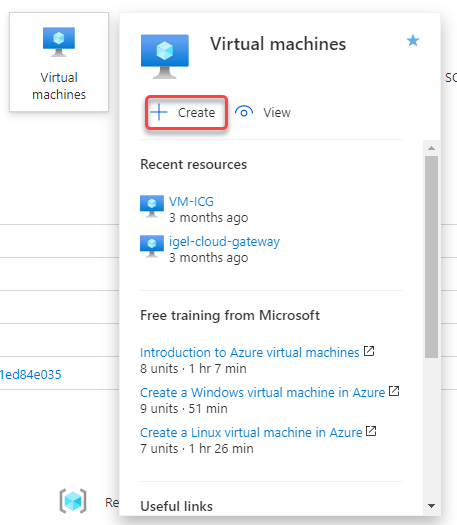
Hover over Virtual machines and select Create.
Edit the data as follows:
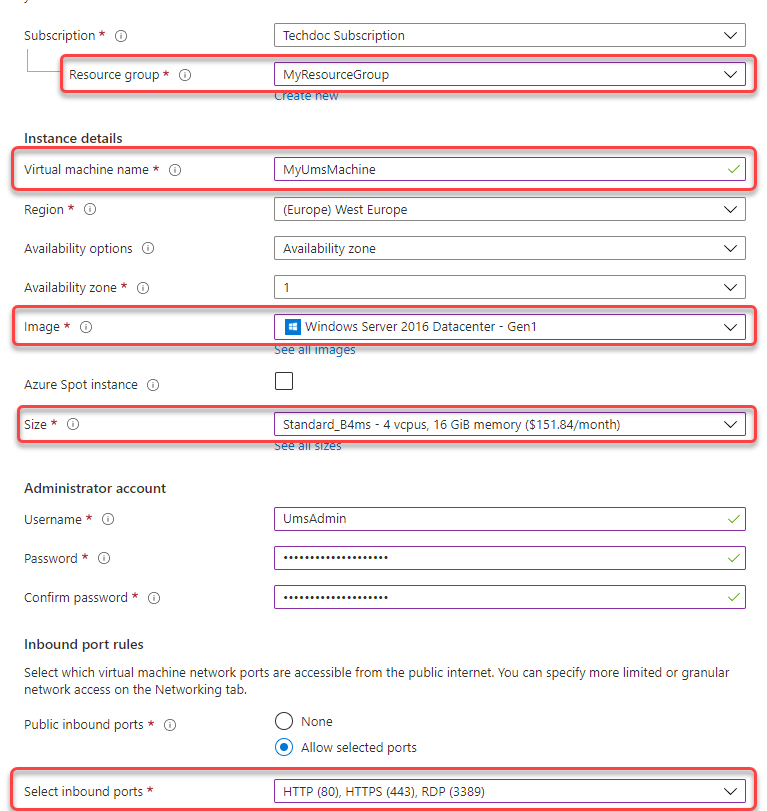
Resource group: Select the resource group you have created before.
Virtual machine name: Enter a name for the virtual machine on which your UMS is to be installed.
Image: Select "Windows Server 2016 Datacenter".
Size: Select the size for your virtual machine. If all components will be running at the same time, we recommend “Standard B4ms” (4cpu/16 GiB). The components and their RAM requirements are as follows:
UMS Server: 4 GB
UMS Administrator: 2 GB
UMS Console: 3 GB
UMS Web App: 1 GB
Embedded database: 2-3 GB
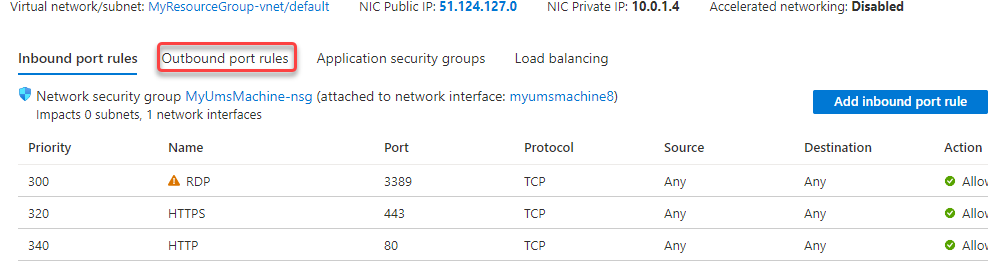
Select inbound ports: Select "HTTP (80)", "HTTPS (443)", and "RDP (3389". As an alternative, you can add the ports later on; see Configuring the Virtual Machine.
Click
 .
.Click
.
Configuring the Virtual Machine
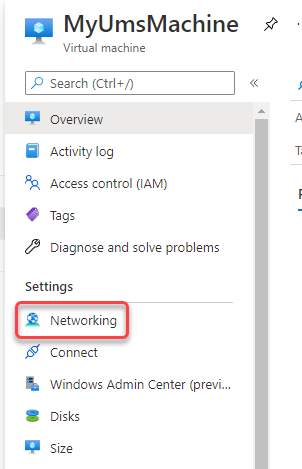
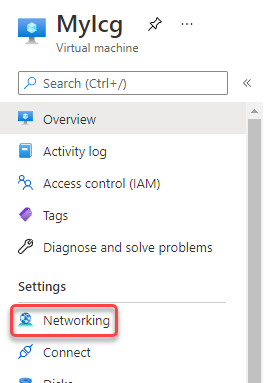
In the sidebar menu, go to Networking.
Click
 .
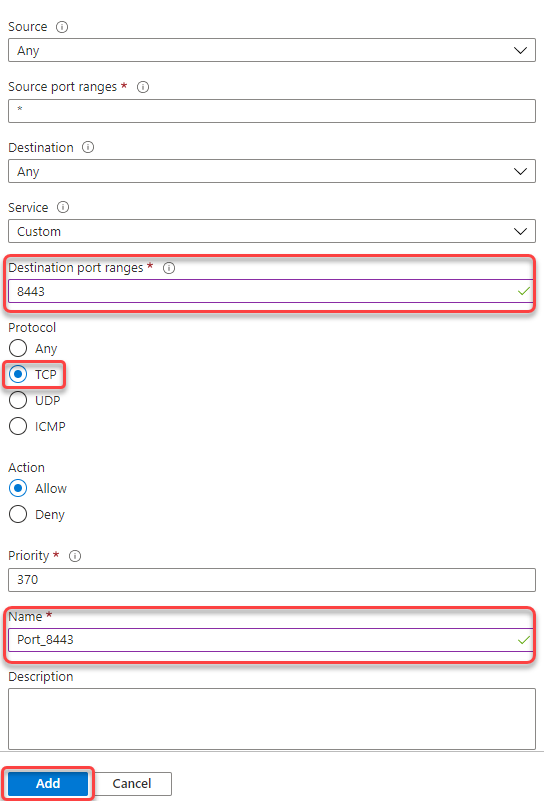
.Edit the data as follows:
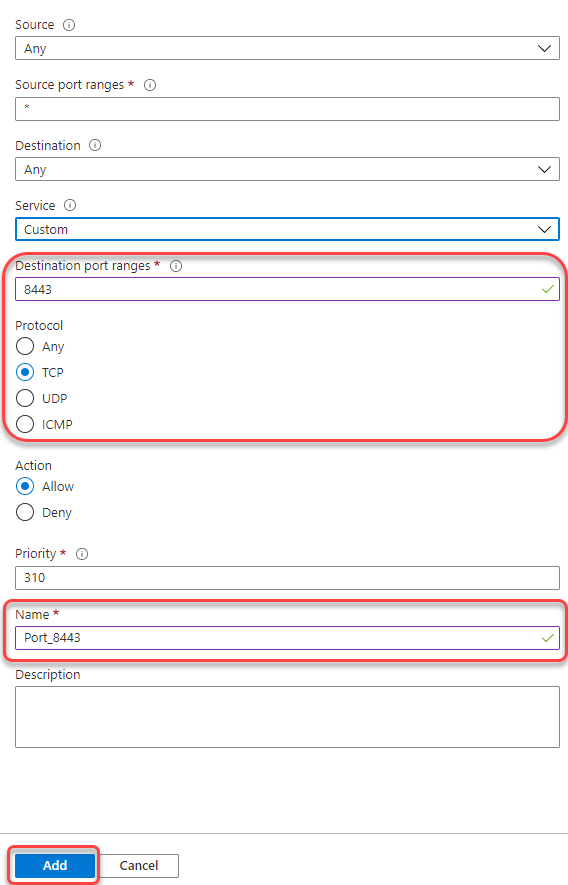
Destination port ranges: Enter "8443".
Protocol: Select TCP.
Name: Change to "Port_8443".
Click
 .
.
After the installation is complete, do not forget to disable ports 3389 and 22!
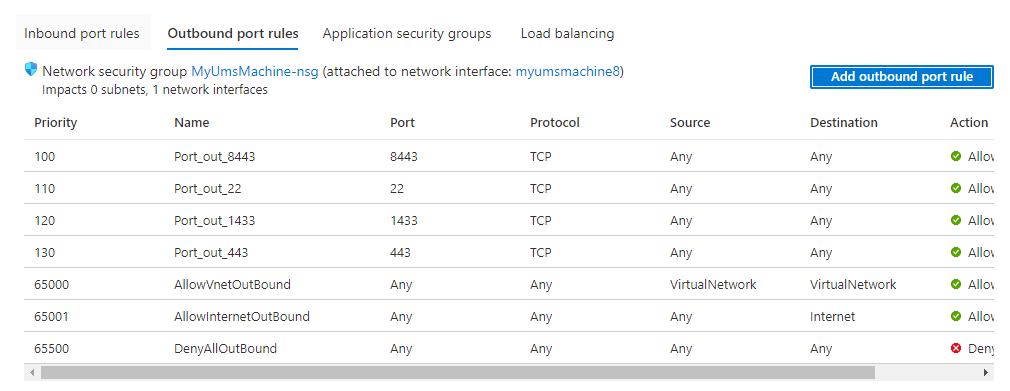
Select Outbound port rules.
Click
 .
.Using the procedure described in steps 2 and 3, add the following ports:
8443 (TCP)
22 (TCP)
Database port: The port that will be used for communication with the database. For more information, see UMS with External Database.
443 (TCP)
Review your settings.
Installing the IGEL UMS
Ensure that your virtual machine is running.
Click Connect and then select RDP.
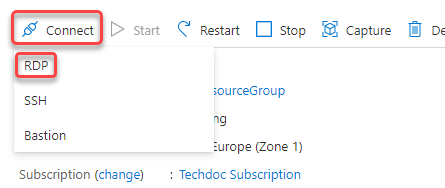
Enter the displayed data in your RDP client or click
 and use the RDP file.
With a web browser, download the UMS installer from the IGEL Download Server > UNIVERSAL MANAGEMENT SUITE > WINDOWS. (Example:
setup-igel-ums-windows_6.07.100.exe)Install the UMS as described in IGEL UMS Installation under Windows with the following settings:
Activate Standard UMS.
Activate with UMS Console.
Deactivate with Embedded Database if you are going to use the external database.
Deactivate Only UMS Console.
Activate UMS Web App.
When the installation is finished, open the UMS Administrator and follow the instructions under How to Set Up a Data Source in the IGEL UMS Administrator.
Setting the Public Address on the IGEL UMS Server
Start the UMS Console and log in.
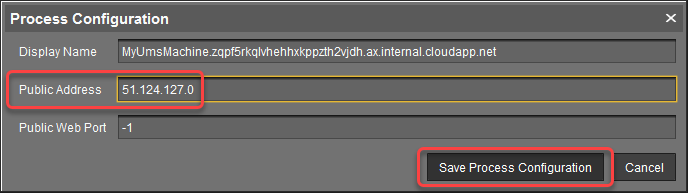
Go to UMS Administration > UMS Network > Server, open the context menu and select Edit.
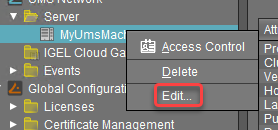
Enter the public ID of your virtual machine (displayed on the overview page) and click Save process configuration.
Create Web Certificates
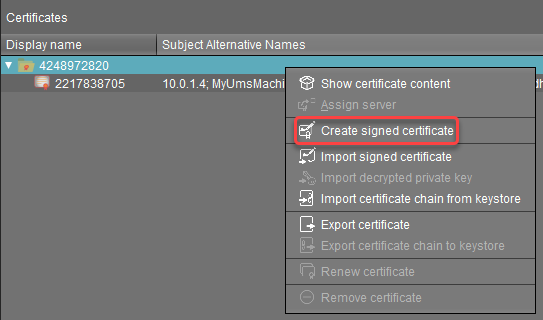
In the UMS Console, go to UMS Administration > Global Configuration > Certificate Management > Web.
Select your root certificate and then select Create signed certificate from the context menu.
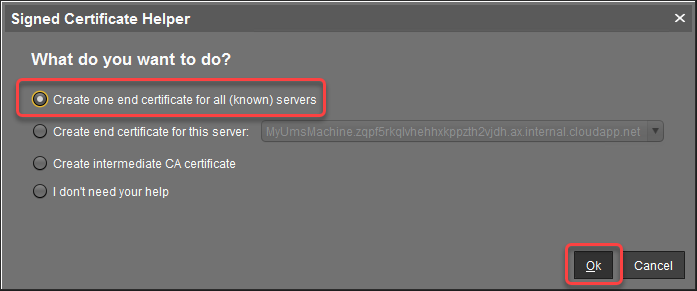
Select Create one end certificate for all (known) servers and then confirm with Ok.
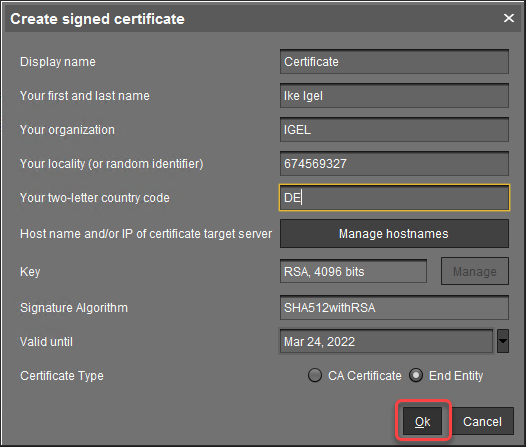
Fill in the details as appropriate.
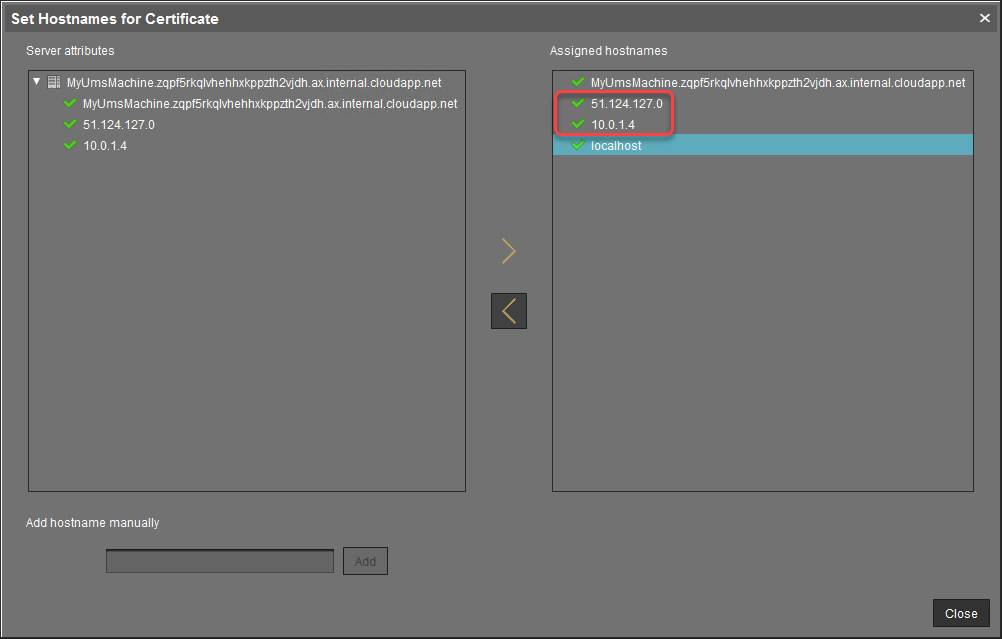
Click Manage hostnames to verify if the internal IP Address and the public IP address are included.
Review your settings and click Ok.
Select your certificate and then select Assign server from the context menu.
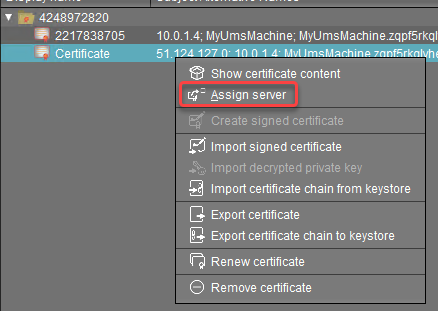
Assign your server to the certificate and confirm with Ok.

Click Assign Certificate to server(s) to confirm.
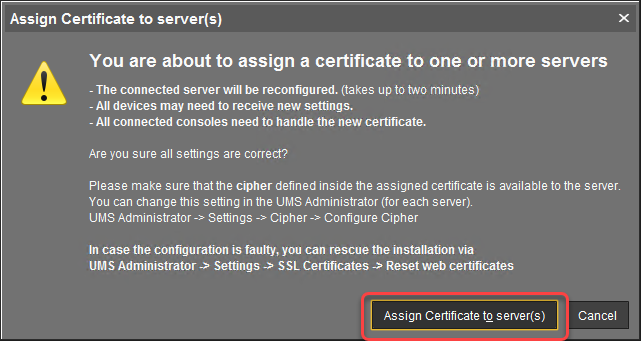
Check if the certificate is marked as Used.

At this point, you can safely connect to your UMS from a local machine as well as from remotely installed UMS Consoles. For clarity purposes, we will still use the UMS Console on Azure.
Downloading the Installer for IGEL Cloud Gateway (ICG)
→ With a web browser, download the ICG installer from the IGEL Download Server > IGEL CLOUD GATEWAY (ICG). (Example: installer-2.02.110.bin) You can do this on the virtual machine or use your local machine and then copy the file to your virtual machine via RDP (clipboard).
Creating a Virtual Machine for IGEL Cloud Gateway (ICG)
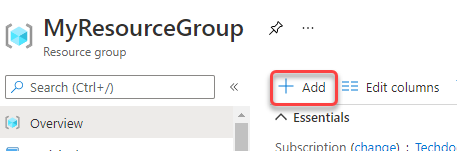
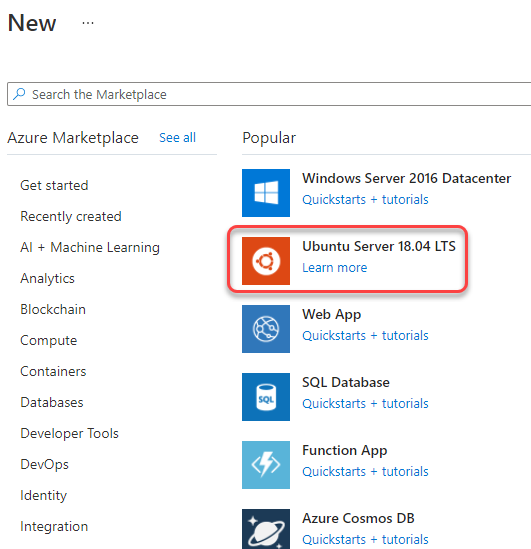
In your Azure portal, go to your resource group (in our example: MyResourceGroup) and add a new Ubuntu Server 18.04 LTS.
Edit the settings as follows:
Resource group: This must be set to the resource group we have created before (in our example: MyResourceGroup).
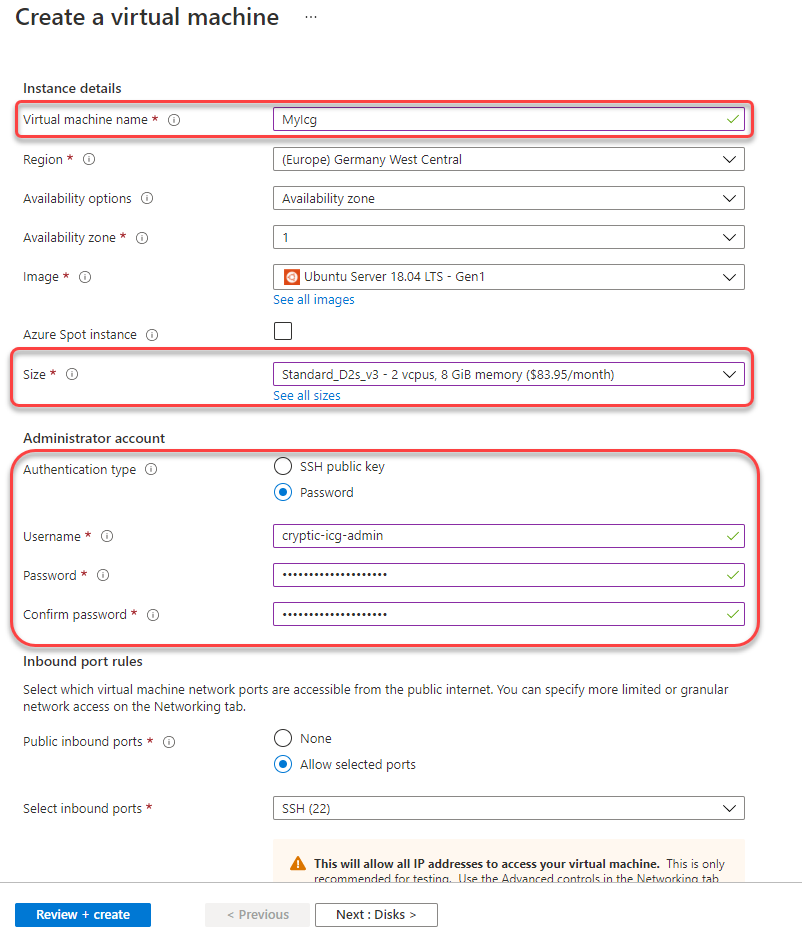
Virtual machine name: Enter a name for the virtual machine.
Size: “D2s v3” (2 CPUs/8 GiB RAM) or higher is recommended.
Authentication type: Select Password.
Username: Enter a username for SSH access. This user account will be used for ICG installation by the UMS.
For security reasons, the username should be long (20 to 30 characters) and cryptic.
Username "icg" Is Reserved
Do not use "icg" as a username for the remote installer; this is the username under which the Tomcat server is running.
Under Password and Confirm password, enter a strong password (20 to 30 characters are recommended)
Click
 and review the settings.
Click
.Click
 and note the Public IP address.
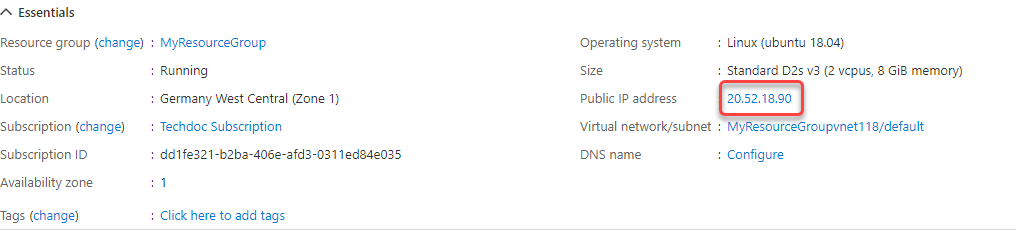
Configuring the IGEL Cloud Gateway Server
In the sidebar menu, go to Networking.
Click
.Edit the data as follows:
Destination port ranges: Enter "8443".
Protocol: Select TCP.
Name: Change to "Port_8443".
Click
 .
.
Installing the IGEL Cloud Gateway
Follow the instructions under Providing the Certificates.
Follow the instructions under Installing the IGEL Cloud Gateway.
Connecting the Devices
→ Follow the instructions under Connecting the Devices.