Disaster Recovery: UMS with an External Database
The following instructions require a proper backup of your environment, see the "External Database" section under Creating a Backup of the IGEL UMS .
Execution Order in Case of the Disaster Recovery
Install the UMS on the server, see IGEL UMS Installation. All the UMS components must be installed like before:
The same UMS version
The same network configuration of the host (the same IP addresses, ports)
For High Availability (HA) installations only: During the installation, use the backed-up IGEL network token. See the "Starting the Installation" section under Adding Further Servers to the HA Network.
Stop the existing UMS Server(s). For the details on how you can do it, see IGEL UMS HA Services and Processes.
Copy all the saved files and firmware updates from
[IGEL installation directory]/rmguiserver/webapps/ums_filetransfer
to the new UMS Server(s) – without the WEB-INF folder.
If you deploy the HA environment, see also Which Files Are Automatically Synchronized between the IGEL UMS Servers?.
Restore the database backup using the procedures recommended by the DBMS manufacturer.
Add the database connection to your external database on each UMS Server: UMS Administrator > Datasource > Add.
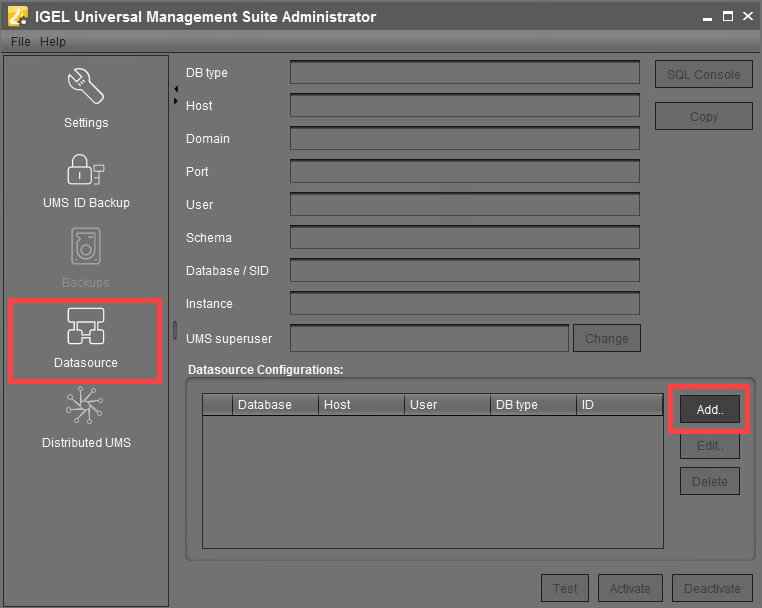
Click Activate to enable the data source.
The UMS Server will start automatically after that.In the UMS Administrator > Backups > Restore, restore the backup of server configurations on each UMS Server. If necessary, transfer host-specific server configurations to the new server(s).
In the UMS Administrator > UMS ID Backup > Restore, restore the backup of the UMS ID.
For HA and Distributed UMS installations only: Check host assignments for job execution and, if required, adjust them. See Updating Host Assignment for Job Execution.
After the procedure is complete, open the UMS Console and go to UMS Administration > UMS Network > Server to check if there is an entry for the previous UMS Server among the listed components. If so, select the entry and click Delete in the context menu.
In the case of the HA installations, the same must be done for the load balancers: UMS Administration > UMS Network > Load Balancer.
If you have a UMS installation with an embedded database, you may find it useful to read: How to Restore and Recover a Corrupted UMS Embedded DB .