These instructions apply to UD2 model M250C, UD3 model M350C, and UD7 model H860C.
With the IGEL VESA mount, you can mount the thin client on the back of your monitor to free up space on your desk.
IGEL VESA mount fits to all flat-panel monitors, complying with the VESA75 or VESA100 standard.
Do not use the IGEL VESA for mounting a thin client horizontally, e.g. at the underside of a desk! This would lead to overheating due to insufficient ventilation.
The IGEL VESA mount consists of:
- two metal plates
- 4 x M3XL8 screws and 4 x gaskets for the thin client plate
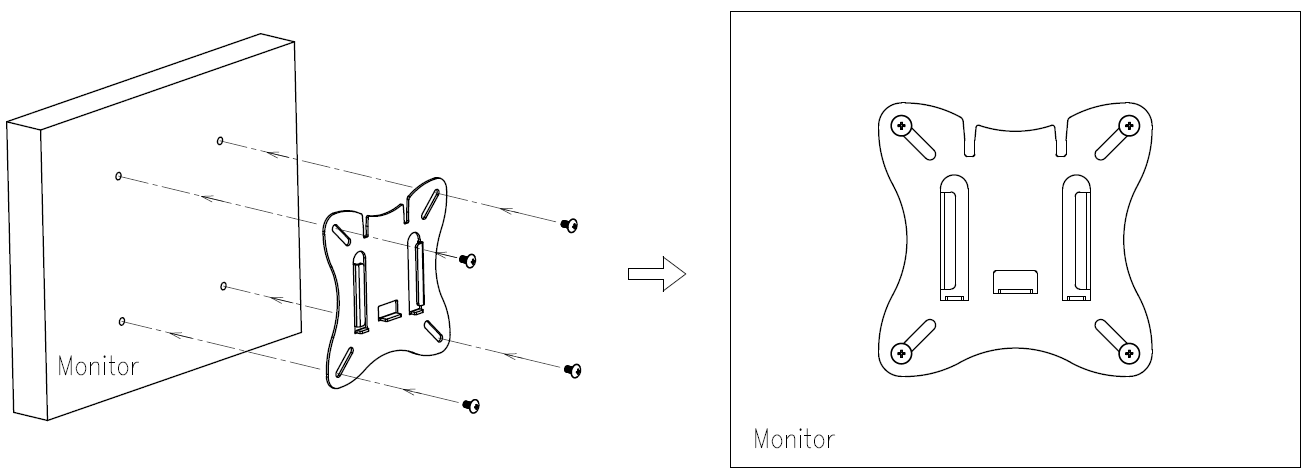
- 4 x M4XL8 screws for the monitor plate
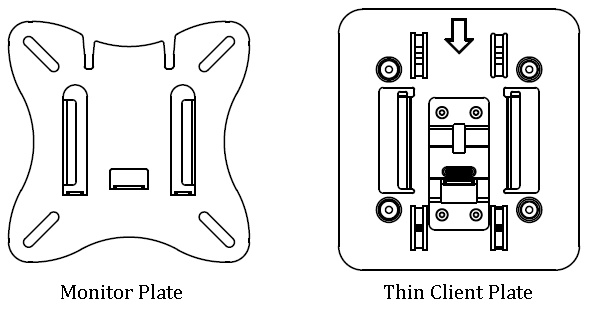
On delivery, the two plates are placed together. To separate them, push the monitor plate with a light raising movement in the direction of the arrow.
 Attach the VESA mount monitor plate with the screws to the back of your monitor, noting the correct alignment.
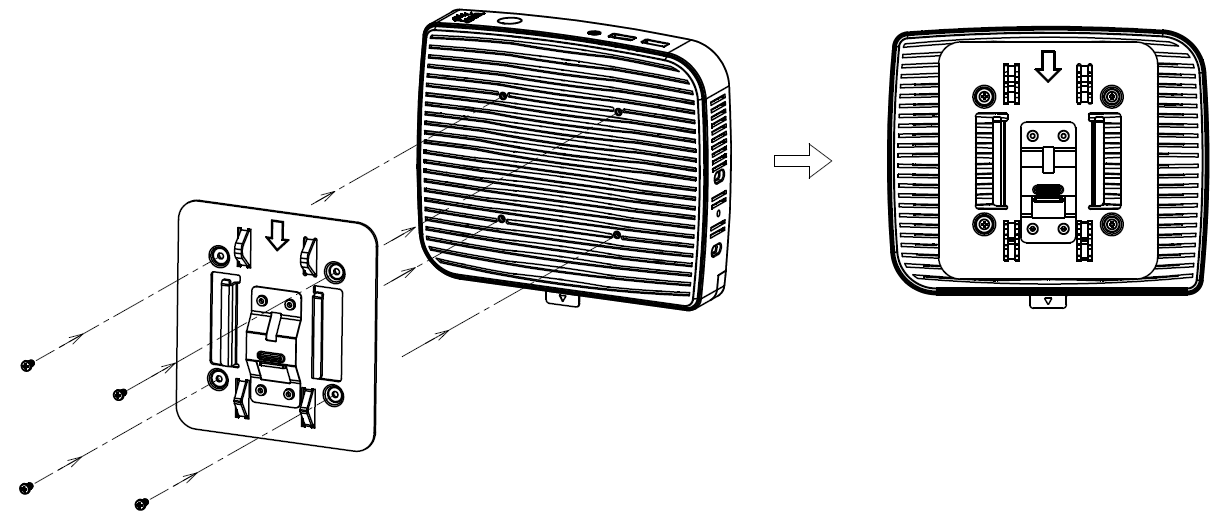
At the back side of the thin client plate, place the gaskets as shown on the picture:
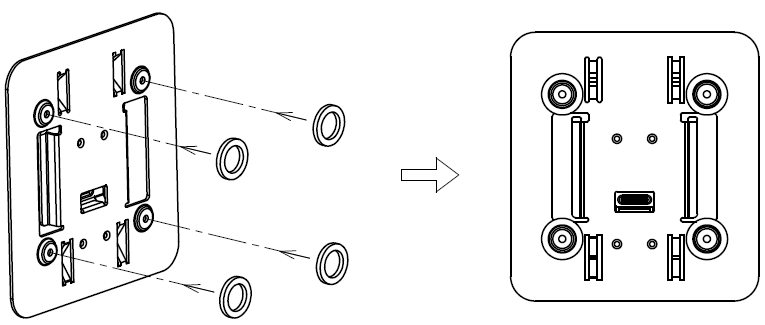
Insert the enclosed screws through the designated holes.
Use only the original screws. If you use longer screws, components in the housing can be damaged. If you use shorter screws, the VESA mount will not be fixed properly on the thin client.
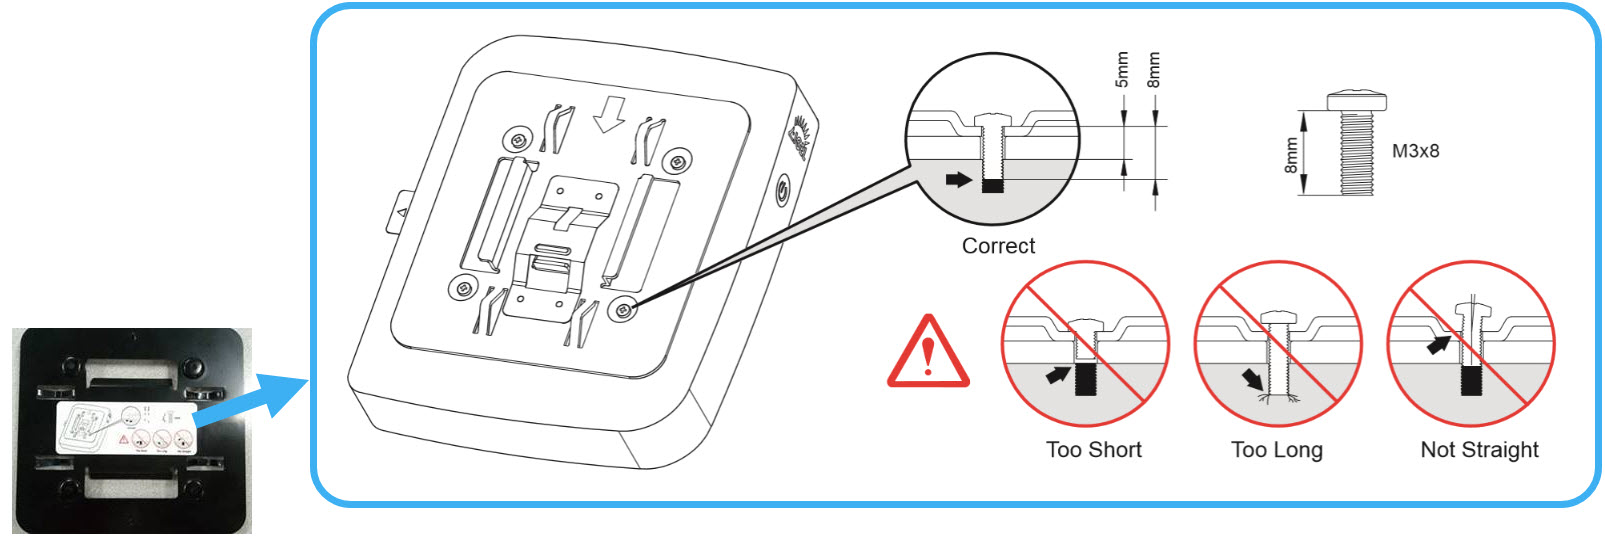
Screw them into the screw threads in the plastic wall of the thin client.
Be careful to ensure that the arrow on the plate is pointing to the back connection site of the client.
Plug in all cables before mounting the thin client to the monitor.
Turn the thin client around so that the power button is facing upwards.

Slide the plate with the thin client from top to bottom in the guide slots of the monitor plate.
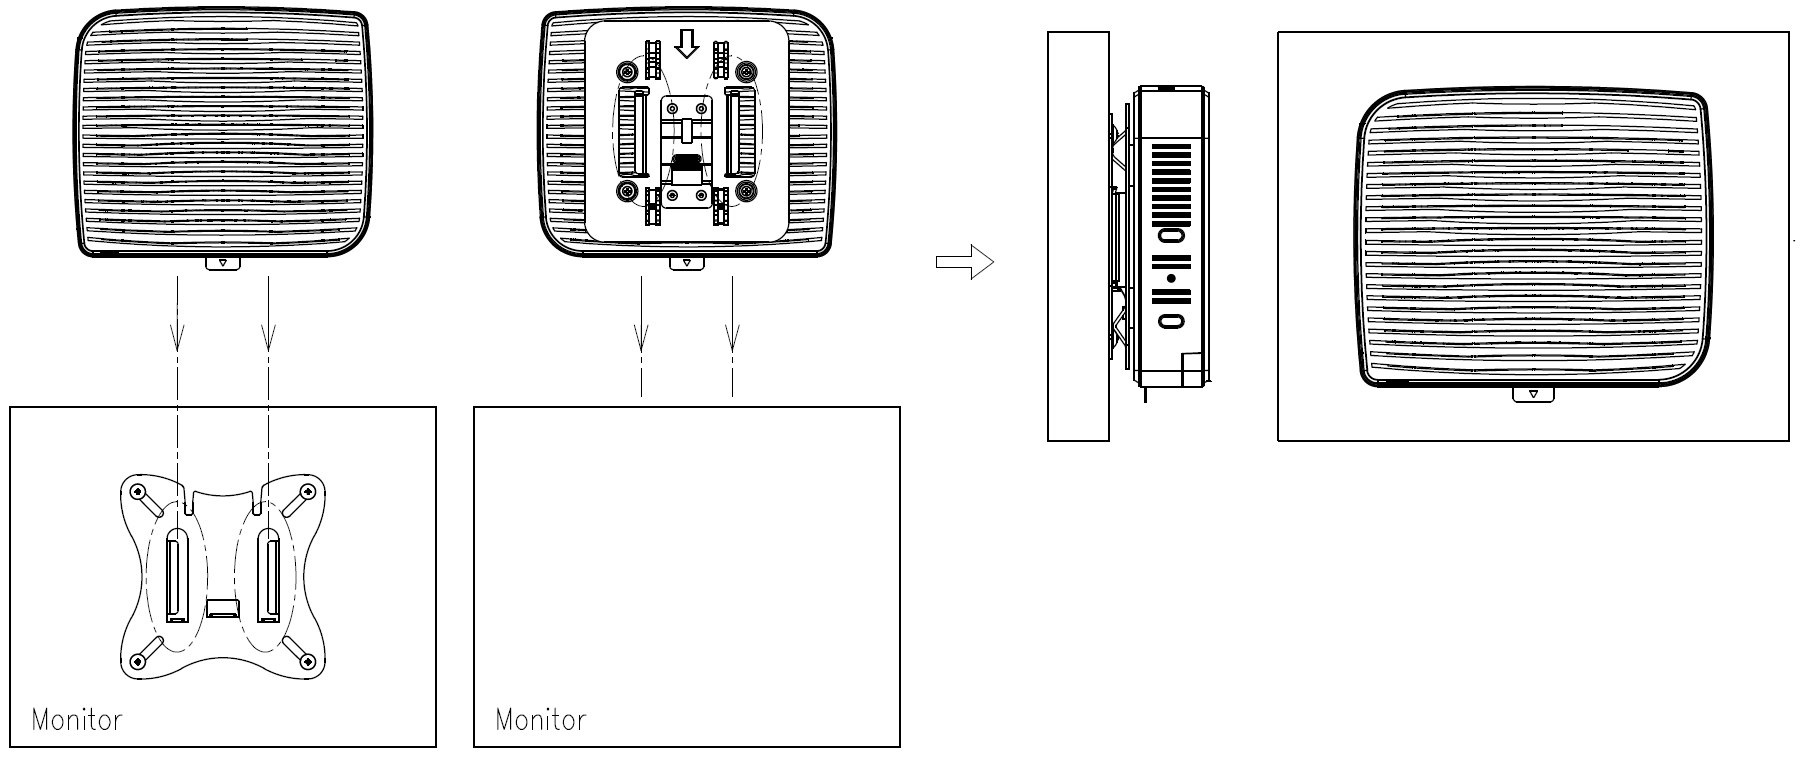
To take the thin client off again, push it up gently. Be careful that you do not press the client against the monitor, otherwise the plates will not detach.