Debugging / How to Collect and Send Device Log Files to IGEL Support
To collect the log files from the IGEL UMS Server, UMS Console, etc., you can use the Support Wizard: UMS Console > Menu bar > Help > Save support information. See Support Wizard - How to Send Log Files in the IGEL UMS. For more information on UMS log files, see Where Can I Find the IGEL UMS Log Files?.
To collect the device log files, see the instructions below.
With IGEL OS 12, additional logging functionalities have been introduced to facilitate debugging. To enable debug mode, proceed as follows:
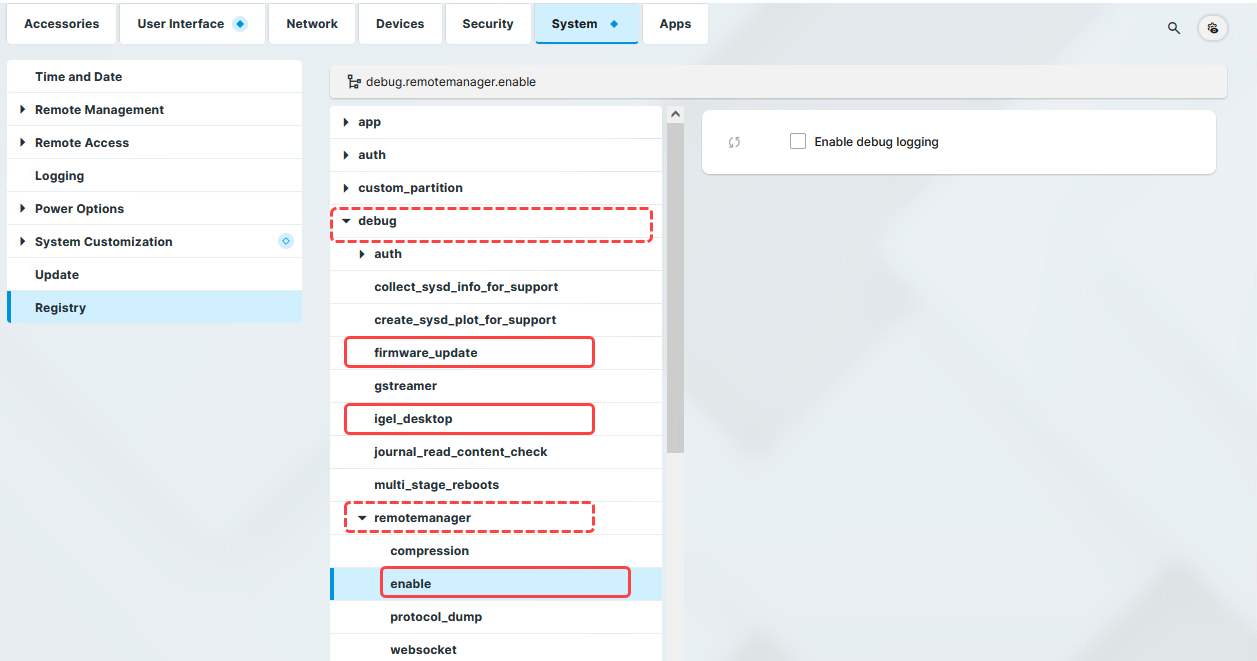
In the IGEL Setup, go to System > Registry and activate the following registry keys:
Registry | Parameter | Function |
|---|---|---|
| Enable debug logging | Debug logging for RMagent communication |
| Enable debug logging for IGEL desktop | Debug logging for user interface applications like the Setup Assistant and the Setup |
| Enable debug logging for firmware update | Debug logging for updates and installations of IGEL OS Apps |
Save the setting.
Optionally, you can also enable protocol dump output via debug.remotemanager.protocol_dump. This activates debug logging for all commands sent from the UMS to the device or vice versa:/var/log/rmagent-ws-in.log/var/log/rmagent-ws-out.log
Activate this registry key only if required.
Collecting Device Logs via the IGEL UMS
After you have activated the above registry keys, you can use the UMS Console or the UMS Web App to collect the device log files.
Collecting Device Logs from the IGEL UMS Web App
To collect the device log files, see the instructions under How to Save Support Information and Log Files in the IGEL UMS Web App .
Collecting Device Logs from the IGEL UMS Console
To collect the device log files:
In the UMS Console, go to Help > Save device files for support.

The dialog Save device files for support opens.
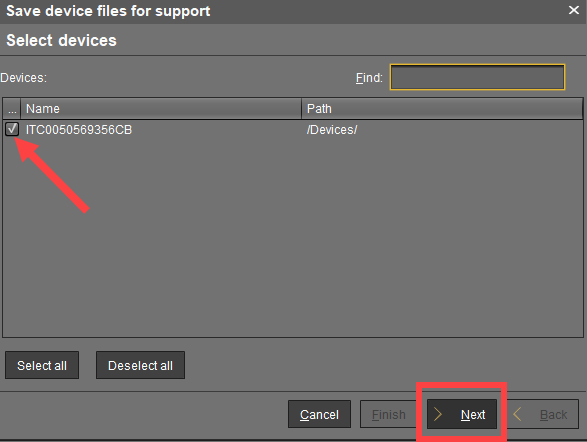
Select the required device(s) and click Next.
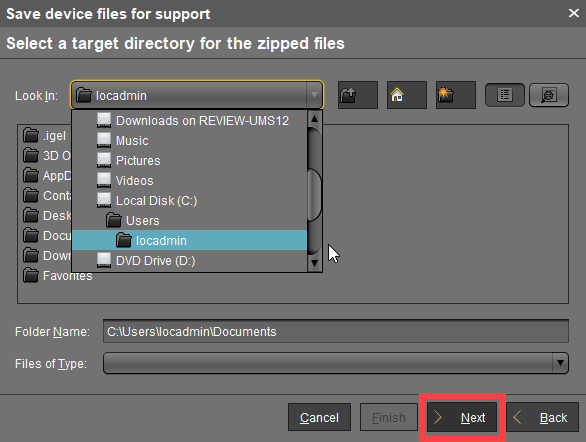
Select a directory which is suitable for saving the zipped log files and click Next.
A confirmation dialog opens and shows the path and file name under which the log files are stored.
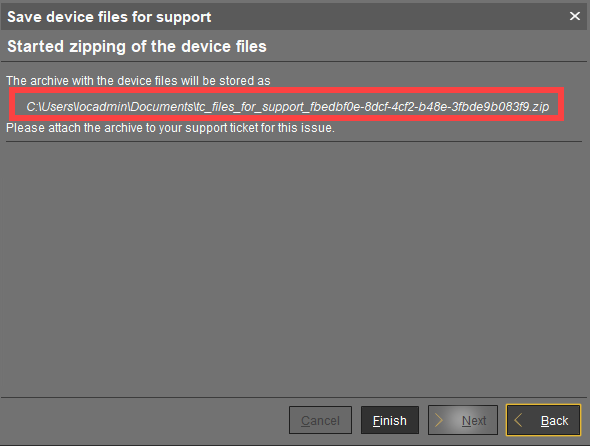
When the log collecting procedure is complete, close the confirmation dialog by clicking Finish.
Find the ZIP file "
tc_files_for_support_..." in the directory you selected and send it to IGEL Support via the IGEL Customer Portal.
Collecting Device Logs without the UMS
When the UMS is not accessible or there is an issue with network connectivity, you can still extract logs from a device.
Option 1: Via Local Terminal
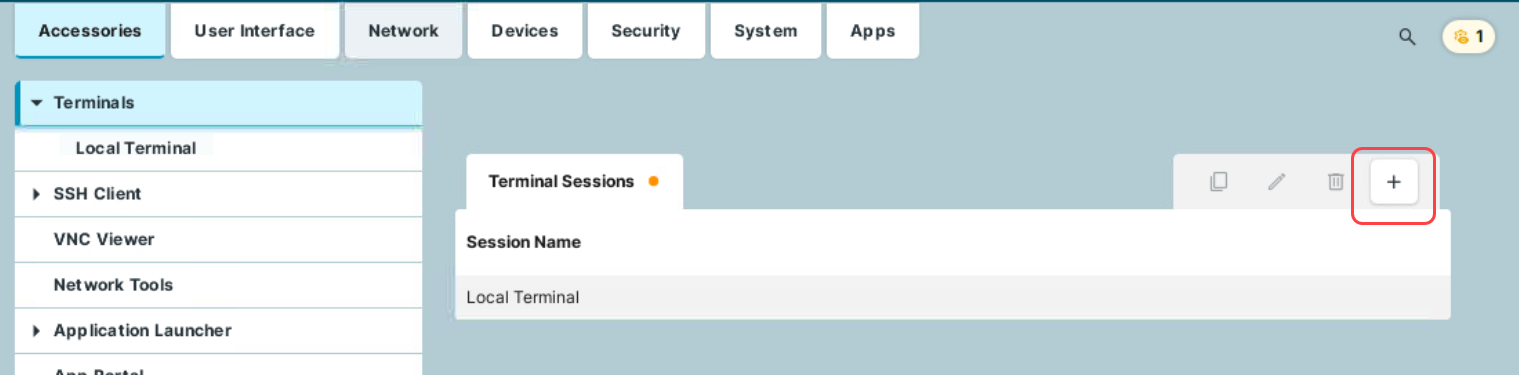
In the IGEL Setup, go to Accessories > Terminals and create a terminal session.
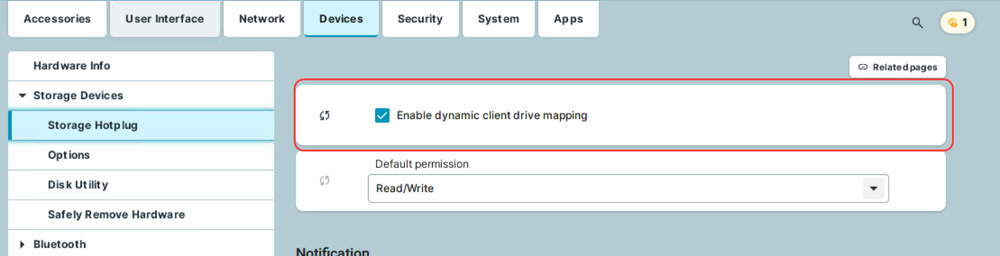
Go to Devices > Storage Devices > Storage Hotplug and activate Enable dynamic client drive mapping.
Verify that System > Registry > debug > igel_desktop > Enable debug logging for IGEL desktop is enabled.
Save the settings.
Plug the USB stick into the endpoint device and start the terminal session.
Log in as
root(by default, no password).
To create the log files, execute the command
/config/bin/create_support_information
This will generate/tmp/tclogs.zip(you can go there as follows:cd /tmp)
To find out the name of the USB stick, you can use the following commands:
cd /userhome/medials -l
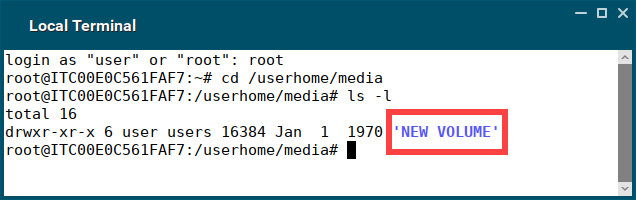
If there are spaces in the device name, you'll have to include it later in quotation marks. Example: "NEW VOLUME".
If there are no spaces in the device name, quotation marks will not be required.
To copy the log files from your endpoint device to the USB stick, run the command
cp /tmp/tclogs.zip /media/[name of your USB stick]/and press [Return].
After /media/, you can press the tab key for autocompletion.
Type
syncand press [Return].
Wait a few seconds before safely ejecting the USB stick from the endpoint device.
Send the log files to IGEL Support via the IGEL Customer Portal.
Option 2: Via CLI
You can collect log files also via command line interface (CLI). This method can be useful, for example, if you experience problems on the stage of device onboarding.
Press anytime [CTRL+ALT+F12] to enter CLI and then press [Return].
Plug in a FAT32-formatted USB stick.
Execute the following command:
dmesg
This command is used to find out if the USB stick was correctly detected and which device name was assigned (sda,sdb,sdc, etc.)
Type
cat /proc/partitions
Search forsda,sdb,sdc, etc. and search for the next line showing the partitions (Example:sda1,sdb1, etc.)
Create the mountpoint directory:
mkdir /mnt
The device name for mounting the USB stick for the following command in step 7 needs an additional partition number. Example:
sda1,sdb1,sdc1, etc.
Mount your USB stick:
mount /dev/sda1 /mnt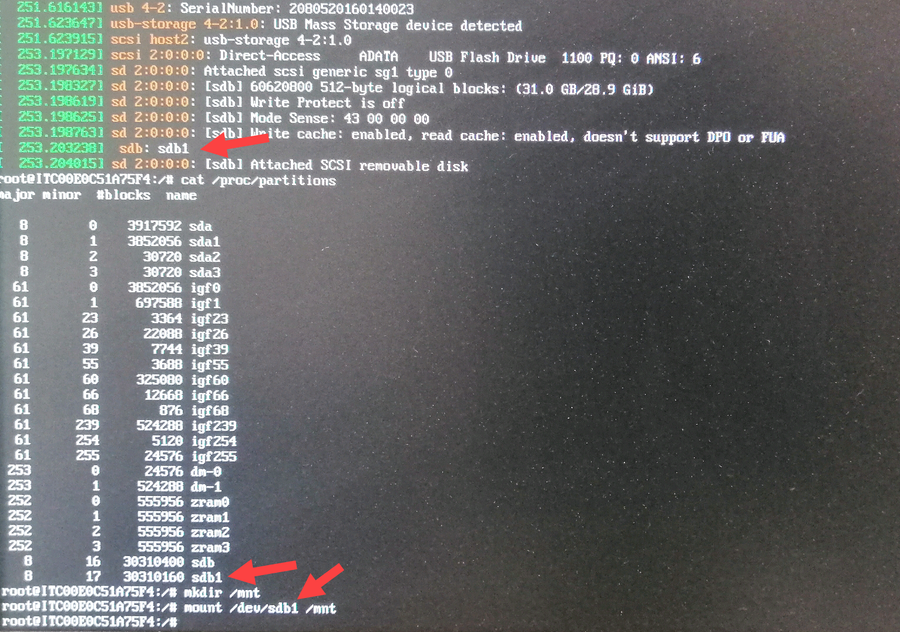
Check your data on your mounted USB stick:
cd /mntls -l
Now you should see your data on the USB stick.
Generate log files:
/config/bin/create_support_information
It can take some time till the log file generation is complete.
Type:
cd /tmpls -l
Now you should see the log filetclogs.ziplisted.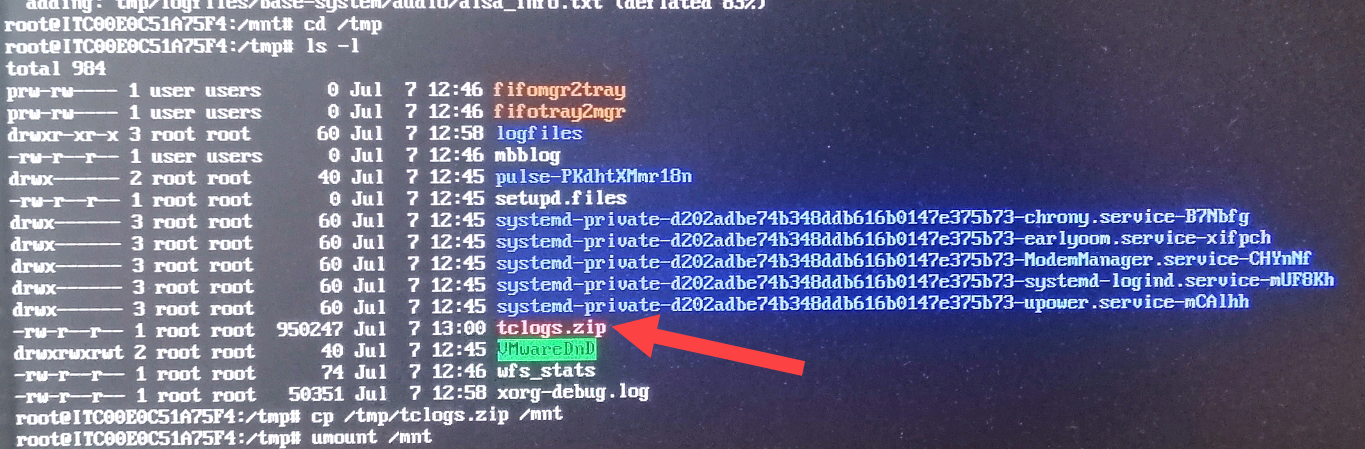
To copy
tclogs.zipfrom your endpoint device to the USB stick, typecp /tmp/tclogs.zip /mntand press [Return].
To unmount your USB stick, use the command
umount /mnt
Now you can safely remove your USB stick.
To close CLI, press [CTRL+ALT+F1].
Send
tclogs.zipto IGEL Support via the IGEL Customer Portal.