Troubleshooting: Error 38 during the Onboarding of an IGEL OS 12 Device
During the onboarding with the IGEL Onboarding Service or with the one-time password method, you get the following error message: "Could not manage your device because of an internal error (<38>)". Error 38 indicates that the device was unable to register the certificate from the UMS Server(s).
Problem
Possible causes for error 38 may be:
The device already exists on the UMS Server.
Typical use case: the device was once registered in the UMS, but was deleted, but not permanently, and remained in the UMS in the recycle bin.Uncommon FQDN of the UMS Server
The Public Address is not resolvable by the endpoint devices, or it is not set, and the devices cannot resolve the internal address.
Multiple UMS Servers are behind a single external address / load balancer.
Solution
The Device Already Exists on the UMS Server
If you get error 38 during the device onboarding, the first thing to check is if the device has already been registered on the UMS Server. To do this, we will find out the current Unit ID of the device, search for it in the UMS, and will remove the device from the UMS:
To find out the Unit ID of the device:
If you are still in the IGEL Setup Assistant: Press anytime
[CTRL+ALT+F12]or[CTRL+ALT+F11]to enter the command line interface (CLI) and then press[Enter]to log in as root.If you skipped all steps in the IGEL Setup Assistant and started the device with a Starter license: In the IGEL Setup > Accessories > Terminals, add a terminal session and log in to the local terminal as root (by default, the password is empty on new devices).
Alternatively, you can simply open the information dialog in the IGEL Setup Assistant and note the MAC address of the device and search for it in the UMS Console as described below:
.png?inst-v=71d4119a-23c3-4299-8343-081785b9582b)
Execute the following command:
echo $(get_unit_id)
This returns the Unit ID of the device:
Enter the Unit ID in the Search field, press
[Enter]and validate that the located device has the correct Unit ID.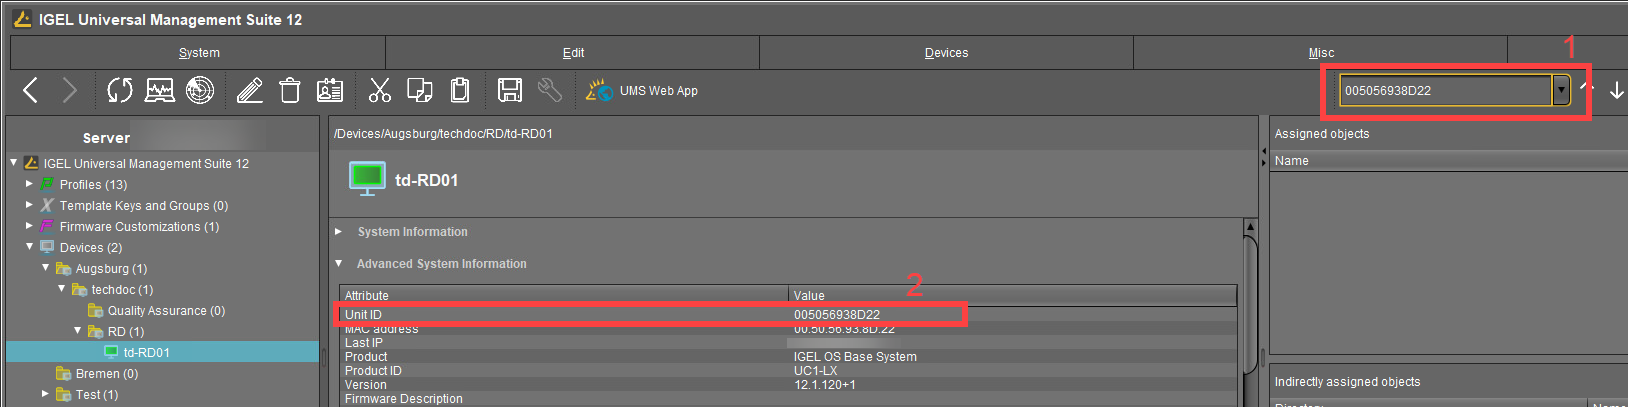
If the device does not show up when running this search, skip the next step and go to the Recycle Bin.
Right-click the device, select Delete and confirm the deletion.
The device will be moved to the recycle bin. See Recycle Bin - Deleting Objects in the IGEL UMS.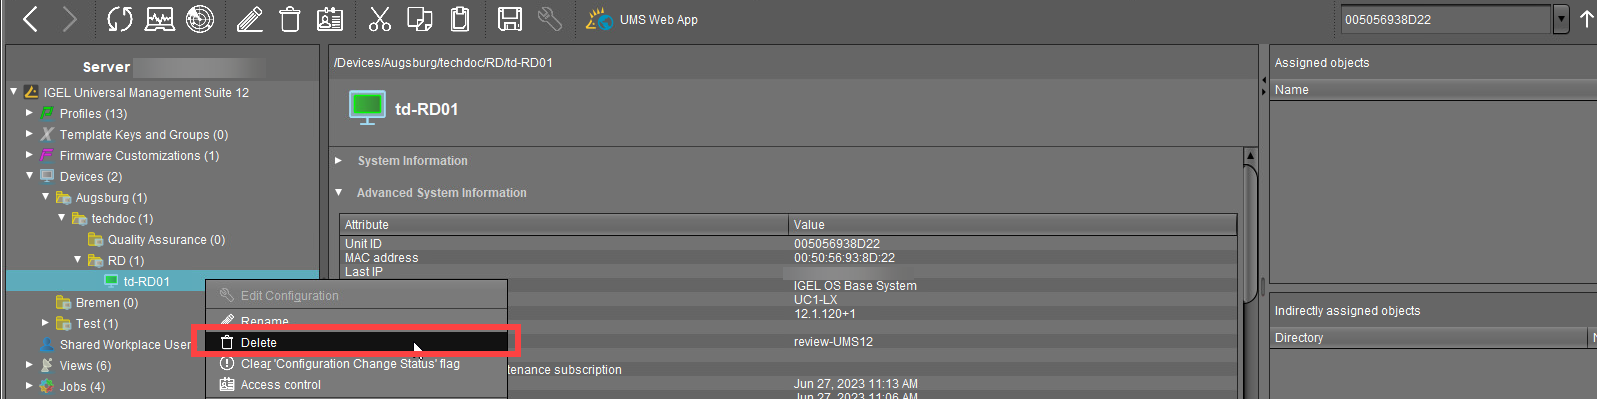
Verify that you do not need any items in the recycle bin and click Clear recycle bin.
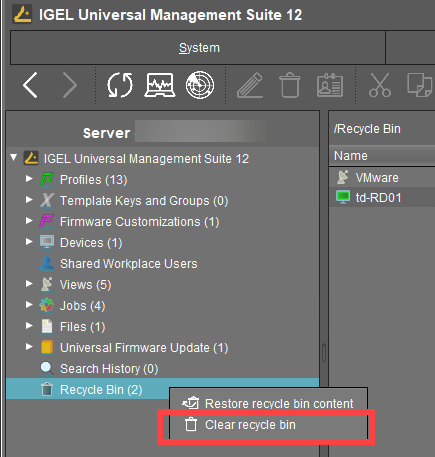
Now, when the device was permanently removed from the UMS, you can repeat the onboarding procedure.
Checking Host Names, FQDNs, and Public Address of the UMS Server
Having incorrect host or public names defined in the UMS can cause issues with devices identifying the UMS and installing the UMS certificates properly, thus resulting in error 38 during the device onboarding.
Please pay attention that hostnames should be spelled everywhere the same way (case-sensitive). The UMS hostname specified during the configuration of the IGEL Onboarding Service must be written exactly as in the UMS.
The hostname of the UMS must match the DNS name or SAN name for your UMS web certificate (see Web Certificates in the IGEL UMS).
The best practice is to use the common / routable FQDN and not the automatically generated name for the hostname. It is generally recommended to check for hostname oddities. For example, such names as ums00.dci3rsbtfpeunizc5g5gghfhwg.ux.internal.cloudapp.net are common for cloud-hosted servers and generated automatically when creating a VM, e.g. in Azure – they should be renamed to simpler FQDNs such as ums00.igel-demo.com.
As a best practice, only use lowercase letters in the FQDN.
Note that the maximal length of the FQDN is restricted to 255 characters.
If the hostnames do not meet these requirements, you need to update them:
To identify and check your UMS hostname, go to UMS Console > UMS Administration > UMS Network > Server and select each server to view their details.

Change the hostname:
via your operating system
The proper way is to update the hostname of the UMS Server itself. To do this, simply follow your OS vendor's instructions for changing the hostname, and then reboot the server.
After that, you should see the changes reflected in the UMS (see step 1).
ORvia the UMS
If changing the hostname of your server is not allowed, then you can change the Display Name and Public Address of your UMS Servers:
1. In the UMS Console, right-click the server under UMS Console > UMS Administration > UMS Network > Server and select Edit.
2. Update the Display Name to easily resolvable FQDN of the server.
3. If you have a different external name for the server, enter it under Public Address. For more information on the Public Address, see Server - View Your IGEL UMS Server Information.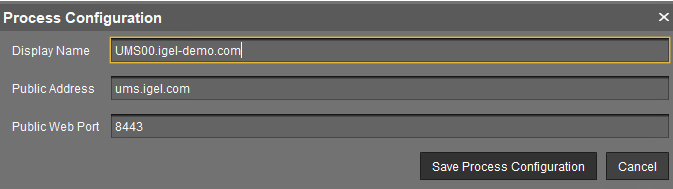
4. Restart the UMS Server service.
5. Validate that you can resolve the Display Name or Public Address of the UMS Server(s) from your IGEL OS devices.
Specifying the Cluster Addresses of the UMS Server
If you are using multiple UMS Servers and they share a single external address, then you will need to update the FQDN of the UMS cluster; see "Cluster Address" section under Server Network Settings in the IGEL UMS. To do this, you can follow the steps below:
Confirm you can resolve / ping the unified FQDN and that it resolves to the correct IP(s) for your UMS cluster.
In the UMS Console, go to UMS Administration > Global Configuration > Server Network Settings and activate Enable common cluster address for all UMS Servers.
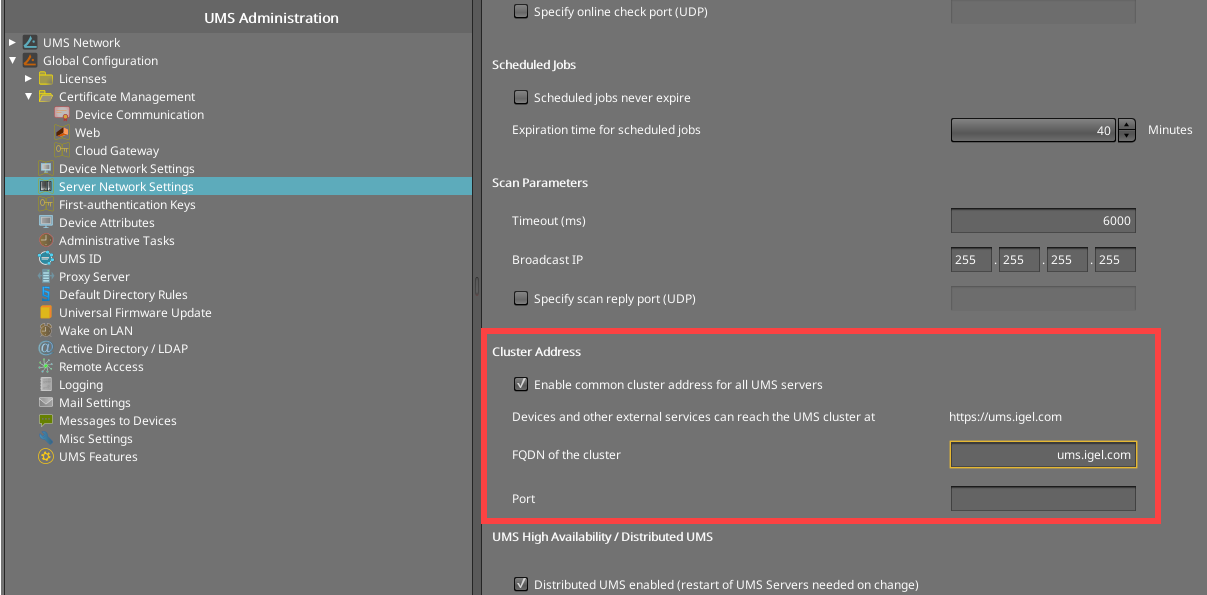
Under FQDN of the cluster, enter the FQDN that your devices can use to resolve the UMS cluster.
If you have configured the custom port, specify it under Port.
Save the settings.
Configure a web certificate for all servers as described under Server Network Settings in the IGEL UMS.
Restart the UMS Server service on all servers.