Click on Network >LAN interfaces in the client setup.
Choose between automatic network setup with the protocols DHCP and BOOTP or manual network configuration in order to set the thin client for each network interface.
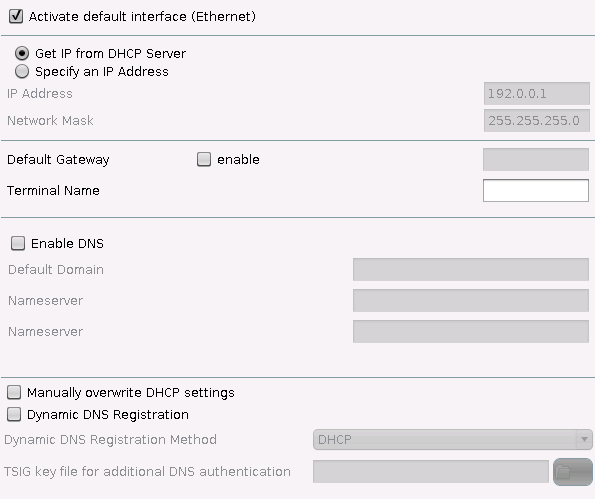
DHCP
Via the Dynamic Host Configuration Protocol, the thin client receives its IP address, network mask, DNS, gateway and other network configurations from a DHCP server. DHCP is enabled by default for LAN 1 (internal). DHCP options can be enabled in theDHCP Clientmenu. A list of standard options is available. However, you can also define your own options.
BOOTP
Via the BOOTP, the thin client receives its IP address, network mask, DNS, gateway and other network configurations from a BOOTP server database.
The transferring of a setup.ini file or a boot script is not supported. BOOTP is not used to call up a boot image from a server and boot this image, in spite of what the term may imply.
Specify IP address manually
Configures the network settings manually instead of searching for a DHCP server. Ensure that the fixed IP address that you enter is not used by another computer in your network.
If you have to use a gateway to forward the data packages to and from the target network, click on Enable and enter the gateway IP address.
Terminal name
Give the local name of the thin client. Otherwise, the standard name IGEL will be generated.
Enable DNS
Configures the DNS - Specify the standard domain in which the device will work as well as the IP address of up to two name servers which will be queried one after the other.
Manual overwrite DHCP settings
Manual entries overwrite the standard route, the domain name and the DNS servers.
Dynamic DNS registration
Here, you can automatically report the current IP address of the thin client to the DNS. The DHCP and DNS methods are available. If you select DNS, you may have to specify a private TSIG key for DNS authentication.