Download page How Can I Configure OpenVPN with an .ovpn or .conf File?.
How Can I Configure OpenVPN with an .ovpn or .conf File?
Solution Based on Experience from the Field
This article provides a solution that has not been approved by the IGEL Research and Development department. Therefore, official support cannot be provided by IGEL. Where applicable, test the solution before deploying it to a productive environment.
Overview
You can use the .ovpn or the .conf file from your firewall to configure OpenVPN for your IGEL OS device.
Creating a Profile
Open the .ovpn or the .conf file in “Microsoft Visual Studio Code” (freeware) or any other editor that can save files in UTF-8 and uses LF (not CR-LF) for a newline.
In the UMS, create a profile with an appropriate name, e.g. "OS11_OpenVPN".
Go to Network > VPN > Open VPN and click to create an OpenVPN session.
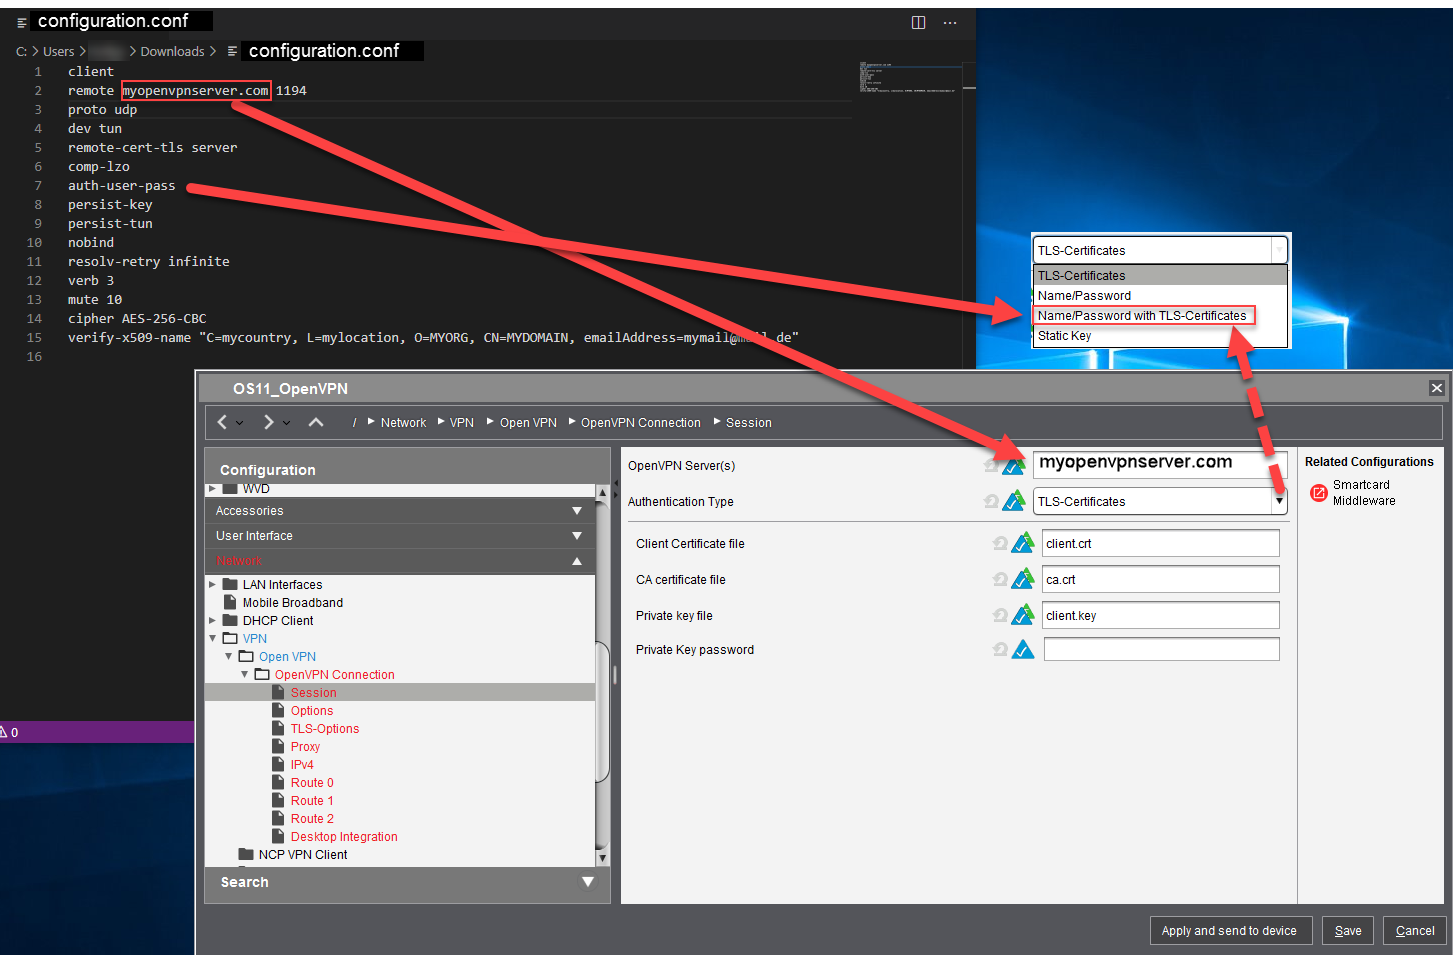
Edit the settings of Network > VPN > Open VPN > [your OpenVPN session] > Session as follows:
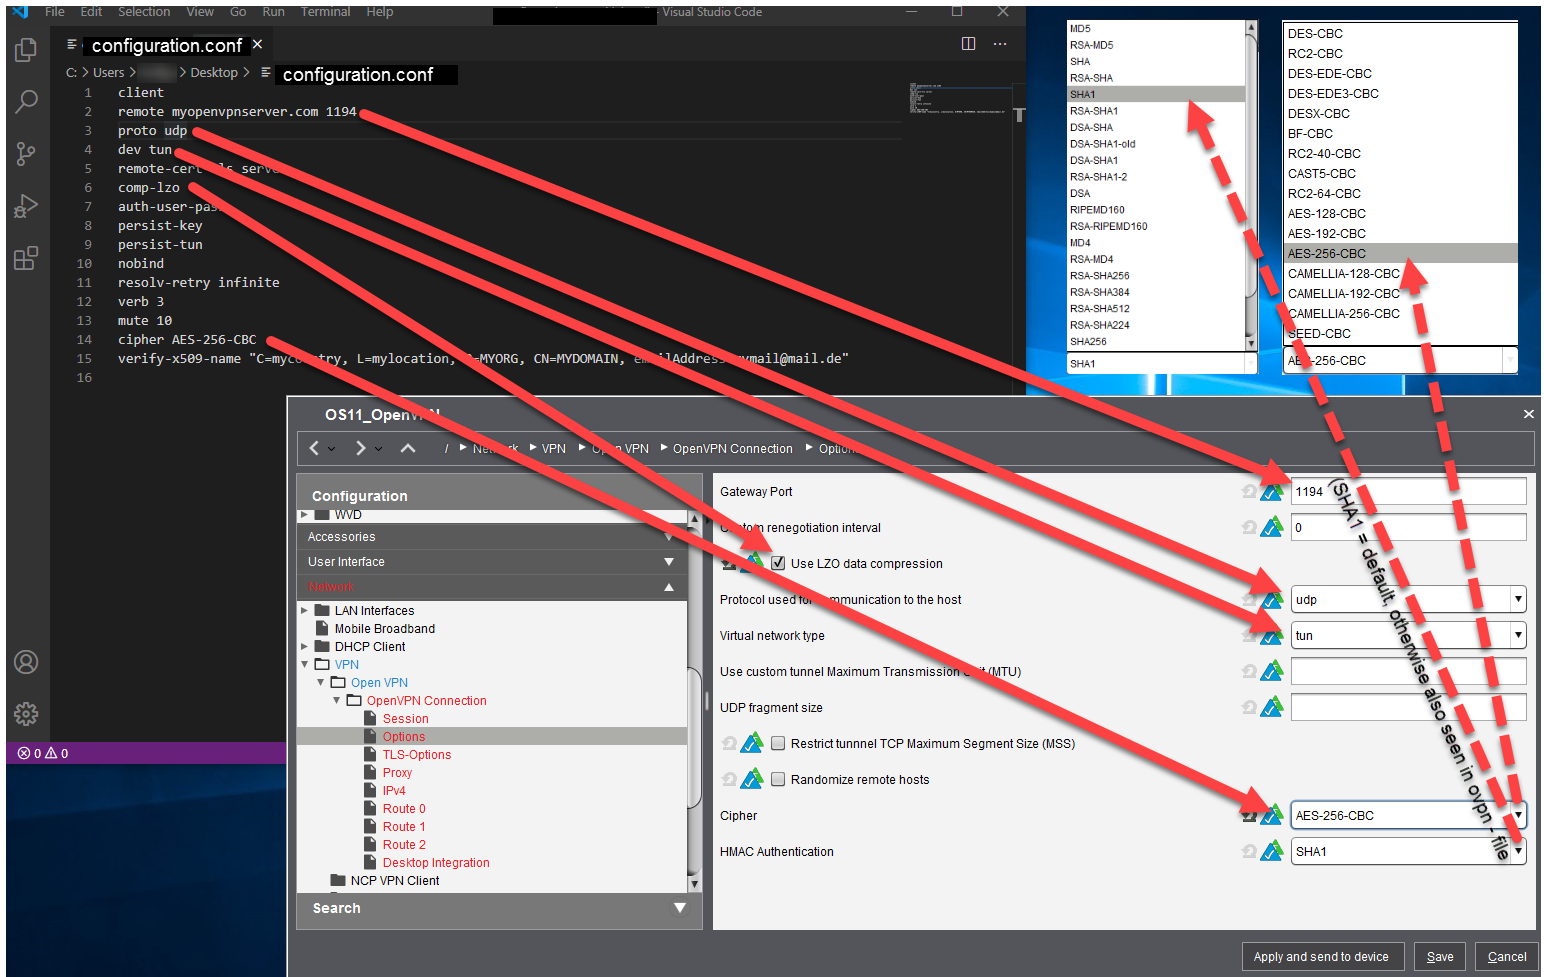
Go to Network > VPN > Open VPN > [your OpenVPN session] > Options and edit the settings as follows:
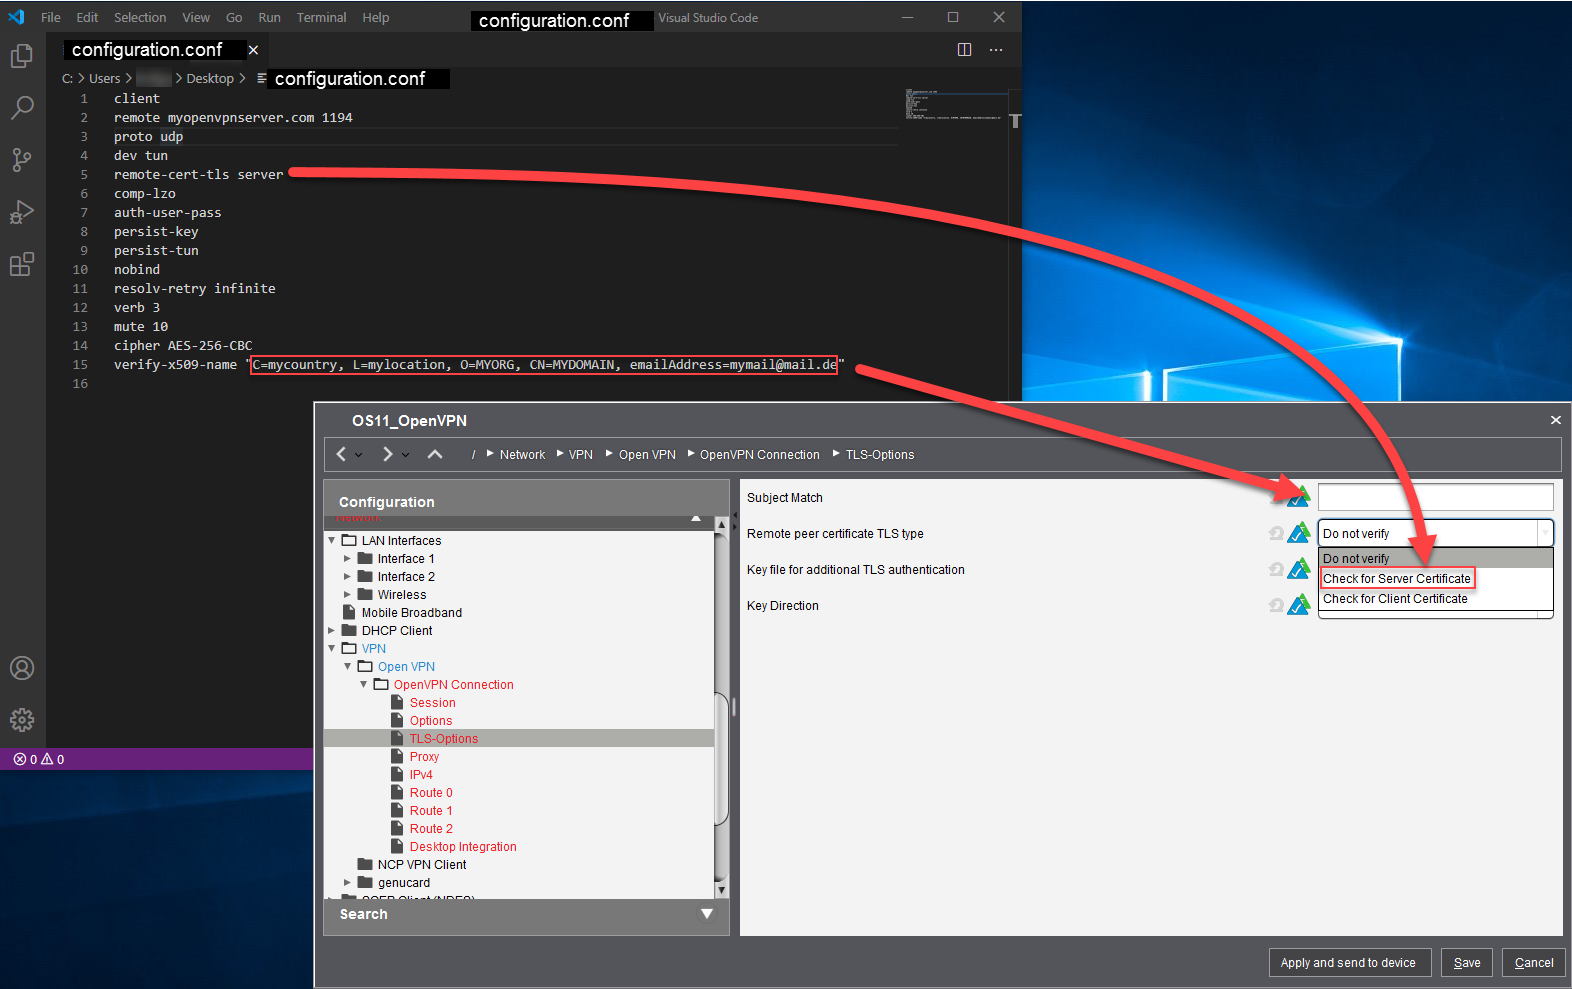
Go to Network > VPN > Open VPN > [your OpenVPN session] > TLS Options and edit the settings as follows:
If the certificates and the key are embedded in your .ovpn file, extract the certificates and key as follows:
Open the .ovpn file in your editor (must be able to save as UTF-8 and use LF, not CR-LF, for a newline).
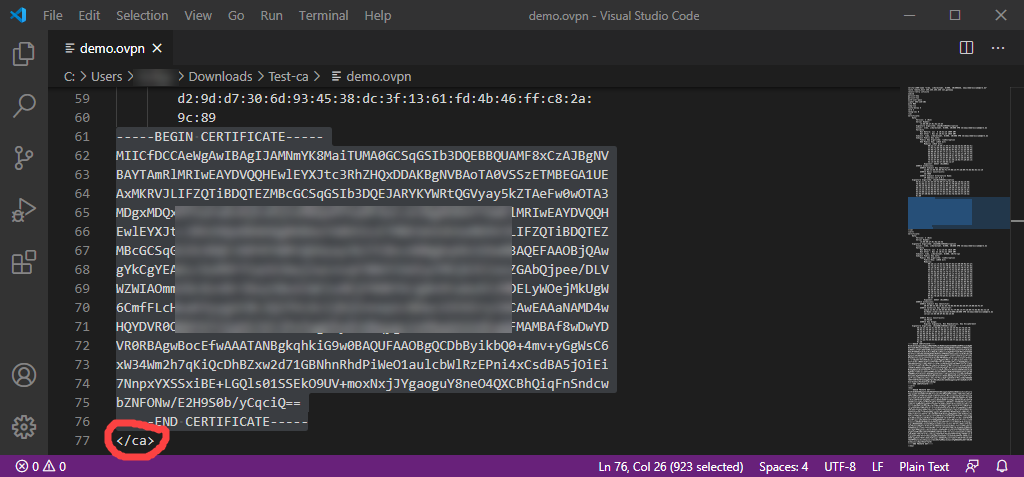
Go to the section tagged as <ca> ... </ca> and copy the marked certificate, including ----BEGIN CERTIFICATE----- and -----END CERTIFICATE-----.
Paste the text to the editor and save it to a file named ca.crt (file type "All files").
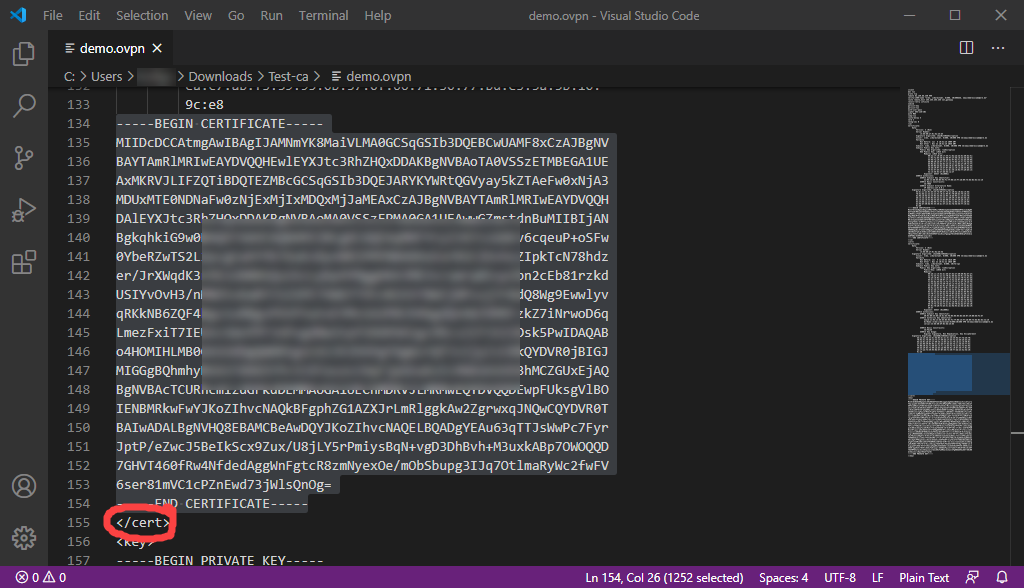
Go to the section tagged as <cert> ... </cert> and copy the marked certificate, including ----BEGIN CERTIFICATE----- and -----END CERTIFICATE-----.
Paste the text to the editor and save it to a file named client.crt (file type "All files").
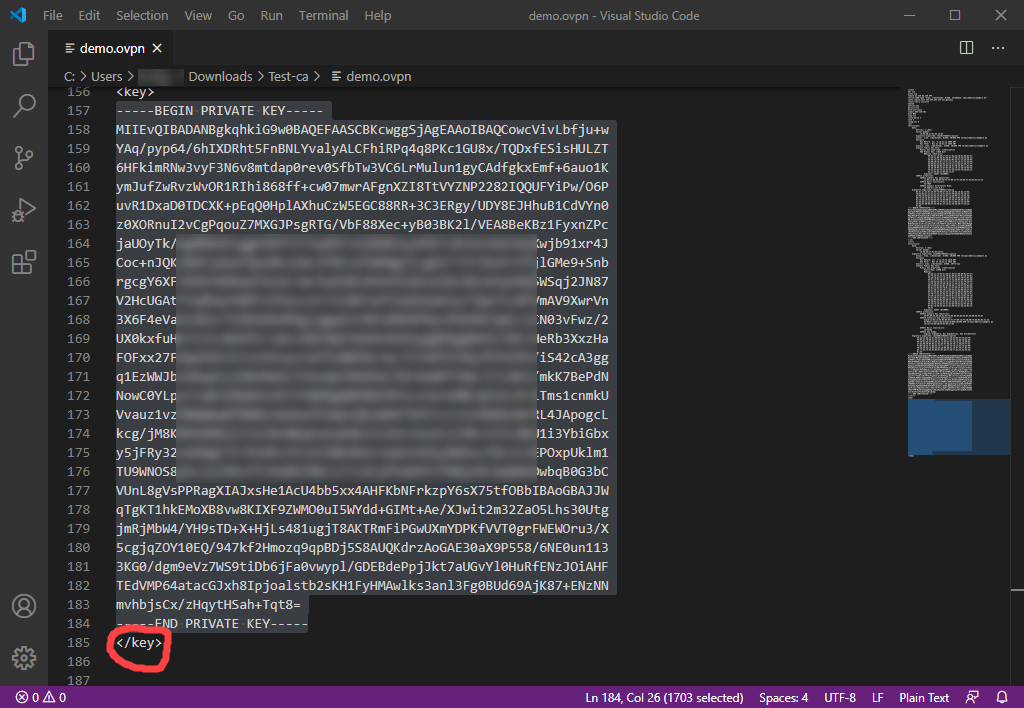
Go to the section tagged as <key> ... </key> and copy the marked key, including ----BEGIN PRIVATE KEY----- and -----END PRIVATE KEY-----.
Paste the text to the editor and save it to a file named client.key (file type "All files").
Transferring the Files to the UMS
In the UMS, create a file object for each certificate/key file; set Classification to "Common Certificate (all purpose)". For details, see Registering a File on the UMS Server.
Assign the file objects to the endpoint devices on which you want to use the OpenVPN connection. For details, see Transferring a File to a Device.
Adjust the Profile
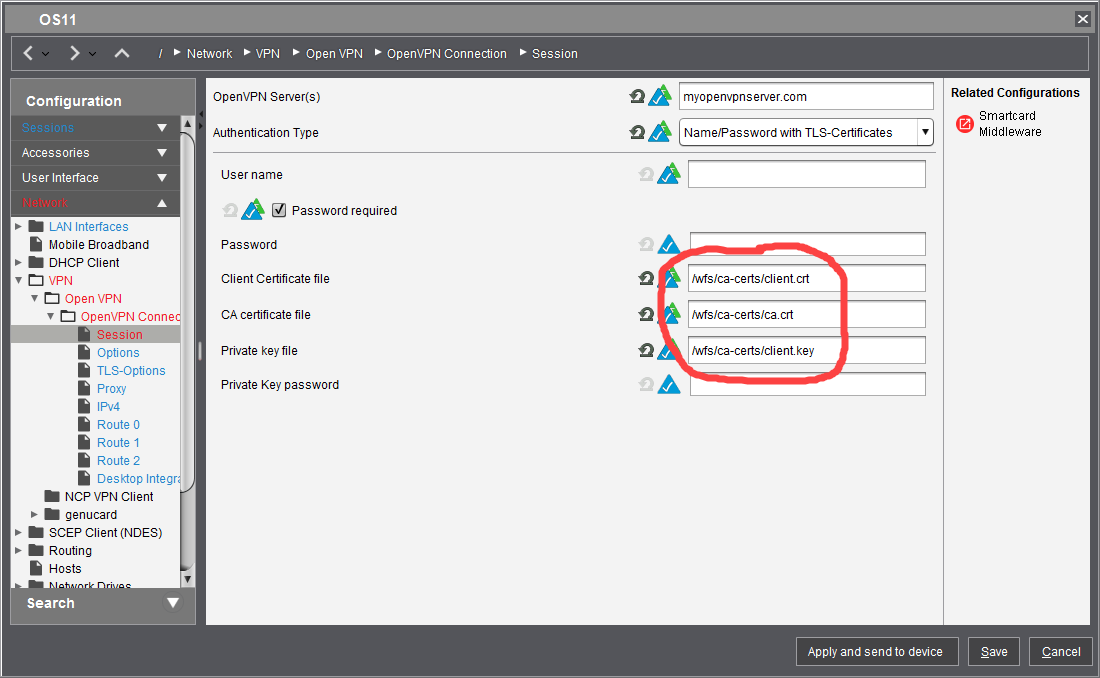
In the UMS, open the profile you have created for your OpenVPN connection and go to Network > VPN > Open VPN > [your OpenVPN connection] > Session.
Edit the file locations as follows:
Apply the profile to the endpoint devices on which you want to use the OpenVPN connection.