How to Configure Key Mapping for IBM iAccess Client
Problem
When you change the key mapping in the IBM iAccess client, the changes are not retained when the client is restarted.
Applying the changes via IGEL Setup is not possible.
Environment/Prerequisites
IGEL OS 10.05.100 or higher
UMS 5.09.110 or higher
IBM iAccess Client session is set up
Solution
Save the settings made in the IBM iAccess client in a file and distribute that file via the UMS.
Editing the Key Mappings
Open the IBM iAccess session and log on to your remote environment.
In the IBM iAccess client, go to Edit > Preferences > Keyboard.
On the Key Assignment tab, create the desired key bindings.
When you are finished creating key bindings, click Save as....
In the save dialog, choose File and edit the file path as follows:
/userhome/IBM/iAccessClient/Emulator/IBMi.kmpClick OK.
The IBM iAccess client will recognize the fileIBMi.kmpas the default key.
Importing the Configuration File to the UMS
Open the UMS.
In the navigation tree, find the thin client with the
IBMi.kmpfile and select Other Thin Client commands > File TC->UMS in the context menu.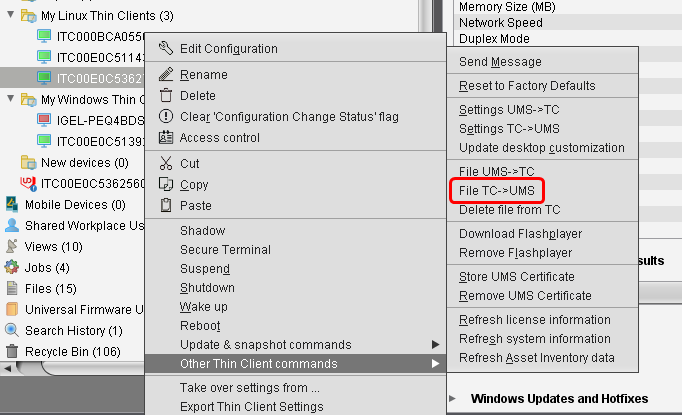
Under Thin Client file location, enter
/userhome/IBM/iAccessClient/Emulator/IBMi.kmp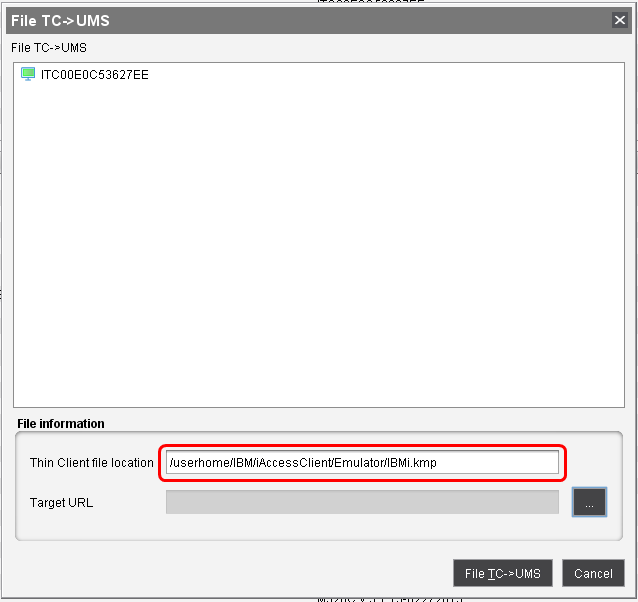
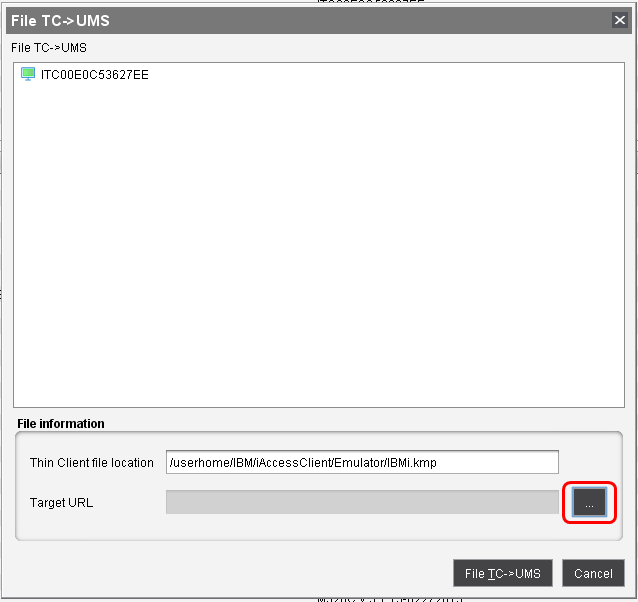
Click

to open the Save dialog.
Choose a file location within the
ums_filetransferfolder.
Under File Name, enter
IBMi.kmpand click Save.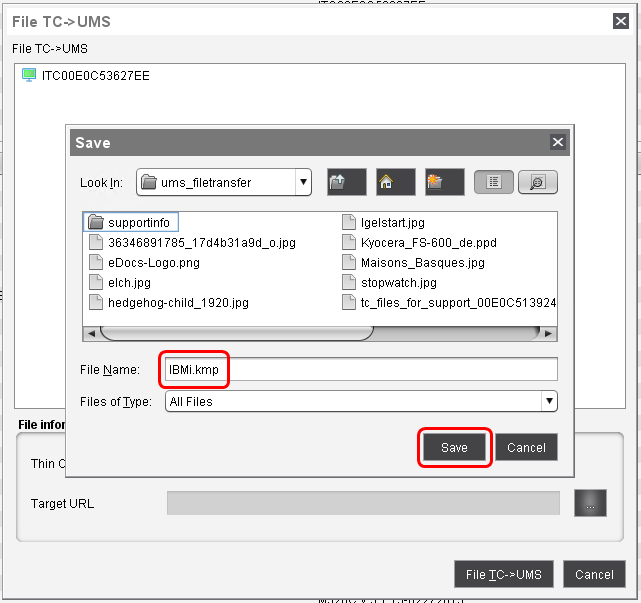
Click TC->UMS.
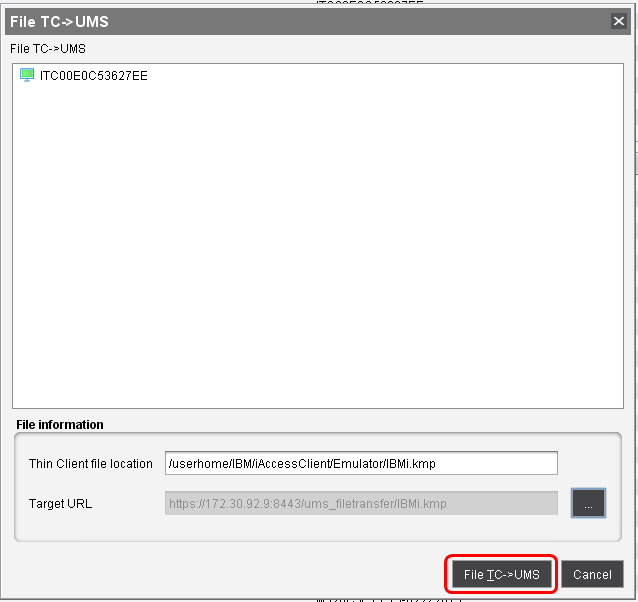
The file is stored within the UMS. Next, we will make it available as an object.
Creating the File Object in the UMS
In the navigation tree, go to Files, open the context menu and choose New file.
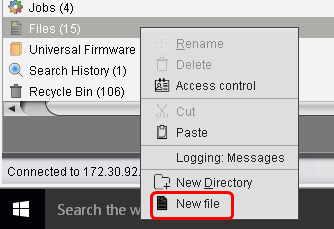
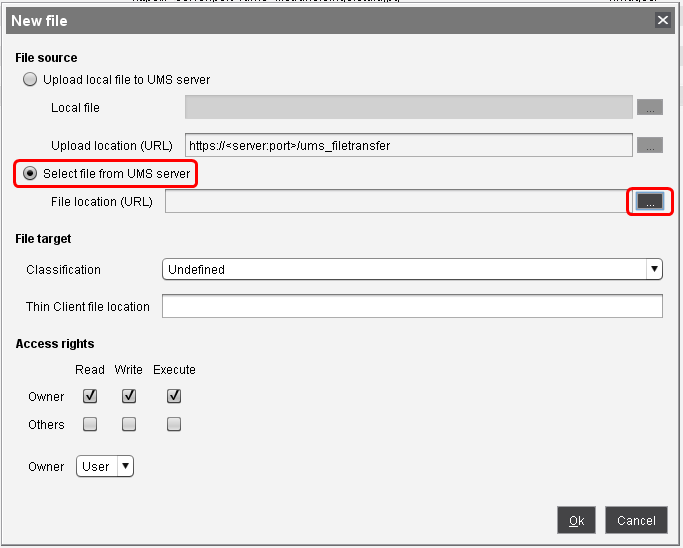
In the New file dialog, choose Select file from UMS server and click
to open the file dialog.
In the file dialog, find the file
IBMi.kmpyou created previously, and click Open.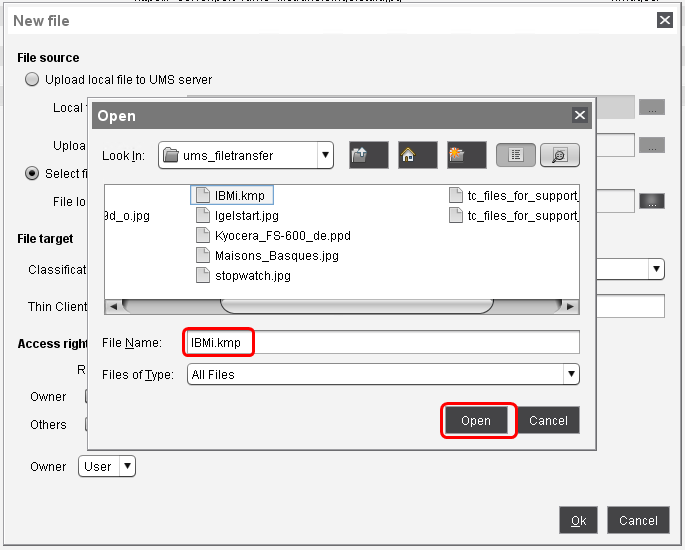
Back in the New file dialog, enter the Thin Client file location as follows:
/userhome/IBM/iAccessClient/Emulator/
Ensure that the Access rights and Owner are set as follows:
Owner rights: Read, Write, Execute
Owner: "User"
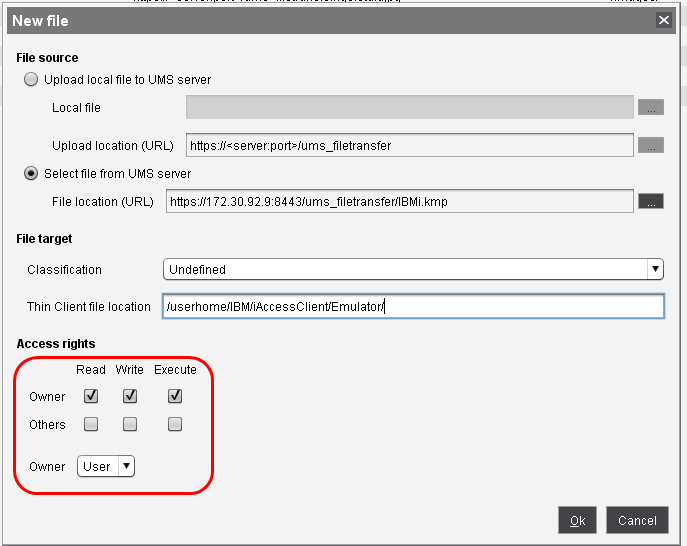
Click Ok.
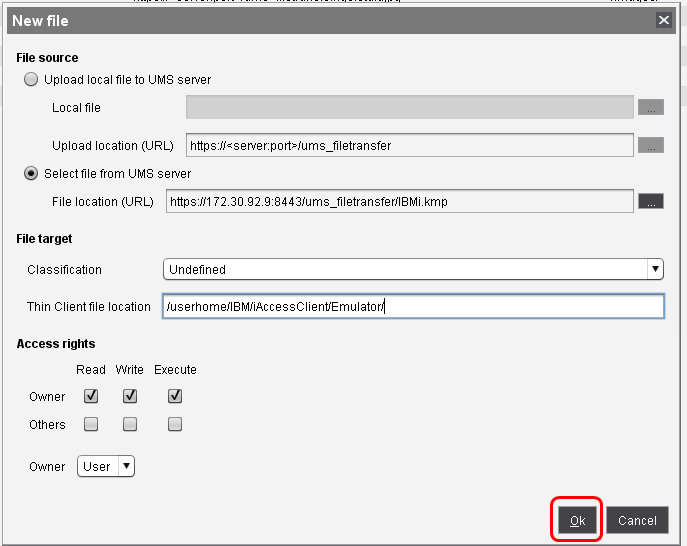
The file object "IBMi.kmp" is created.
Assigning the File Object to Thin Clients
In the navigation tree, select the file object "IBMi.kmp" and click

in the Assigned objects area (upper right).
In the Select assignable objects dialog, select the thin clients to which you want to assign the new key mapping and add them to the Selected objects area.
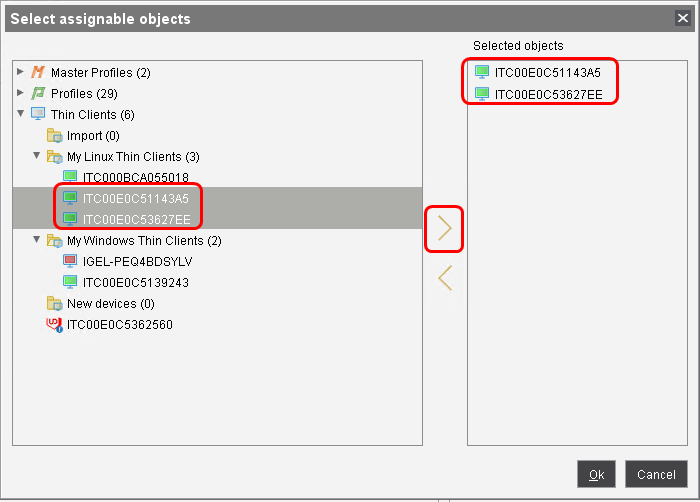
Click Ok.

In the Update time dialog, choose whether the file should be assigned to the thin clients at next reboot or immediately; then, click Ok.
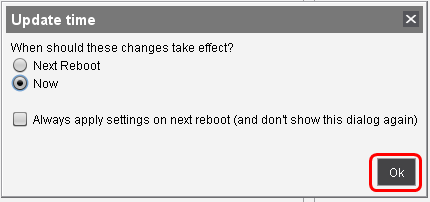
The file is transferred to the thin clients.