Automatic Configuration
The firmware recognizes the native graphic driver and will apply the screens automatically by default.
Define two or more monitors:
Go to User Interface > Display in the structure tree.
Select 2 (or more) under Number of screens.
The number of monitors that you can select depends on your hardware. Using the Universal Management Suite (UMS), you can choose up to 8 monitors.
Choose the screen under Selected screen or by clicking it with a mouse.
The selected screen is highlighted with a blue frame: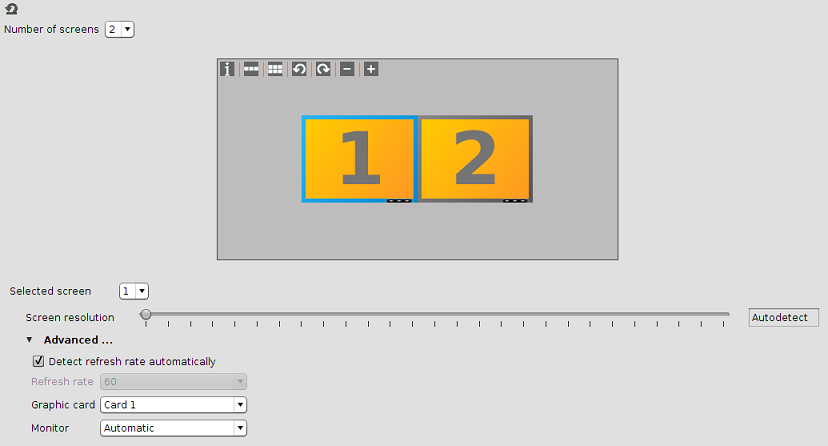
Set Screen Resolution to Autodetect (default setting).
The operating system reads out the EDID (Extended Display Identification Data) of the monitors through DDC (Display Data Channel). With these data, the correct resolution for the monitors can be recognized and set.If the Autodetect resolution is not available check Monitor probing (DDC) under User Interface > Display > Options. The Monitor probing (DDC) must be enabled (default setting).With more than 2 monitors, the screen resolution has to be specified for each screen manually.
Enable Detect refresh rate automatically (default setting) under Advanced.
Set Monitor to Automatic.
The selected screen is automatically assigned to the graphic connector (monitor).Drag and drop the rectangles to position the screens.
Screen 1 is always the primary screen where the taskbar is situated.
Click Apply or OK to save the settings.