How to Create a Custom Bootsplash for IGEL OS Devices via the UMS
This document shows how you can create a custom bootsplash for your endpoint devices using the Universal Management Suite (UMS). There are two ways to do it:
via a firmware customization (recommended as it is easier and quicker)
via a profile
If the image file or any setting of an existing custom bootsplash is changed, the bootsplash code has to be rebuilt. You can trigger this from the UMS via Jobs > New Scheduled Job with the command Update desktop customization or via Devices > [context menu] > Other commands > Update desktop customization.
How to Create a Custom Bootsplash via a Firmware Customization
This is how you can create your own bootsplash using a firmware customization function in the UMS:
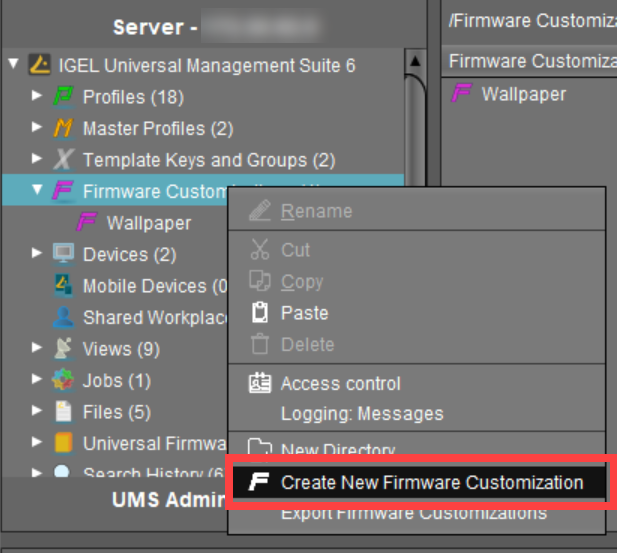
In the UMS, right-click on Firmware Customizations > Create New Firmware Customization.
The Firmware Customization Details dialog opens.Enter a Name for your bootsplash customization.
As Use case, select Bootsplash.

Select the image file for your bootsplash:
Click Choose file if you have already uploaded a file to the UMS Server.
Click Upload file if you want to upload a new file.
- The file name must not contain any blank spaces or special characters such as %, §, umlauts, etc.
- The following file types are supported: JPG, JPEG, BMP, and PNG.
- The optimum size of the picture is 800 x 600 pixels.
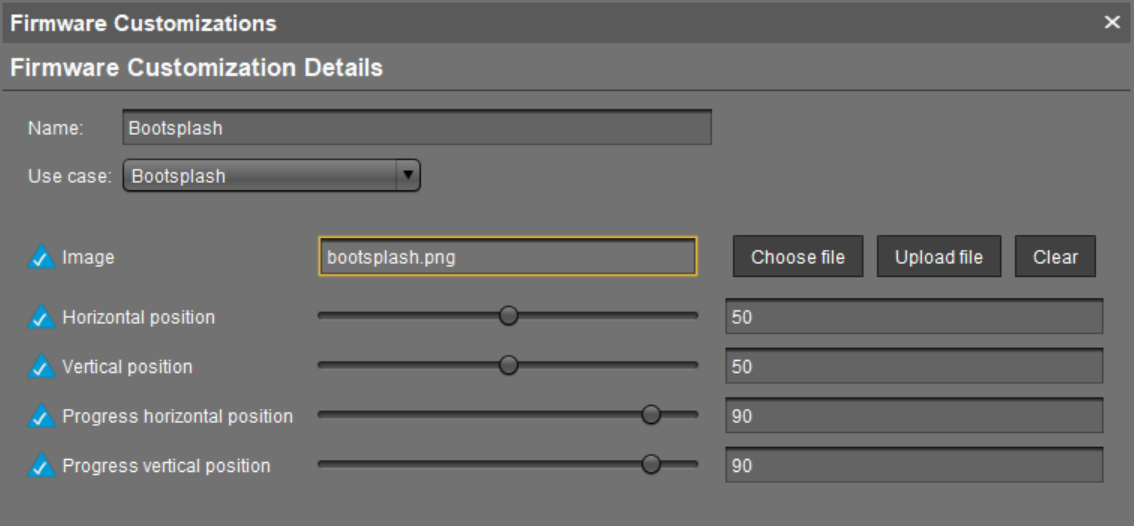
Define the position of your bootsplash.
Click Next to assign this new firmware customization to a device or a device directory.
Or assign it later per drag & drop or via Assigned objects.Click Finish to save your new firmware customization.
How to Create a Custom Bootsplash via a Profile
This is how you can create your own bootsplash using a profile in the UMS:
Upload your bootsplash image to the UMS Server; see Uploading a Picture.
- The file name must not contain any blank spaces or special characters such as %, §, umlauts, etc.
- The following file types can be used: JPG, JPEG, BMP, PNG, SVG, GIF, and TIFF.
- The optimum size of the picture is 800 x 600 pixels.
Create a new profile named Bootsplash; see Create a Profile.
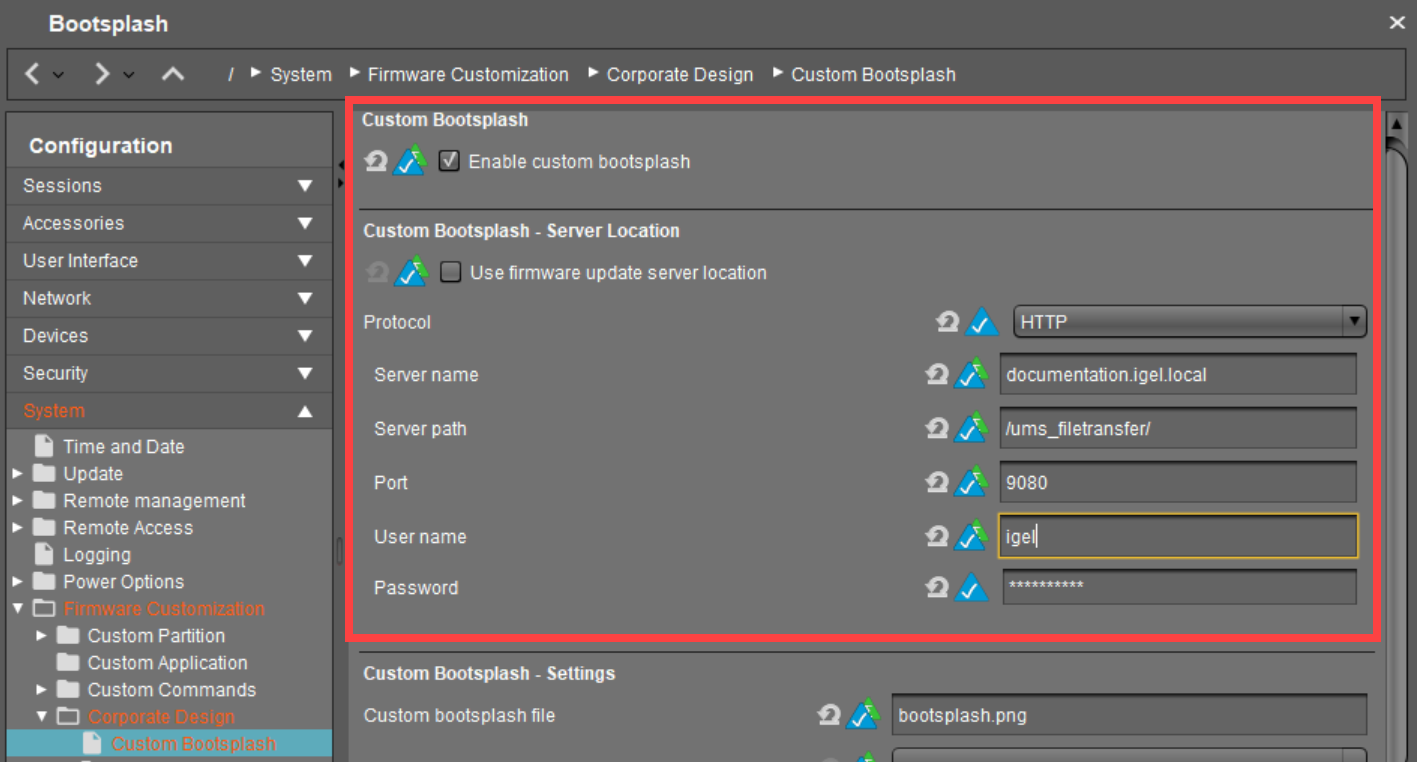
In the profile configuration window, go to System > Firmware Customization > Corporate Design > Custom Bootsplash to create your own bootsplash.
Activate Enable custom bootsplash.
Choose HTTP as Protocol.
Under Server name, enter the name or the IP address of your UMS Server.
Enter the path of your boot logo directory as Server path.
Specify your HTTP server port under Port.
The default UMS HTTP server port is 9080. For more information on UMS ports, see Universal Management Suite > Universal Management Suite (UMS) > IGEL UMS Communication Ports.
Enter your UMS administrator User name and Password.
Enter the name of your bootsplash image under Custom bootsplash file.
Define Custom bootsplash style and Background color.
Define vertical and horizontal position for the bootsplash image and progress indicator.
The scale goes from 0 (left) to 100 (right); 50 means "centered".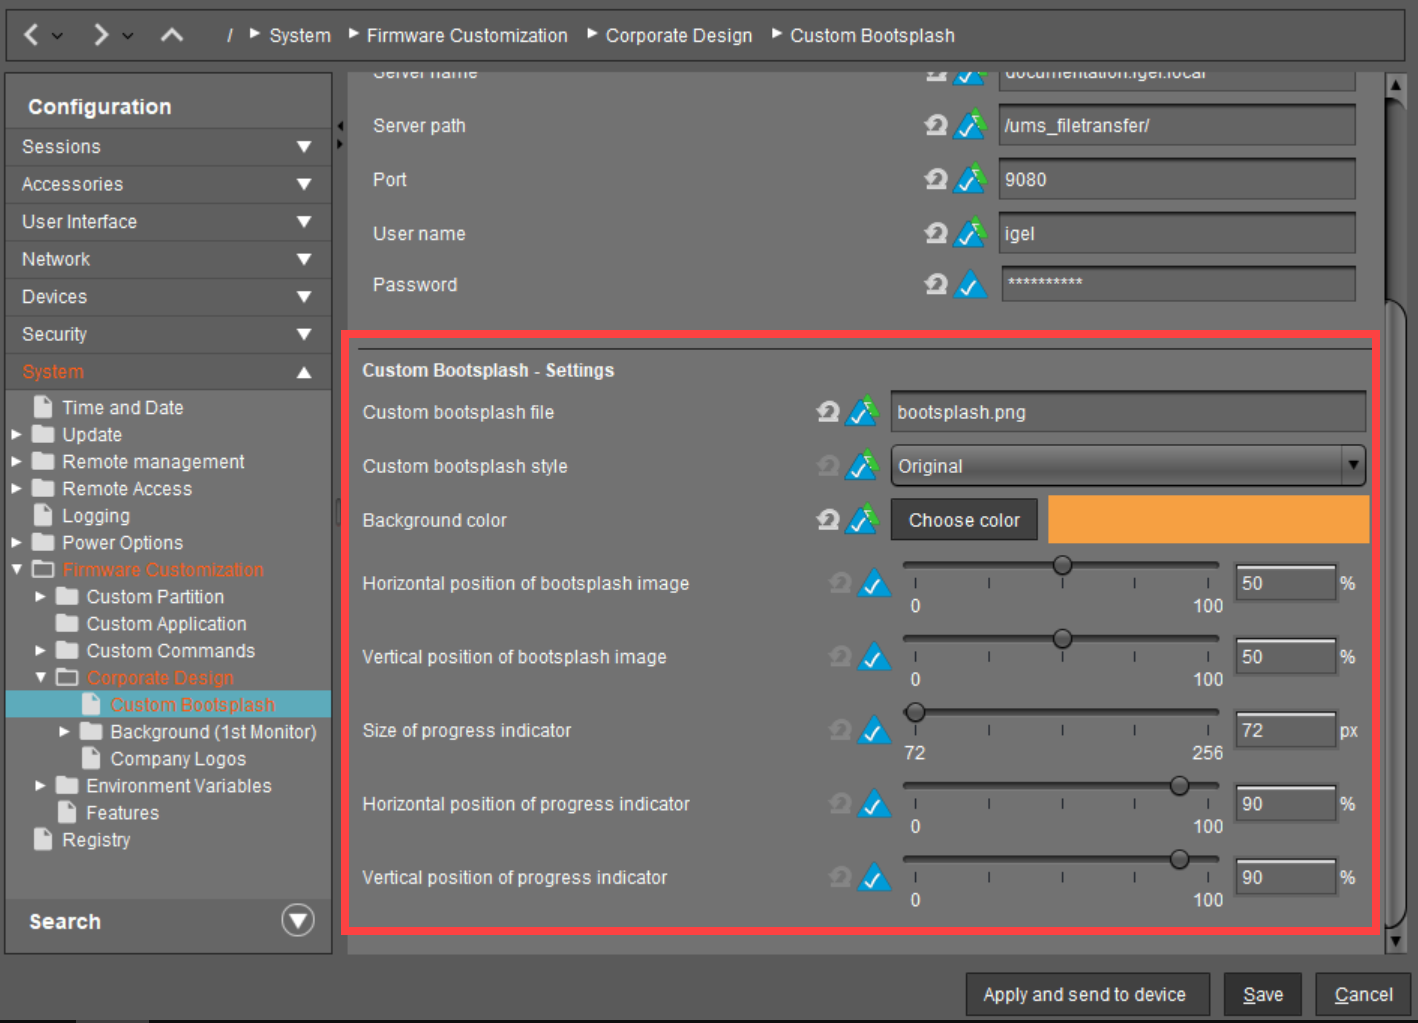
Save the settings.
Assign your bootsplash image to the created profile.
Assign the profile to your devices per drag & drop or by adding them under Assigned objects. For more information on the profile assignment, see Universal Management Suite > Universal Management Suite (UMS) > UMS Reference Manual > Profiles in the IGEL UMS > Using Profiles > How to allocate IGEL UMS Profiles.