Distributing the Public Key with UMS
In UMS Console, right-click on Files in the navigation tree.
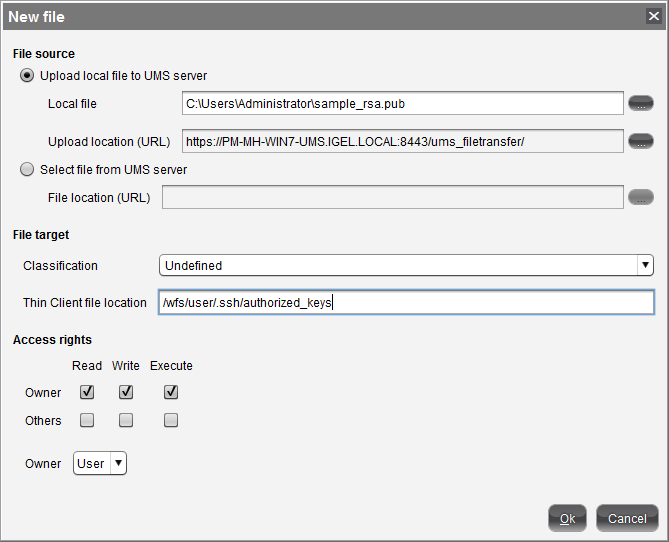
Select New File.
Upload the public key file (
*.pub) as a Local File.Make sure that you do not upload the private key file by mistake.Set the Classification to Undefined.
Specify the Thin Client file location as
/wfs/user/.ssh/authorized_keysLeave the Access rights as Read, Write, Execute.
Leave the Owner as User.
Assign the file to the desired thin clients, profiles or directories.
 If you wish to authorize more keys for SSH connections to thin clients, prepare an
authorized_keysfile containing all the public keys. Simply append them using a text editor.