Configuring the OSCW Installer in Buddy Mode
The target machines that are designated as update buddies download the ISO file containing the IGEL OS firmware from the UMS. When they have downloaded the file, the remaining target machines download it from the update buddies.
Make sure that all devices are joined to a Microsoft Active Directory and are accessible by the same AD user with reading permissions.
First, we create a profile for the update buddies that provides the OSCW installer with the download source for the ISO file. Then, we will assign this profile to the update buddies; the assignment of the profile triggers the update buddies to download the file. After that, we create a profile for the remaining target machines which configures them to use the update buddies. When the update buddies have downloaded the file, we can assign the profile to the remaining target machines. On assignment, each target machine selects an update buddy automatically and starts downloading the file from it.
The configuration comprises the following steps:
Creating a Profile for the Update Buddies
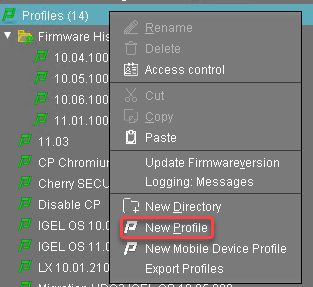
In the structure tree of the UMS Console, go to Profiles and open New Profile in the context menu.
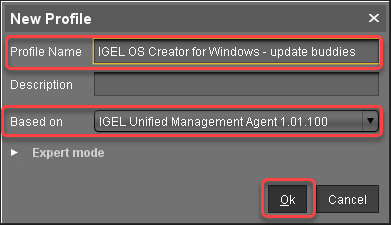
In the New Profile dialog, change the settings as follows:
Profile Name: A name for the profile, e. g. "IGEL OS Creator for Windows - update buddies"
Based on: Select "IGEL Unified Management Agent 1.01.100".
Click Ok.
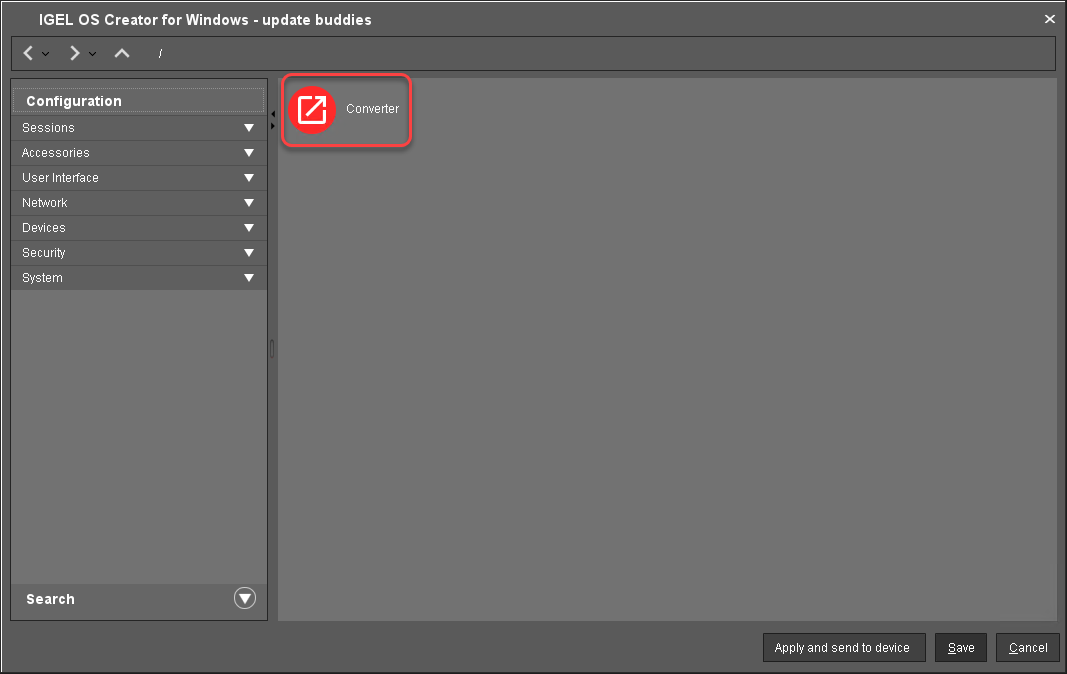
The configuration dialog opens.Click Converter.
You are taken to System > OSC > Converter where you can set all relevant parameters.Change the settings as follows (click the
 icon to enable the configuration; the icon will change to
  ):
):Download URL of IGEL OS Creator: Enter
https://[IP address of your UMS Server]:8443/ums_filetransfer/orhttp://[IP address of your UMS Server]:9080/ums_filetransfer/
Example:https://192.168.178.100:8443/ums_filetransfer/orhttp://192.168.178.100:9080/ums_filetransfer/Username: Enter the username for the UMS.
Password: Enter the password for the UMS user.
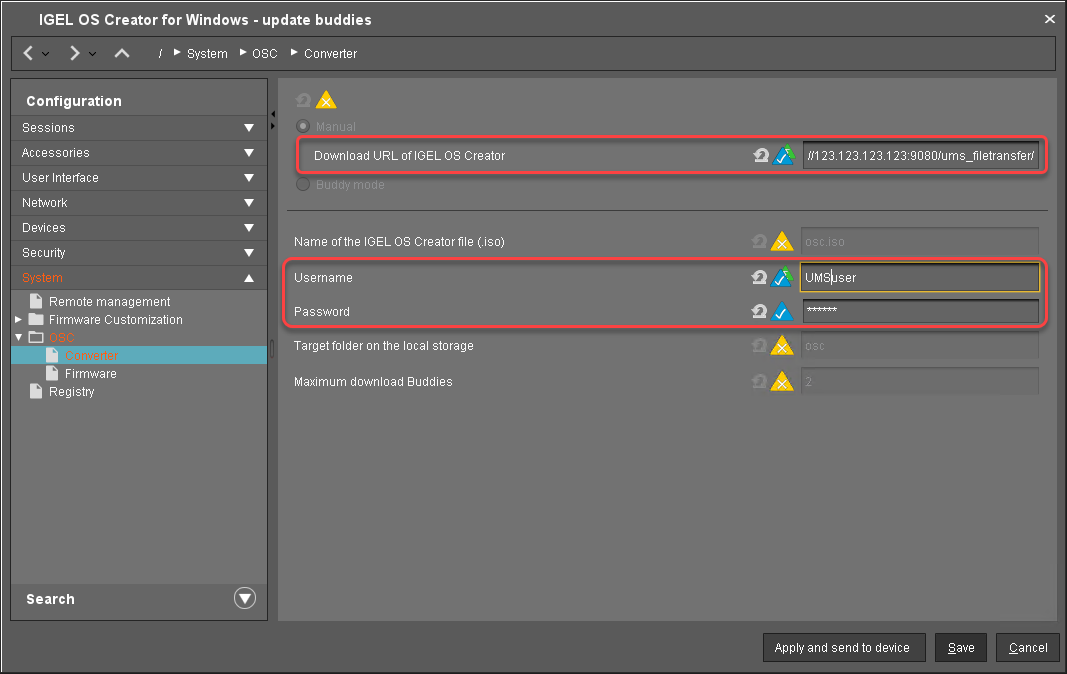
Click Save.
Assigning the Profile to the Update Buddies
In the structure tree of the UMS console, select the machines that will serve as update buddies and click
 in the Assigned objects area.
Select the update buddies profile, click
 and then Ok.
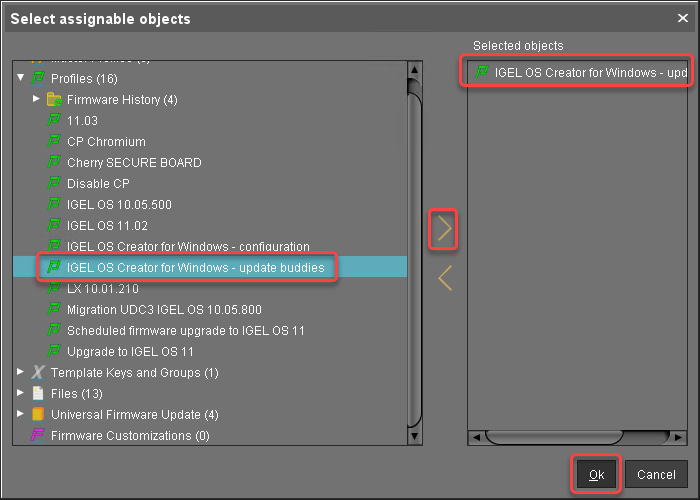
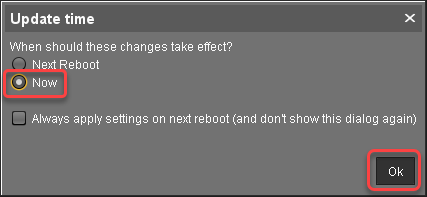
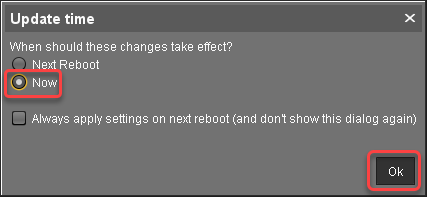
In the Update time dialog, select Now and click Ok.
Checking If the Update Buddies Are Ready
Perform the following check for each update buddy:
In the structure tree of the UMS, open the context menu of the update buddy and select Other commands > Refresh system information.
In the dialog, click Refresh system information and then
 every few seconds.
In the Attribute area, under Firmware Description, the current status of the download is shown. When it reads "IGEL OSC Ready for Conversion", the update buddy is ready for use.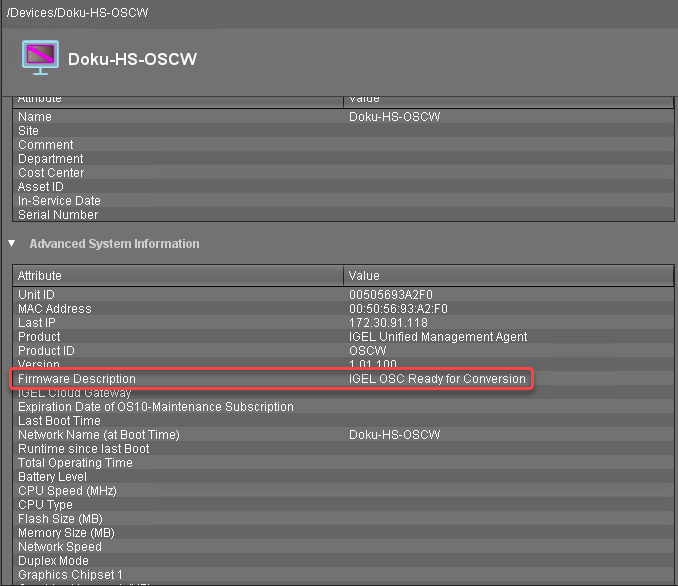
Creating a Profile for the Remaining Target Machines
In the structure tree of the UMS Console, go to Profiles and open New Profile in the context menu.
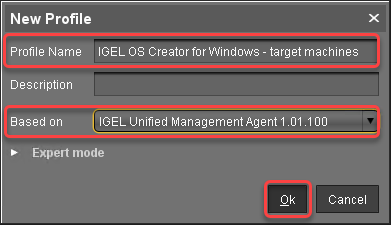
In the New Profile dialog, change the settings as follows:
Profile Name: A name for the profile, e. g. "IGEL OS Creator for Windows - target machines"
Based on: Select "IGEL Unified Management Agent 1.01.100".
Click Ok.
The configuration dialog opens.
Click Converter.

You are taken to System > OSC > Converter where you can set all relevant parameters.Change the settings as follows (click the
 icon to enable the configuration; the icon will change to
  ):
):Select Buddy Mode.
Username: Common username in Microsoft Active Directory for all target machines, including the update buddies.
Password: Common password associated with the Username.
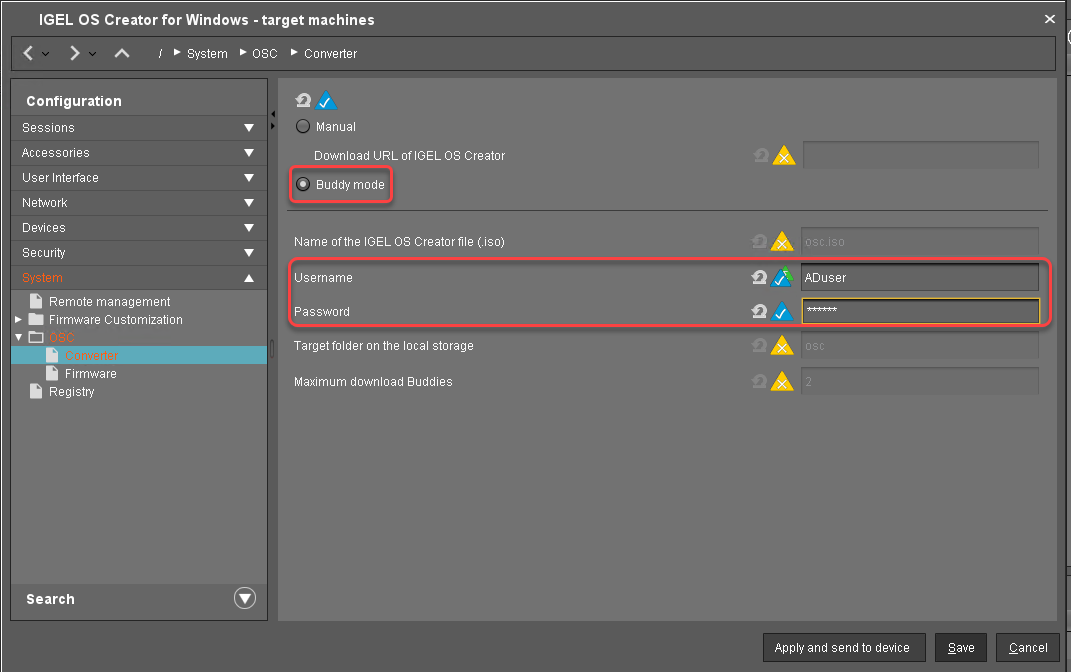
Click Save.
Creating a View to Select the Target Machines
The target machines must be selected in order to assign the profile to them. For the selection, a view will be used.
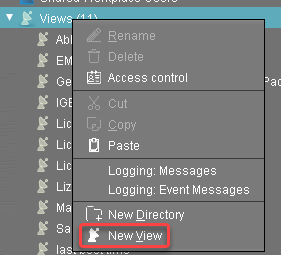
In the structure tree of the UMS Console, go to Views and select New View in the context menu.
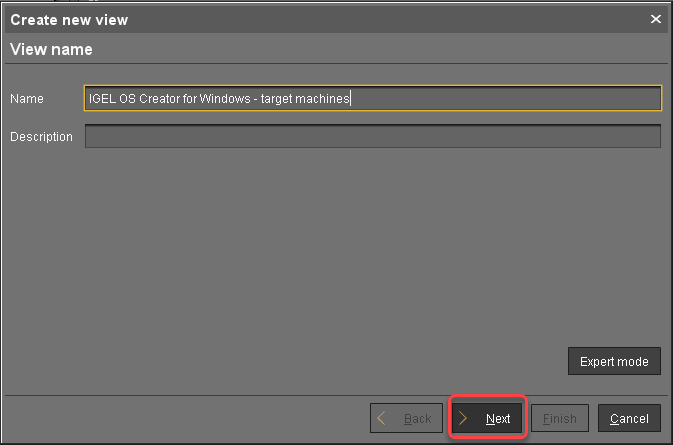
Enter a name for the view, e. g. "IGEL OS Creator for Windows - target machines" and click Next.
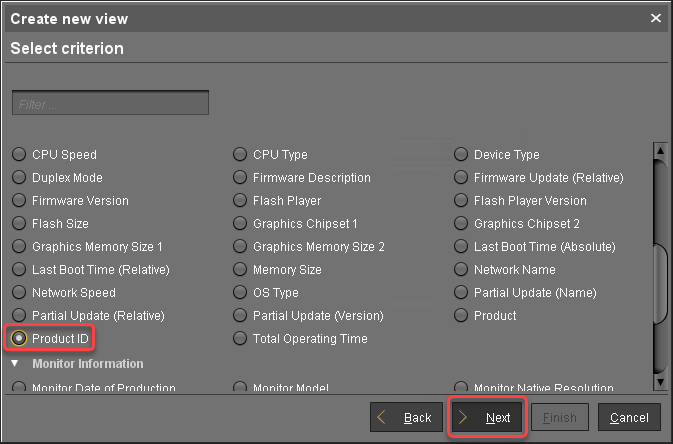
On the Select criterion page, select Product ID and click Next.
On the Text search page, enter "OSCW" and click Next.

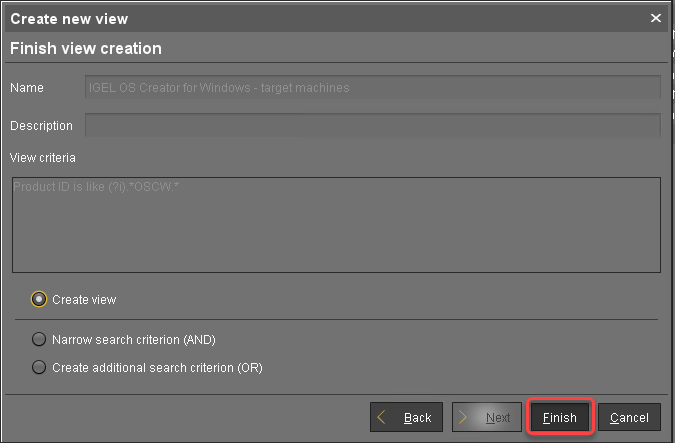
On the Create new view page, click Finish.
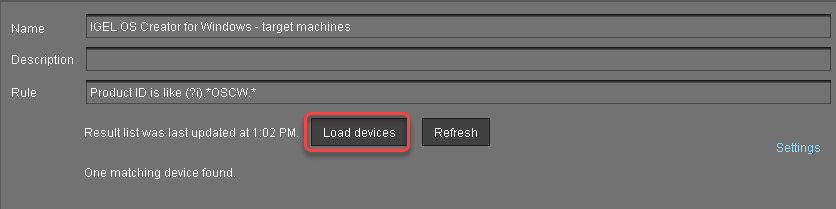
The number of matches is shown.Click Load devices to view the target machines.
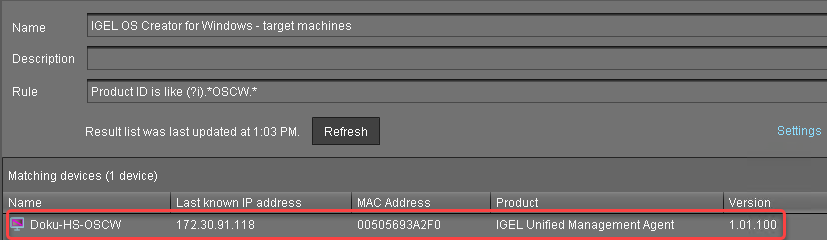
The target machines are shown.
Assigning the Profile to the Target Machines
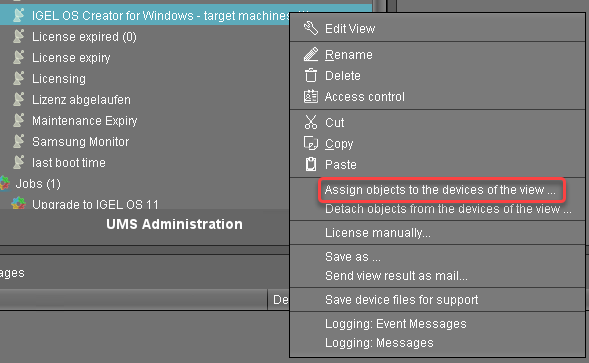
Select the view you have created beforehand and select Assign objects to the devices of the view .....
In the Assign objects dialog, select the profile for the target machines, click
 to assign it and then click Ok.
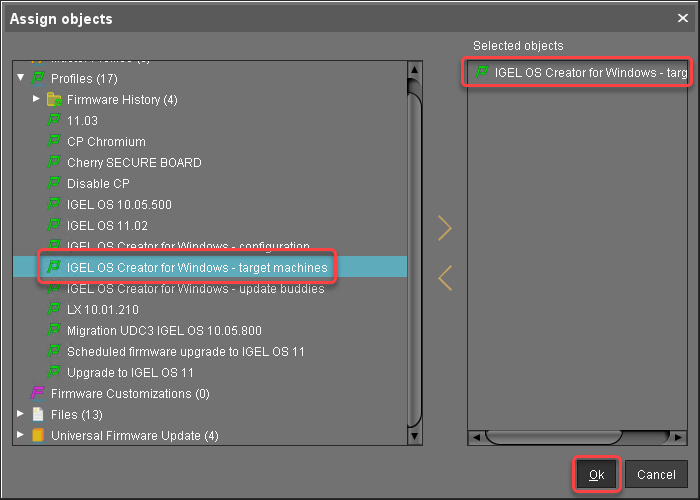
In the Update time dialog, select Now and click Ok.
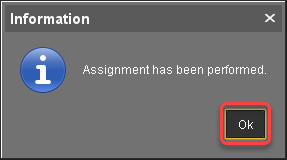
Confirm the Information dialog.
The target machines download the ISO file.
Monitoring the Process
In the structure tree of the UMS, open the context menu of one of the target machines and select Other commands > Refresh system information.
In the dialog, click Refresh system information and then
 every few seconds.
In the Attribute area, under Firmware Description, the current status of the download is shown.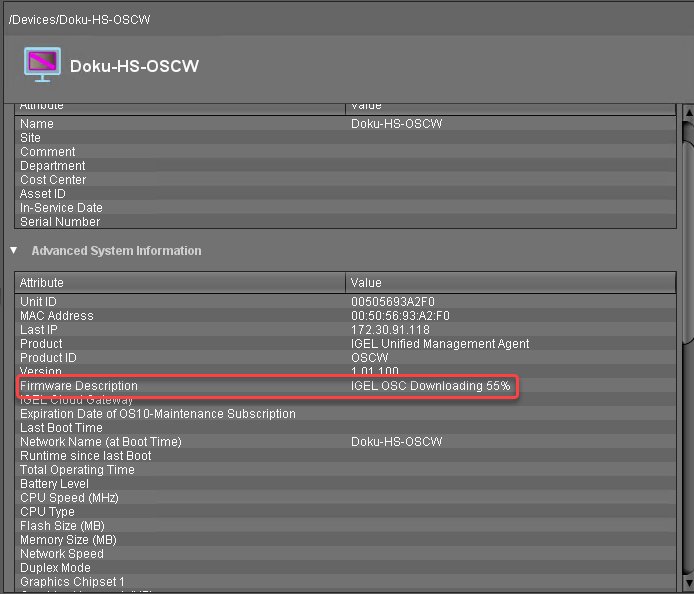
When a device is ready, the value of Firmware Description changes to "IGEL OSC Ready for Conversion".
When Firmware Description reads "IGEL OSC Ready for Conversion", continue with Starting the Conversion 1.
Check List
![]() The conversion profile is assigned to all target machines.
The conversion profile is assigned to all target machines.
![]() All target machines have downloaded the OSCW ISO file, which is indicated by the Firmware Description "IGEL OS Ready for Conversion".
All target machines have downloaded the OSCW ISO file, which is indicated by the Firmware Description "IGEL OS Ready for Conversion".