Create USB installation medium (Windows)
Download the ZIP archive for OS Creator from our download server:
- For new devices, use the standard installer (e. g. OSC_11.01.100.zip).
- For older devices or if you haven't been able to boot the installer at all, use the legacy installer (e. g. OSC_11.01.100_legacy.zip).Unzip the contents into a local directory.
Connect a USB memory stick with at least 4 GB capacity to the computer.
All existing data on the USB memory stick will be destroyed.
Double-click the
preparestick.exefile from the unzipped directory.
If you are in the "administrators" group, the program will start after you have confirmed a dialog. If you are not in the "administrators" group, you must enter the administrator password to start the program.
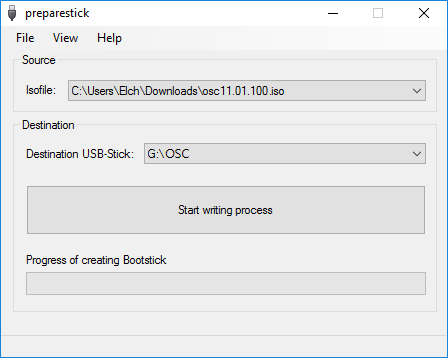
The dropdown menu Isofile shows the ISO files contained in the unzipped directory.
Under Isofile, select the appropriate ISO file, e. g.
osc11.01.100.isoUnder Destination USB stick, select the USB storage medium on which you would like to save the installation data.
It is recommended that you only have one USB storage medium connected during this procedure. If you accidentally select the wrong medium, all data on it will be lost.
Generally speaking, the list of available USB storage media is refreshed automatically. If, however, you would like to refresh it manually, click on View > Refresh USB Device List.
Click on Start writing process.
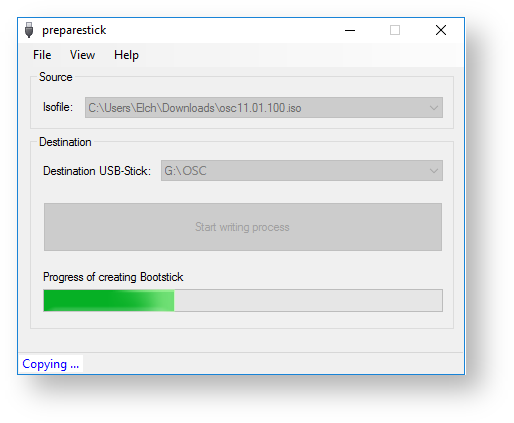
In the program window, the progress of the process is shown.
When the process is finished, a message window is displayed.
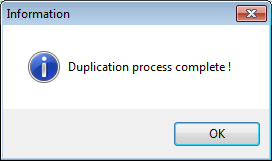
Close the message window and the program.
After about 3 seconds, remove the USB memory stick.
If you remove the USB memory stick immediately, there is a possibility that the writing process has not been completed. In this case, the data on the memory stick gets corrupted.