Getting the Certificates
Secure mode requires a set of certificates being present both on the endpoint and the keyboard. First, all required certificates are transferred to the endpoint. Then, the endpoint installs a user certificate and the corresponding key on the keyboard; optionally, the client root CA certificate is also installed. This installation of certificates is referred to as personalization.
Downloading the Device Certificates
->Download all certificates from https://github.com/secureboard10/secureboard-ca:
Device root CA certificate:
SecureboardRootCA.pemDevice intermediate CA certificates:
p-20190712.pem,p-20191030etc.
Creating the Custom Certificates
According to "CHERRY SECUREBOARD 1.0, Software Developer's Guide", chapter 9.5, all certificate and key pairs that are sent to the keyboard must meet the following requirements:
X509 Version 3 using ECDSA over NIST curve prime256v1 with corresponding keys
Size: Maximum of 572 bytes resp. 475 bytes in DER format
->Create the following custom certificates:
An example how-to for OpenSSL can be found in "CHERRY SECUREBOARD 1.0, Software Developer's Guide", chapter 9.5; see https://www.cherry.de/files/manual/SECUREBOARD_SwDev_Guide_en-0.4.pdf.
Also, the SECURE BOARD 1.0 Quick Installation Package contains a ready-made shell script that creates example certificates. Download the package from https://www.cherry.de/files/software/Cherry_Secureboard_1.0_Quick_Installation_Package_V1.0.zip, unzip the file, and use Cherry Secureboard 1.0 cert-package V1.0/secureboard_linx/create_certs.sh (Linux) or Cherry Secureboard 1.0 cert-package V1.0/secureboard_windows/create_certs.bat (Windows).
Certificate | Required/Optional | Requirements | Encoding/Extension | Max. File Size* | File Name | Remarks |
|---|---|---|---|---|---|---|
User root CA certificate | required | not specified | PEM | not specified | not specified | If this certificate is also used as the client root CA certificate for mutual authentication, it must meet the requirements for certificates that are sent to the keyboard: X509 Version 3 using ECDSA over NIST curve prime256v1 with corresponding keys; max. 475 bytes |
Intermediate CA certificates | optional (according to the certificate chain that is to be used) | not specified | PEM | not specified | not specified | |
User certificate (keyboard) | required | X509 Version 3 using ECDSA over NIST curve prime256v1 with corresponding keys | DER (binary) | 572 bytes |
| |
Corresponding user key (keyboard) | required | X509 Version 3 using ECDSA over NIST curve prime256v1 with corresponding keys | PEM (without a passphrase) | not specified |
| |
Client root CA certificate (keyboard) | optional; for mutual authentication** | X509 Version 3 using ECDSA over NIST curve prime256v1 with corresponding keys | PEM | 475 bytes | not specified | Can be identical with the user root CA certificate |
Client certificate (endpoint) | optional; for mutual authentication** | X509 Version 3 using ECDSA over NIST curve prime256v1 with corresponding keys | PEM | 475 bytes |
| |
Client key (endpoint) | optional; for mutual authentication** | X509 Version 3 using ECDSA over NIST curve prime256v1 with corresponding keys | PEM (without a passphrase) | not specified |
|
* The relevant value is the file size that the certificate has when it is stored in binary format.
** When these certificates are installed, the keyboard can verify if the endpoint is authentic. Without the optional certificates, only the verification of the keyboard's authenticity by the endpoint will be carried out.
Provisioning the Personalization Machine
The following instructions describe how to transfer the required certificates to the personalization machine. The personalization machine will deploy the certificates to the keyboard. The UMS will be used for this purpose.
First, a file object is created for each certificate or key file so that the files can be handled by the UMS.
Second, the file objects are assigned to the personalization machine, which results in the files being transferred to that machine.
Creating the File Object for the Device Root CA Certificate
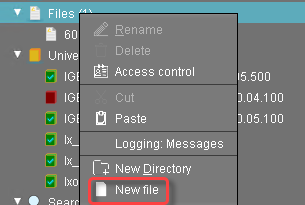
In the UMS structure tree, go to Files and in the context menu, select New file.
In the New file dialog, configure the settings as follows:
Local file: Local file path of
SecureboardRootCA.pem. Use the file chooser by clicking .
. Device file location:
/wfs/cherry/ca-certs/Access rights - Owner: Read, Write
Access rights - Others: Read
Owner: Root

Click Ok.
In the UMS, the file object SecureBoardRootCA.pem is created.
Creating the File Object for the Device Intermediate CA Certificate
In the UMS structure tree, go to Files and in the context menu, select New file.
In the New file dialog, configure the settings as follows:
Local file: Local file path of
p-20190712.pem. Use the file chooser by clicking .
.Device file location:
/wfs/cherry/ca-certs/Access rights - Owner: Read, Write
Access rights - Others: Read
Owner: Root
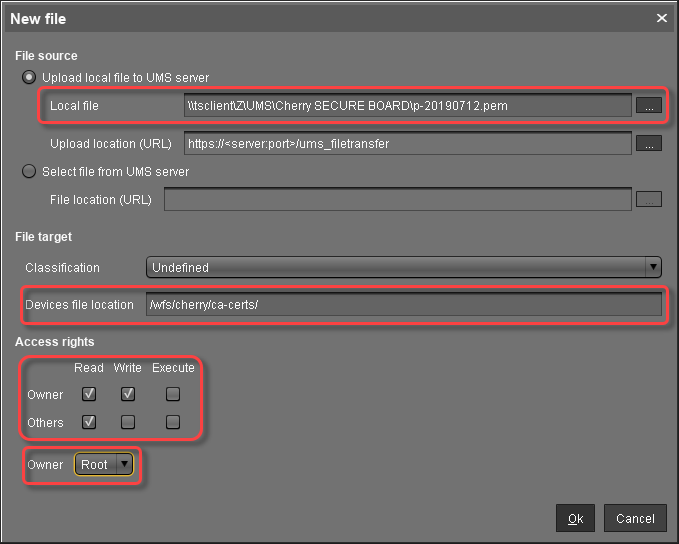
Click Ok.
In the UMS, the file object p-20190712.pem is created.
Creating the File Object for the Device Client CA Certificate (Optional)
In the UMS structure tree, go to Files and in the context menu, select New file.
In the New file dialog, configure the settings as follows:
Local file: Local file path of
clientca-cert.pem. Use the file chooser by clicking .
.Device file location:
/wfs/cherry/ca-certs/Access rights - Owner: Read, Write
Access rights - Others: Read
Owner: Root
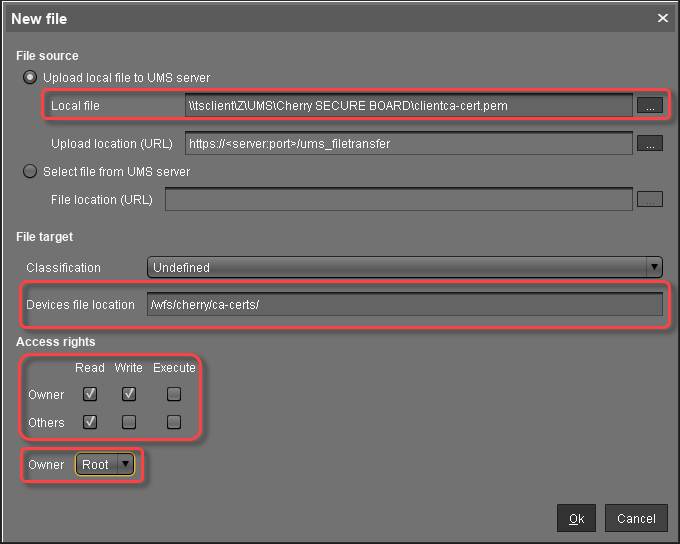
Click Ok.
In the UMS, the file object clientca-cert.pem is created.
Creating the File Object for the User Certificate (Keyboard)
To transfer the certificate file user-cert.der to the directory /wfs/cherry/client-certs/ on the personalization machine, proceed as follows:
In the UMS structure tree, go to Files and in the context menu, select New file.
In the New file dialog, configure the settings as follows:
Local file: Local file path of
user-cert.der. Use the file chooser by clicking .
.Device file location:
/wfs/cherry/client-certs/Access rights - Owner: Read, Write
Access rights - Others: Read
Owner: Root
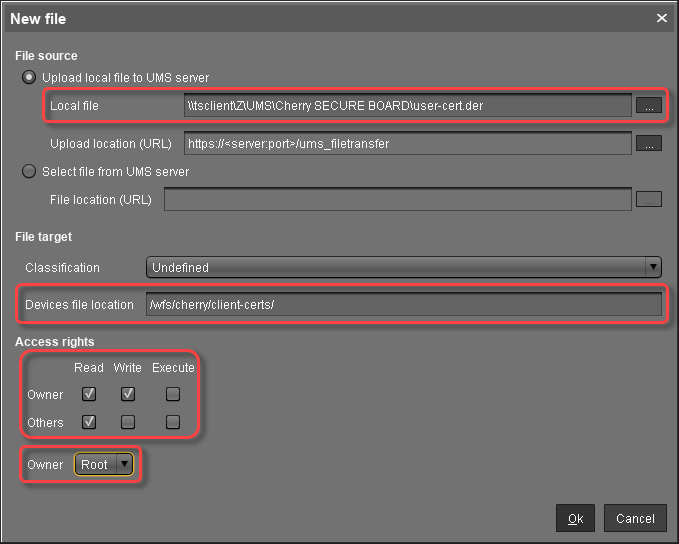
Click Ok.
In the UMS, the file object user-cert.der is created.
Creating the File Object for the User Key (Keyboard)
In the UMS structure tree, go to Files and in the context menu, select New file.
In the New file dialog, configure the settings as follows:
Local file: Local file path of
user-key.pem. Use the file chooser by clicking .
.Device file location:
/wfs/cherry/client-certs/Access rights - Owner: Read, Write
Access rights - Others: -
Owner: Root
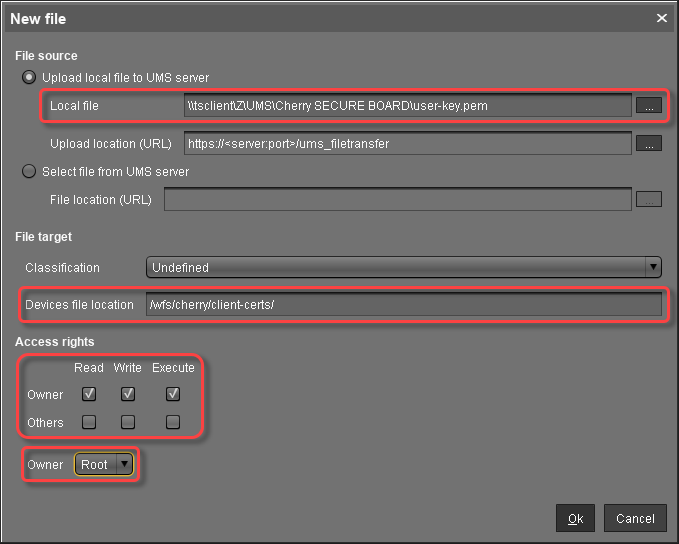
Click Ok.
In the UMS, the file object user-key.pem is created.
Provisioning the Endpoints for Using the SECURE BOARD
The following instructions describe how to transfer the required certificates to the endpoints which will be connected to the SECURE BOARD in secure mode.
Creating the File Object for the User Root CA Certificate
In the UMS structure tree, go to Files and in the context menu, select New file.
In the New file dialog, configure the settings as follows:
Local file: Local file path of the certificate file. Use the file chooser by clicking
 .
.Device file location:
/wfs/cherry/ca-certs/Access rights - Owner: Read, Write
Access rights - Others: Read
Owner: Root
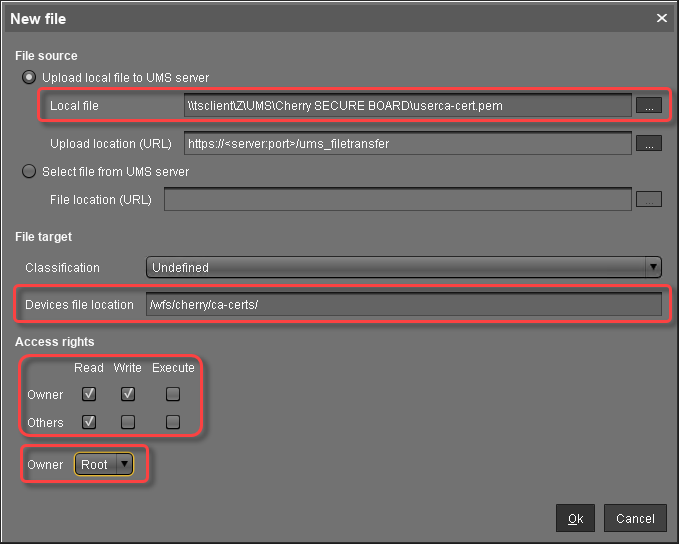
Click Ok.
In the UMS, the file object is created. The name of the file object is derived from the file name.
Creating the File Object for the Client Root CA Certificate (Optional)
In the UMS structure tree, go to Files and in the context menu, select New file.
In the New file dialog, configure the settings as follows:
Local file: Local file path of the certificate file. Use the file chooser by clicking
 .
.Device file location:
/wfs/cherry/ca-certs/Access rights - Owner: Read, Write
Access rights - Others: Read
Owner: Root
Click Ok.
In the UMS, the file object is created. The name of the file object is derived from the file name.
Creating the File Object for the Client Certificate (Endpoint) (Optional)
In the UMS structure tree, go to Files and in the context menu, select New file.
In the New file dialog, configure the settings as follows:
Local file: Local file path of
client-cert.pem. Use the file chooser by clicking .
.Device file location:
/wfs/cherry/client-certs/Access rights - Owner: Read, Write
Access rights - Others: Read
Owner: Root
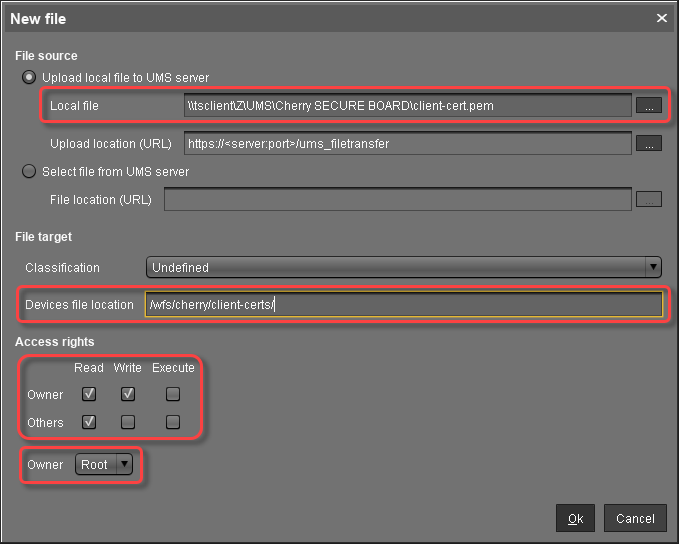
Click Ok.
In the UMS, the file object is created. The name of the file object is derived from the file name.
Creating the File Object for the Client Key (Endpoint) (Optional)
In the UMS structure tree, go to Files and in the context menu, select New file.
In the New file dialog, configure the settings as follows:
Local file: Local file path of
client-key.pem. Use the file chooser by clicking .
.Device file location:
/wfs/cherry/client-certs/Access rights - Owner: Read, Write
Access rights - Others: -
Owner: Root
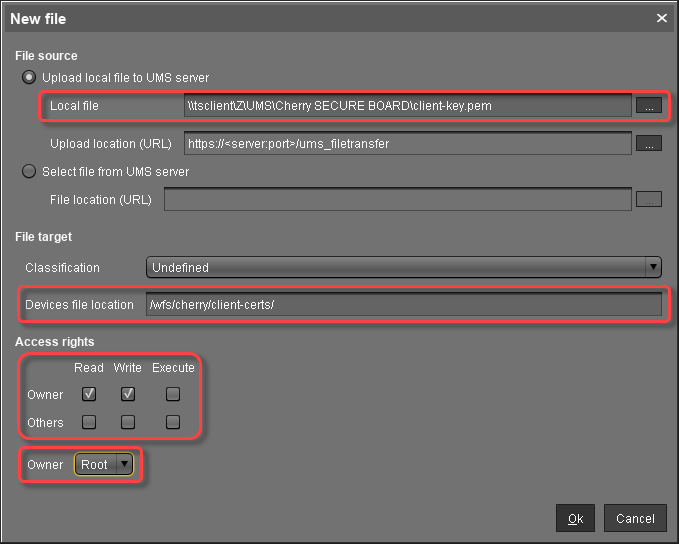
Click Ok.
In the UMS, the file object is created. The name of the file object is derived from the file name.