Installation Procedure
This article describes the regular installation procedure for single devices with the IGEL OS Creator (OSC). If you are an IGEL third-party endpoint partner (i.e. hardware manufacturer, independent hardware vendor, reseller) that has a factory ID from IGEL, please refer to Installation Procedure for Factory Images.
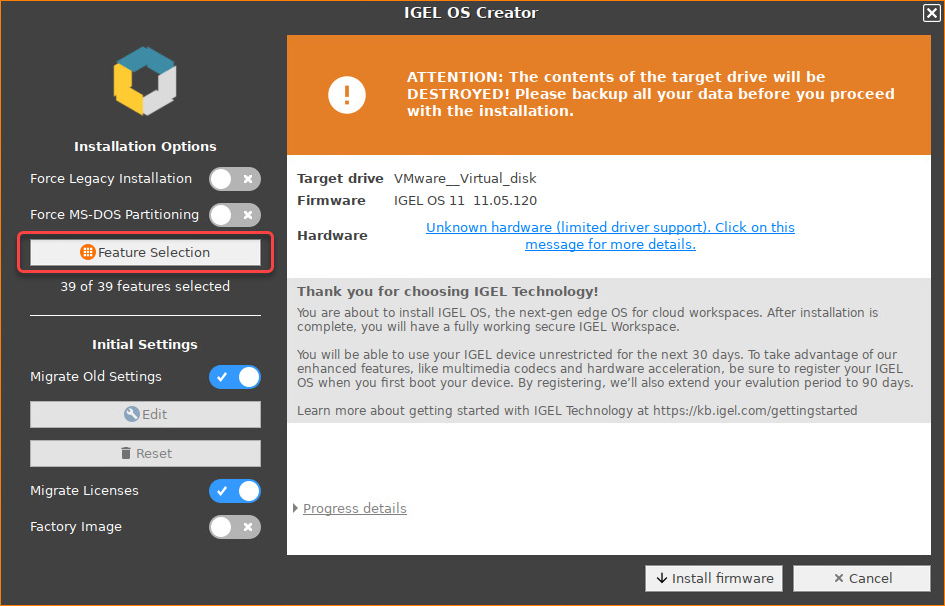
The installation will overwrite all existing data on the target drive.
Connect the prepared USB memory stick to the target device and switch the target device on.
Select one of the following options from the boot menu:
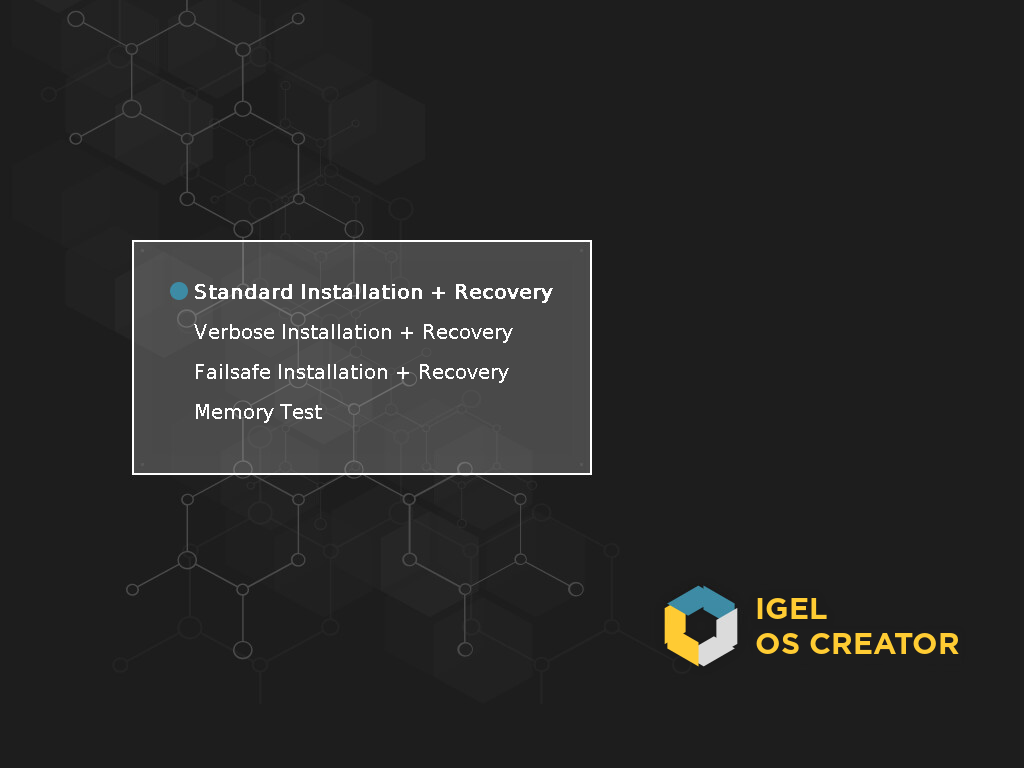
Standard Installation + Recovery: Boots the system with just a few messages from the USB memory stick and launches the installation program. (Default)
Verbose Installation + Recovery: Boots the system from the USB memory stick and shows the Linux boot messages in the process.
Failsafe Installation + Recovery: Fallback mode to be used if the graphical boot screen cannot be displayed.
Memory Test: Memory test, only available in legacy/BIOS mode. This option does not carry out an installation.
EFI Debug Shell: Available only in UEFI boot mode. If the hardware in use is EFI-capable, boot problems can be analyzed with that.
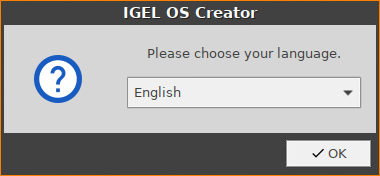
Select the language for the installation process.
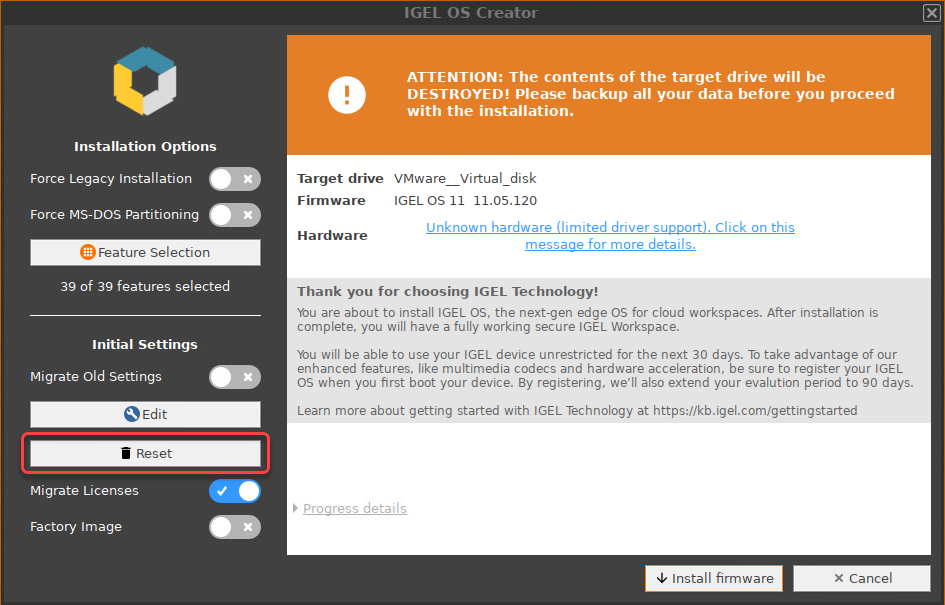
Optional, only available if your device has booted in UEFI mode: If you want to install the legacy/BIOS version of IGEL OS 11, activate Force Legacy Installation.
If you have activated Force Legacy Installation, remember to set the system to legacy/BIOS mode after installation.
Optional, only available if your device has booted in UEFI mode: If you want to use an MS-DOS partition table instead of a GPT partition table, activate Force MS-DOS Partitioning.
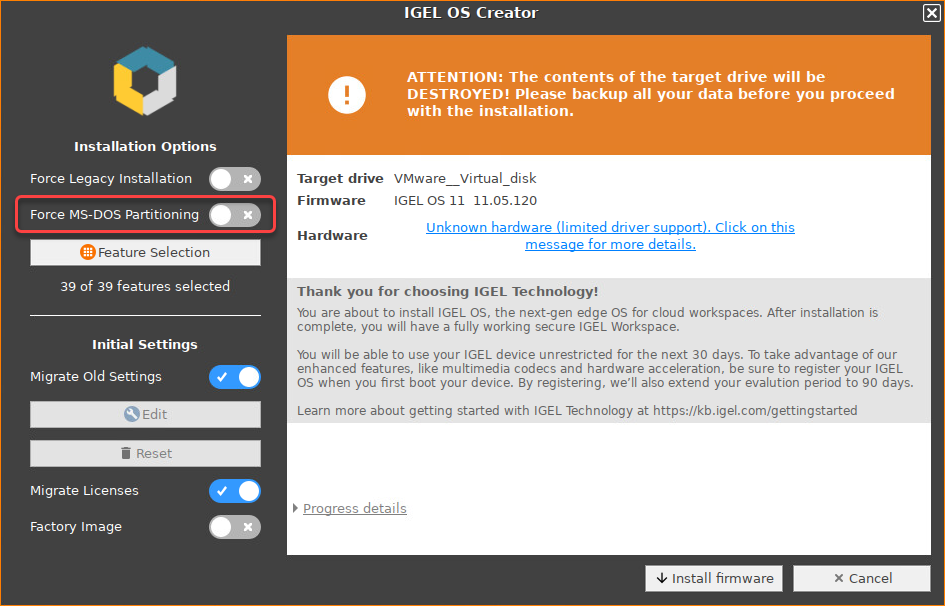
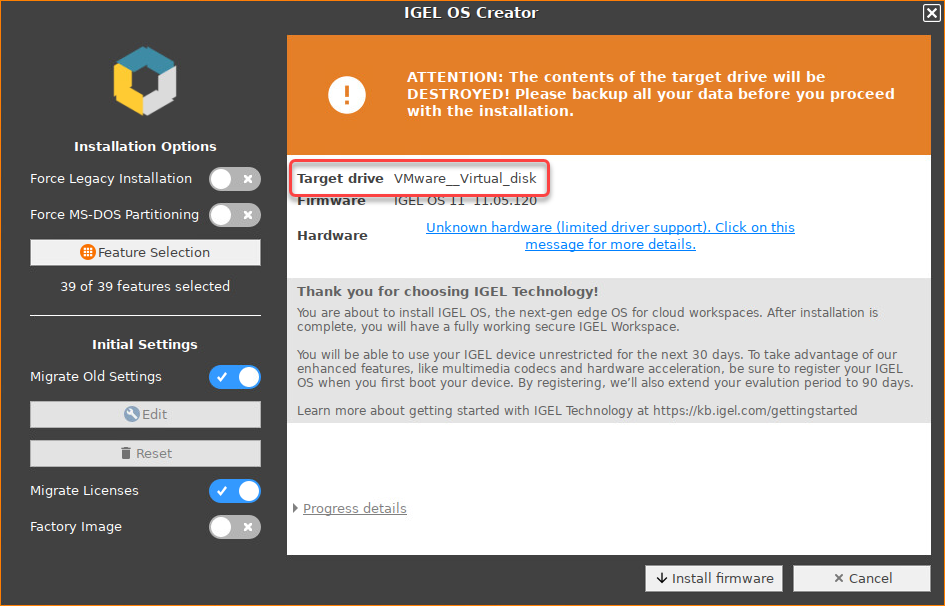
Check the Target drive to ensure that the system is installed on the desired drive.
If you want to exclude features of IGEL OS, e.g. to save storage space, click Feature Selection and edit the settings as required.
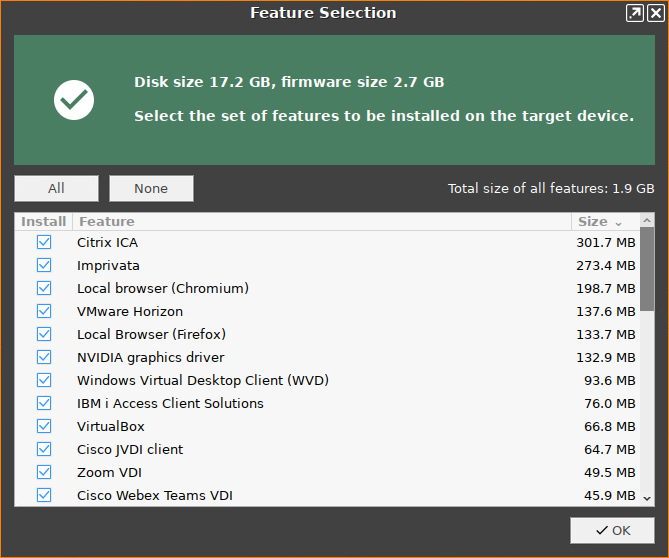
All: Select all features
None: Select no feature
Feature: Sort the list alphabetically
Size: Sort the list by the memory requirements of the features
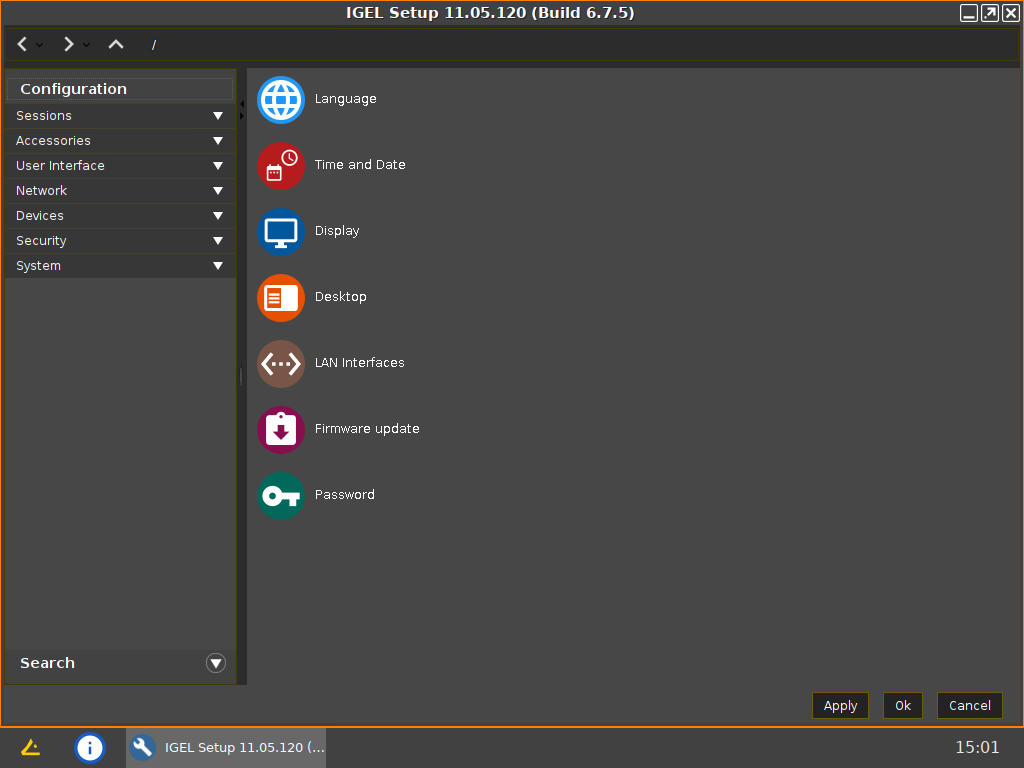
If you want to change initial settings for the devices you are about to deploy, click Edit.
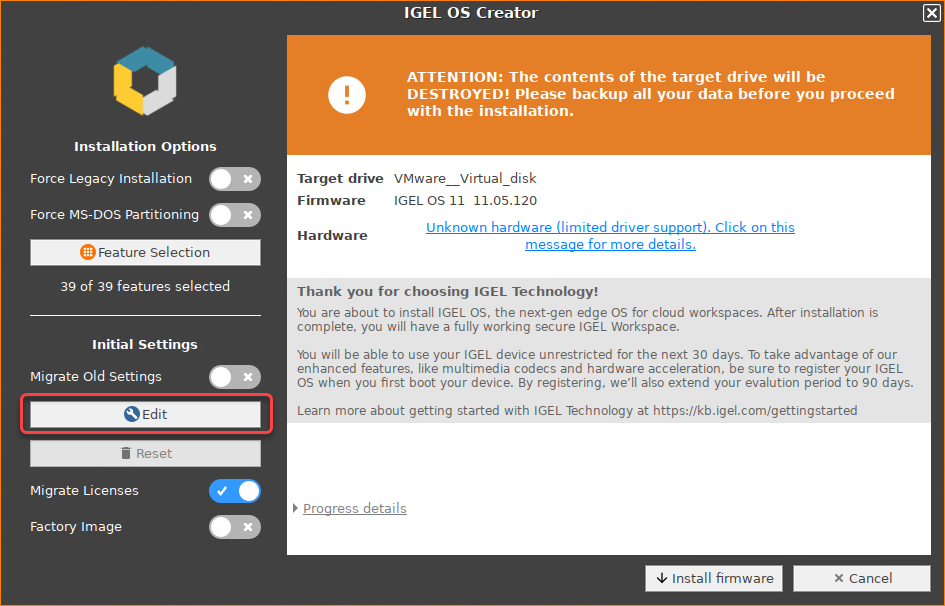
The IGEL Setup opens, enabling you to change the settings in the same way as with a regular IGEL OS installation.The changes are stored on the USB memory stick from which the IGEL OS Creator (OSC) is executed. When you use this USB memory stick for subsequent OSC installations, your custom settings will be re-used. This allows you to easily create a number of IGEL OS installations with custom settings.
For details about the settings, see the chapters Setup and the subsequent chapters in the IGEL OS Reference Manual.
If you want to undo your changes and restore the original settings, click Reset.
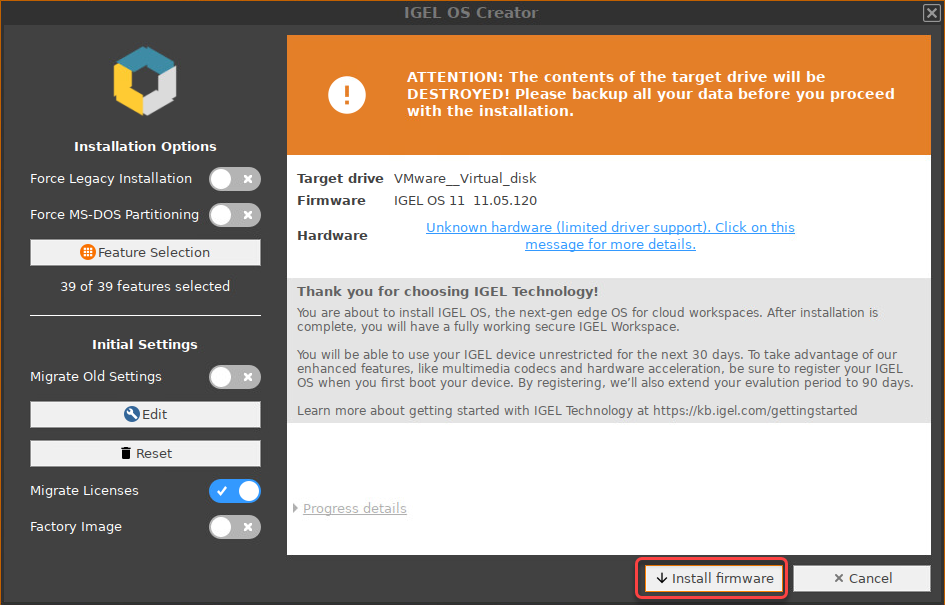
Click on Install firmware.
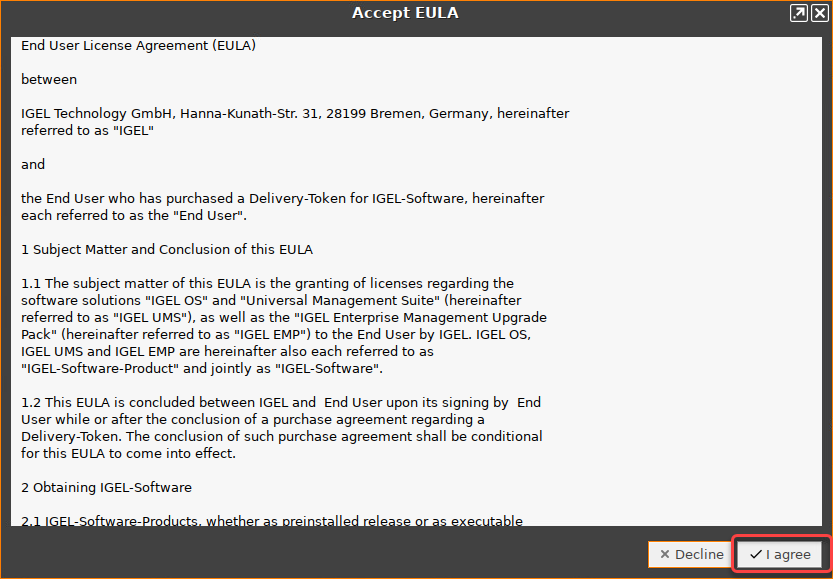
Accept the EULA by clicking I agree.
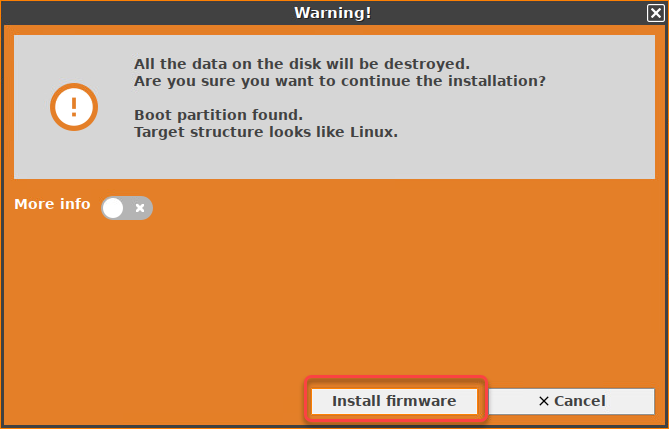
Confirm the warning dialog.
The installation program will install IGEL OS 11 on the target drive. If you see the success message, the installation is complete.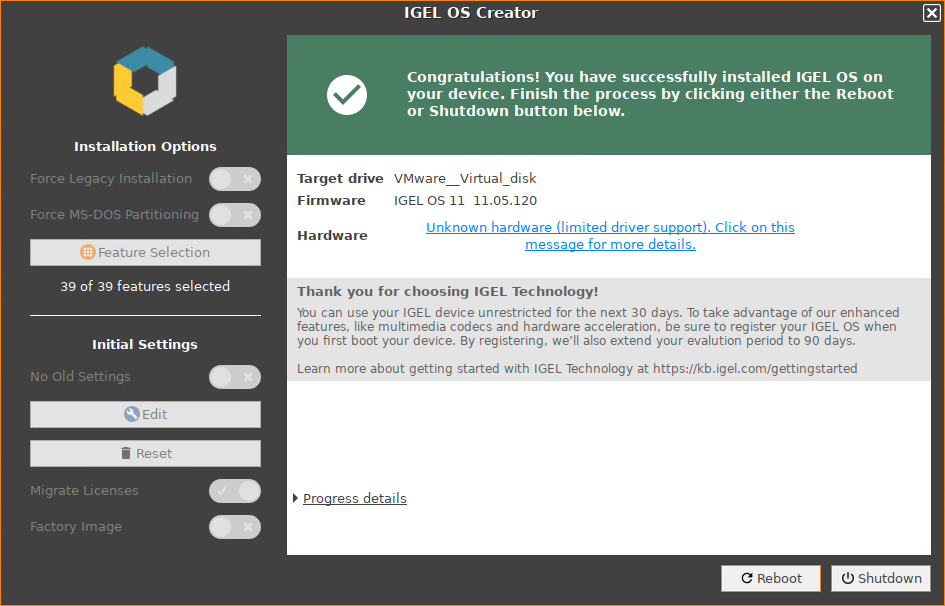
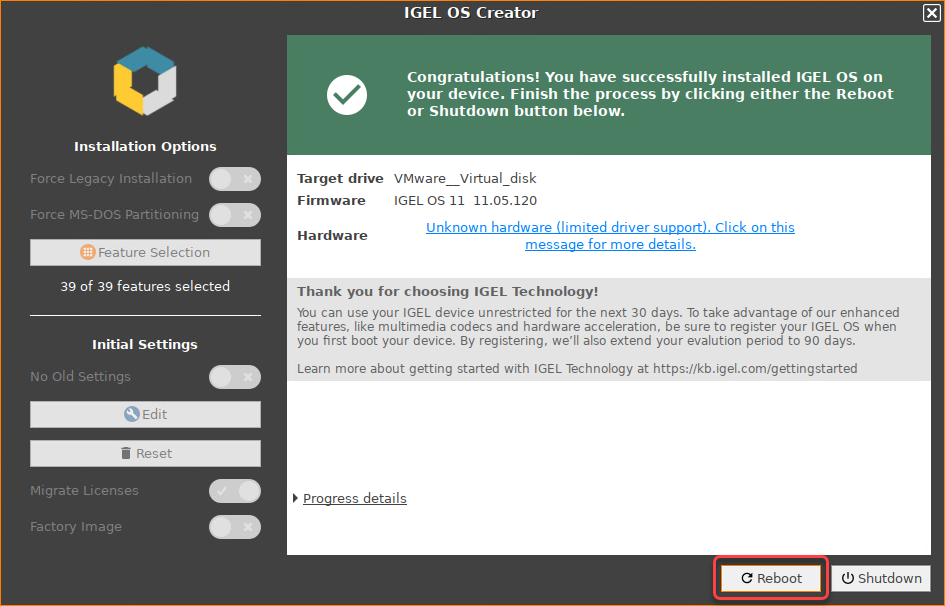
Detach any external network adapters from the device.
In this way, you ensure that the unit ID for the device is derived from the built-in network adapter. The unit ID will be saved on the device persistently, regardless of any external network adapter that may be used in the future. This is important for licensing.Click on Reboot.
Remove the USB memory stick.
Close the message window.
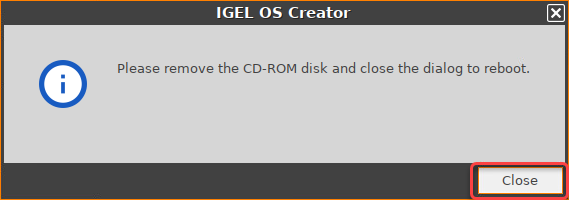
The system will shut down and then boot IGEL OS 11.