Because of misconfiguration, an incorrectly performed update, or some other reason, you may sometimes need to re-image your IGEL UD Pocket. The procedure is generally the same as IGEL OS Creator (OSC) installation procedure. The difference is that you must select your UD Pocket as a target device, and not your PC, during the installation.
Requirements
PC with 2 free USB ports
1 USB stick with 4 GB or more without important data (will be overwritten)
IGEL UD Pocket
Re-Image IGEL UD Pocket
First of all, you must create an IGEL OS Creator stick. For the instructions, see:
If not already enabled, activate booting from USB storage media on your PC, see Boot Settings.
Connect the created IGEL OS Creator stick to the PC.
Connect the IGEL UD Pocket to the PC.
Switch the PC on and make sure to boot from the IGEL OS Creator stick.
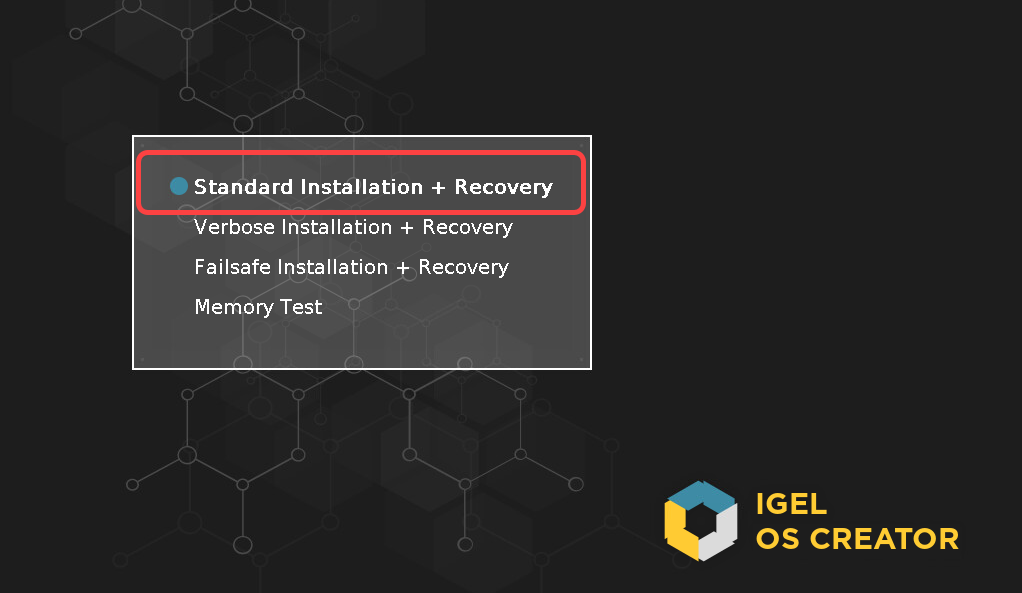
Select Standard Installation + Recovery from the boot menu.
Select the language for the installation process.
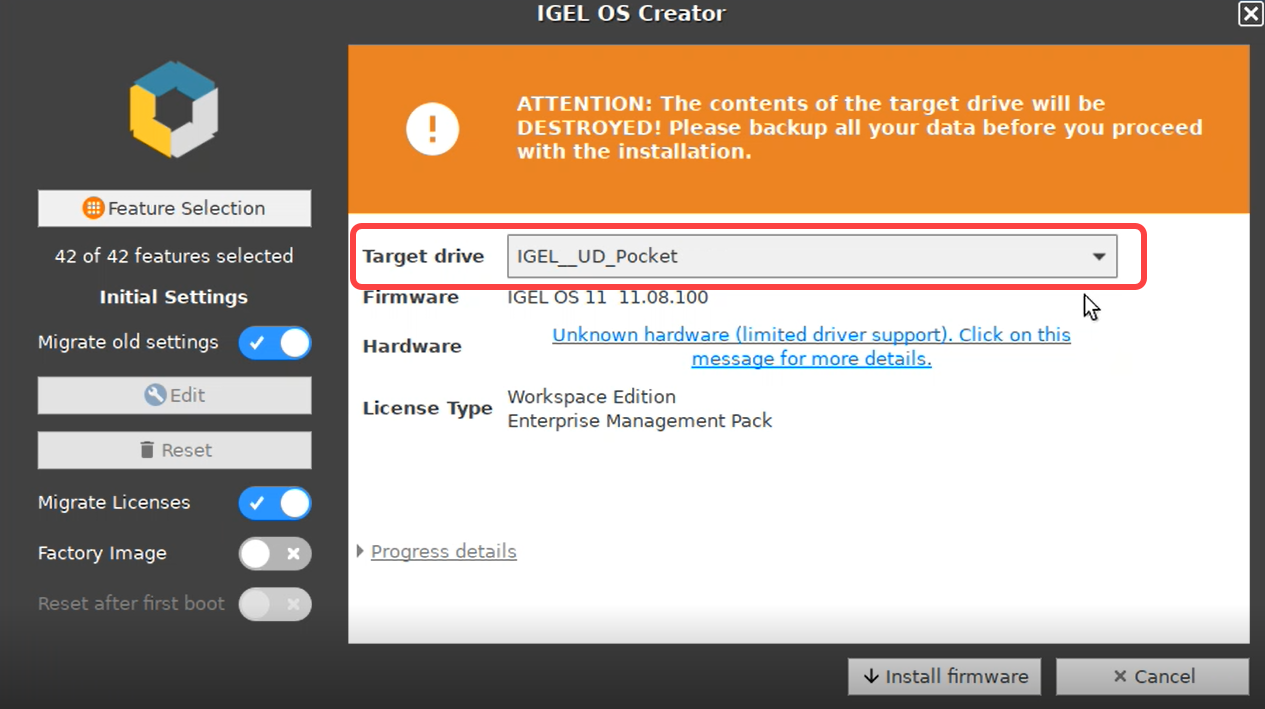
Under Target drive, select your UD Pocket.
Make sure you select the right target device!Otherwise, data on your PC will be deleted!
Installing IGEL OS via OSC destroys all data on the device selected under Target drive. Therefore, be careful not to accidentally select your PC's hard drive!
If your UD Pocket is still functional and has no errors, leave the option Migrate old settings activated to migrate the previous settings.
Disable Migrate old settings if your UD Pocket has some misconfiguration problems or is not bootable anymore.
Make sure Migrate Licenses is activated if you want to keep the existing licenses.
Optional settings:
Force legacy installation (only available if the PC has booted in UEFI mode)
Force MS-DOS Partitioning (only available if the PC has booted in UEFI mode)