Download PDF
Download page BIOS Update for Devices Supported by LVFS.
BIOS Update for Devices Supported by LVFS
BIOS Updates at Your Own Risk
IGEL is offering and supporting the LVFS BIOS Update mechanism - BIOS updates are performed at your own risk!
Legacy BIOS Not Supported
The LVFS BIOS update mechanism works only with EFI/UEFI, not with legacy BIOS.
The LVFS BIOS update mechanism is functional even with Secure Boot enabled and when a BIOS password is set.
If the BIOS of your devices is distributed via the Linux Vendor Firmware Service (LVFS), you can update, downgrade, or reinstall it using the IGEL Universal Management Suite (UMS).
As the procedure for reinstalling and downgrading the BIOS are analogous to the update procedure, we will use the term "update" in the following instructions.
Supported Devices
For a list of supported devices, see https://fwupd.org/lvfs/devices/
Requirements
- UMS 6.01 or higher
- Device supports LVFS
- The device has IGEL OS 11.08.100 or higher; it is recommended to use IGEL OS 11.08.230 due to significant improvements in our implementation.
Getting the BIOS Update File from LVFS
![]() Look up the latest update file from https://fwupd.org/lvfs/devices/ and download it. If you want to use the UMS for file distribution, store it in a location that is reachable from the machine on which your UMS Server is running.
Look up the latest update file from https://fwupd.org/lvfs/devices/ and download it. If you want to use the UMS for file distribution, store it in a location that is reachable from the machine on which your UMS Server is running.
Configuring the BIOS Update
We will create a profile to make the settings available for all relevant devices.
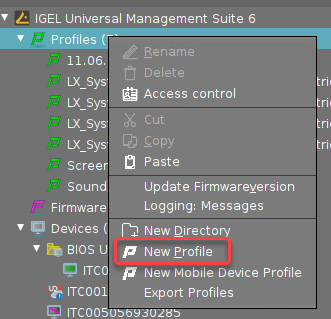
- In the UMS Console, go to Profiles, open the context menu and select New Profile.
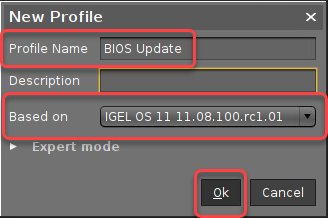
- Provide the following data and then click Ok.
- Profile Name: Display name of the profile
- Based on: Select the IGEL OS version of the devices; must be IGEL OS 11.08 or higher
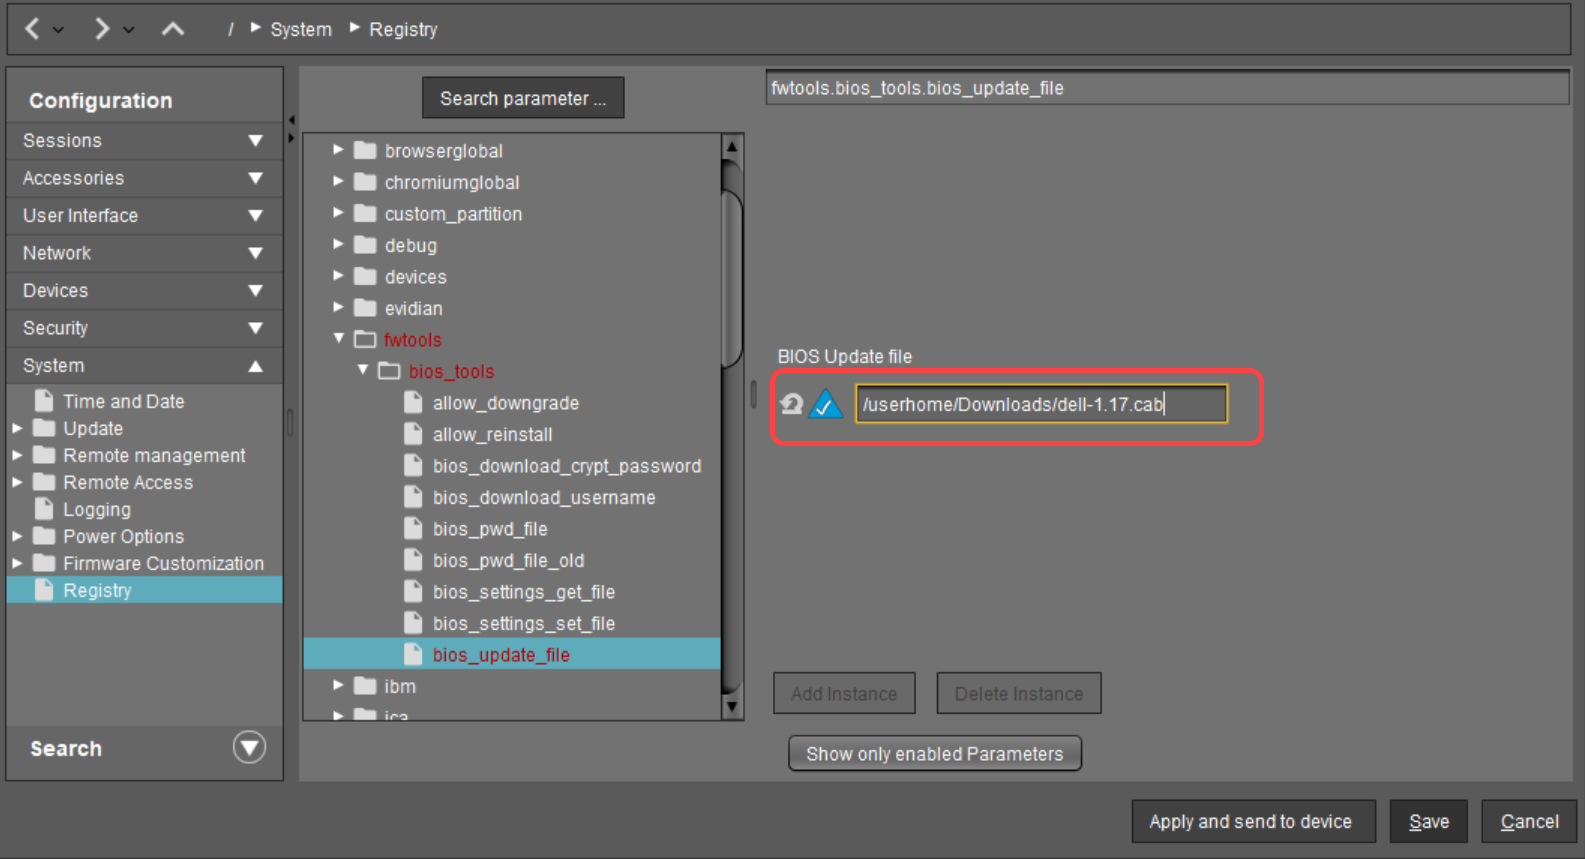
- Go to System > Registry > fwtools > bios_tools > bios_update_file, click the yellow icon to activate the parameter (turns blue when active), and enter the path or the URL of the update file.
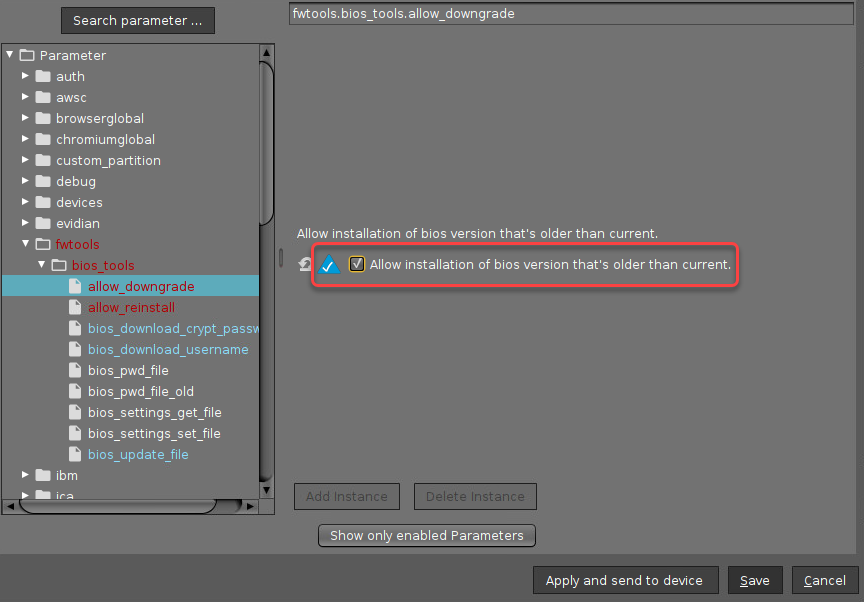
- If you want to downgrade the BIOS, i.e. replace the BIOS with a lower version: Click the yellow icon and activate System > Registry > fwtools > bios_tools > allow_downgrade.
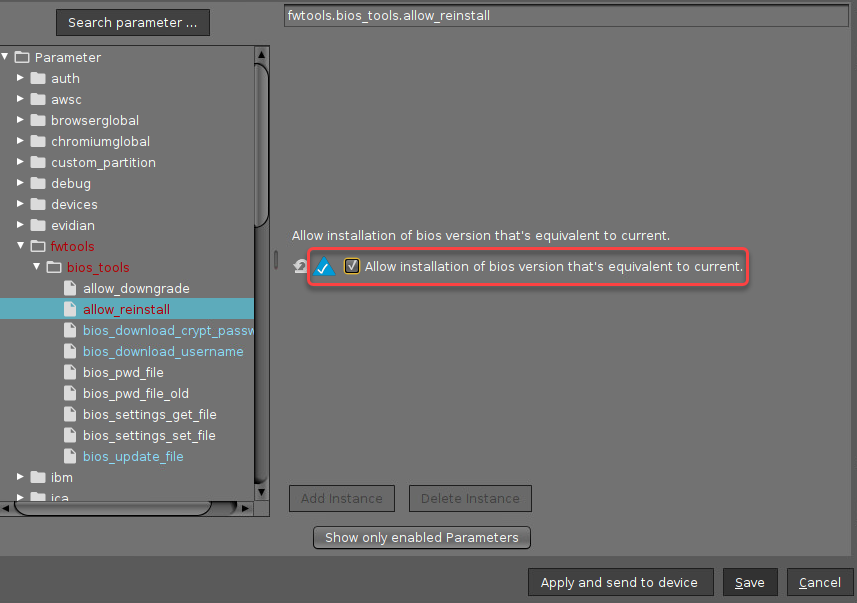
- If you want to reinstall the BIOS, i.e. replace the BIOS with a fresh BIOS of the same version: Click the yellow icon and activate System > Registry > fwtools > bios_tools > allow_reinstall.
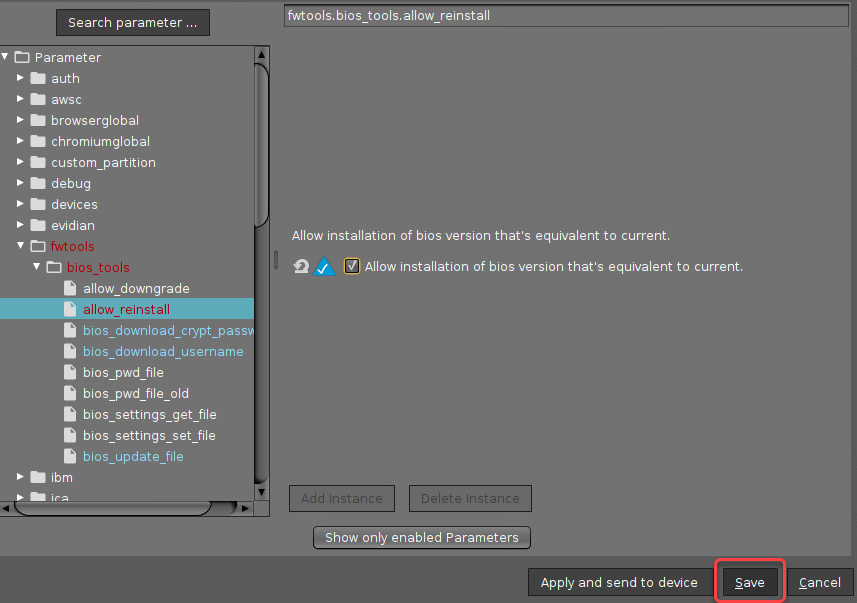
- Click Save to write the profile.
Providing the BIOS Update File
Local Source
To transfer the BIOS update file to the device, we will use the UMS file transfer functionality.
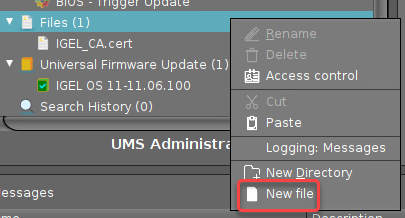
- In the UMS Console, go to Files, open the context menu, and select New file.
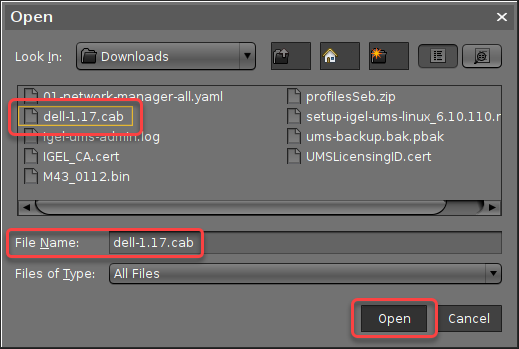
- Click the file chooser button.

- Find the BIOS update file in your file system, select it and click Ok.
In the field Device file location, define the local path in which the file will be stored on the device, e.g.
/userhome/Downloads/. Afterward, click Ok.
It is recommended NOT to use
/wfs/to store the BIOS update file.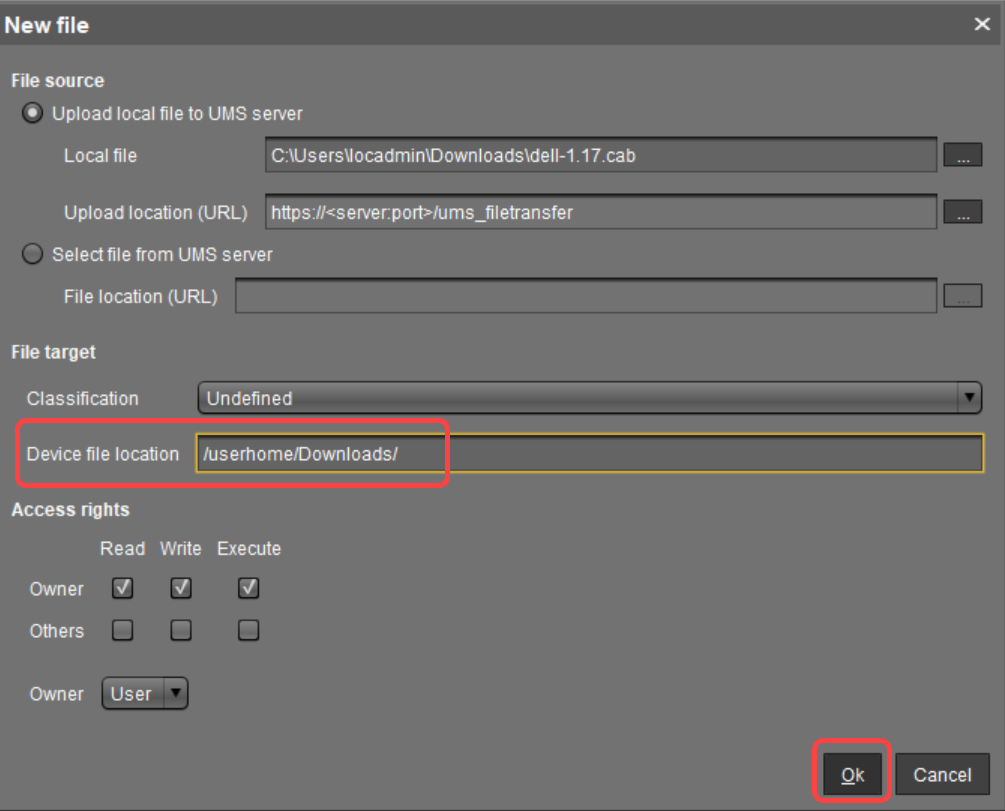
- Click the
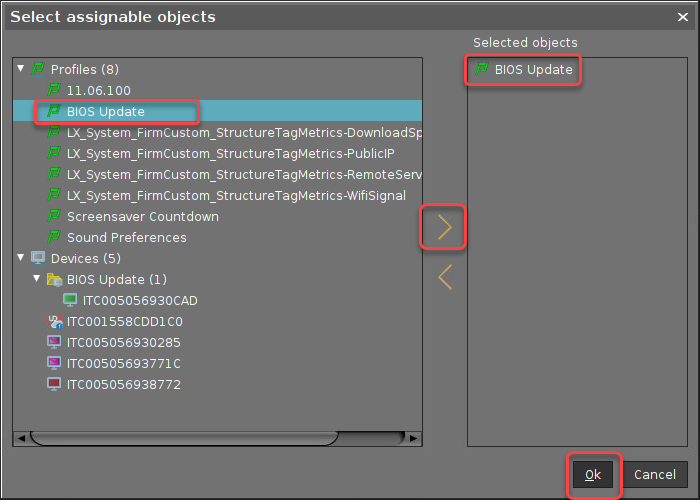
 icon to open the assignment dialog.
- Assign the file to your devices by assigning it to the profile we have created beforehand.
Remote Source
![]() Transfer the file to an HTTP server; ensure that the URL provided under System > Registry > fwtools > bios_tools > bios_update_file is matched.
Transfer the file to an HTTP server; ensure that the URL provided under System > Registry > fwtools > bios_tools > bios_update_file is matched.
Triggering the BIOS Update
In the following instruction, we will use a scheduled job to trigger the BIOS update.
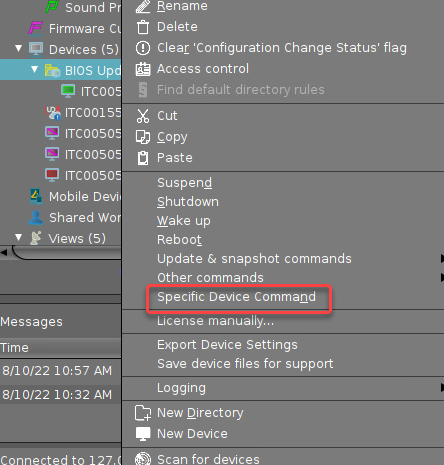
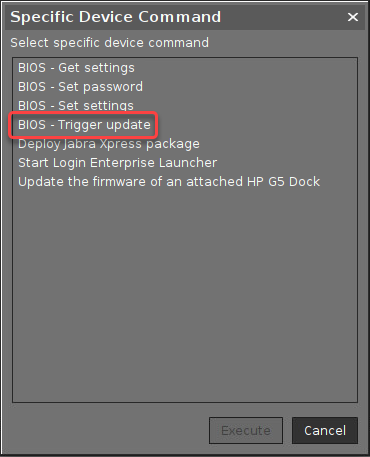
Alternatively, you can trigger the BIOS update manually. For this purpose, select Specific Device Command from the context menu of the device or the corresponding directory and then select BIOS - Trigger update:
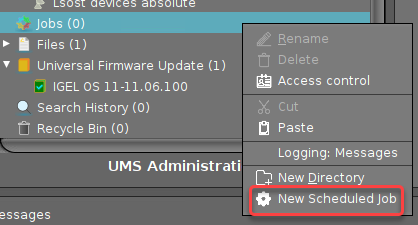
- In the UMS Console, go to Jobs, open the context menu and select New Scheduled Job.
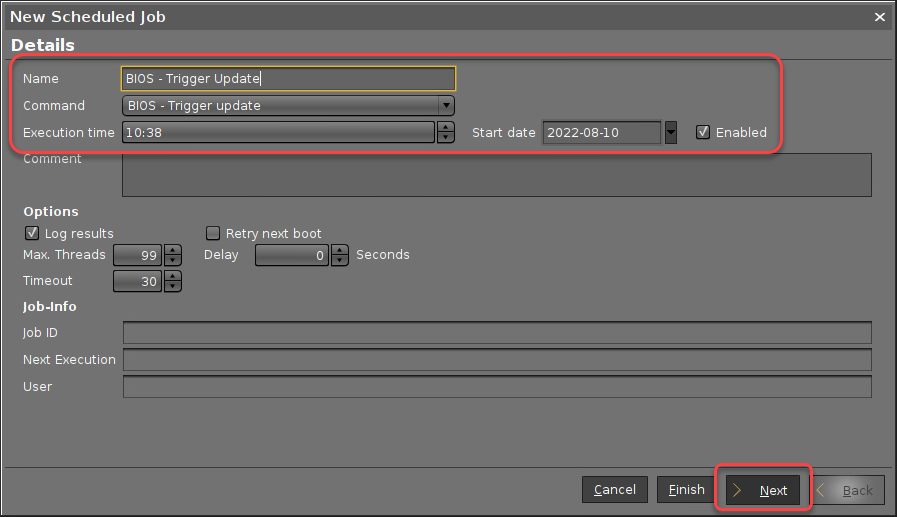
- Provide the following data and then click Next.
- Name: Display name for the job
- Command: Select BIOS - Trigger update.
- Execution time: Time at which the BIOS should be updated
- Start date: Date at which the BIOS should be updated
- Enabled: Ensure that this is activated
- Make sure that Repeat Job is set to Never and click Next.

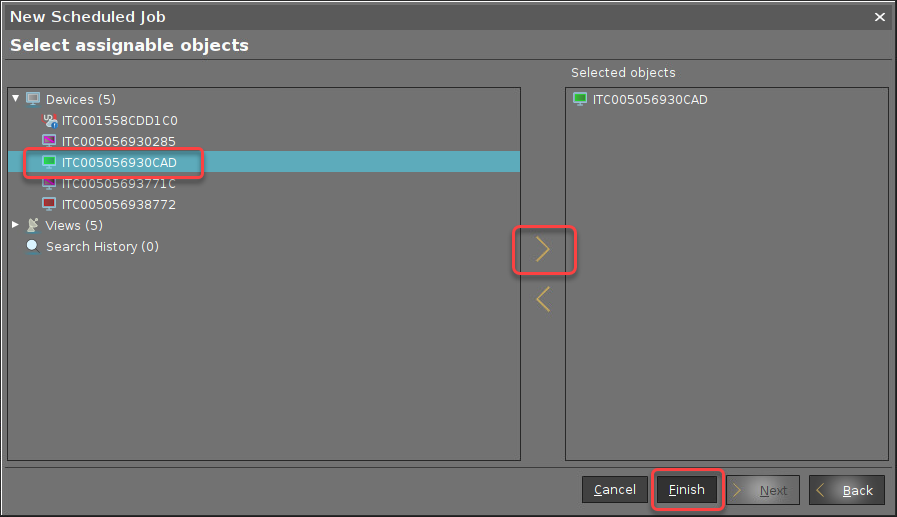
- Select the devices on which the BIOS update should be performed. You can select single devices, directories, views, and search histories. Afterward, click Finish.
When the job is executed, a dialog informs the user that a reboot is required. The user can choose between two options:
- Perform the reboot and update right away
- Postpone the update to the next reboot
Using the Command Line Tool (bios-tools)
For testing the BIOS update on a single device, you can use the command line tool as an alternative to a scheduled job from the UMS.
As a prerequisite, the steps described under Getting the BIOS Update File from LVFS, Configuring the BIOS Update, and Providing the BIOS Update File must be completed. As an alternative, you can also use a USB storage device (see Storage Hotplug) or an NFS network drive (see NFS).
When the command has been executed, a dialog informs you that a reboot is required. You can choose between two options:
- Perform the reboot and update right away
- Postpone the update to the next reboot
Usage
bios-tools [OPTIONS] COMMAND [ARGS]...
Options
| Option / Contrary Option | Comment |
|---|---|
--debug / --no-debug | Provide extensive information (verbose mode) |
--help | Show the help text and exit |
Commands
| Command | Argument (Short / Long Form) | Comment |
|---|---|---|
update | Handle BIOS update | |
-e --enable | Enable BIOS update. Will be triggered after reboot. | |
-d --disable | Disable BIOS update | |
-s --show | Show if BIOS update is enabled or not | |
--help | Show the help text and exit |
Example
The following command performs a BIOS update and displays extensive information:
update --debug -e