Download PDF
Download page Configuration of IGEL Windows 365 on IGEL OS.
Configuration of IGEL Windows 365 on IGEL OS
Configuring Logon
- In the Profile Configurator, go to Apps > Windows 365 Cloud PC > Windows 365 Cloud PC Sessions > [Session Name] > Logon.
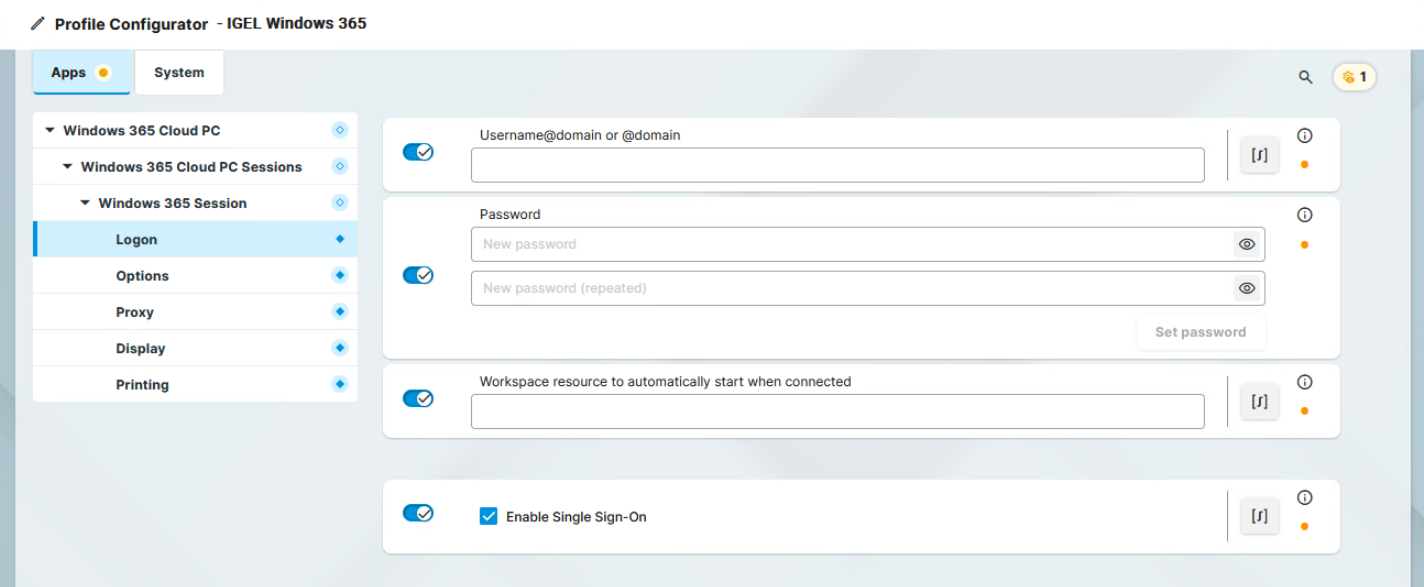
- Edit the settings according to your needs. The parameters are described in the following.
Username@domain or @domain
A user name or a preset domain name used for the automatic connection to the Windows 365 session. The string after "@" is taken as a preset domain name.
Example:
windows@your.domain.com: To log in, the user does not need to enter the username and the domain name.
@your.domain.com: To log in, the user only needs to enter the username. The preset domain – your.domain.com – will automatically be appended.
Overwriting the Preset Domain Name
Use the following registry key to specify whether the user should be able to overwrite the preset domain, e.g. with username@other-domain.com:
| Path | System > Registry |
| Registry | sessions.cpc%.options.allow-preset-domain-overwrite |
| Value | enabled / disabled (Default) |
| Note | If enabled: the domain entered by the user is accepted. |
Password
The password used for the automatic connection to the Windows 365 session.
If the Login Credentials Should Not Be Applied Automatically for the Session Host Authentication
You can use the following registry key to always prompt for a user name and password or only for a password when connecting to an Windows 365 session:
| Path | System > Registry |
| Parameter | Always prompt for username and password upon session host connection |
| Registry | sessions.cpc%.options.always-prompt-for-session-username-and-password |
| Value | enabled / disabled (Default) |
| Path | System > Registry |
| Parameter | Always prompt for password upon session host connection |
| Registry | sessions.cpc%.options.always-prompt-for-session-password |
| Value | enabled / disabled (Default) |
| Note | On the server side, you can enable the RDP group policy "Always prompt for password upon connection" to achieve the same result. |
Workspace resource automatically start when connected
Name of the resource that is to be started automatically when the Windows 365 session is launched. The name specified here must exactly match the name of the Windows 365 resource that has been assigned to the user.
Enable Single Sign-On
☑ Single sign-on (SSO) is activated. (Default)
After the Azure Active Directory authentication the user needs to authenticate to the session host as well, which is done automatically from what was used for the Azure Active Directory authentication.
Configuring the Options
- In the Profile Configurator, go to Apps > Windows 365 Cloud PC > Windows 365 Cloud PC Sessions > [Session Name] > Options.
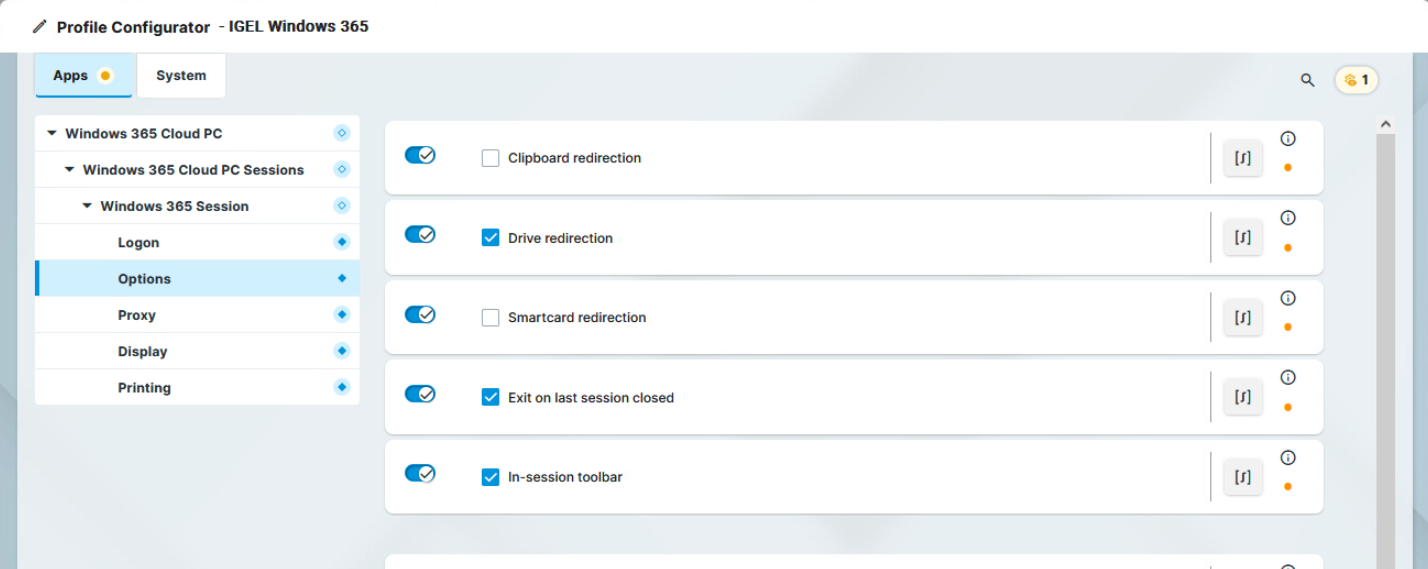
- Edit the settings according to your needs. The parameters are described in the following.
Clipboard redirection
☑ Text and images from the clipboard are shared between the Windows 365 session and the local client.
☐ Text and images from the clipboard are not shared between the Windows 365 session and the local client. (Default)
Drive redirection
☑
Redirection is bound to the /media folder, so that locally mounted storage devices, including USB sticks, are forwarded to the Windows 365 session. (Default)
Smartcard redirection
☑ Smartcards are forwarded to the Windows 365 session.
☐ Smartcards are not forwarded to the Windows 365 session. (Default)
Exit on last session closed
☑ When the last session window is closed, the entire IGEL Windows 365 client automatically closes. (Default)
In-session toolbar
☑ The in-session toolbar is enabled. (Default)
Audio output redirection
☑ The audio output is redirected between the Windows 365 session and the local client. (Default)
Audio input redirection
☑ The audio input (microphone) is redirected between the local client and the Windows 365 session. (Default)
AAC Codec
☑ The AAC (Advanced Audio Coding) codec used for support of audio output redirection is enabled. (Default)
Configuring the Proxy
- In the Profile Configurator, go to Apps > Windows 365 Cloud PC > Windows 365 Cloud PC Sessions > [Session Name] > Proxy.

- Edit the settings according to your needs. The parameters are described in the following.
Proxy mode
Specifies if a proxy should be used.
Possible options:
- Off: A proxy is disabled. The direct connection to the Internet is used. (Default)
- Global proxy setting: The proxy configured under Network > Proxy is used, see Proxy.
- Session specific proxy: The proxy configuration specified under Proxy host and Proxy port is used.
Proxy host
The hostname or IP address of the proxy server. Configurable if Session specific proxy is selected.
Proxy port
Port on which the proxy service is available. Configurable if Session specific proxy is selected.
Configuring the Display
- In the Profile Configurator, go to Apps > Windows 365 Cloud PC > Windows 365 Cloud PC Sessions > [Session Name] > Display.
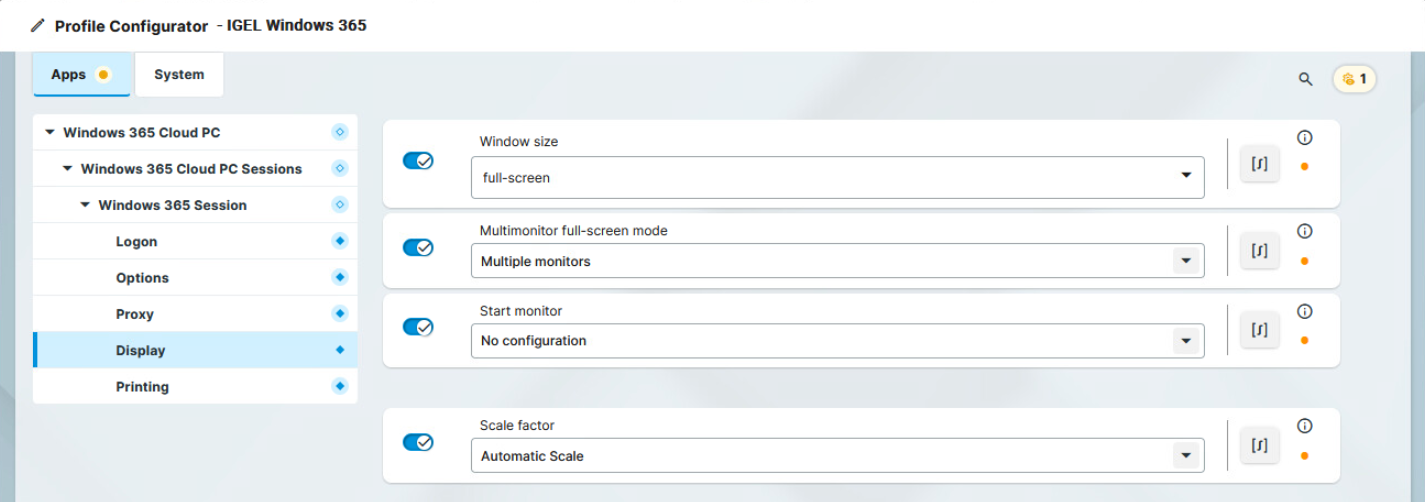
- Edit the settings according to your needs. The parameters are described in the following.
Window size
Specifies the width and height of the window.
Possible options:
- Full-screen: The session is shown on the full screen. The device's taskbar is not visible. (Default)
- Work area: The session is shown on the full screen, minus the area needed by the device's taskbar.
- Numeric details: The session is shown in the selected resolution or on the selected percentage of the screen area.
Multimonitor full-screen mode
This setting is relevant if more than one monitor is connected to the terminal.
Possible options:
- Single monitor: Restricts the full-screen session to one monitor.
- Multiple monitors: Displays the full-screen session on multiple monitors. (Default)
- Expand to all monitors: Expands the full-screen session across all monitors.
Start monitor
Specifies the monitor on which the session is displayed.
Possible options:
- No configuration: The monitor is selected according to the current position of the mouse pointer. (Default)
- 1st-8th monitor
Scale factor
Specifies the desktop scaling in percent.
Possible values:
- Automatic scale: The resolution set under User Interface > Display Settings > DPI Options > Monitor-DPI is used for the session. For details, see DPI Options.
Numeric details: The display is magnified by the factor given here.
Configuring Printing
- In the Profile Configurator, go to Apps > Windows 365 Cloud PC > Windows 365 Cloud PC Sessions > [Session Name] > Printing.
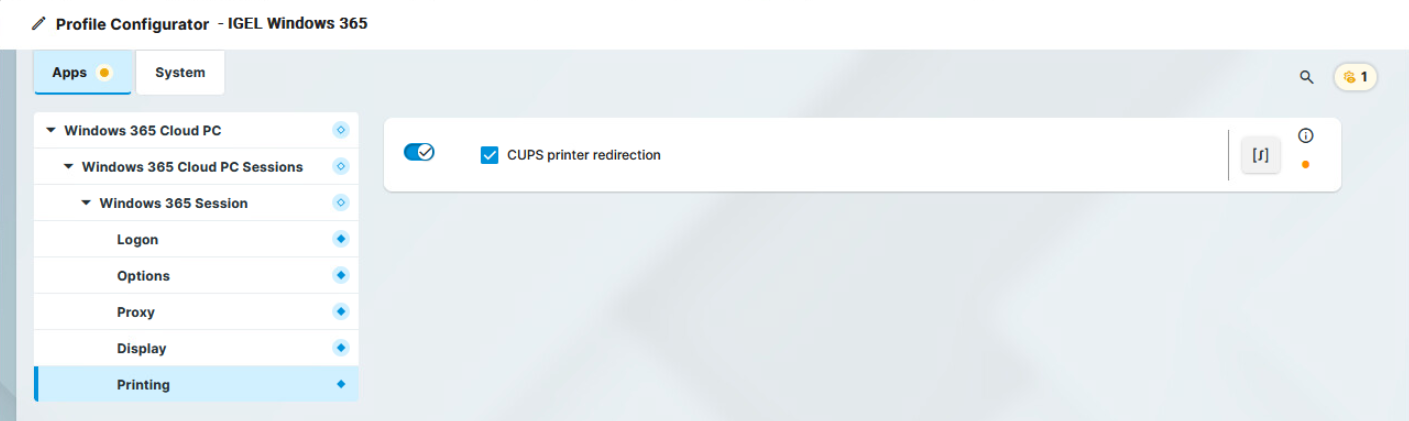
- Edit the settings according to your needs. The parameters are described in the following.
CUPS printer redirection
☑ CUPS printers are redirected to the Windows 365 session. (Default)