Download PDF
Download page Configuration of CUPS Printing on IGEL OS.
Configuration of CUPS Printing on IGEL OS
Configuring Global Printer Settings
The settings defined here are valid for all printers if not specified otherwise.
- In the profile configurator, go to Apps > CUPS Printing > CUPS Printing Global.
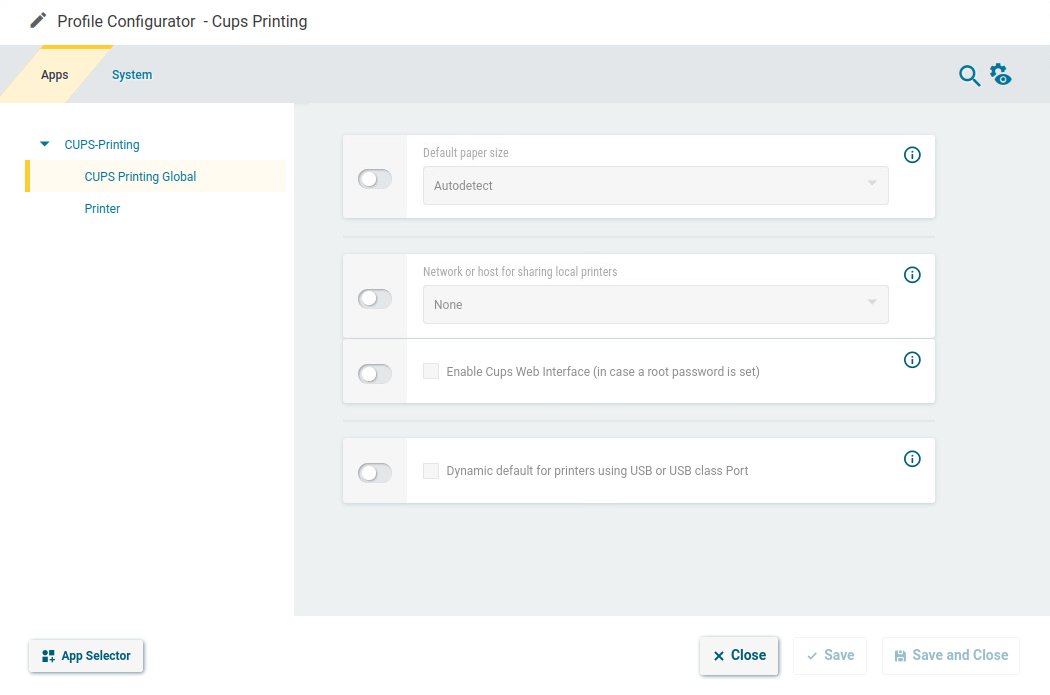
- Edit the settings according to your needs. The parameters are described in the following.
Default paper size
Set the printer-specific paper size that you would like to use as a default.
Possible values:
- Autodetect (default)
- Letter
- Legal
- Executive
- A5
- A4
- A3
Network or host for sharing local printers
Access to the printer is possible from this network or host.
Possible values:
- None (default)
Local network: Allows printing on the local device from the local network.

This can also be given in the form 192.0.2.* or 192.0.2.0/24 or *.domain.com or 192.0.2.1 or host.domain.com.
- Global: Allows printing on the local device from the global network.
Enable CUPS Web Interface (in case a root password is set)
☑ If you have set a root password under Security > Password > Administrator, you can enable the CUPS web interface on port 631. You can access it via the browser at http://localhost:631/
☐
The CUPS Web Interface is disabled; see Known Issues. (Default)
Dynamic default for printers using USB or USB class port
If your users frequently change their workplace, e.g. in a mobile workplace scenario, they might often face the problem that the local printer is not the one that is set as the default printer and, as a result, this local printer may not be redirected to the remote session.
To save your users from dealing with default printer selection, you can configure IGEL OS to automatically set the currently connected printer as the default printer. This feature works with USB printers and USB class printers.
☑ The currently connected USB printer or USB class printer will be automatically set as the default printer (no matter if any of the printers under CUPS Printing > Printer has already been selected manually as the default printer via Is Default). If several printers are connected at the same time, the last printer you plugged in will be automatically set as the default printer.
☐ The dynamic selection of the default printer is disabled. (Default)
Limitations
The method of the dynamic selection of the default printer is feasible if only one printer is connected at a time.
Note: The default printer selection may change on a reboot of the endpoint device. This means: If two or more printers are connected to the endpoint device at the same time, the printer that was dynamically selected as the default printer before the reboot will NOT necessarily remain the default printer after the reboot.
Best practice recommendations for the case when multiple USB printers are used can be found hier.
Configuring an Individual Printer
- In the profile configurator, go to Apps > CUPS Printing > Printer and click
 . If you want to edit an existing printer, select it and click
  .
.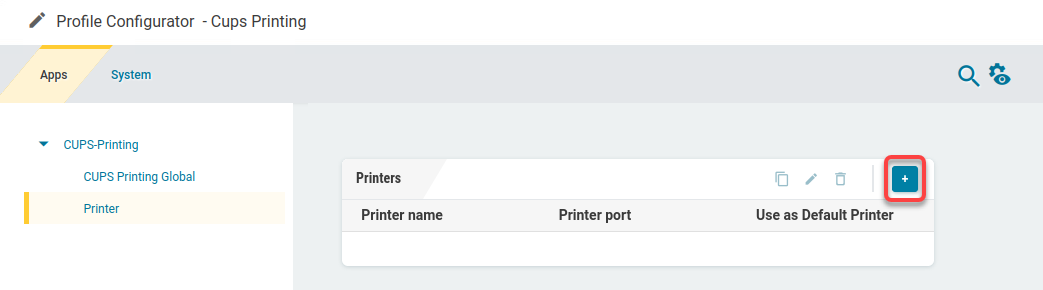
- Edit the settings according to your needs. The parameters are described in the following.
Printer name
The name by which this printer will be referred to. Maximum length: 127 characters. The printer's name must start with a letter. Allowed characters: Letters, digits, underscores; blank spaces are not allowed.
The name of each printer must be unique.
Is default
☑ This printer is the default printer for all sessions. See also Dynamic default for printers using USB or USB class port.
Printer port
Interface type for locally connected printers or the network protocol for network printers. For details, see https://kb.igel.com/igelos-11.08.200/en/settings-to-be-configured-for-each-printer-port-type-69178113.html (IGEL OS 11 article).
- USB printer
- USB class printer
- TCP network printer
- IPP network printer
Depending on the chosen Printer port type, different parameters have to be configured.
If multiple USB printers are used at the same time, it is not recommended to use "2nd USB printer"/ "1st USB printer" (Printer port="USB printer") since the numbering depends on the timing the printer is registered on the endpoint and can be different on the next reboot. Instead, it is advisable to use one of the following methods:
USB Printer Class
The printer is assigned by matching patterns. This method is recommended if the endpoint device is to be configured completely with the UMS, preferably with a profile.
- Open the relevant printer under CUPS Printing > Printer.
- Set Printer port to "USB class printer" and edit the printer settings appropriately.
- Optional: Set the printer as the default printer by enabling Is Default.
Manufacturer
List of possible printer manufacturers. When you select a manufacturer here, the relevant selection of models will be provided under Model.
A custom printer driver cannot yet be defined.
Model
List of possible models.
Default paper size
Set the printer-specific paper size that you would like to use as a default.
Possible values:
- Letter
- Legal
- Executive
- A5
- A4
- A3
- System setting: The global setting is used. (Default)
Share printer
☑ You can access the printer via the network if you have enabled the print server under CUPS Printing > CUPS Printing Global > Network or host for sharing local printers. (Default)
Map printer in Citrix sessions
☑ The printer is available in Citrix sessions. (Default)
Install the HP Color LaserJet 2800 Series PS driver on the server side to redirect the local printer to Citrix sessions, see https://support.citrix.com/article/CTX140208.
Map printer in AVD sessions
☑ The printer is available in AVD sessions. (Default)
CUPS printer redirection must also be activated under AVD > AVD Sessions > [session name] > Printing.
Printer driver
Windows driver name for the automatically created printer. Specify only if the Universal Printer Driver should not be used.
The name must not contain “;” or “:”.
Note that special characters, spaces, and case-sensitive characters are relevant when specifying a driver name.