Synopsis
The workflow from setup to operation can be divided into four steps:
-
Create a golden virtual machine image on an IGEL OS 12 machine dedicated to this task (image creation machine)
-
Capture the golden image and upload it to a WebDAV repository
-
Configure the IGEL OS 12 endpoint devices on which the virtual machines will run
-
Remotely manage and configure the virtual machines on the target machines via the UMS Web App
Prerequisites
Hardware
-
CPU
-
64-bit capable
-
Dual Core or more
-
1.5 GHz or more
-
CPU must be virtualization-enabled (Intel VT-x or AMD-V)
-
-
RAM: 8 GB minimum, 16 GB recommended
-
Storage
-
128 GB or more; for virtual machines that run MS Windows 10 or MS Windows 11, the storage requirements may be higher
-
SSDs are strongly recommended
-
Environment / Infrastructure
UMS
-
Your UMS version is 12.08.100 or higher
-
Your UMS user has the following permissions (User Management area in the UMS Web App):
-
App management
-
Hypervisor management
-

-
The image creation machine and all target machines are registered in the UMS
-
The app IGEL Managed Hypervisor 1.0.0 BUILD 1.0 is registered in the UMS
ISO Source
-
The image from which you want to create the Golden Image is available
WebDAV server
-
Your WebDAV server is set to use basic authentication
-
HTTPS should be used
-
Two users are configured:
-
1 user with read permissions
-
1 user with write permissions
-
-
The following servers can be used:
-
Apache
-
Nginx
-
Microsoft IIS; please note the following: Use the IIS manager to add the MIME type
application/x-lz4as described here: Adding Static Content MIME Mappings -
If you want to roll out the VMs on about 15 or fewer devices, the built-in WebDAV server of the UMS might be sufficient.
-
IGEL OS Base System
-
IGEL OS Base System 12.7.1 PR 1 or higher is installed on the image creation machine and all target machines
Licenses
-
Your UMS has the IGEL Enterprise UMS license; for details, see IGEL OS Editions
-
The IGEL Managed Hypervisor Add-On License is deployed to the image creation machine and all target machines
Supported Operating Systems on Virtual Machines
The following operating systems can be used on virtual machines created and managed by the IGEL Managed Hypervisor:
-
Microsoft Windows XP
-
Microsoft Windows 7
-
Microsoft Windows Embedded Systems (WES) 7
-
Microsoft Windows 10
-
Microsoft Windows 10 IoT Core
-
Microsoft Windows 11
-
Microsoft Windows 11 IoT Core
Preparing the Image Creation Machine
Creating a profile for the IGEL Managed Hypervisor App
-
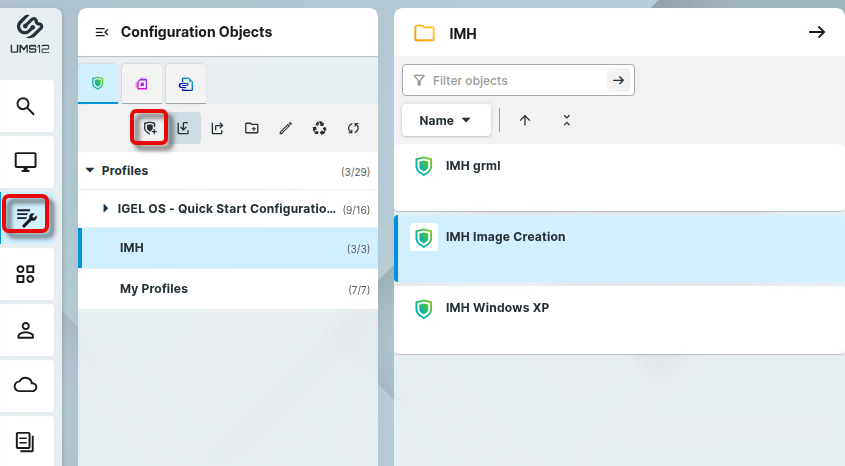
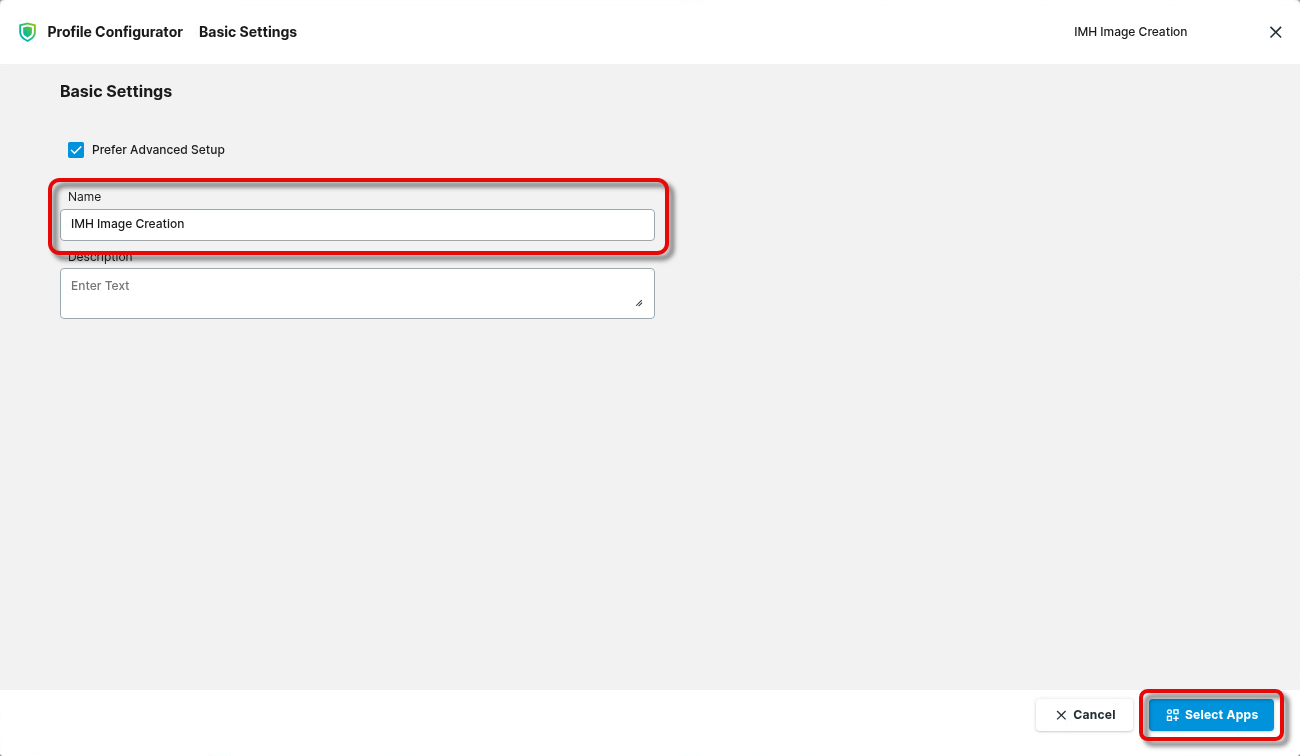
Open the UMS Web Console, go to Profiles, and create a new profile.
-
Provide a Name for the profile and click Select Apps.
-
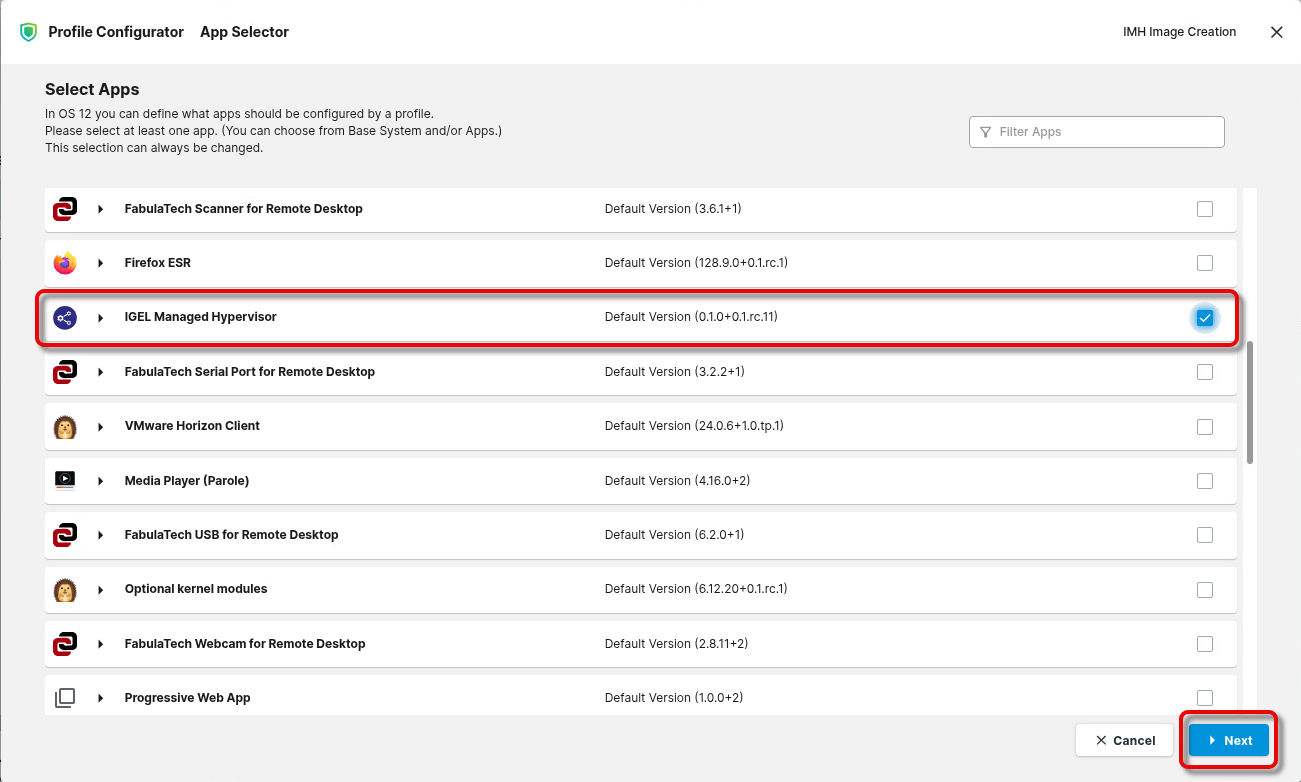
Select the app IGEL Managed Hypervisor and click Next.
-
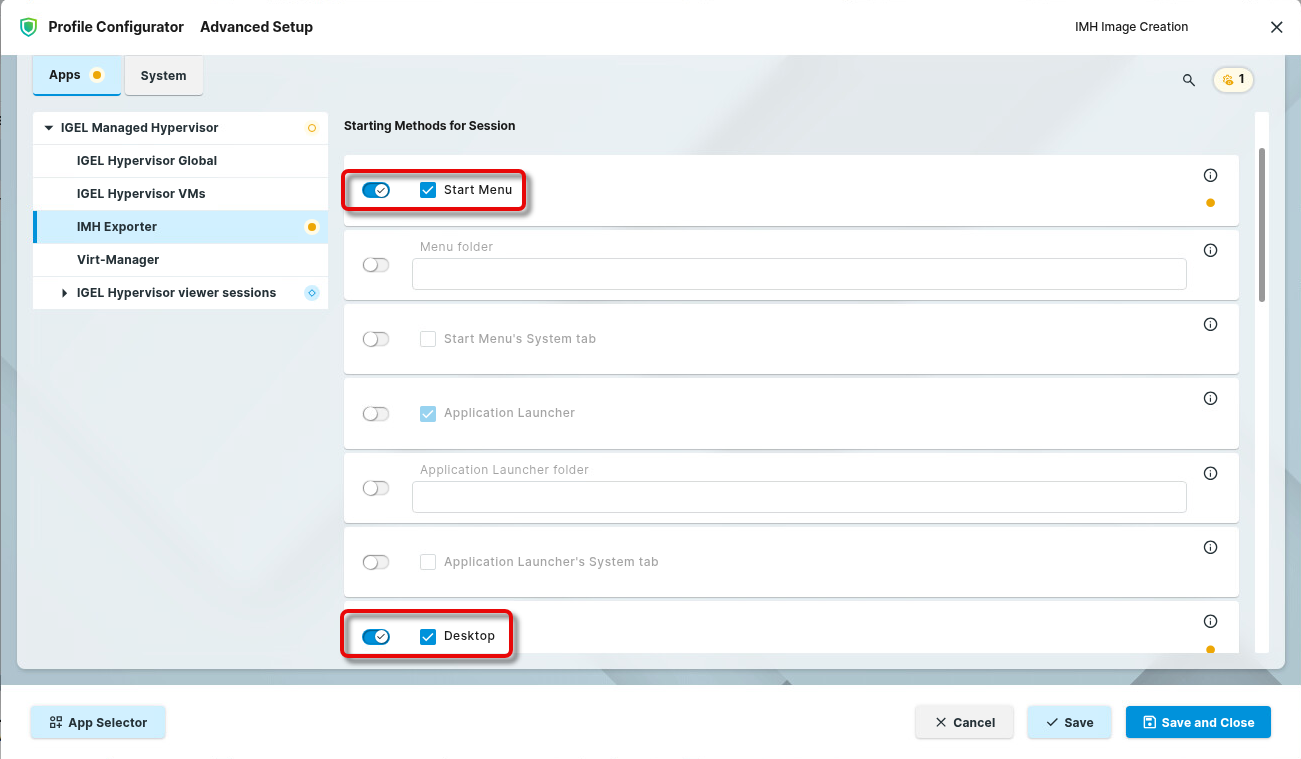
If you want to configure the start options for the IMH Exporter, go to Apps > IGEL Managed Hypervisor > IMH Exporter and add/remove starting methods. In our example, we add a starter to the start menu and to the desktop.
-
If you want to configure the start options for virt-manager, the actual tool for creating the virtual machine, go to Apps > IGEL Managed Hypervisor > Virt-Manager and add/remove starting methods. In our example, we add a starter to the start menu and to the desktop.

-
Click Save and Close to finish the profile.

-
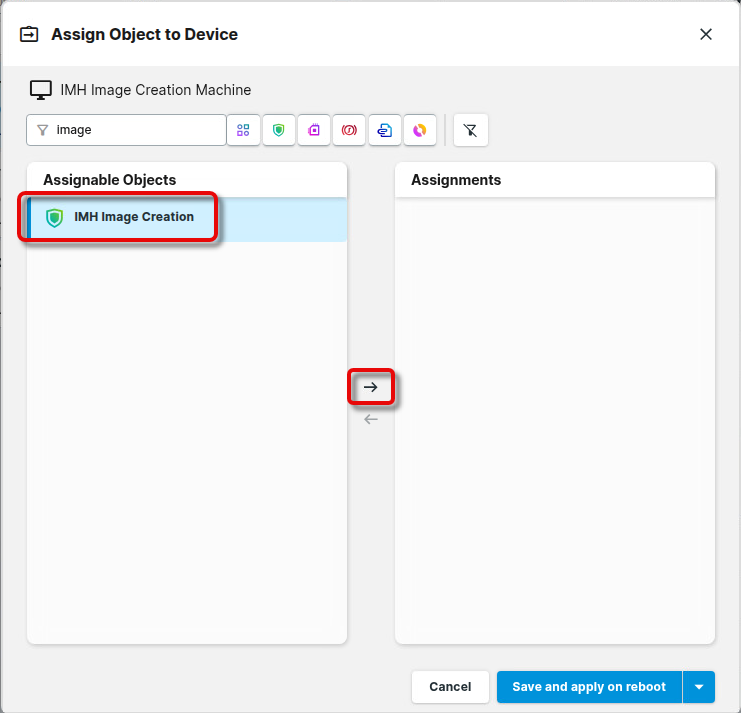
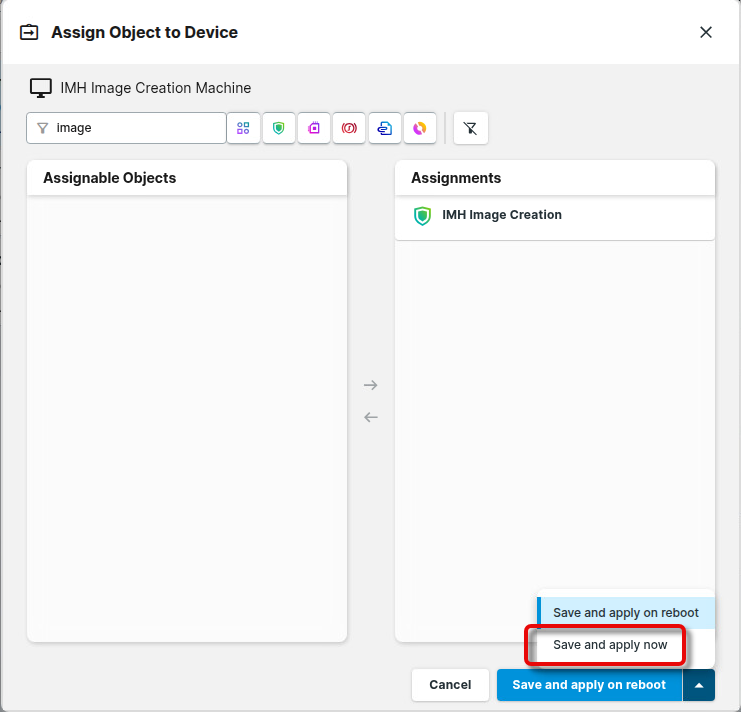
Go to Devices, select your image creation machine, and click Assign Object.
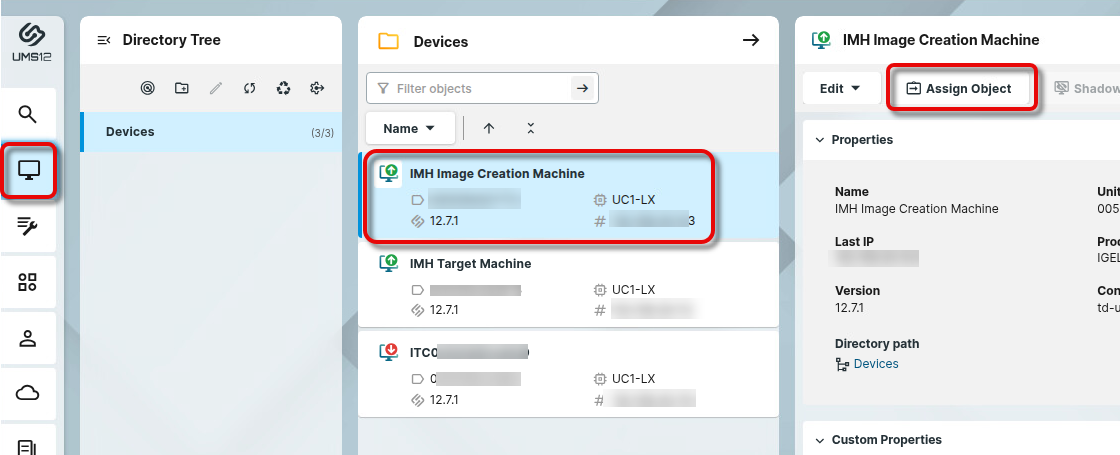
-
Find and select your profile and assign it to your device.
Providing the ISO File
We must ensure that the ISO file from which we will create the Golden Image is available to the image creation machine.
You can use the following methods to provide the ISO file:
-
Local installation media (ISO image on a USB memory stick, network drive, or CD-ROM)
-
Network installation
-
Manual installation
In our example, we will use a local installation medium.
→ Ensure that the installation media is accessible for IGEL OS.
Creating Your Golden Image on the Image Creation Machine
-
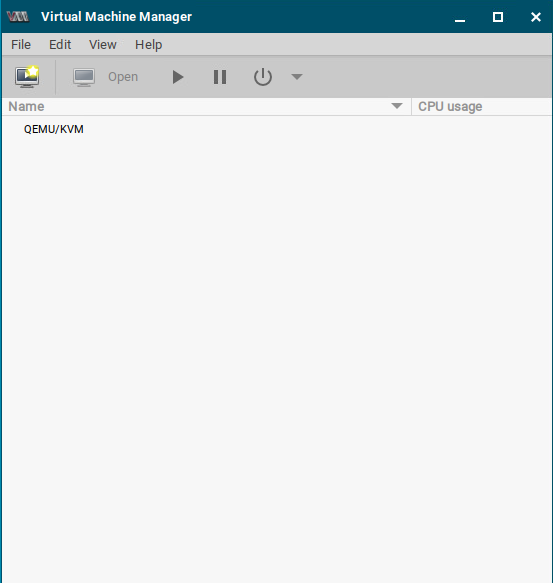
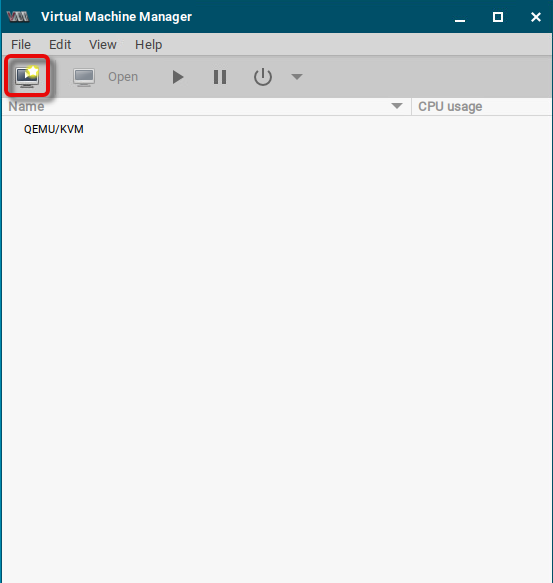
Click the virt-manager start icon. (In our example, we configured a start icon on the desktop.)

The Virtual Machine Manager appears.
-
Click

-
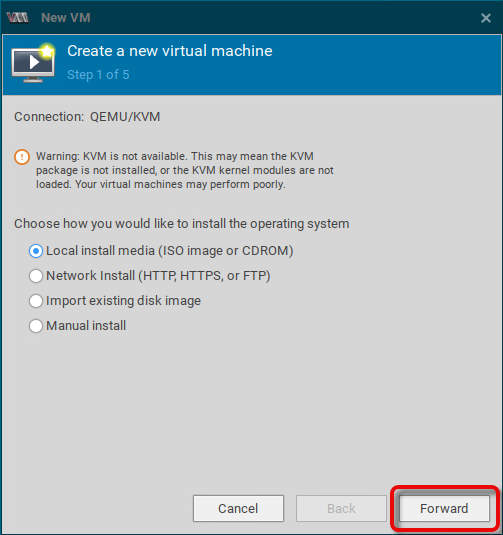
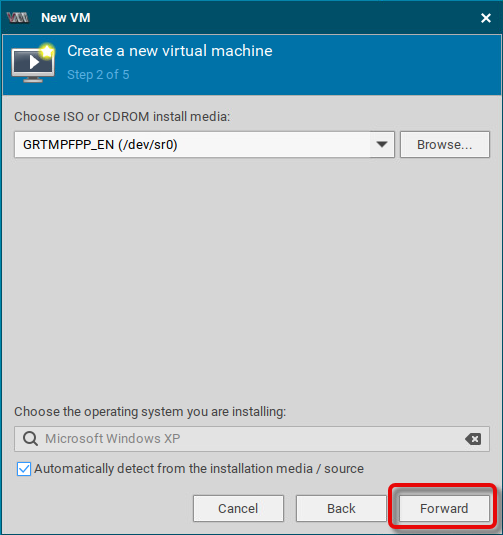
Select the source for the new virtual machine (in our example: Local install media (ISO image or CDROM)) and click Forward.
-
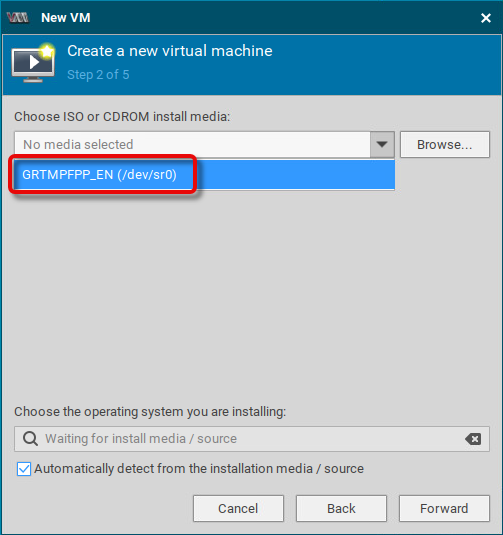
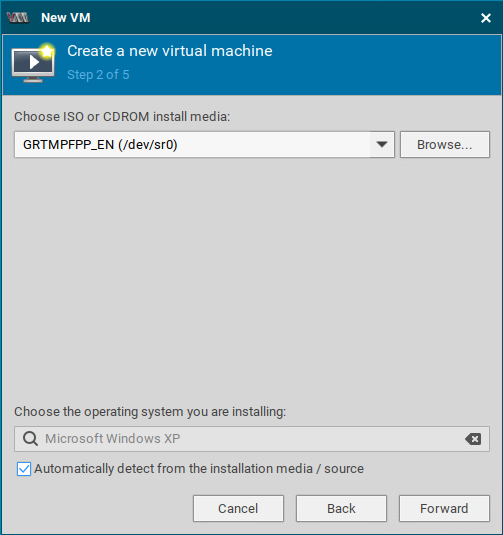
Select your installation media. Browse…
-
Click Forward.
-
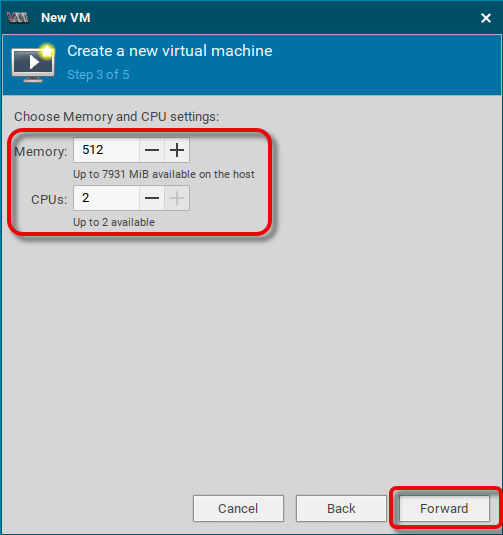
Choose the RAM size and the number of CPUs. Afterward, click Forward.
-
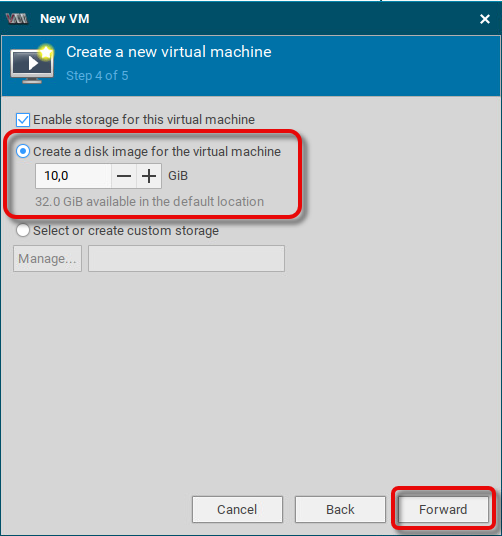
Review the size of the disk image that is to be created and click Forward.
We do NOT recommend selecting or creating custom storage; this might interfere with the preconfigured storage provided by IGEL Managed Hypervisor.
-
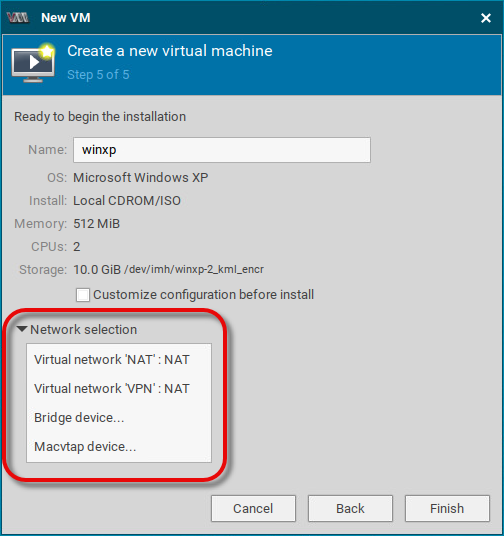
Select the network to be used by the virtual machine.
-
Review the settings and click Finish.
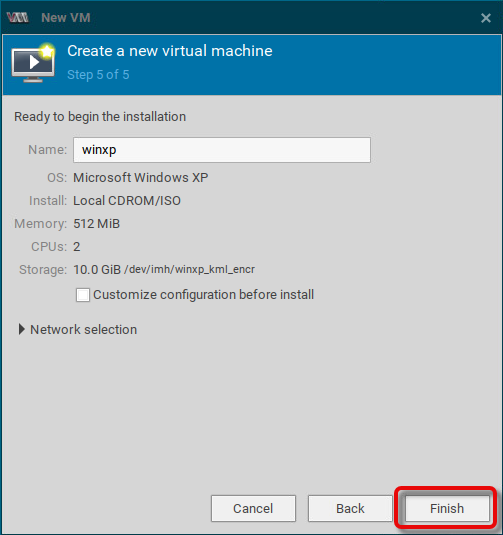
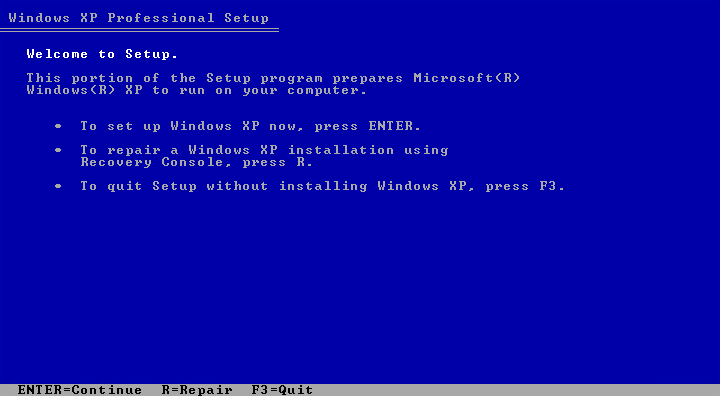
The installer provided by the ISO file starts (in our example: Microsoft Windows XP).
-
Follow the instructions to install your guest system; if required, modify it according to your needs.
Exporting Your VM Image to the WebDAV server
-
On the image creation machine, shut down the virtual machine.
-
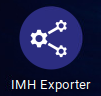
Start the IMH Exporter by clicking on this icon:
-
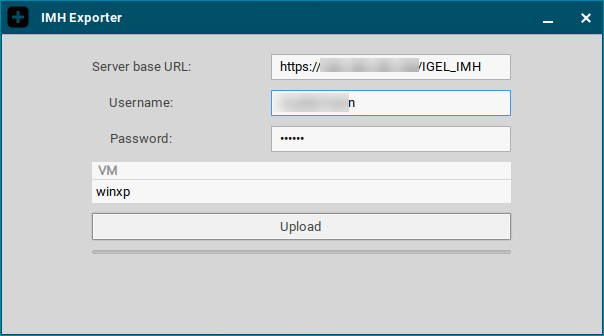
Enter the required data:
-
Server base URL: The path to the directory on the WebDAV repository
-
Username: The username for write access to the WebDAV repository
-
Password: The password associated with the username. Please note that the password must not contain “@”.
-
VM: Select the name of the image you have created.
-
The following files are uploaded to the WebDAV repository:
-
<Server base URL>/<domain>.xml: An XML file that provides the size, URL, checksum, and compression method of the image file. Example:https://123.123.123.123/IGEL_IMH/winxp.xml -
<Server base URL>/<domain>_d0.img.lz4:The image file, compressed with lz4. Example:https://123.123.123.123/IGEL_IMH/winxp_d0.img.lz4
Distributing Your VM Image to the Target Machines
-
In the UMS Web Console, go to Profiles, and create a new profile.
-
Provide a Name for the profile and click Select Apps.

-
Select the app IGEL Managed Hypervisor and click Next.
-
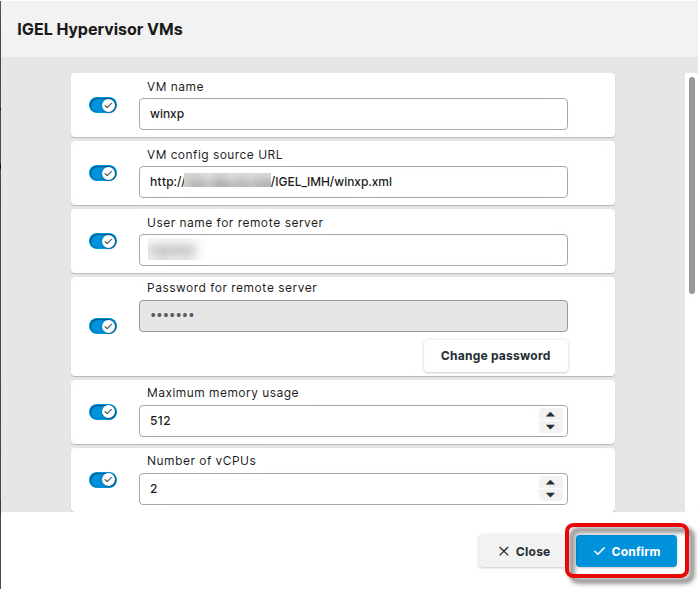
Go to Apps > IGEL Managed Hypervisor > IGEL Hypervisor domains and click + to add a new domain.
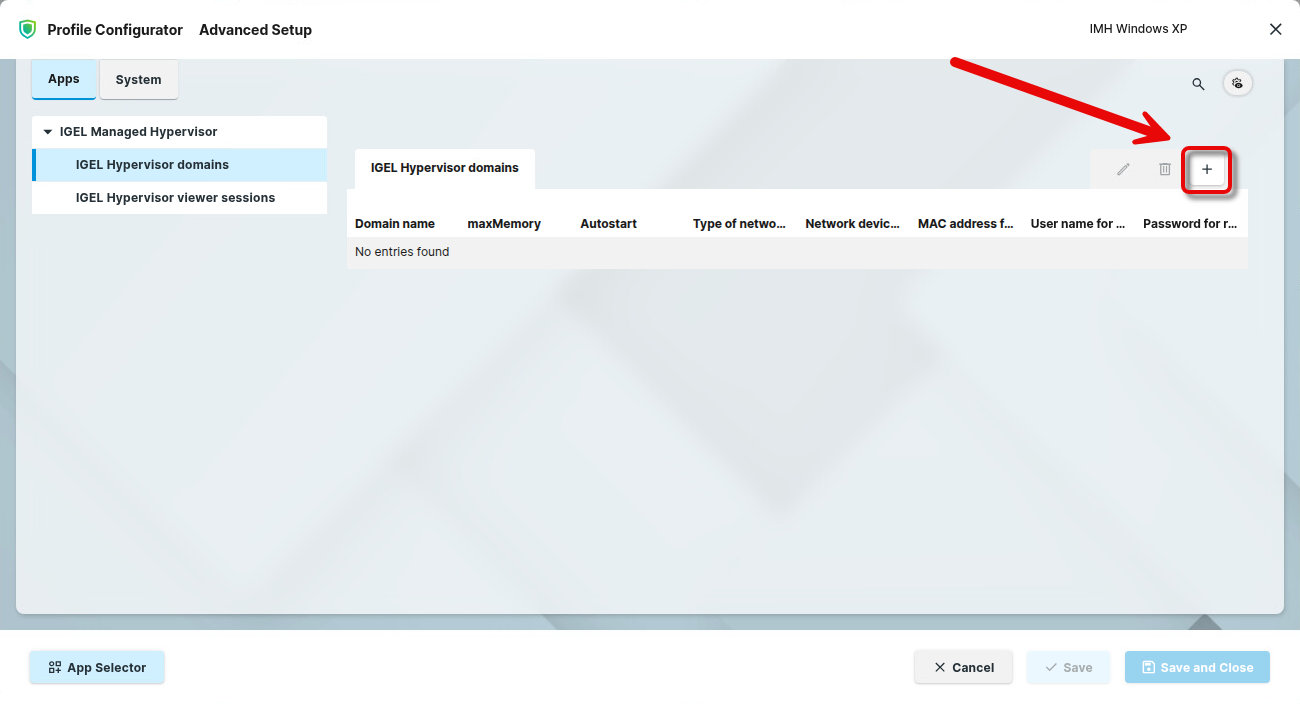
-
Edit the data according to your needs:
-
VM name: The name of the virtual machine you have created
-
VM config source URL: The URL of the XML file you have exported
-
User name for remote server: The username for read access to the WebDAV repository
-
Password for remote server: The password associated with the username
-
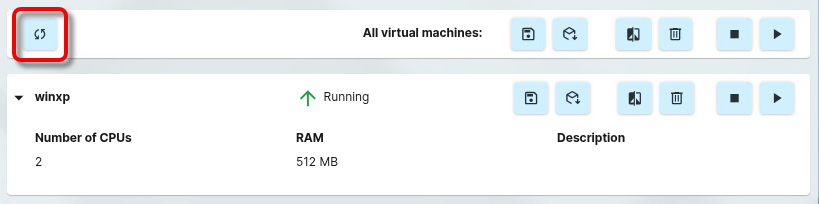
Maximum memory usage: The maximum memory (RAM) used by the virtual machine
-
Number of vCPUs: The number of virtual CPUs
-
Autostart: When enabled, the virtual machine will be started automatically
-
Disk Image is immutable: If enabled, changes in the virtual machine will be gone when it is restarted. If this is disabled (default), changes in the virtual machine will persist after a restart.
-
MAC address for virtual interface: You can specify the MAC address of your virtual machine’s network interface. This is useful if the software in your virtual machine is licensed for a specific MAC address.
-
Type of network for this VM: The following networks are supported on the target machines:
-
isolated: The network interface is deactivated in the virtual machine.
-
NAT: Network Address Translation (NAT) is used; the host machine translates the internal IP address of the virtual machine to its own IP address.
-
bridged: The network device specified in Network device used for this VM. Will be ignored for some pre-configured bridge devices is used.
-
hostonly: The preconfigured hostonly bridge is used.
-
macvtap: The network device specified in Network device used for this VM. Will be ignored for some pre-configured bridge devices is used with the macvtap driver.
-
-
Network device used for this VM. Will be ignored for some pre-configured bridge devices: Create a network interface by setting the Registry key network.interfaces.ethernet.device<NUMBER>.bridge (System tab > Registry > network > interfaces > ethernet > device<NUMBER>.bridge to own). Example: If the setting has been made for device0, the network interface will be
breth0. Enter the resulting name in this field.
-
Go to Apps > IGEL Managed Hypervisor > IGEL Hypervisor viewer sessions and click + to add a new session.
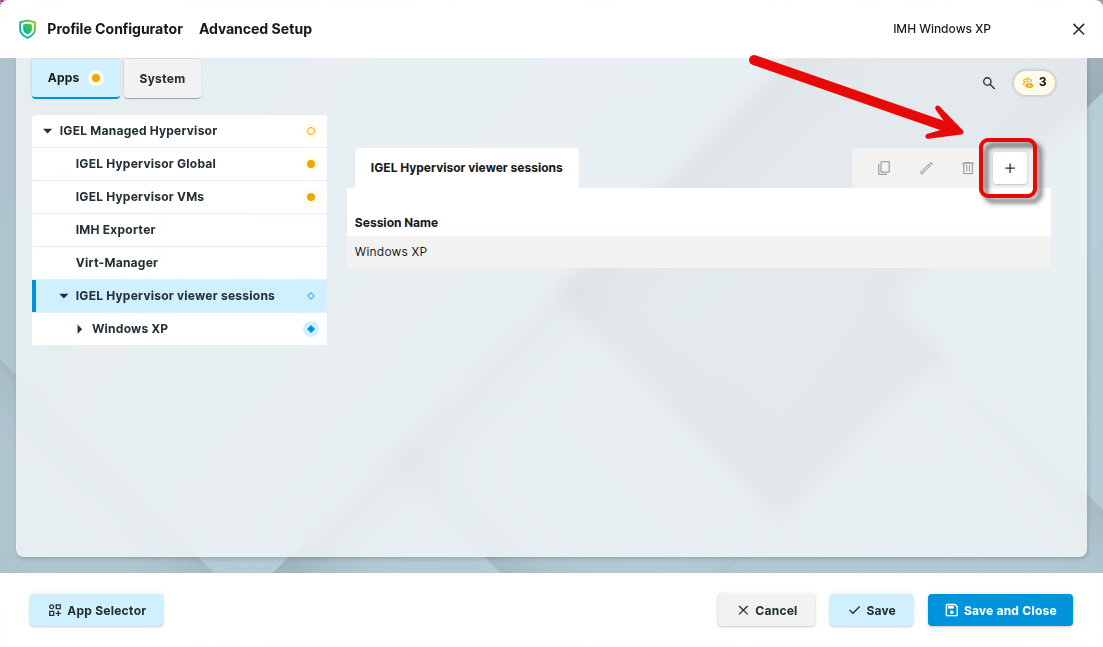
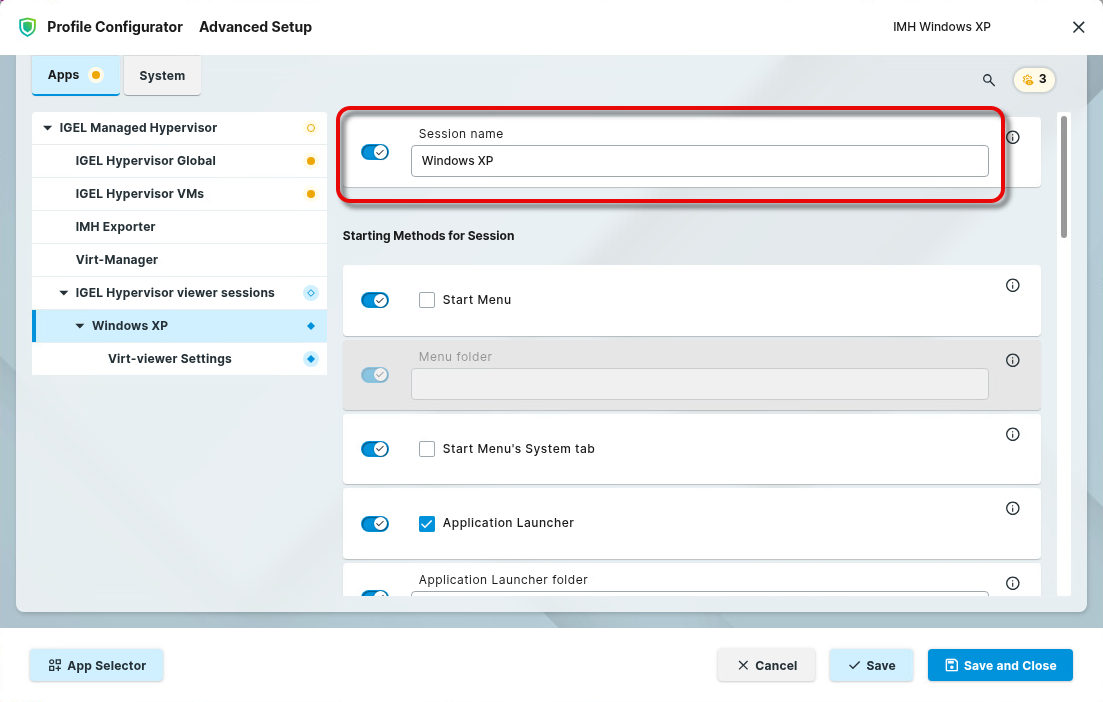
-
Enter a Session name and configure the start options according to your needs. For details on the start options, see Starting Methods for Apps .
-
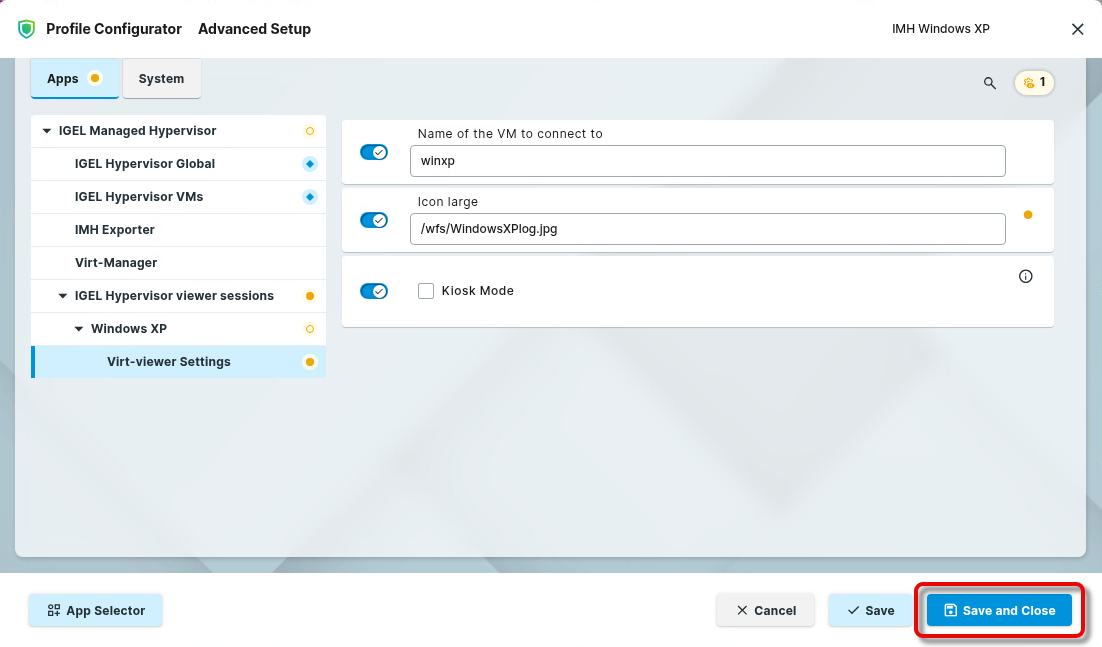
Go to Apps > IGEL Managed Hypervisor > IGEL Hypervisor viewer sessions > [session name] > Virt-viewer Settings and edit the data according to your needs:
-
Name of the VM to connect to: The name of the virtual machine you have created
-
Icon large: By default, a generic icon will be used as the start icon. You can add the path to a custom icon
-
Kiosk Mode: If enabled, the user views the virtual machine in full-screen mode with limited controls, allowing interaction only with the VM itself. The viewer automatically connects to the specified virtual machine on startup..
-
Go to Devices, select your target machine, and click Assign Object.
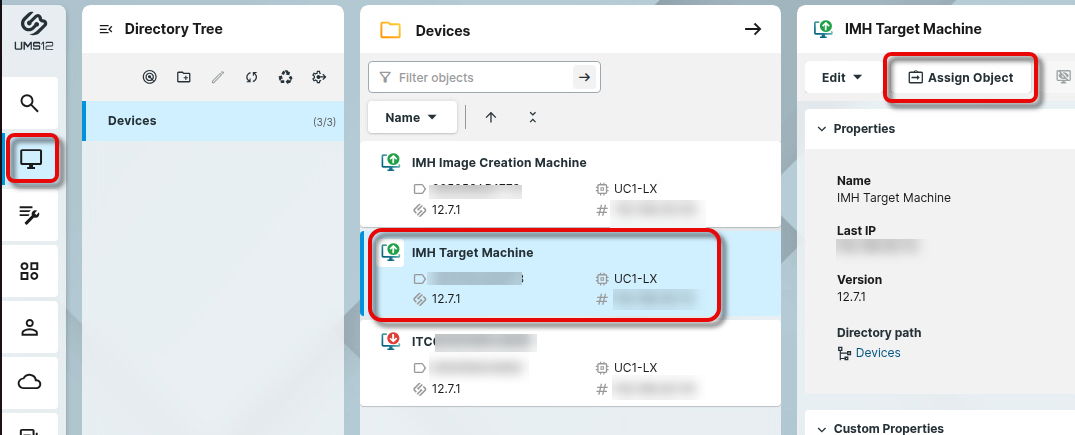
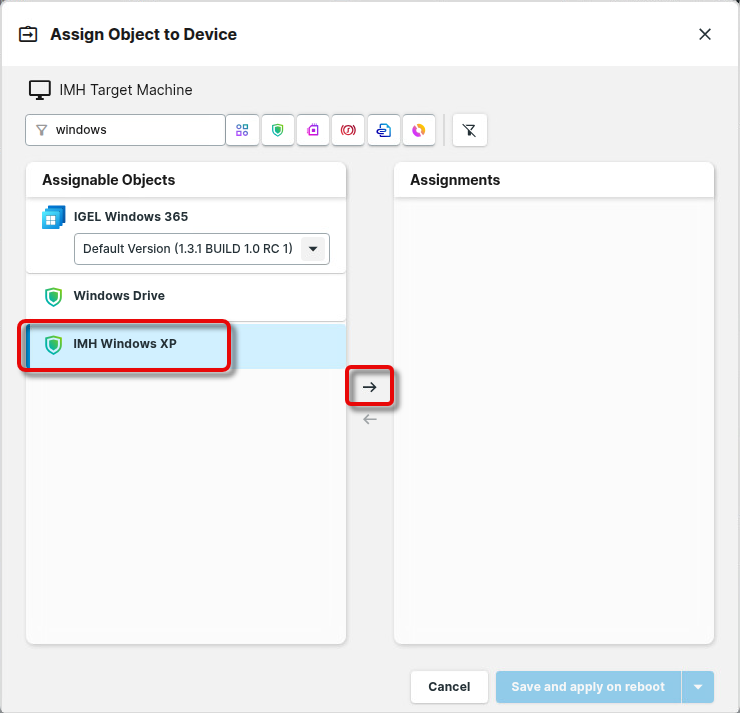
-
Find and select your profile and assign it to your device.
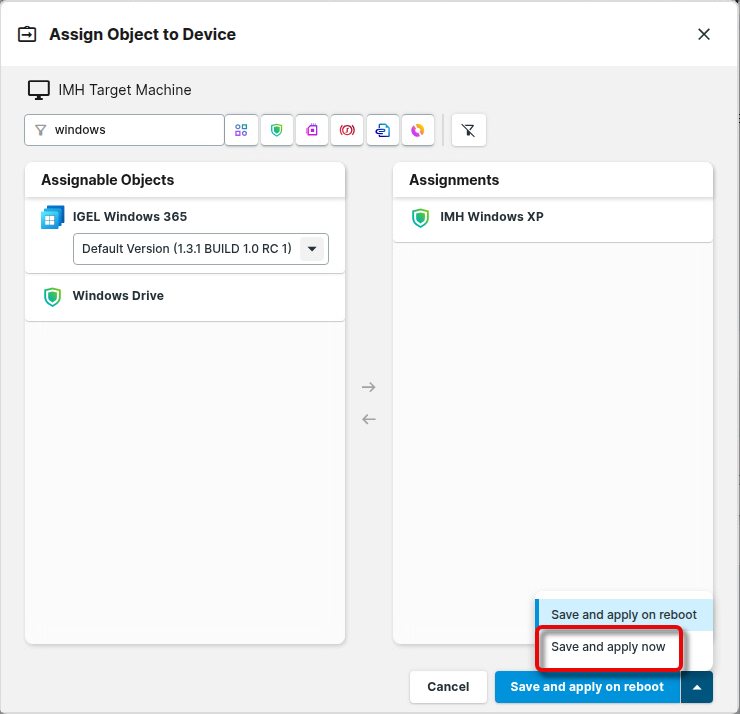
When the profile is applied, the device downloads and installs the IGEL Managed Hypervisor app. Afterward, it downloads the virtual machine from the WebDAV repository. You can now access, start, and stop the virtual machine via the start icon.
Managing the Virtual Machine via the Universal Management Suite (UMS)
When the target device has received the virtual machine and restarted, a new tab labeled Managed Hypervisor is added.
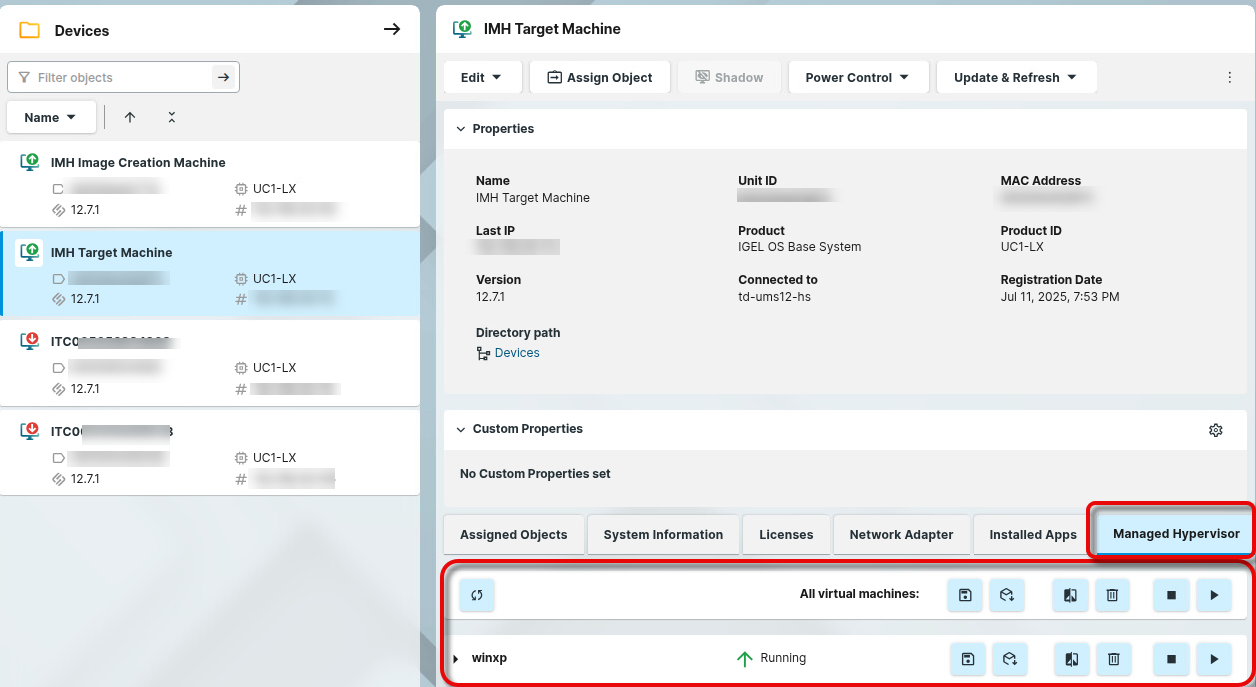
→ Click the refresh button to determine the current status of your virtual machines.
The available possibilities of managing virtual machines on endpoint devices are described below.
Starting a Virtual Machine
→ To start a virtual machine, click ![]()

Stopping a Virtual Machine
→ To stop a virtual machine, click ![]()
