IGEL OS Creator for Windows (OSCW) for IGEL OS 12 on Windows 11/10 Workstations
Introduction
The IGEL OS Creator (OSC) for Windows is able to convert any Windows 11 or Windows 10 machine to IGEL OS 12, provided that it fulfills the hardware requirements, see IGEL OS 12 Hardware Support.
Read all the following chapters and follow the instructions in the order given.
Prerequisites
Hardware
For supported hardware, see IGEL OS 12 Hardware Support.
Software
The following software and configuration must be present on the target machines:
Windows 11 or Windows 10 (32 Bit or 54 Bit)
Microsoft Bitlocker is disabled
Network
All machines are in a network that can be reached by the UMS.
For buddy mode: All machines must be joined to a Microsoft Active Directory (AD) and be accessible by the same AD user with reading permissions.
Getting the Required Software
The following software must be downloaded resp. installed:
IGEL Universal Management Suite (UMS) 12.01.100 or Higher
Download UMS 12.01.120 or higher from https://www.igel.com/software-downloads/igel-os-12-secure-endpoint/ > Universal Management Suite 12.
Update your UMS to version 12.01.120 or later resp. install UMS 12.01.120. For update instructions, see IGEL UMS Update; for installation instructions, see IGEL UMS Installation.
OSCW Files
Download OSC for Windows 1.01.100 or higher (EXE or MSI installer)
EXE file: https://www.igel.com/software-downloads/igel-os-12-secure-endpoint/ > OS Creator for Windows >
setup-igel-osc-for-windows_2.1.0.exeMSI file: https://www.igel.com/software-downloads/igel-os-12-secure-endpoint/ > OS Creator for Windows >
setup-igel-osc-for-windows_2.1.0.msi
Download IGEL OS 12.4.1 or higher (ISO): https://www.igel.com/software-downloads/igel-os-12-secure-endpoint/ > OS Creator (Deployment Tool (USB) for IGEL OS 12) >
osc-12.4.1.zip
Check List
![]() The UMS is updated to version 12.01.120 or higher.
The UMS is updated to version 12.01.120 or higher.
![]() OSC for Windows 2.1.0 or higher is available.
OSC for Windows 2.1.0 or higher is available.
![]() IGEL OS 12.4.1 or higher (ISO file) is available.
IGEL OS 12.4.1 or higher (ISO file) is available.
Transferring the IGEL OSC File to the UMS
In this step, we will transfer the IGEL OS firmware file (ISO) to the UMS so that the UMS can deploy it to the target machines.
Do not register the file as a file object. This might lead to various issues, particularly in ICG and HA environments.
Get access to the file system of the machine on which your UMS Server is running.
Copy
osc-<version>.isoto<UMS Installation directory>\rmguiserver\webapps\ums_filetransfer
Deploying the OSCW Installer on the Target Machines
In this step, we will deploy the OSCW installer on the target machines.
Deploy the installer on all devices that are to be converted. The following methods are available for deployment:
SCCM (System Center Configuration Manager):
→ Use the MSI installer (setup-igel-osc-for-windows_2.1.0.msi) and deploy it just like any software. The OSCW installer is installed silently.Group policy:
→ Use the MSI installer (setup-igel-osc-for-windows_2.1.0.msi) and deploy it just like any software. The OSCW installer is installed silently.File-based methods:
→ Transfer the EXE file (setup-igel-osc-for-windows_2.1.0.exe) to your target machines and install it on each machine; see Installing the OSCW Installer from a FIle.
You can use file sources such as:USB memory stick
Network drive
DVD
Installing the OSCW Installer from a File
On the target machine, double-click
setup-igel-osc-for-windows_2.1.0.exeand confirm the Windows UAC (user account control). The OSCW installer is digitally signed by "IGEL Technology GmbH".
The setup wizard opens.Read the licence agreement, accept it and click Next.
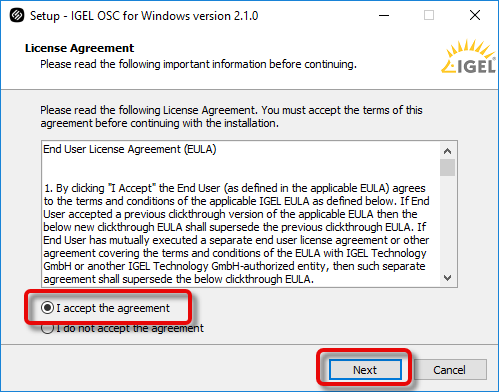
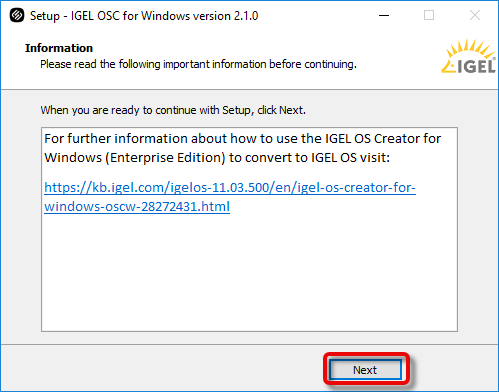
Click Next to install IGEL OS Creator for Windows on your device.
Check List
![]() The OSCW installer is installed on each target machine.
The OSCW installer is installed on each target machine.
Registering the Target Machines to the UMS
In this step, we will register all target machines to the UMS. This is necessary because the conversion to IGEL OS will be triggered by the UMS.
Two registration methods are available: a scan by the UMS and automatic registration.
Registering by a UMS Scan
Open the UMS Console and click
 to scan for devices.
 Select the scope in which the devices are located; for details, see How to Scan the Network for Devices and Register Devices on the IGEL UMS.
Click Scan.
The dialog Found devices opens.In the Filter field, enter "IGEL Unified Management Agent OSCW".

Select all target machines and click Ok.
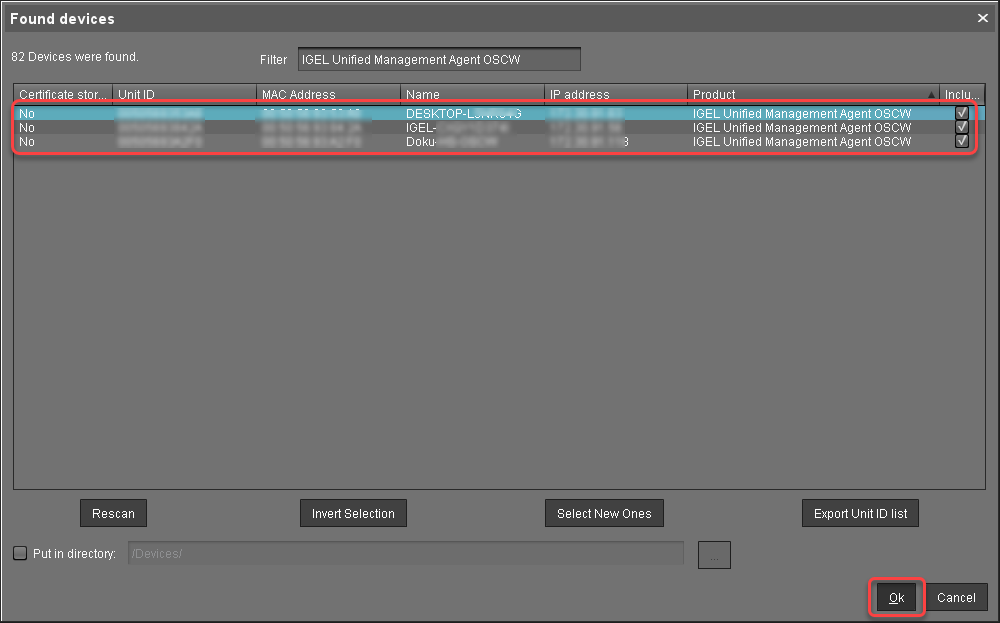
The target machines are registered with the UMS.
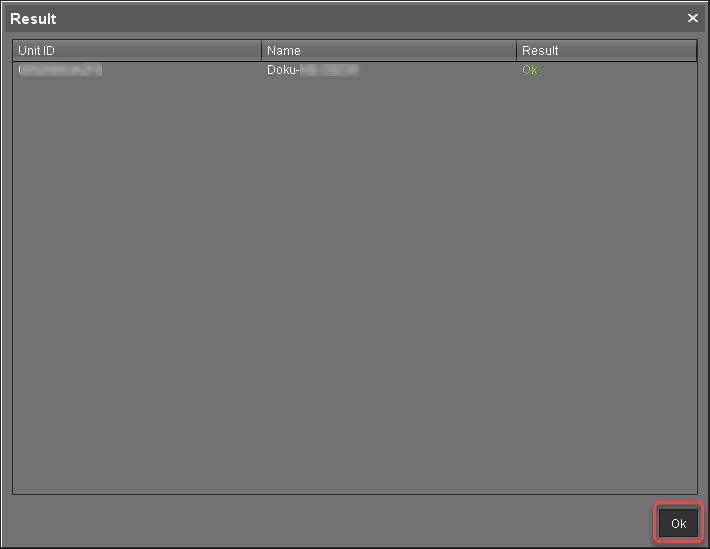
In the Result dialog, click Ok.
Registering by Automatic Registration
For this method, a DNS entry or DHCP option must be set.
→ Follow the instructions in Registering Devices Automatically on the IGEL UMS .
Check List
![]() All target machines are registered with the UMS.
All target machines are registered with the UMS.
Configuring the OSCW Installer
In this step, we will provide the OSCW installer with the download source for the ISO file that contains the IGEL OS Creator.
Two methods are available:
Configuring the OSCW Installer in Normal Mode: Each target machine individually downloads the ISO file from the server (UMS). This increases the amount of outgoing traffic from the UMS.
Configuring the OSCW Installer in Buddy Mode: This method is recommended if the connection bandwidth of the download source is limited; it ensures a more balanced use of network bandwidth during the distribution of the ISO file to the target machines. First, a group of target machines downloads the ISO file. Then, these machines serve as the download source ("update buddies") for the remaining target machines. As a requirement, all devices must be joined to a Microsoft Active Directory (AD) and be accessible by the same AD user with reading permissions.
Configuring the OSCW Installer in Normal Mode
To provide the OSCW installer with the download source for the IGEL OS Creator file (ISO), we will create a profile that provides the path to that file. To assign the profile to the target machines, we will use a view that recognizes the target machines by their product ID.
The configuration comprises the following steps:
Creating a Profile
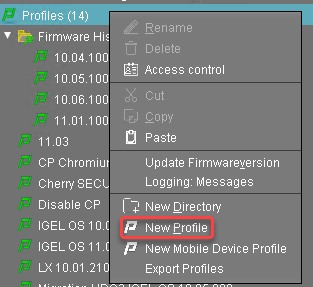
In the structure tree of the UMS Console, go to Profiles and open New Profile in the context menu.
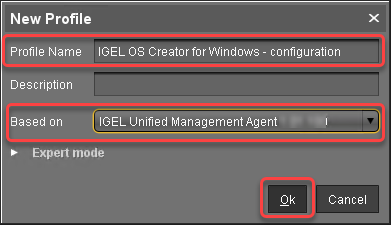
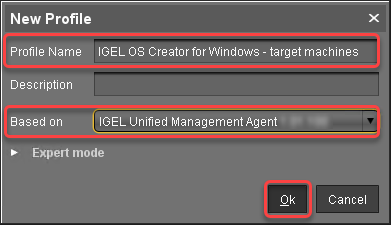
In the New Profile dialog, change the settings as follows and confirm with Ok.
Profile Name: A name for the profile, e. g. "IGEL OS Creator for Windows - configuration"
Based on: Select "IGEL Unified Management Agent 2.01.0".
The configuration dialog opens.
Click Converter.
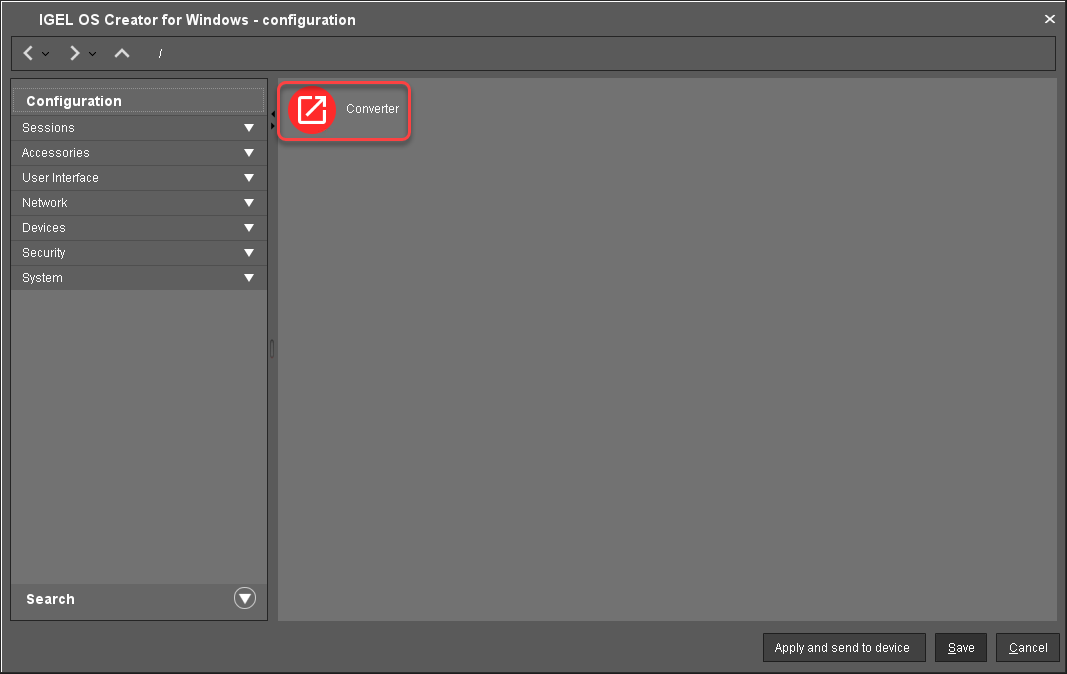
You are taken to System > OSC > Converter where you can set all relevant parameters.
Change the settings as follows (click the
 icon to enable the configuration; the icon will change to
  ):
):Download URL of IGEL OS Creator: Enter
https://[IP address of your UMS Server]:8443/ums_filetransfer/ orhttp://[IP address of your UMS Server]:9080/ums_filetransfer/
Example:https://192.168.178.100:8443/ums_filetransfer/orhttp://192.168.178.100:9080/ums_filetransfer/Username: Enter the username for the UMS.
Password: Enter the password for the UMS user.

Click Save.
Creating a View to Select All Target Machines
The target machines must be selected to assign the profile to them. For the selection, a view will be used.
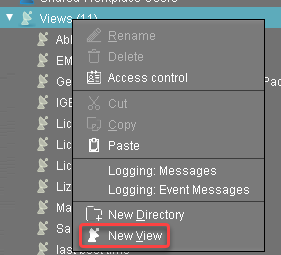
In the structure tree of the UMS Console, go to Views and select New View in the context menu.
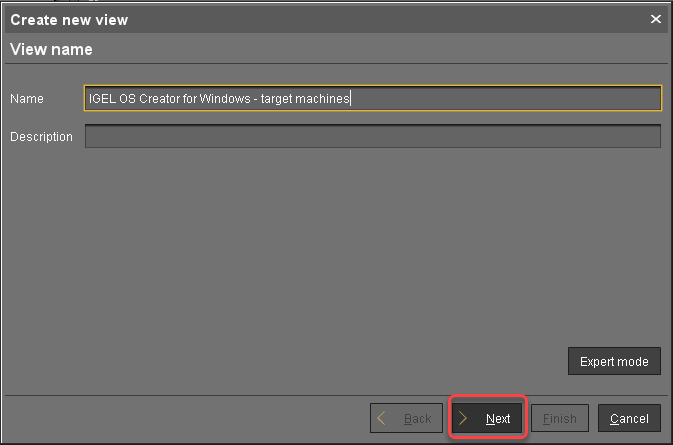
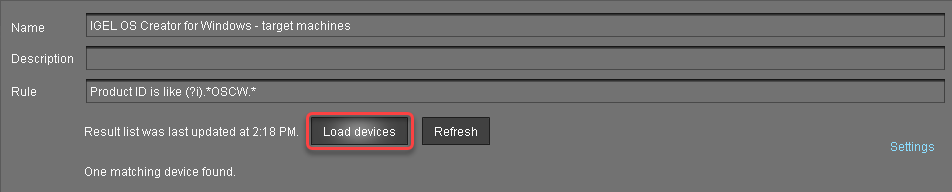
Enter a name for the view, e.g. "IGEL OS Creator for Windows - target machines" and click Next.
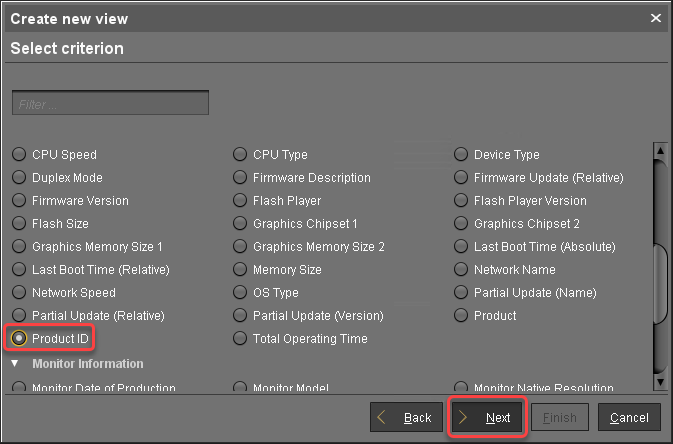
On the Select criterion page, select Product ID and click Next.
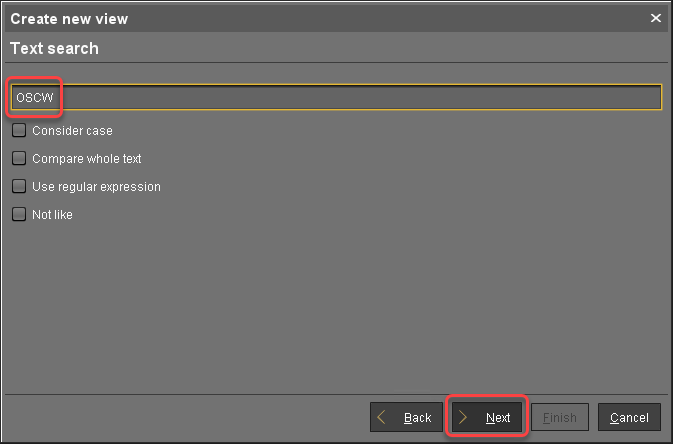
On the Text search page, enter "OSCW" and click Next.
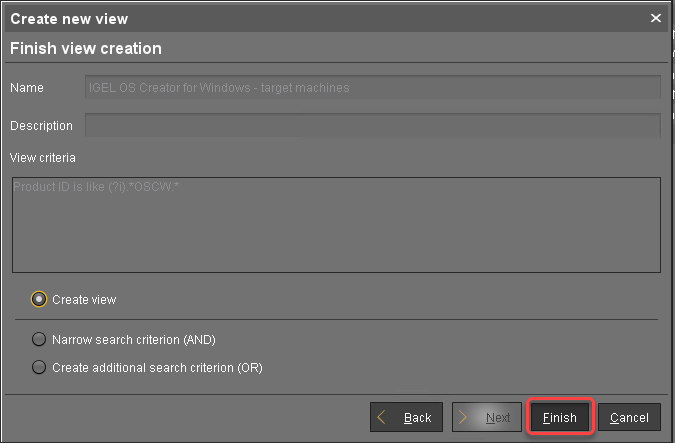
On the Create new view page, click Finish.
The number of matches is shown.
Click Load devices to view the target machines.
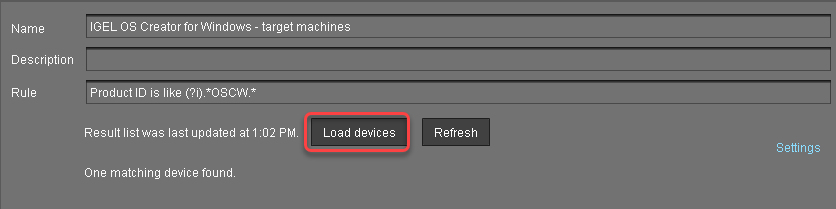
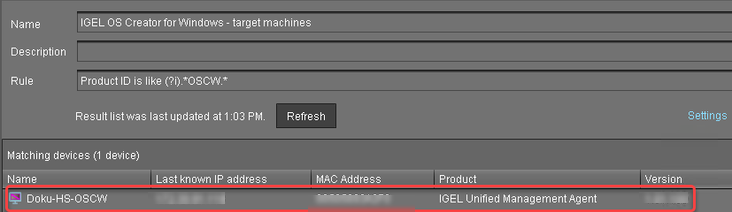
The target machines are shown.
Assigning the Profile to the Target Machines
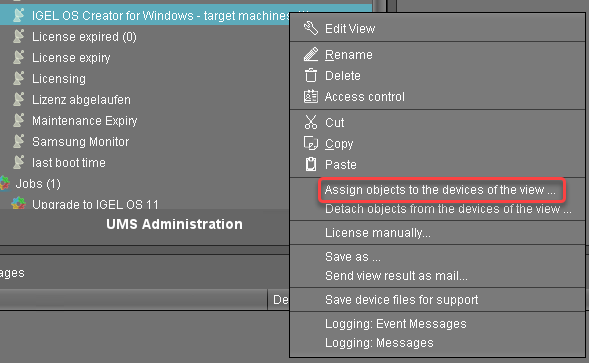
Select the view you have created beforehand and select Assign objects to the devices of the view .....
In the Assign objects dialog, select the profile you have created beforehand, click
 to assign it and then click Ok.
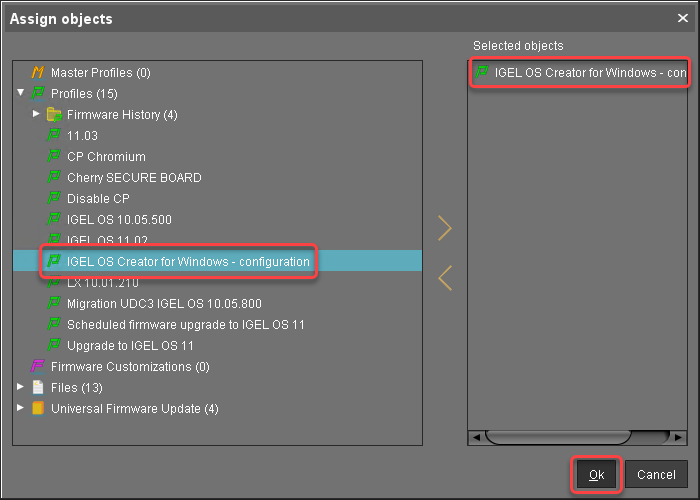
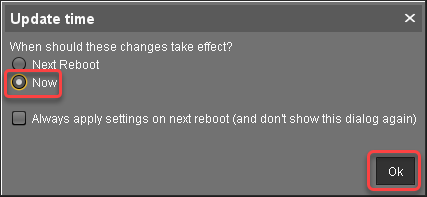
In the Update time dialog, select Now and click Ok.
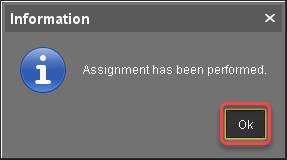
Confirm the Information dialog.
The target machines download the ISO file. This may take a few minutes.
Monitoring the Process
In the structure tree of the UMS, open the context menu of one of the target machines and select Other commands > Refresh system information.
In the dialog, click Refresh system information and then
 from time to time.
In the Attribute area, under Firmware Description, the current status of the OSC installation is shown.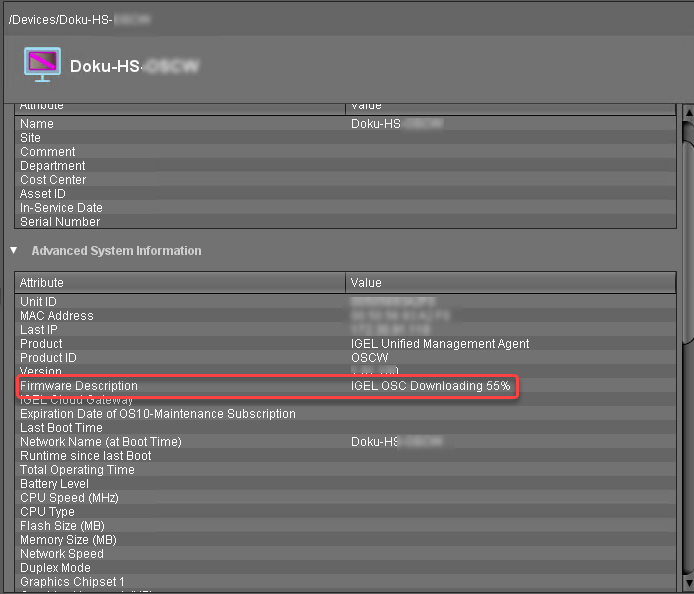
When a device is ready, the value of Firmware Description changes to "IGEL OSC Ready for Conversion".
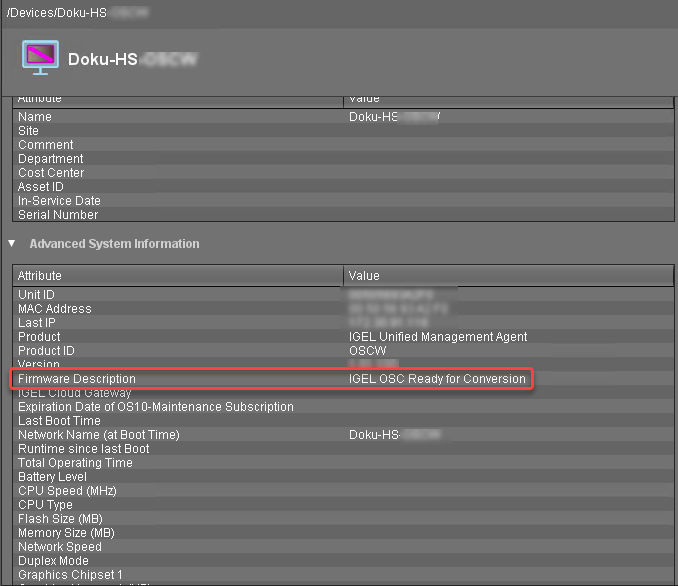
When Firmware Description reads "IGEL OSC Ready for Conversion", continue with Starting the Conversion 1.
Check List
![]() The conversion profile is assigned to all target machines.
The conversion profile is assigned to all target machines.
![]() All target machines have downloaded the IGEL OS 11 Creator (ISO), which is indicated by the Firmware Description "IGEL OS Ready for Conversion".
All target machines have downloaded the IGEL OS 11 Creator (ISO), which is indicated by the Firmware Description "IGEL OS Ready for Conversion".
Next Step
Configuring the OSCW Installer in Buddy Mode
The target machines designated as update buddies download the ISO file containing the IGEL OS firmware from the UMS. When they have downloaded the file, the remaining target machines download it from the update buddies.
Make sure that all devices are joined to a Microsoft Active Directory (AD) and are accessible by the same AD user with reading permissions.
First, we create a profile for the update buddies that provides the OSCW installer with the download source for the ISO file. Then, we will assign this profile to the update buddies; the assignment of the profile triggers the update buddies to download the file. After that, we create a profile for the remaining target machines which configures them to use the update buddies. When the update buddies have downloaded the file, we can assign the profile to the remaining target machines. On assignment, each target machine selects an update buddy automatically and starts downloading the file from it.
The configuration comprises the following steps:
Creating a Profile for the Update Buddies
In the structure tree of the UMS Console, go to Profiles and open New Profile in the context menu.
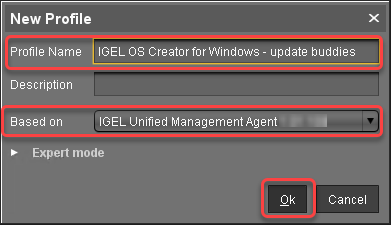
In the New Profile dialog, change the settings as follows and click Ok:
Profile Name: A name for the profile, e. g. "IGEL OS Creator for Windows - update buddies"
Based on: Select "IGEL Unified Management Agent 2.1.0".
The configuration dialog opens.
Click Converter.
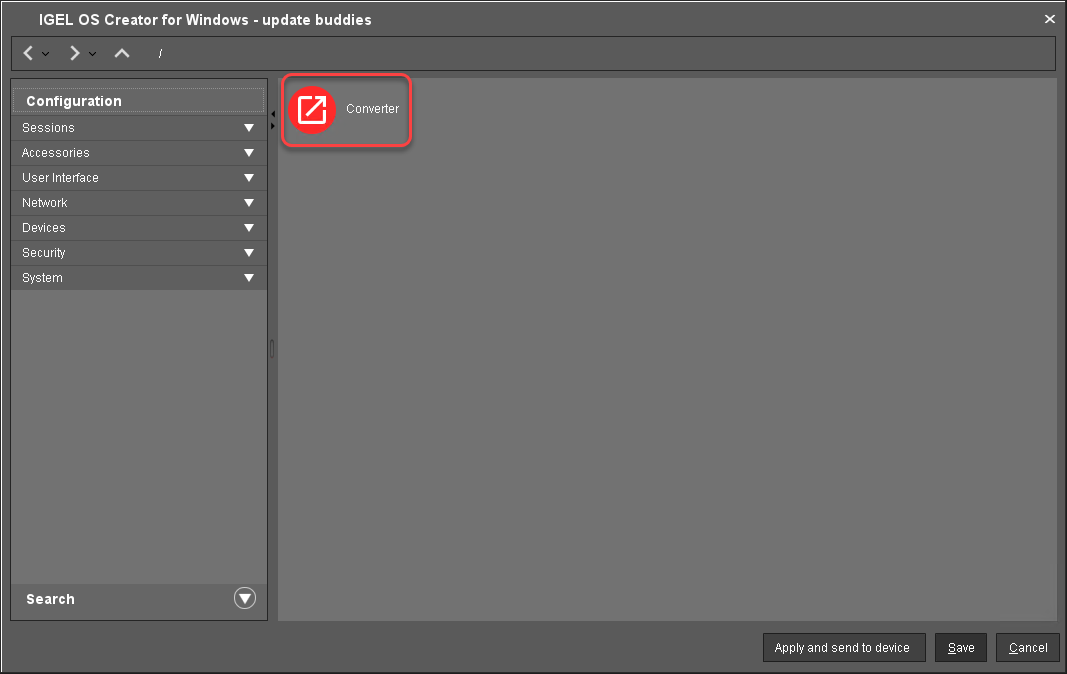
You are taken to System > OSC > Converter where you can set all relevant parameters.
Change the settings as follows (click the
icon to enable the configuration; the icon will change to ):Download URL of IGEL OS Creator: Enter
https://[IP address of your UMS Server]:8443/ums_filetransfer/orhttp://[IP address of your UMS Server]:9080/ums_filetransfer/
Example:https://192.168.178.100:8443/ums_filetransfer/orhttp://192.168.178.100:9080/ums_filetransfer/Username: Enter the username for the UMS.
Password: Enter the password for the UMS user.

Click Save.
Assigning the Profile to the Update Buddies
In the structure tree of the UMS console, select the machines that will serve as update buddies and click
 in the Assigned objects area.
Select the update buddies profile, click
 and then Ok.
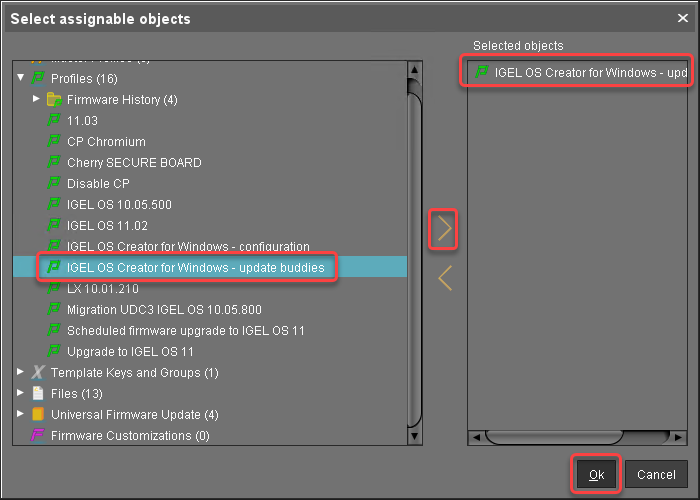
In the Update time dialog, select Now and click Ok.
Checking If the Update Buddies Are Ready
Perform the following check for each update buddy:
In the structure tree of the UMS, open the context menu of the update buddy and select Other commands > Refresh system information.
In the dialog, click Refresh system information and then
 every few seconds.
In the Attribute area, under Firmware Description, the current status of the download is shown. When it reads "IGEL OSC Ready for Conversion", the update buddy is ready for use.
Creating a Profile for the Remaining Target Machines
In the structure tree of the UMS Console, go to Profiles and open New Profile in the context menu.
In the New Profile dialog, change the settings as follows:
Profile Name: A name for the profile, e. g. "IGEL OS Creator for Windows - target machines"
Based on: Select "IGEL Unified Management Agent 2.1.0".
Click Ok.
The configuration dialog opens.
Click Converter.

You are taken to System > OSC > Converter where you can set all relevant parameters.
Change the settings as follows (click the
 icon to enable the configuration; the icon will change to
  ):
):Select Buddy Mode.
Username: Common username in Microsoft Active Directory for all target machines, including the update buddies.
Password: Common password associated with the Username.
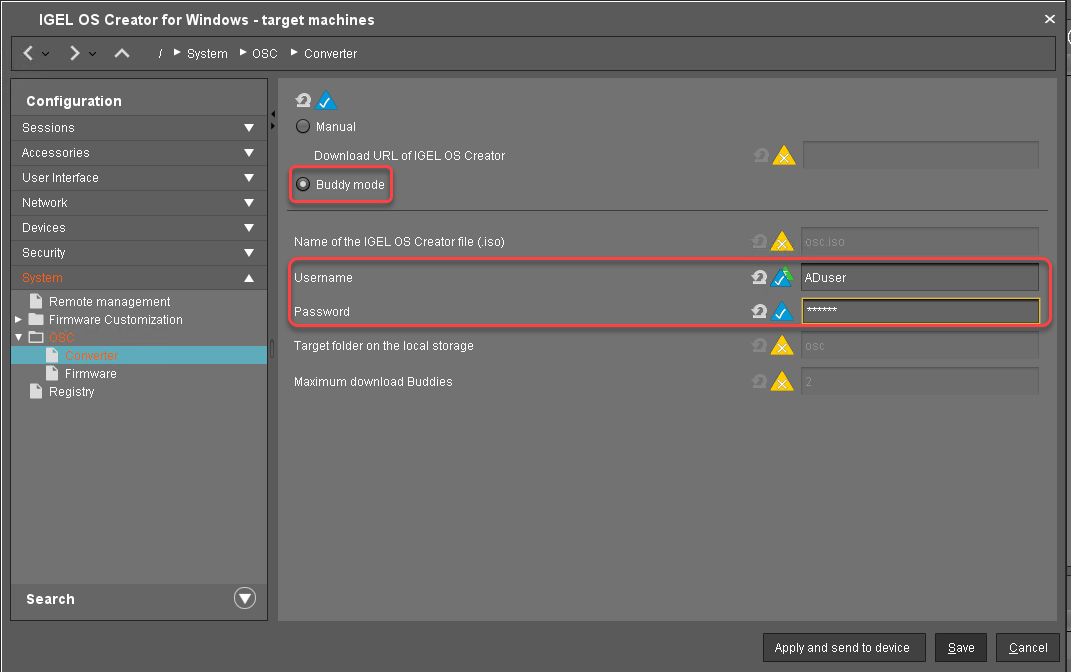
Click Save.
Creating a View to Select the Target Machines
The target machines must be selected in order to assign the profile to them. For the selection, a view will be used.
In the structure tree of the UMS Console, go to Views and select New View in the context menu.
Enter a name for the view, e. g. "IGEL OS Creator for Windows - target machines" and click Next.
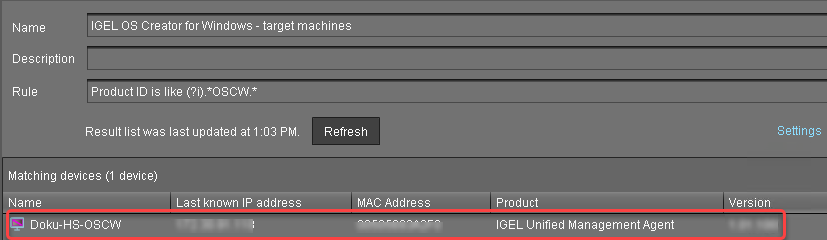
On the Select criterion page, select Product ID and click Next.
On the Text search page, enter "OSCW" and click Next.
On the Create new view page, click Finish.
The number of matches is shown.
Click Load devices to view the target machines.
The target machines are shown.
Assigning the Profile to the Target Machines
Select the view you have created beforehand and select Assign objects to the devices of the view .....
In the Assign objects dialog, select the profile for the target machines, click
 to assign it and then click Ok.
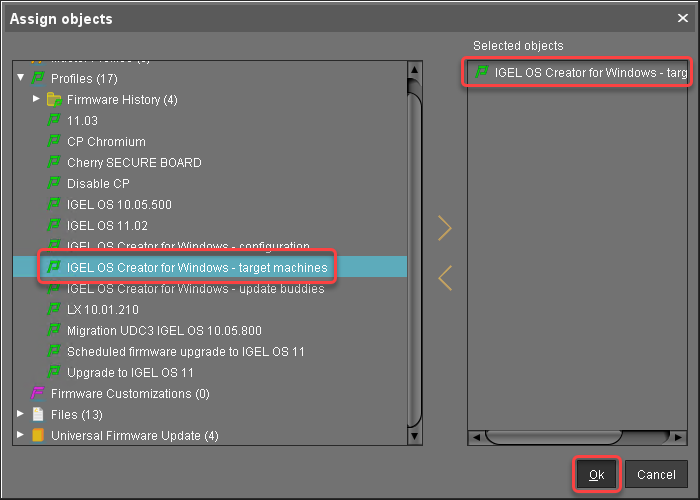
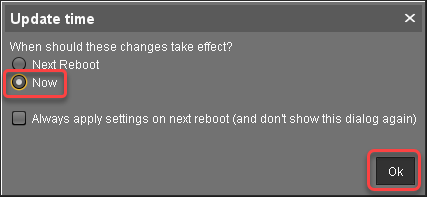
In the Update time dialog, select Now and click Ok.
Confirm the Information dialog.
The target machines download the ISO file.
Monitoring the Process
In the structure tree of the UMS, open the context menu of one of the target machines and select Other commands > Refresh system information.
In the dialog, click Refresh system information and then
every few seconds.
In the Attribute area, under Firmware Description, the current status of the download is shown.
When a device is ready, the value of Firmware Description changes to "IGEL OSC Ready for Conversion".

When Firmware Description reads "IGEL OSC Ready for Conversion", continue with Starting the Conversion 1.
Check List
![]() The conversion profile is assigned to all target machines.
The conversion profile is assigned to all target machines.
![]() All target machines have downloaded the OSCW ISO file, which is indicated by the Firmware Description "IGEL OS Ready for Conversion".
All target machines have downloaded the OSCW ISO file, which is indicated by the Firmware Description "IGEL OS Ready for Conversion".
Next Step
Starting the Conversion in IGEL OS Creator
In the UMS structure tree, select the view you have created for selecting the target machines, and click Load devices.
Select all machines and in the context menu, select Specific Device Command.
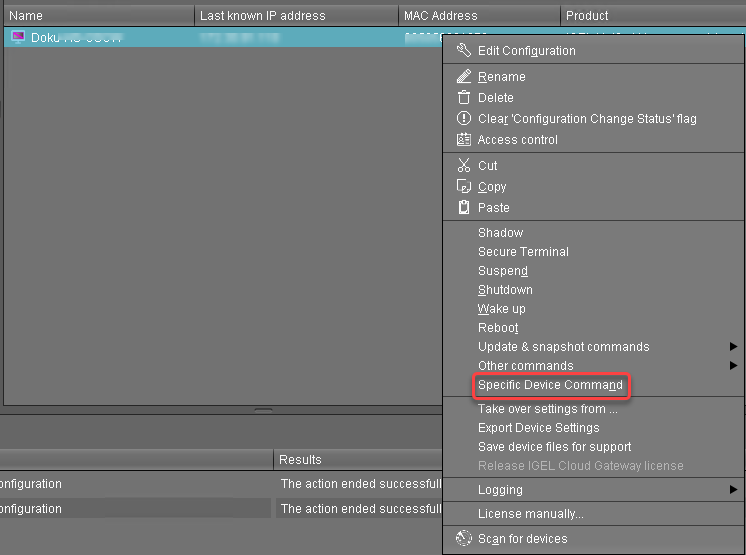
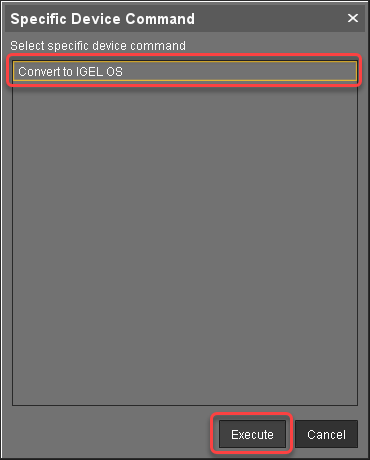
In the Specific Device Command dialog, select Convert to IGEL OS and click Execute.
On the devices, a dialog is displayed. When the dialog is confirmed, the conversion starts immediately. If the dialog is not confirmed, the conversion starts after 20 seconds.
When the conversion is complete, the Product information in the UMS is changed to "IGEL OS 12".