Upload and Assign Files in the IGEL UMS Web App
In the IGEL Universal Management Suite (UMS) Web App, you can upload files as configuration objects. Then, you can distribute these files to your devices through assignment. For information on configuration objects, see Configuration - Centralized Management of Device Settings in the IGEL UMS Web App.
Files cannot currently be deleted in the UMS Web App. Use the UMS Console, instead.
Menu path: UMS Web App > Configuration
File Upload
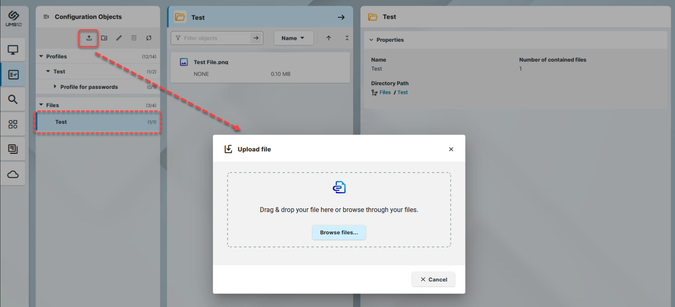
Select a folder under Files. The file will be uploaded here.
Click the Upload file button.

Browse or drag&drop the file.
You can only upload one file at a time.
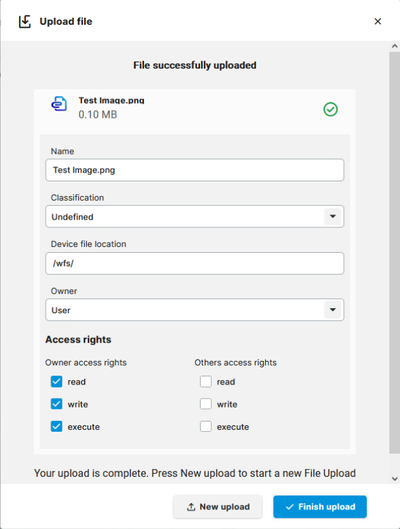
As soon as the file upload begins, you can edit the properties.

Under Classification, select the type of file. This serves to automatically establish suitable storage locations and file authorizations. Choose between:
Undefined
Web browser certificate
SSL certificate
Java certificate
IBM iAccess certificate
App signing certificate
Common certificate
For information on certificate deployment, see the section Deploying Certificates via the UMS in IGEL OS > Deploying Trusted Root Certificates in IGEL OS.
If you set the classification to Undefined, specify the path in the devices's local file system under Device file location.
Paths must end with a path separator – a slash "/" or a backslash "\". If you enter a directory which does not yet exist, it will be created automatically.Because of its space limit, the use of the/wfs/folder is NOT recommended for large files (>2 MB).For the Undefined classification, set the Owner and the Access rights.
These will be attached to the file when it is transferred to the device and will be used on the destination system.Click Finish upload to confirm the settings and close the dialog or New upload to upload another file.
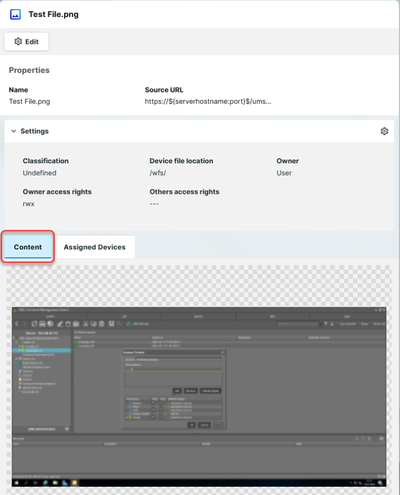
Once the upload is finished, you can preview the uploaded file under the Content tab. A preview is only shown for files uploaded through the IGEL UMS Web App.
When you upload a file with a filename that already exists, the new filename gets modified according to the format {filename}({n}), where n specifies how many files exist with the same name. For example, Logo(1).png, Logo(2).png. In the UMS Web App, this is only visible in the Source URL but not in the Name of the file.
Uploaded files can be managed both in the IGEL UMS Web App and UMS Console. For details on managing files in the UMS Console, see Files - Registering Files on the IGEL UMS Server and Transferring Them to Devices.
File Assignment
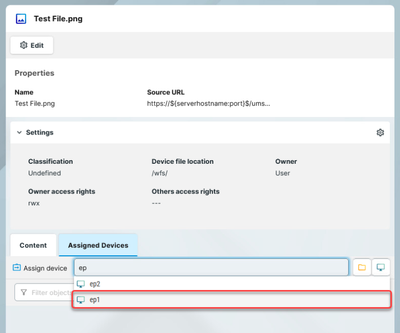
In the Configuration area, you can quickly assign individual files through the Assigned Devices tab.
Select the file you want to assign.
In the information dialog, go to the Assigned Devices tab.

Start typing the name of the device or device directory.
In the displayed list, click on the device or device directory to assign the file.
Confirm the assignment.
You can also assign files as any other objects through the Devices area. For more on object assignment, see How to Assign Objects in the IGEL UMS Web App.
