This article provides instructions for configuring an AWS Application Load Balancer (ALB) with mTLS support to prepare for installing an IGEL Universal Management Suite (UMS) Server on an Amazon Elastic Compute Cloud (EC2) instance.
For details on the general network configurations, see IGEL Universal Management Suite Network Configuration.
Overview
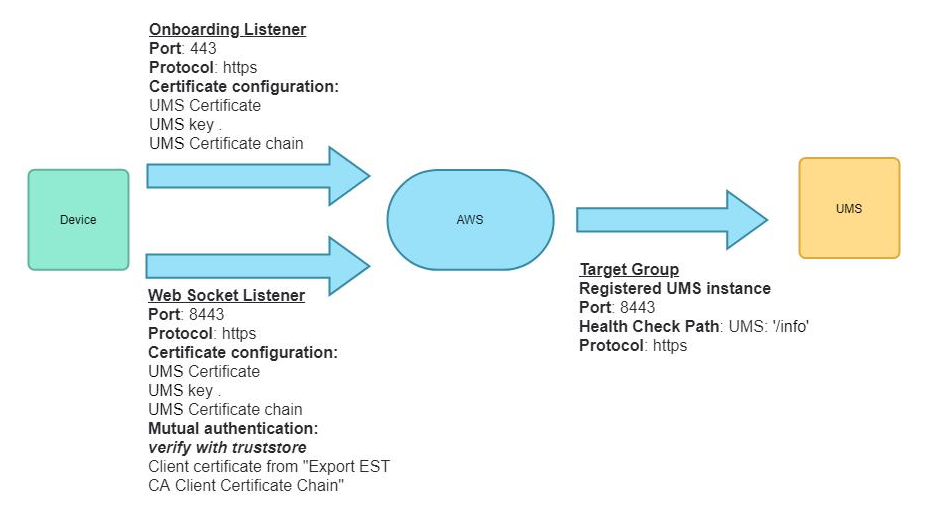
We set up an Application Load Balancer (ALB) in AWS to securely expose the UMS Server application, running on port 8443, with HTTPS and mTLS enabled.
The AWS loadbalancer offers two different types of Mutual Authentication (mTLS) support:
-
Verify with Truststore
The Client Certificate is verified by the AWS load balancer. The ALB requires a Client Certificate Chain to verify the Client Certificate. This chain must be added in to a truststore stored in S3.
The request is then forwarded including the Client Certificate Leaf to the backend. -
Passthrough
The Client Certificate Chain is forwarded to the backend without a verification. (For the related configuration, see Alternative Configuration with mTLS Passthrough.)
To support client certificates forwarded from the ALB, the UMS Server must be configured to support Base64 decoding by setting the encodingType to URL_AWS.
|
Component |
Value |
|---|---|
|
ALB Type |
Application Load Balancer |
|
Scheme |
Internet-facing |
|
Listener Port |
HTTPS 8443 & 443 |
|
Target |
EC2 Instance running UMS |
|
mTLS |
Enabled (on port 8443) |
|
Trust Store |
Client Certificate Chain in S3 bucket |
|
Encoding |
|
AWS Configuration
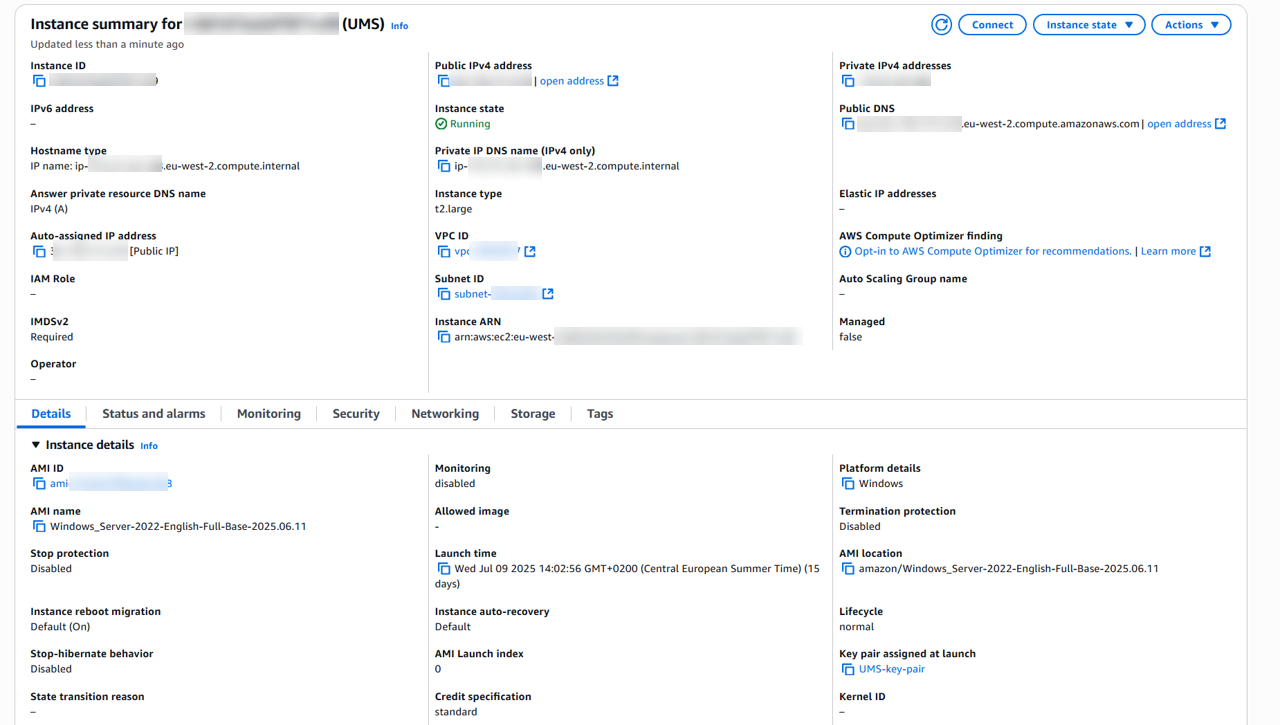
Setting up an EC2 Instance
-
Launch a new EC2 instance using the Windows Server 2022 AMI with the following settings:
-
Ensure the instance has a security group allowing HTTPS (8443) inbound traffic from the ALB's security group.
-
Assign a static public IP address
-
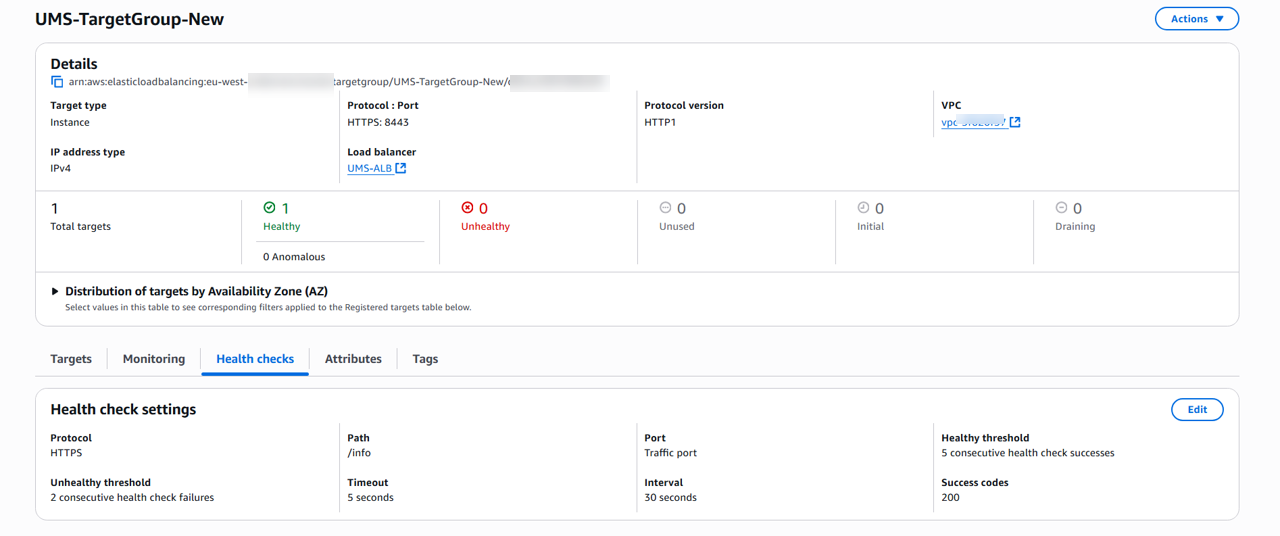
Creating a Target Group
-
Create a new Target Group, e.g. with “UMS-TargetGroup“ as the name, with the following settings:
-
Target type:
Instance -
Protocol : Port:
HTTPS : 8443 -
Health check path:
-
UMS:
/info -
ICG:
/usg/check-status
-
-
Success codes:
200
-

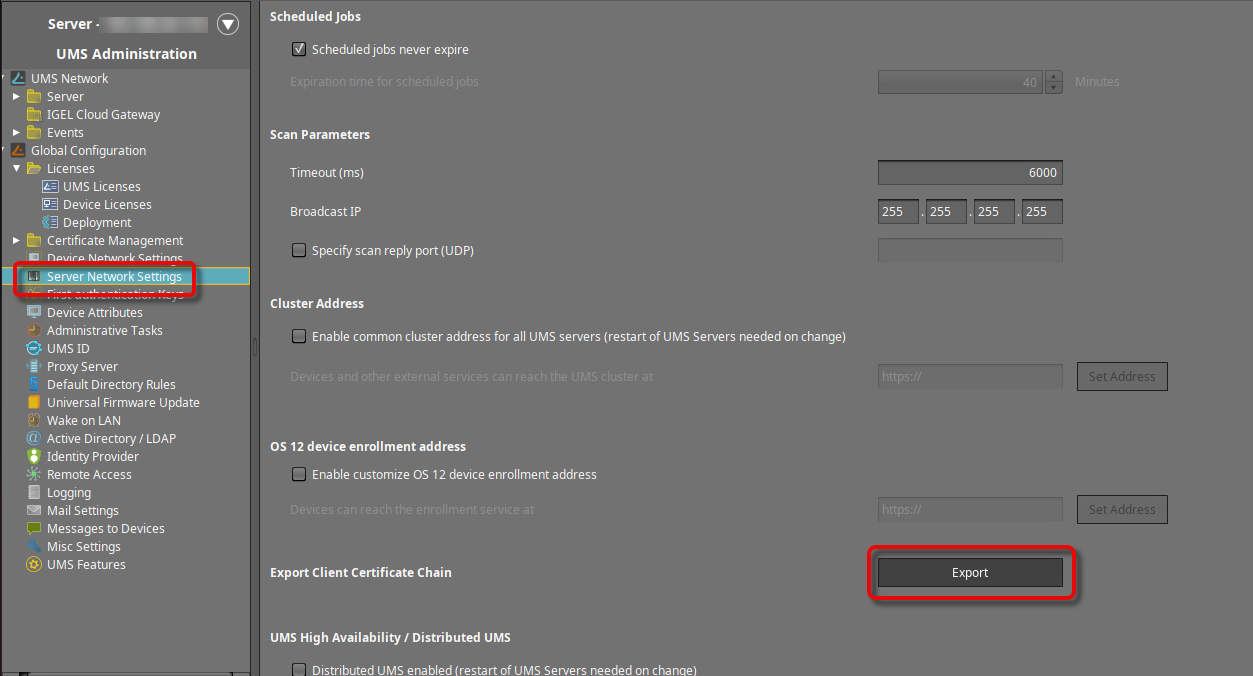
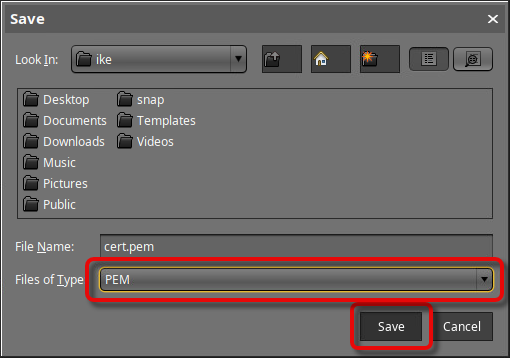
Exporting the CA Certificate Chain from the UMS
→ In the UMS Console, go to UMS Administration > Global Configuration > Server Network Settings > Export Client Certificate Chain, click Export, and save the certificate file in PEM format to a suitable location.
Creating a Trust Store with the UMS CA Certificate Chain via S3
→ Create an S3 bucket and upload the CA certificate chain you have just created.
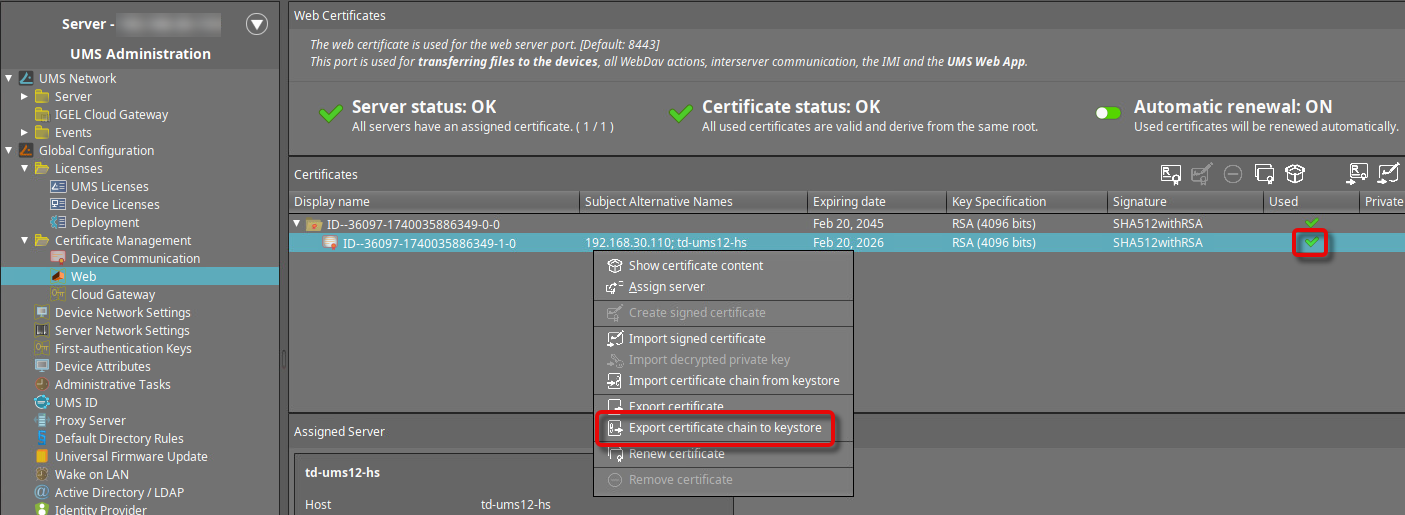
Exporting the UMS Web Certificate Chain
-
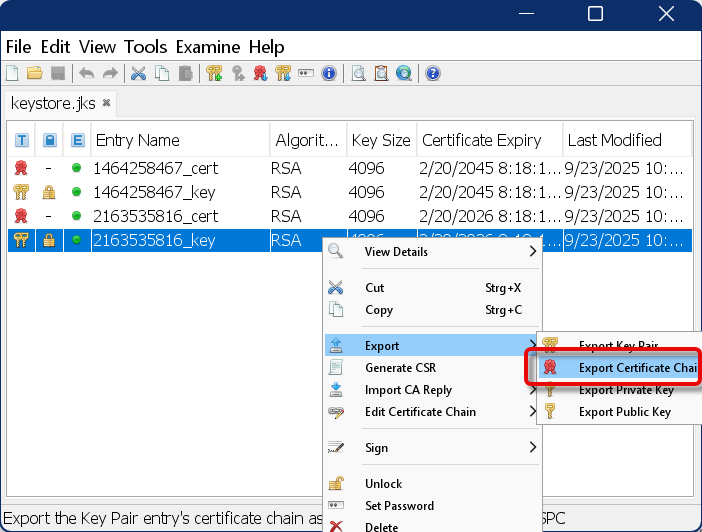
Select the web certificate that is currently in use, open the context menu, and click Export certificate chain to keystore.
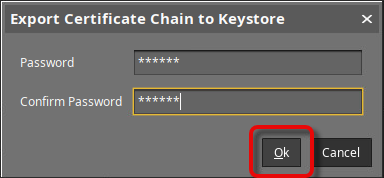
-
Set a password for the keystore.
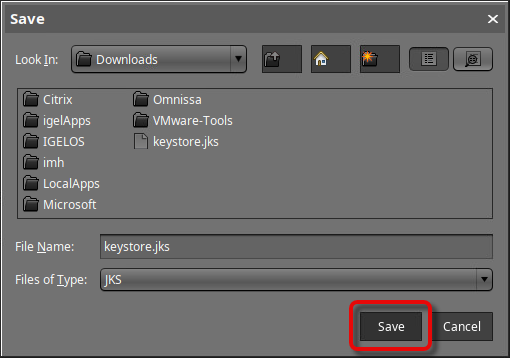
-
Save the keystore file to a suitable location.
-
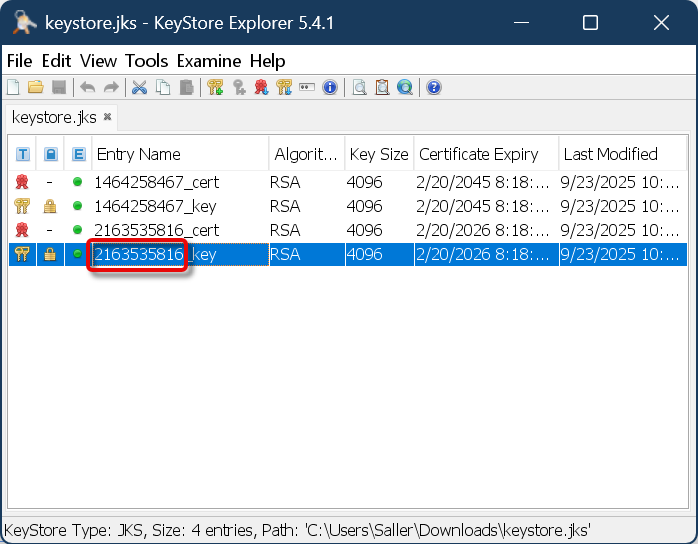
Open the keystore file with a suitable tool, e.g., KeyStore Explorer.
-
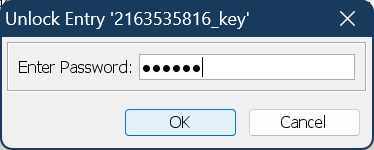
Enter the password you have defined during the export from the UMS.
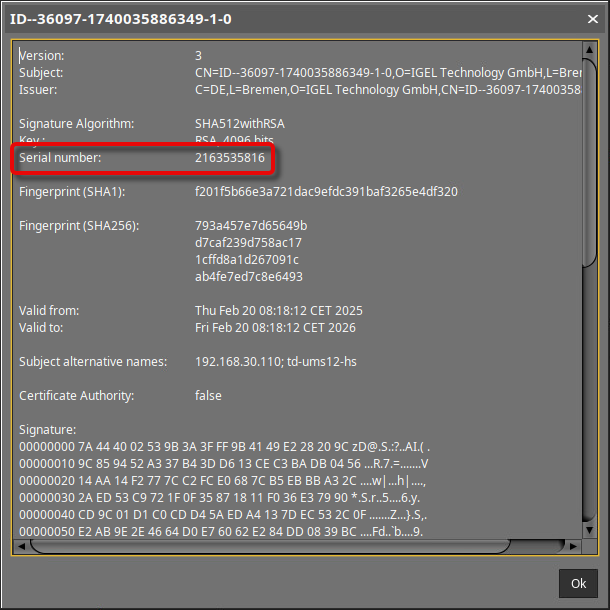
-
Select the correct key pair by comparing the entry name in the keystore tool with the serial number displayed in the UMS when you click Show certificate content.

-
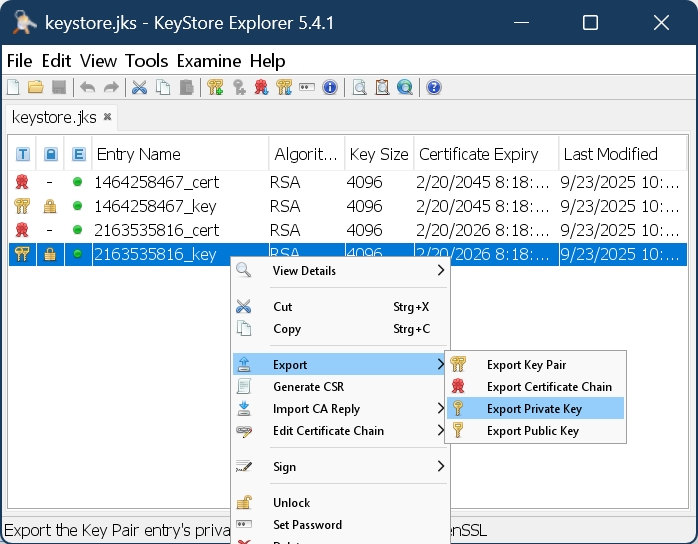
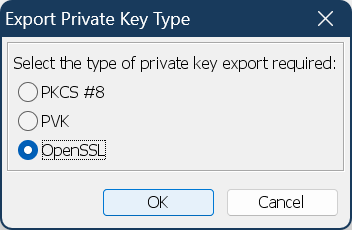
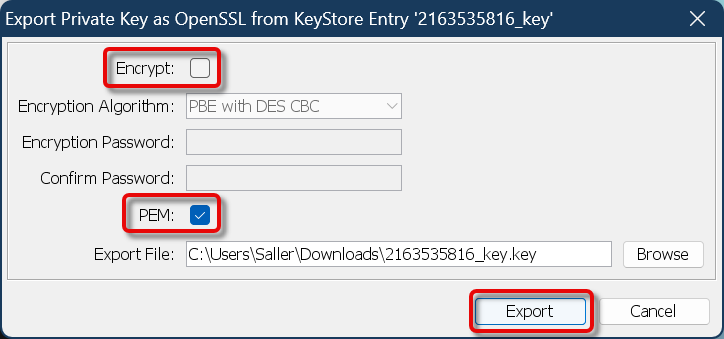
Export the private key with the following properties:
-
Type: OpenSSL
-
Unencrypted
-
PEM is activated
-
Appropriate filename, e.g., something with “private_key”
-
-
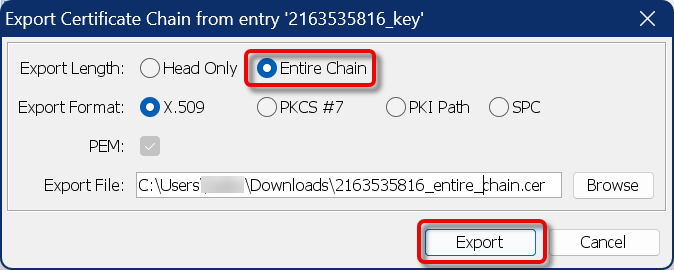
Export the certificate chain with the following properties:
-
Export length: Entire chain
-
PEM is activated
-
Appropriate filename, e.g., something with “entire_chain”
-
-
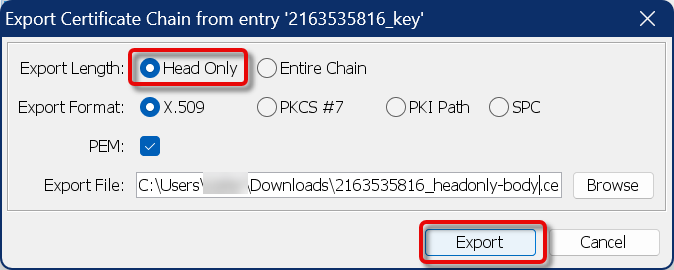
Export the certificate chain, this time with the following properties:
-
Export length: Head only
-
PEM is activated
-
Appropriate filename, e.g., something with “headonly-body”
-
Configuring the ALB Listeners
In the following, we will create an ALB with two listeners:
-
Create an Internet-facing ALB.
-
Create a listener that listens for HTTPS connections with mTLS on port 8443 and forwards traffic to the UMS target group.
-
Click Import a certificate and paste the complete contents of the files we have exported from the keystore:
-
Certificate private key: Paste the content of the file we created in Exporting the UMS Web Certificate Chain, step 7.
-
Certificate chain (optional): Paste the content of the file we created in Exporting the UMS Web Certificate Chain, step 8.
-
Certificate body: Paste the content of the file we created in Exporting the UMS Web Certificate Chain, step 9.
-
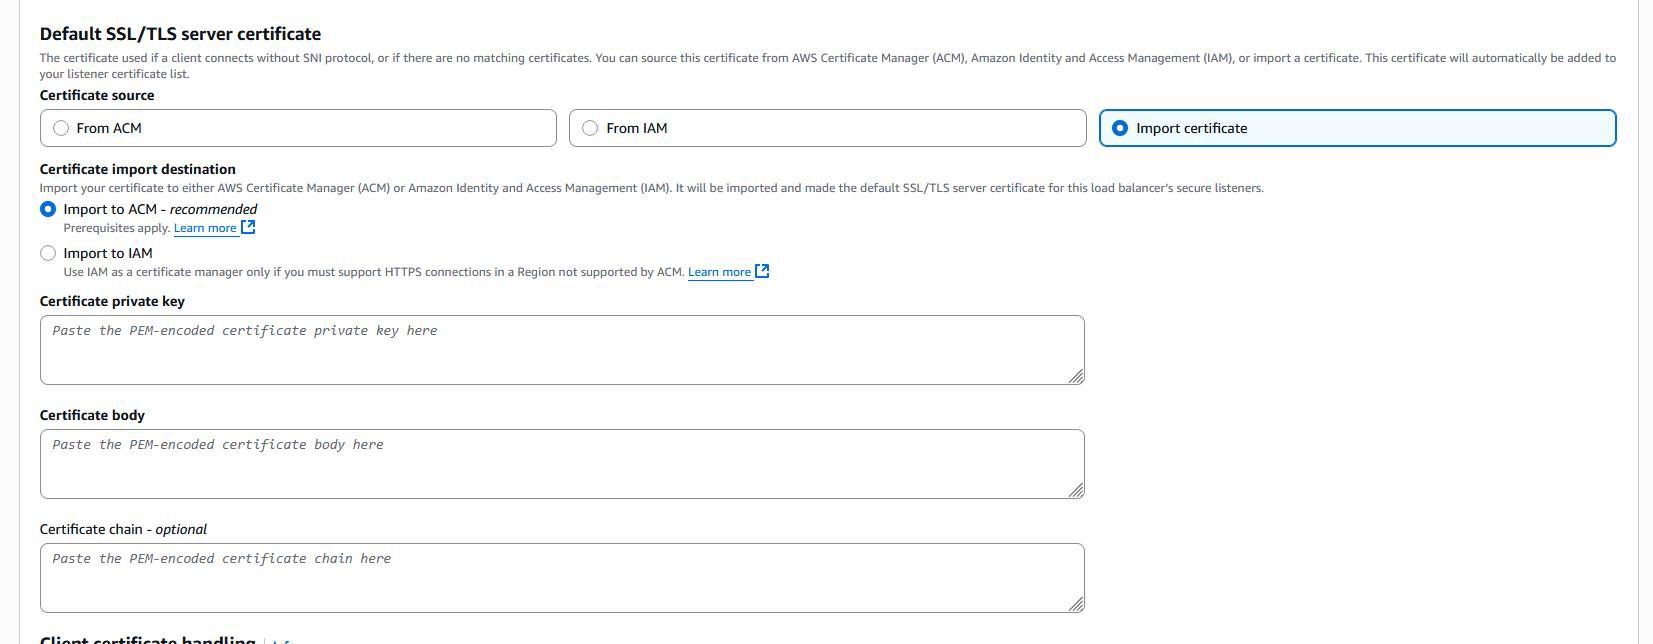
Once imported, the certificate becomes available in the AWS Certificate Manager (ACM).
-
Under mTLS settings, enable Verify with Trust Store and link to the S3 bucket with the UMS CA certificate chain you have created beforehand.
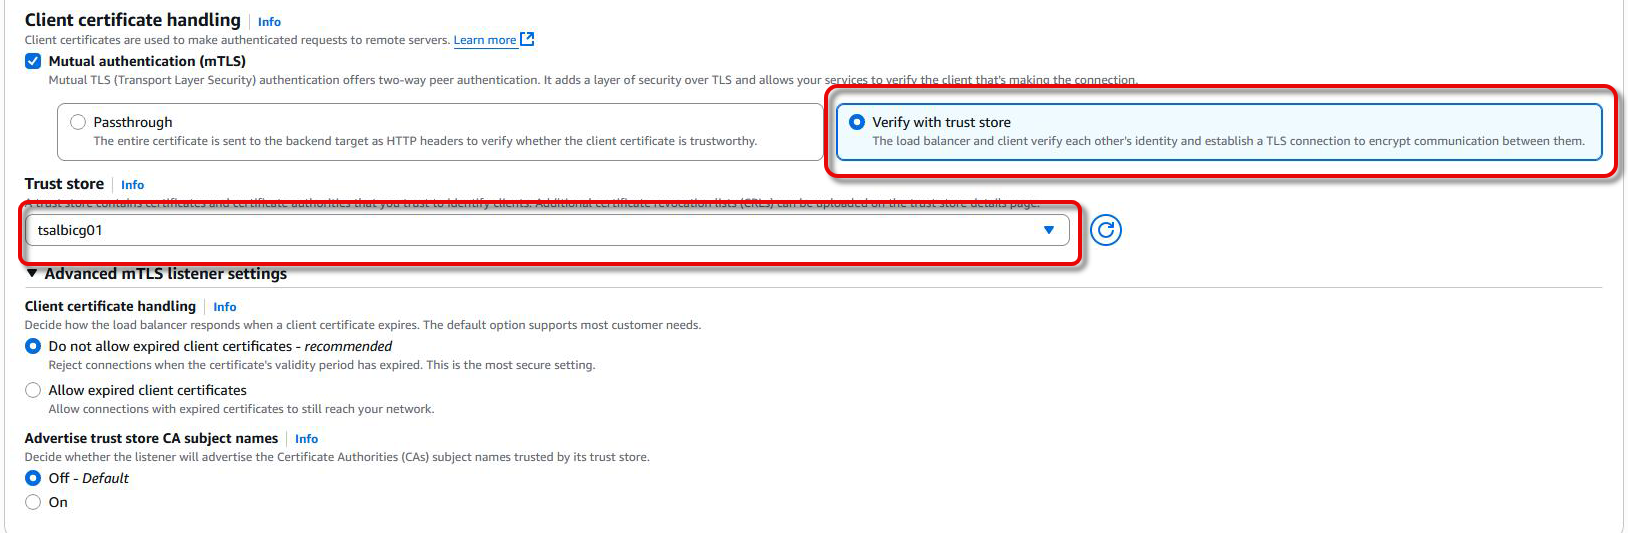
-
Create another listener that listens for HTTPS connections with standard TLS (no mTLS) on port 443 and forwards traffic to the UMS target group.
-
Click Import a certificate and provide the same certificate configuration as you did for the first listener in step 4.
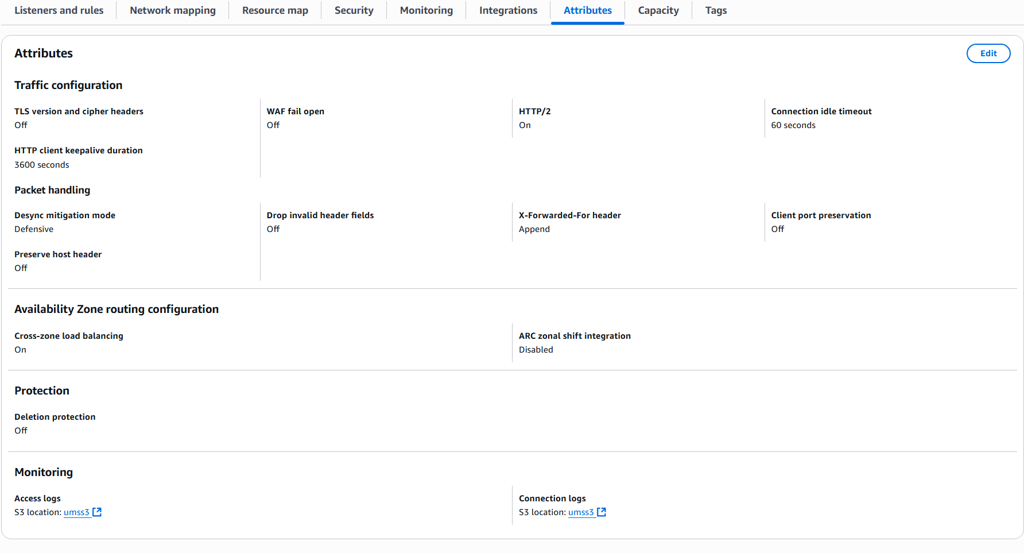
Configuring Logging and Monitoring
-
Enable Access Logs and Connection Logs for the ALB.
-
Set the log destination to the S3 bucket that is used for the trust store or another one as needed.
Configuring the UMS Server
Adjusting the Server Network Settings
The FQDN of the UMS cluster must be set as the external address. This FQDN of the UMS cluster must be included in your web certificate, and the corresponding certificate must be assigned to all UMS servers:
Configuration With ICG
If there are only ICGs behind the Loadbalancer you do not need to configure the UMS Cluster Address. Cluster Address is only required if a UMS is directly contacted by the AWS Loadbalancer.
-
Go to UMS Administration > Global Configuration > Server Network Settings.
-
Set the Cluster Address to the external address of your AWS ALB.
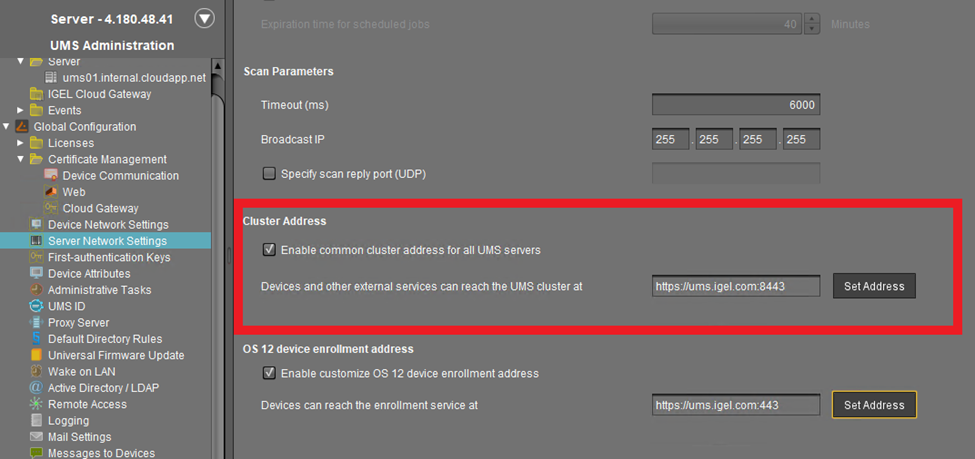
-
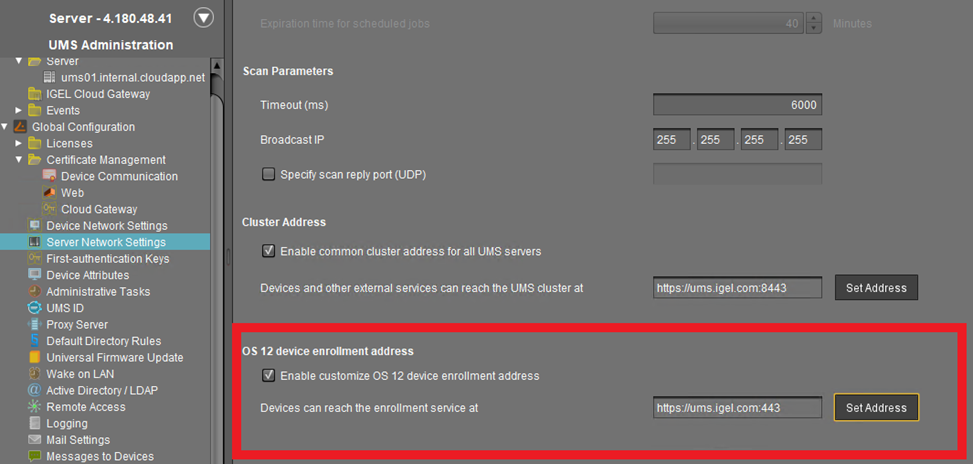
Set the OS 12 device enrollment address to the external address of your AWS ALB.
Create UMS Web Certificate / Cloud Gateway Certificate
Setting the UMS Server to Accept the Certificate from the AWS ALB
The AWS ALB sends a header (X-Amzn-Mtls-Clientcert-Leaf) that contains only the client certificate, not the full certificate chain. Therefore, the UMS Server must be configured accordingly.
-
Edit the file
<UMS installation path>\rmguiserver\conf\appconfig\application.ymlaccording to the example below:
igel:
  client-cert-forwarding:
    enabled: true
    encodingType: URL_AWS
    client-cert-forwarded-header: X-Amzn-Mtls-Clientcert-Leaf
The encodingType must be explicitly set to URL_AWS to properly decode the certificate format used by the ALB, which URL-encodes the PEM-formatted certificate.
-
Restart the UMS Server.
ICG Configuration
The ICG configuration for integration of the AWS Loadbalancer requires the selection of the Host (external) value in the ICG installation process. This value must be set to the AWS Loadbalancer IP/Hostname.

If this value isn’t listed in the combobox, create a new Cloud Gateway Certificate which also contains the AWS Loadbalancer address.
Alternative Configuration with mTLS Passthrough
Passthrough can be selected as an alternative to truststore verification to forward the device Client Certificate. In the sections below, we highlight how this configuration differs compared to the truststore configuration.
AWS Configuration Steps
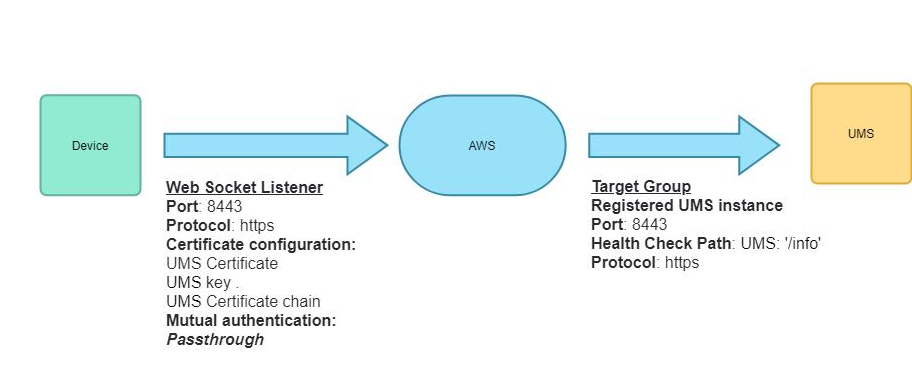
The Passthrough option only requires one configured listener on AWS side. To configure this listener:
-
Create an Web Socket listener.
-
Create a listener that listens for HTTPS connections with mTLS on port 8443 and forwards traffic to the UMS target group.
-
Click Import a certificate and paste the complete contents of the files we have exported from the keystore:
-
Certificate private key: Paste the content of the file we created in Exporting the UMS Web Certificate Chain, step 7.
-
Certificate chain (optional): Paste the content of the file we created in Exporting the UMS Web Certificate Chain, step 8.
-
Certificate body: Paste the content of the file we created in Exporting the UMS Web Certificate Chain, step 9.
-
Once imported, the certificate becomes available in the AWS Certificate Manager (ACM).
-
Under mTLS settings, enable Passthrough.

UMS Configuration
The FQDN of the UMS cluster must be set as the external address. This FQDN of the UMS cluster must be included in your web certificate, and the corresponding certificate must be assigned to all UMS servers:
Configuration With ICG
If there are only ICGs behind the Loadbalancer you do not need to configure the UMS Cluster Address. Cluster Address is only required if a UMS is directly contacted by the AWS Loadbalancer.
In case of a one-listener configuration, the OS 12 device enrollment address is also not required.
-
Go to UMS Administration > Global Configuration > Server Network Settings.
-
Set the Cluster Address to the external address of your AWS ALB.
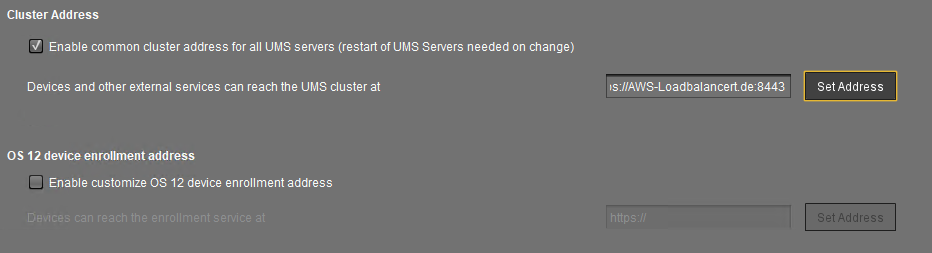
With the passthrough configuration, the OS 12 device enrollment address is not required.
Setting the UMS Server to Accept the Certificate from the AWS ALB
The UMS backend expects the client certificate chain to be forwarded via the X-Amzn-Mtls-Clientcert header. For this:
-
Edit the file
<UMS installation path>\rmguiserver\conf\appconfig\application.ymlaccording to the example below:
igel:
  client-cert-forwarding:
    enabled: true
    encodingType: URL_AWS
    client-cert-forwarded-header: X-Amzn-Mtls-Clientcert
The encodingType must be explicitly set to URL_AWS to properly decode the certificate format used by the ALB, which URL-encodes the PEM-formatted certificate.
-
Restart the UMS Server.
ICG Configuration
→ To integrate the AWS Loadbalancer in the ICG, set the Host (external) value in the ICG installation process to the AWS Loadbalancer’s IP/Hostname.
If this value isn’t listed in the combobox, create a new Cloud Gateway Certificate which contains the AWS Loadbalancer address.
-
Restart the UMS Server.