The following article describes the procedure for connecting the IGEL Universal Management Suite (UMS) Console to the UMS Server.
If you need to start the UMS Console under Linux from the terminal emulator, use the command /[IGEL installation directory]/RemoteManager.sh (if the default installation directory is used: /opt/IGEL/RemoteManager/RemoteManager.sh)
It is generally NOT recommended to execute RemoteManager.sh with sudo. On Red Hat Enterprise Linux 8, RemoteManager.sh can be executed only without sudo.
Login to the UMS Console as of UMS 12.08.100
If you are using IGEL UMS version 12.08.100 or higher, you can establish a connection to the UMS Server as follows:
-
Start the UMS Console.
-
Enter the access data:
-
Server: Host name or IP address of the UMS Server. If you are logging in to the local UMS Console of the server, enter
localhostor leave the field empty. -
Port: Port on which the GUI server of the UMS receives UMS Console queries (Default: 8443). You can change the port using the UMS Administrator, see Settings - Change Server Settings in the IGEL UMS Administrator.
-

The data entered under Server, Port will be saved for subsequent connection procedures. The next time you establish a connection, you will only need to enter the username and password. You can delete stored logon data under Misc > Settings > General > Clear login history.
-
Click Connect.
You get redirected to the UMS login page. For the supported browsers, see the “Supported Environment” section in the corresponding release notes.
Error Message
You get the Server is not fully running error message when the auth-service of the UMS server is not yet running at the specified address. The browser is only opened if the auth-service is confirmed to be available and responsive.
Wait some time and try to connect again.
-
Provide the login data.
User name: User name for the connection between the UMS Console / UMS Web App and the database. When setting up the UMS for the first time, this is the user name of the database user account which was created while the UMS Server was being installed.
For users imported via LDAP enter <username>@<domain>. For example:username@domainname.com
Password: Password for the connection between the UMS Console / UMS Web App and the database. When setting up the UMS for the first time, this is the password of the database user account which was created while the UMS Server was being installed.
To ensure that all UMS users can log in to the UMS without any issues, please check the UMS Login Requirements.

-
Click Login.
After several failed login attempts via the UMS Console, IMI REST API, or WebDAV (e.g. https://<server>:8443/ums_filetransfer/), the brute-force protection will temporarily lock the user accounts for 10 minutes. The UMS login dialog will show a corresponding message when the user account is locked.
-
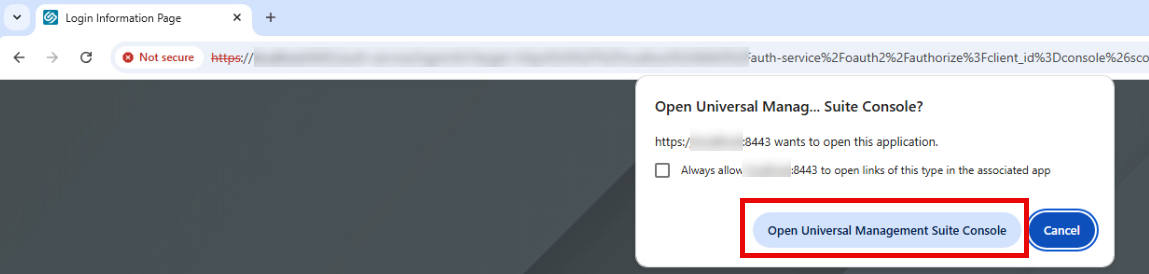
Confirm the following dialog. Depending on the browser, it can look differently.
-
Now you are logged in and can continue with
-
the UMS Web App: Click Open UMS Web App in the login dialog.
For additional information on logging in to the UMS Web App, see How to Log In to the IGEL UMS Web App.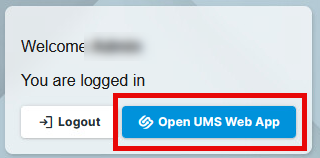
-
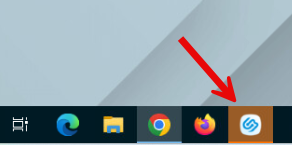
the UMS Console: Bring the UMS Console window to the foreground.
-
Troubleshooting
With UMS 12.08.100, a new login process is introduced with a new set of requirements for your environment. If you experience any issue during the login, see the related troubleshooting articles under Start of the UMS Console / Web App.
Login to the IGEL UMS Console before UMS 12.08.100
To establish a connection to the UMS Server, proceed as follows:
-
Start the UMS Console.
-
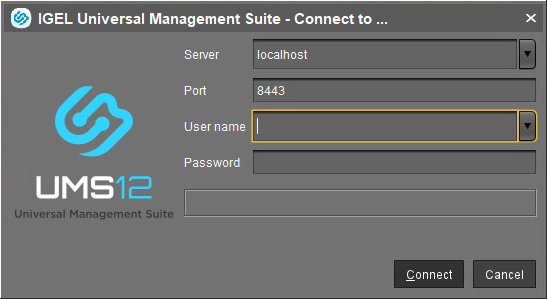
Enter the access data:
-
Server: Host name or IP address of the UMS Server. If you are logging in to the local UMS Console of the server, enter
localhostor leave the field empty. -
Port: Port on which the GUI server of the UMS receives UMS Console queries (Default: 8443). You can change the port using the UMS Administrator, see Settings - Change Server Settings in the IGEL UMS Administrator.
-
User name: User name for the connection between the UMS Console and database. When setting up the UMS for the first time, this is the user name of the database user account which was created while the UMS Server was being installed.
For users imported via LDAP enter <username>@<domain>. For example:username@domainname.com -
Password: Password for the connection between the UMS Console and database. When setting up the UMS for the first time, this is the password of the database user account which was created while the UMS Server was being installed.
-
-
Click on Connect.
The data entered under Server, Port, and User name will be saved for subsequent connection procedures. The next time you establish a connection, you will only need to enter the password. The server and user information last used is also stored. You can delete stored logon data under Misc > Settings > General > Clear login history.
After several failed login attempts via the UMS Console, IMI REST API, or WebDAV (e.g. https://<server>:8443/ums_filetransfer/), the brute-force protection will temporarily lock the user accounts for 10 minutes. The UMS Console will show a corresponding message when the user account is locked.