You can use the following Identity Providers (IdPs) to access the Unified Management Suite (UMS):
Each IdP requires specific configurations and role mappings to facilitate seamless user authentication and authorization within the UMS.
Basically, setting up an IdP for the UMS involves 4 steps:
-
Create an application in your Cloud IDP
-
Set up users and groups resp. app roles in your Cloud IDP
-
Configure your IDP connection in the UMS Console
-
Map IDP roles to UMS groups
The steps are described in general terms below; your mileage, including the exact wording of concepts like “client id”, may vary depending on the IdP you are using.
Prerequisites
-
Users and groups with the appropriate permissions are already configured in your UMS
UMS Login with Microsoft Entra ID
Creating an Application in Microsoft Entra ID
-
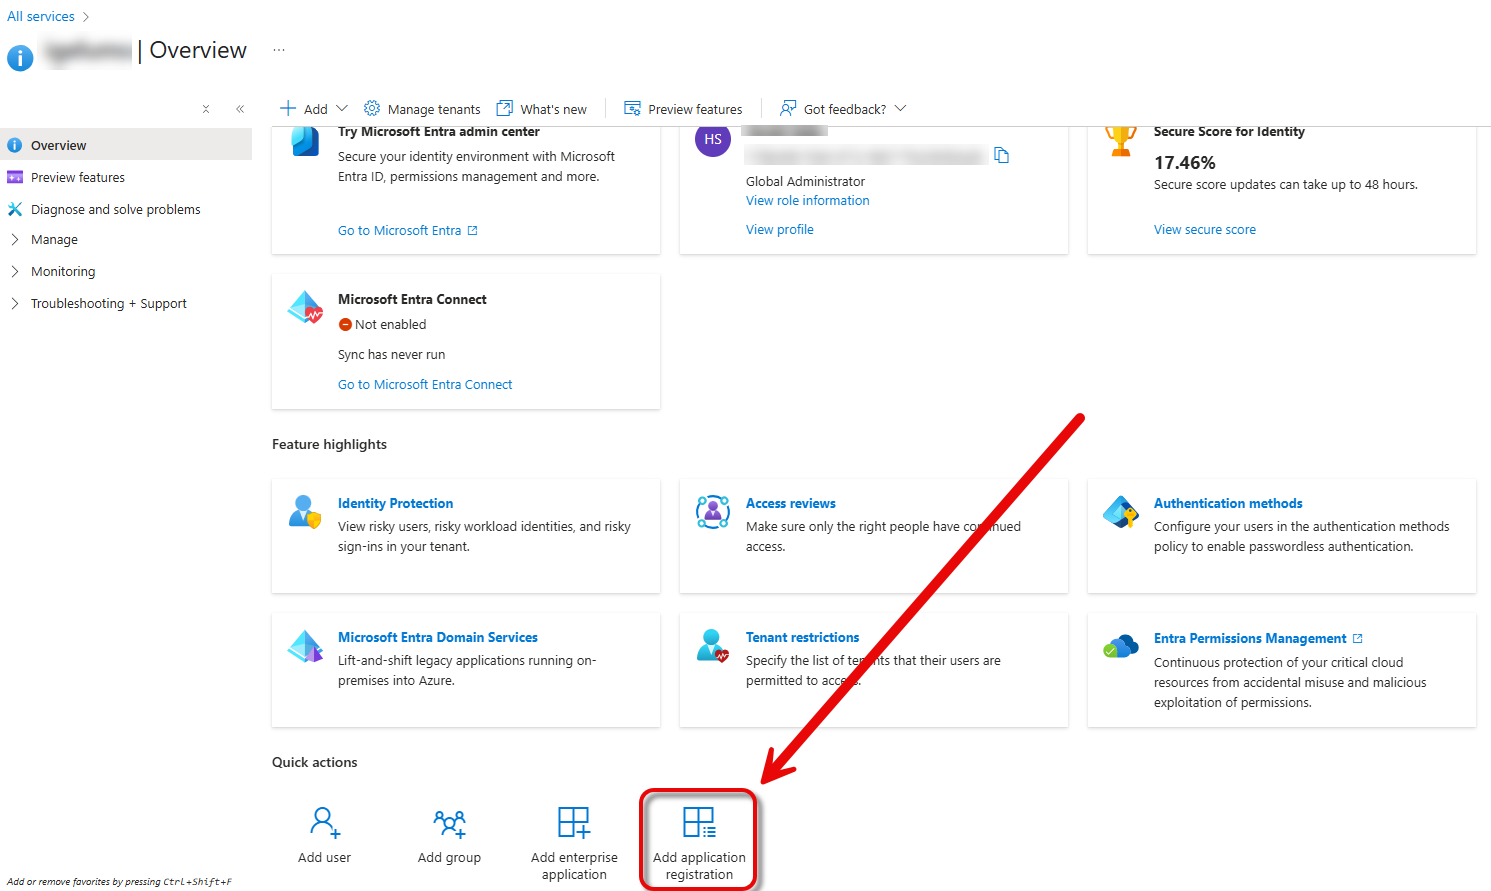
Log in to the Microsoft Entra ID portal and click Add application registration.
-
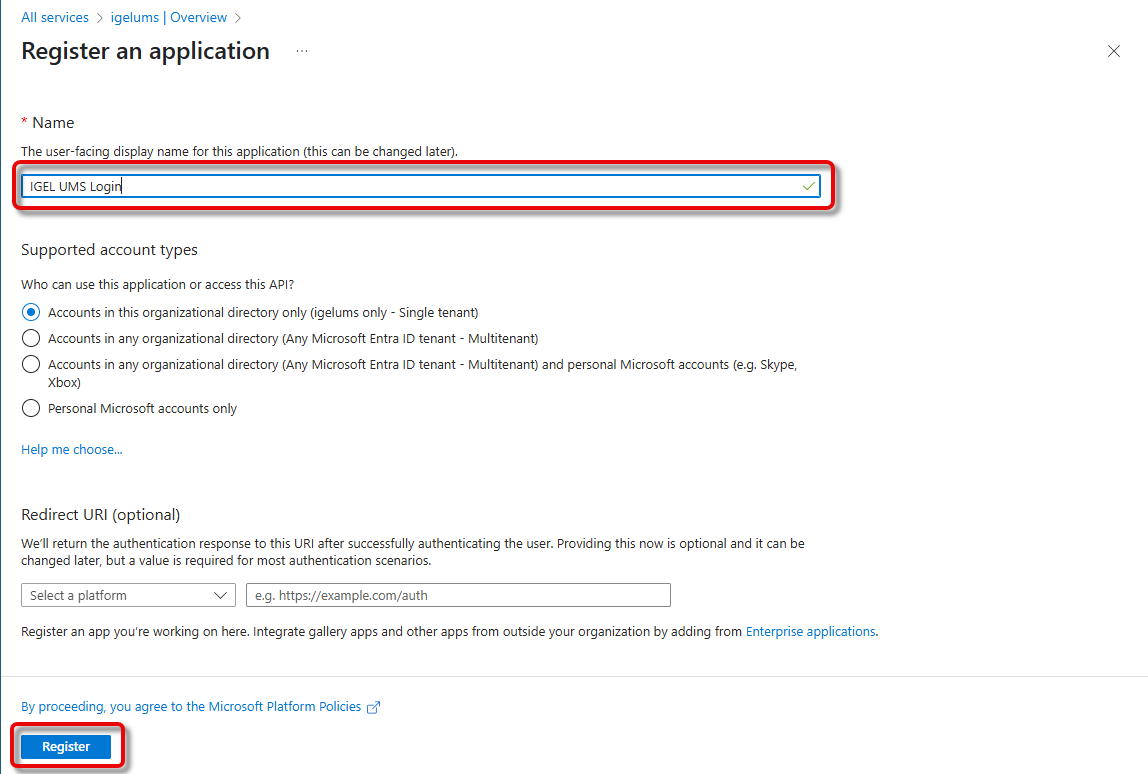
Enter a Name for this application. It is recommended to use a descriptive name, as this name is user-facing. Afterward, click Register.
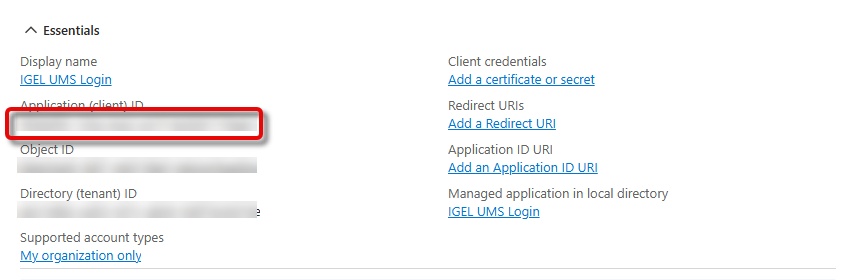
The essential data for your application is displayed.
-
From the field Application (client) ID, copy the application ID, also referred to as the client ID.
-
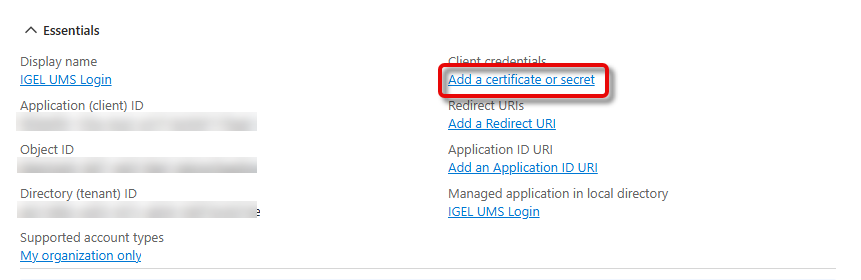
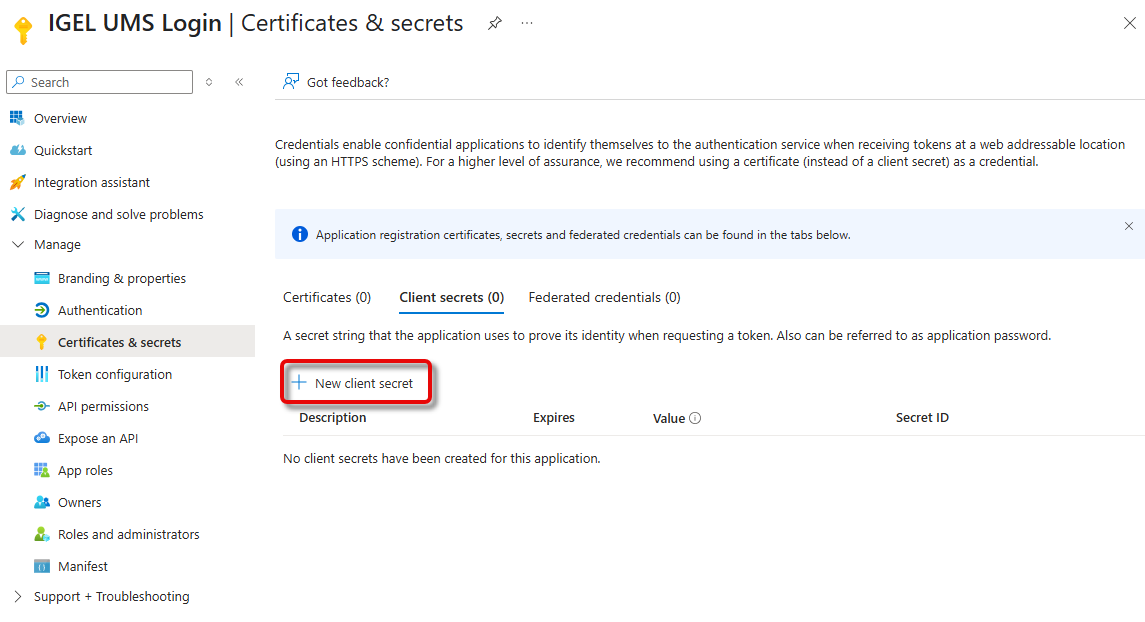
To open the menu for secret creation, click Add a certificate or secret.
-
Click New client secret.
-
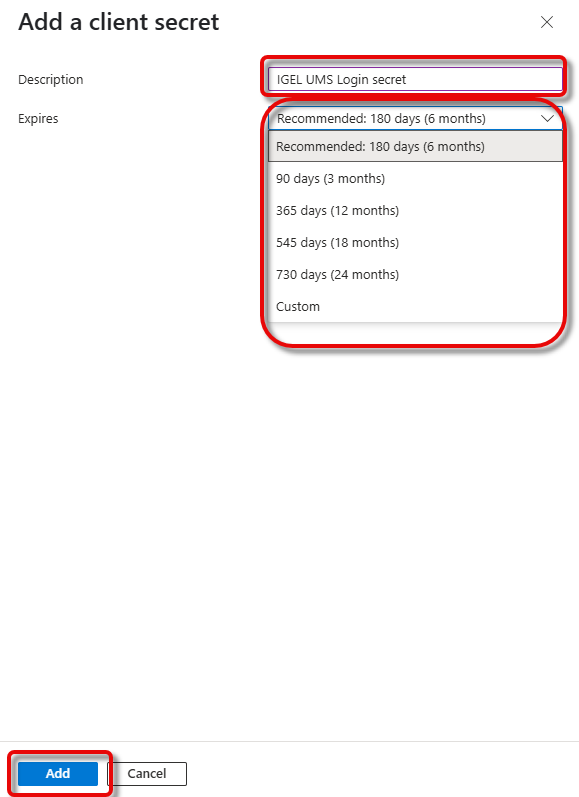
Add a description and an expiry date for your secret and click Add.
-
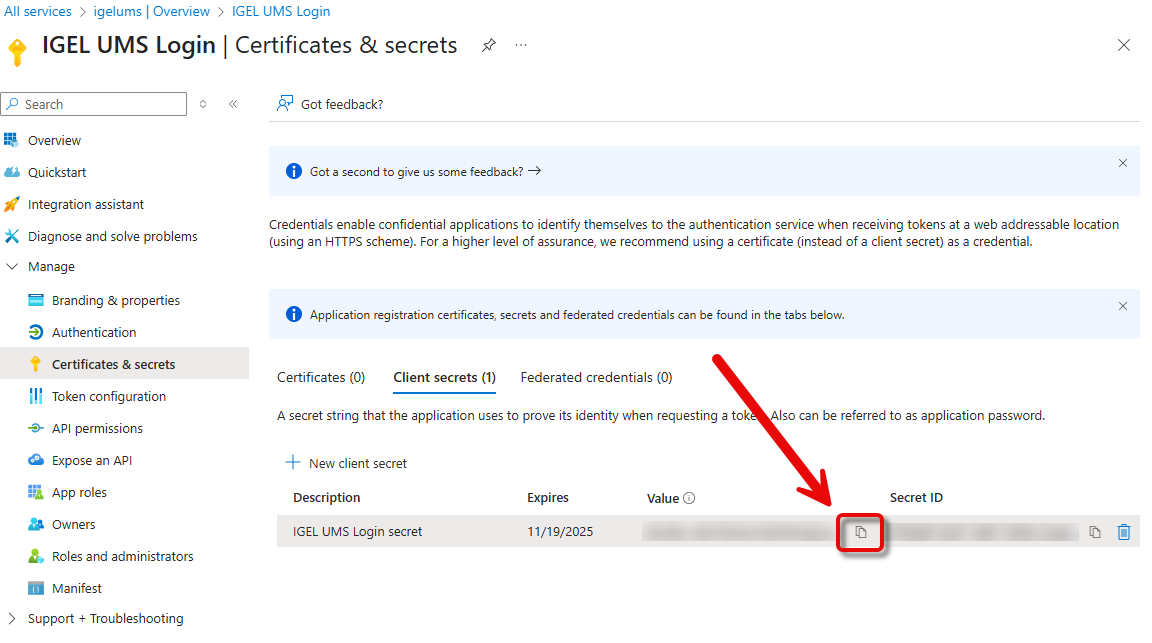
Copy the secret’s Value immediately before you leave the current page.
You must copy the secret immediately because it will not be visible after leaving this page.
-
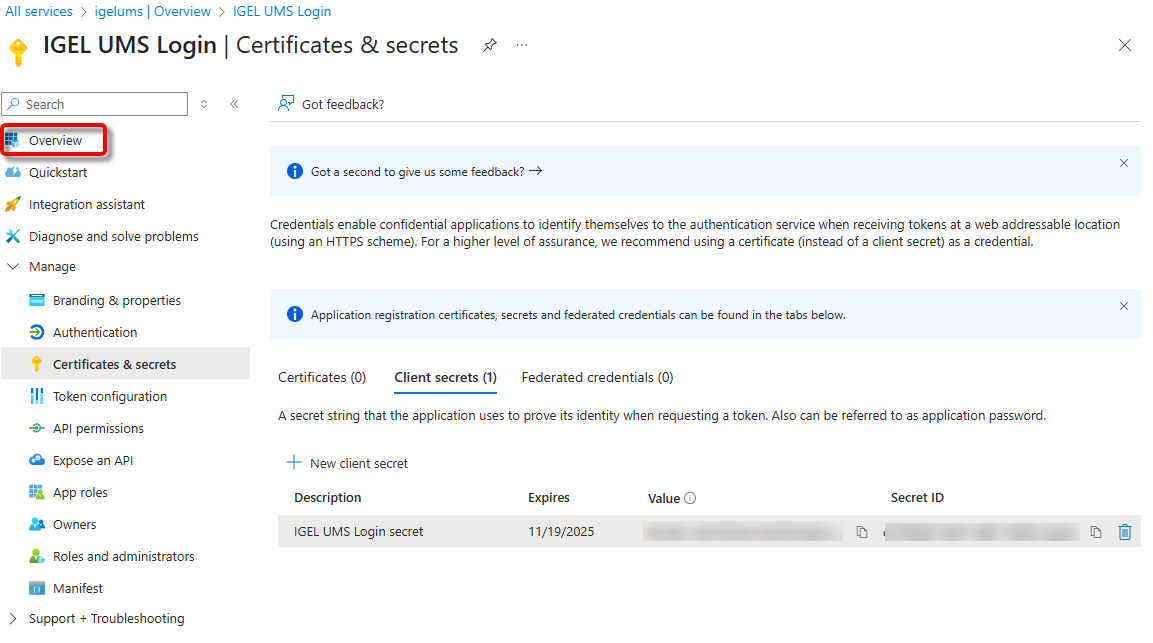
Go back to the Overview and click Endpoints.
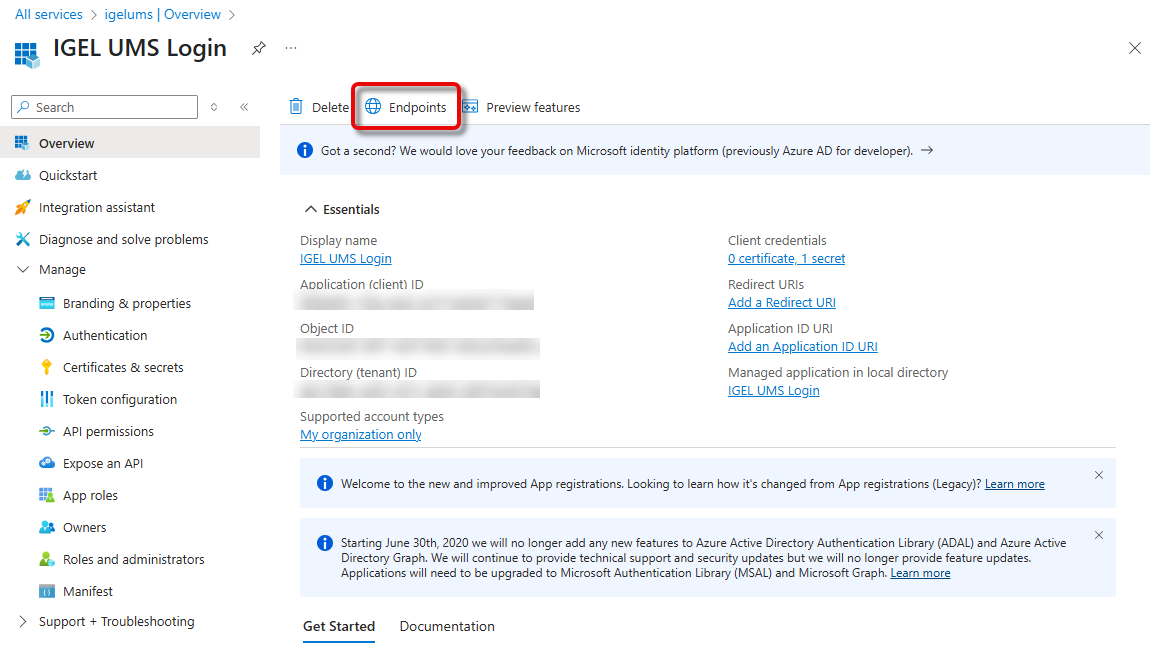
The window Endpoints opens.
-
Open the URL of the OpenID Connect metadata document in a new browser tab.
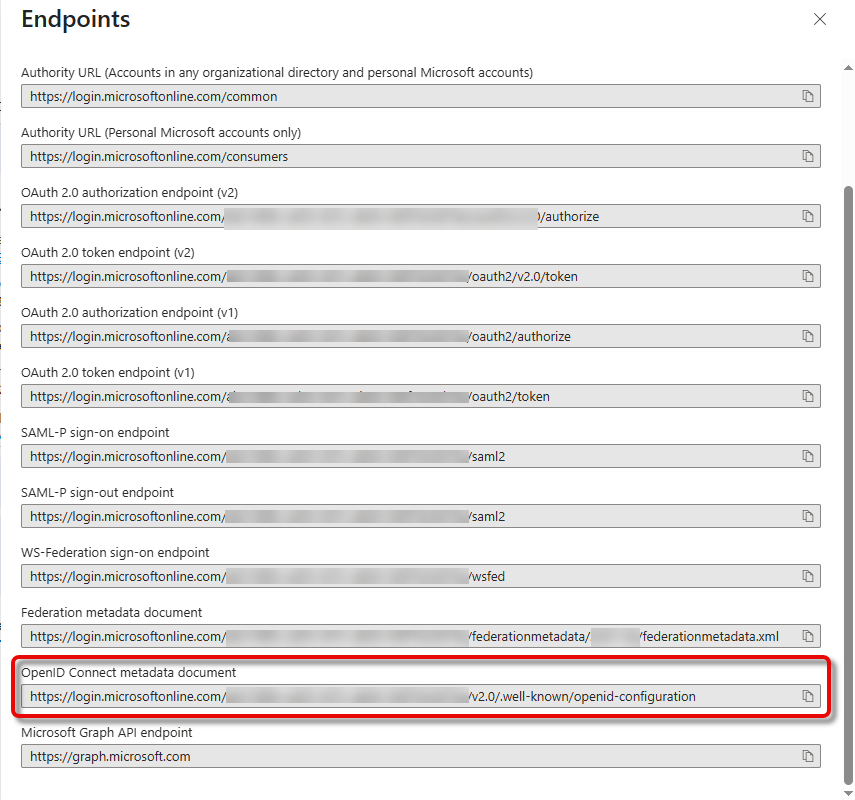
The JSON document is displayed in the new browser tab.
-
Copy the URL for the key
“issuer”from the document.

Configuring Your Connection to Microsoft Entra ID in the UMS Web App
-
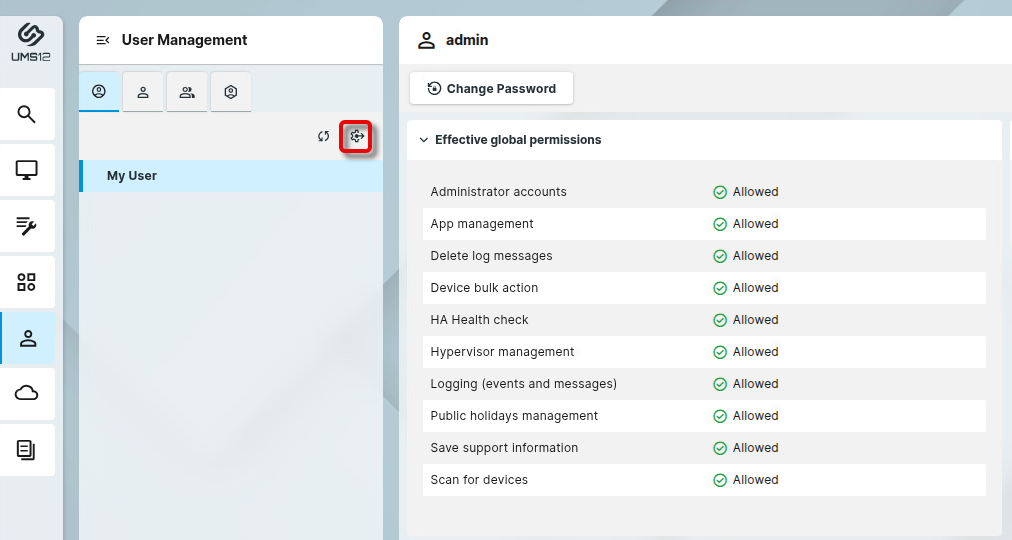
Open the UMS Web App, go to User Management, and click

-
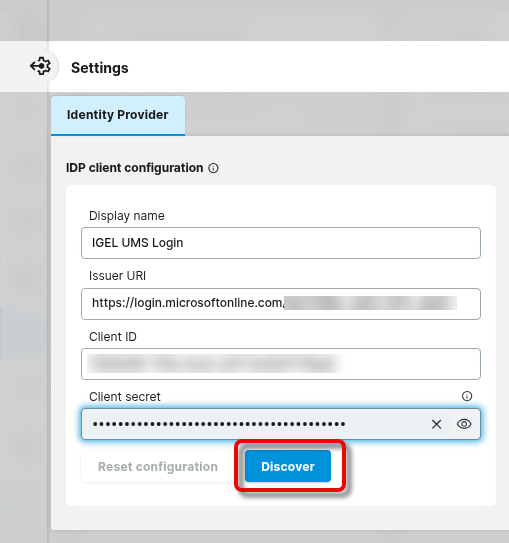
Enter the following data from the application you have created in Microsoft Entra ID and click Discover.
-
Display name: The name of your application
-
Issuer URI: The value of “issuer” you have copied from the OpenID Connect metadata document.
-
Client ID: The application ID or client ID for your application
-
Client secret: The secret you have created for your application
-
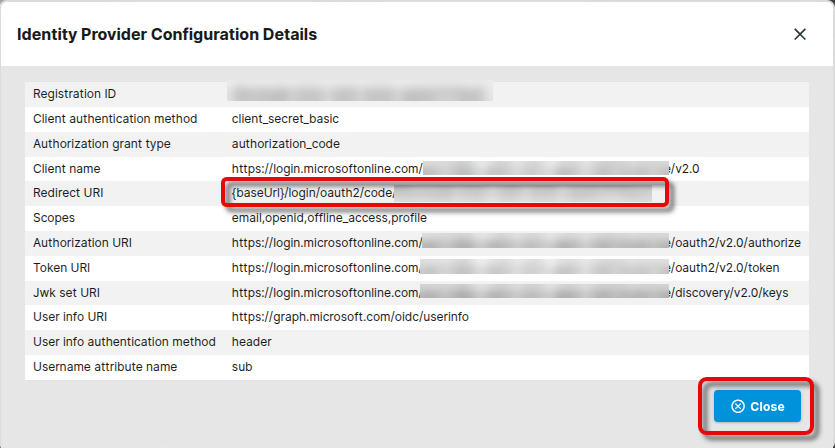
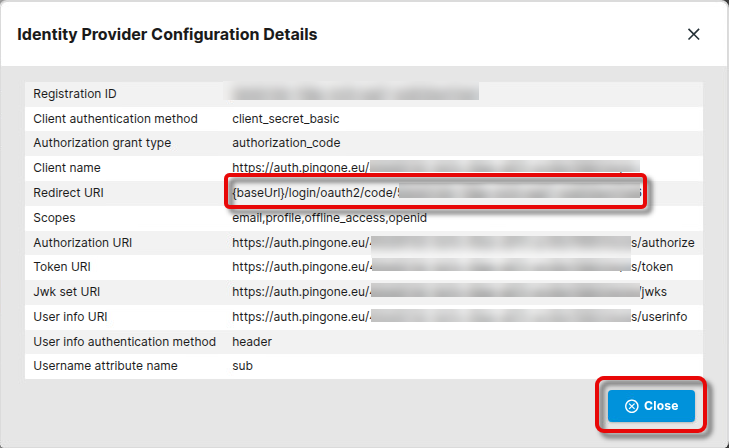
-
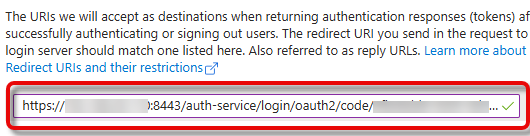
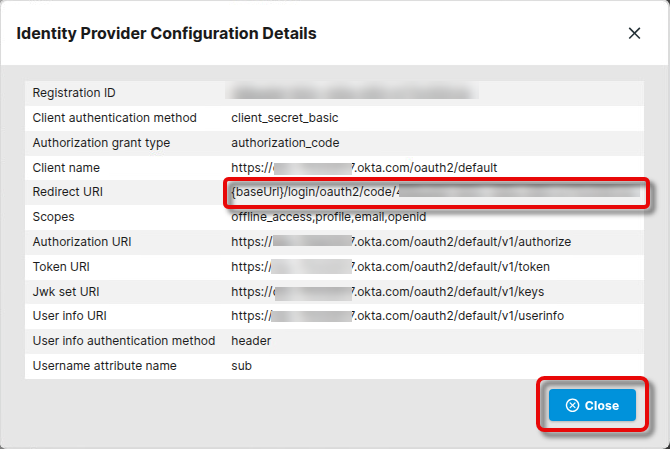
In the Identify Provider Configuration Details window, copy the Redirect URI and close the window.
Configuring the Redirect URIs of the UMS in Microsoft Entra ID
We must configure the redirect URI for every base URL the end user will use.
-
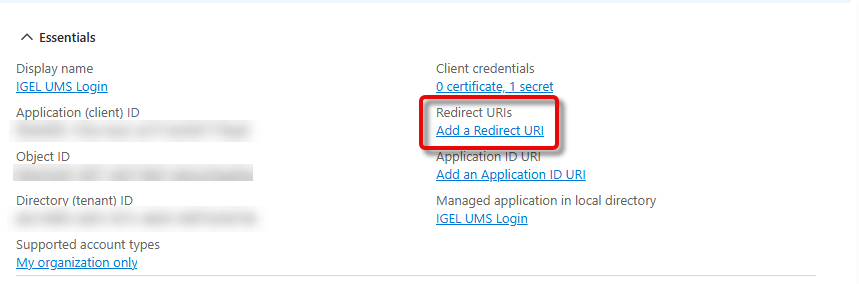
In Microsoft Entra, go to the Overview page and click Add a Redirect URI.
-
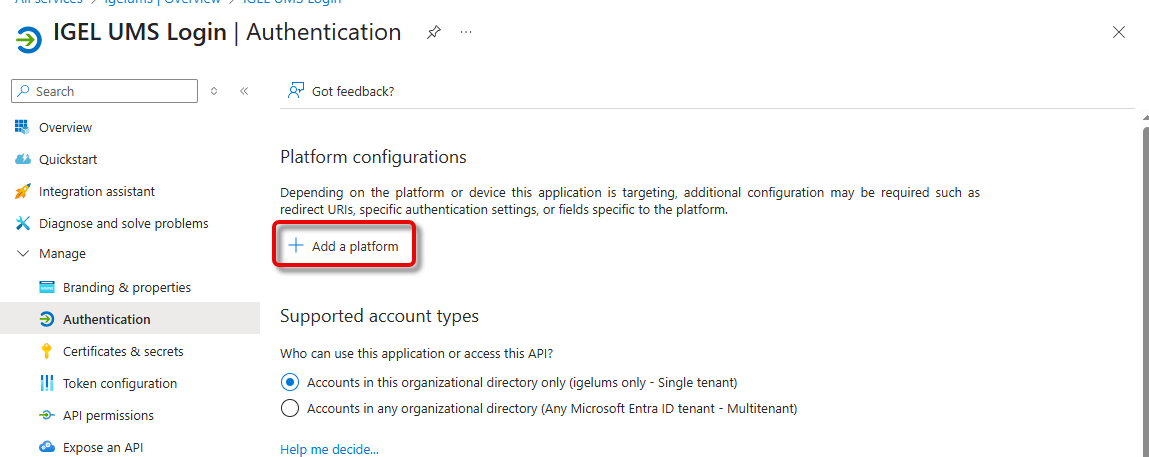
Click Add a platform.
-
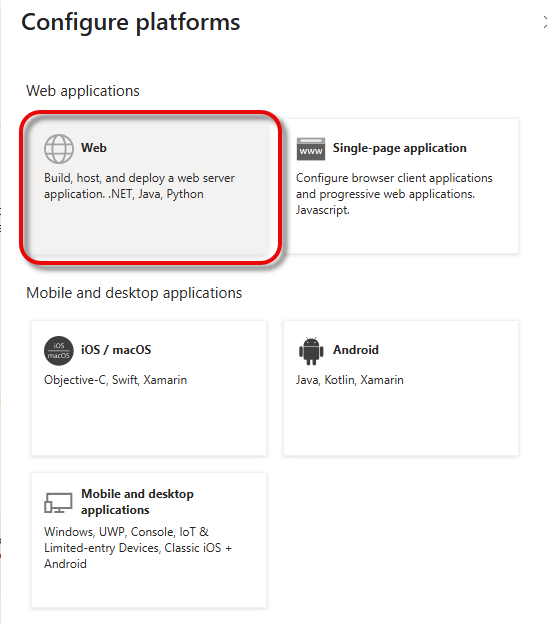
Select Web.
-
In the Redirect URI you have copied from your UMS, replace
{baseUrl}with the actual IP address and port of your UMS, and enter it. Example:https://123.123.123.111:8443/auth-service/login/oauth2/code/9ad85dd8-9372-5d11-1966-abe5f1365e58. Afterward, click Configure.
The configured redirect URI is shown.
-
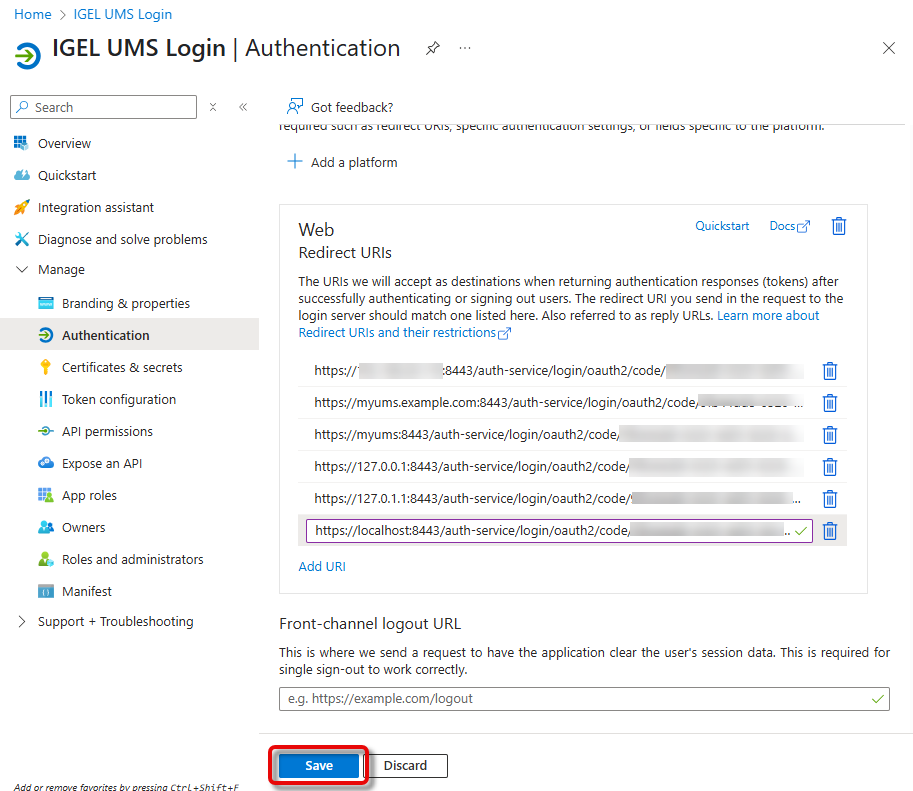
Click Add URI to enter the other redirect URI for your UMS. All URIs that can be used for login must be added here, according to the following patterns:
-
IP address of the UMS Server:
https://<IP ADDRESS>:8443/auth-service/login/oauth2/code/<REGISTRATION ID>- example:https://123.123.123.123:8443/auth-service/login/oauth2/code/ik45379f-ea33-413c-ed06-649f52d1a64d -
FQDN of the UMS Server:
https://<FQDN>:8443/auth-service/login/oauth2/code/<REGISTRATION ID>- example:https://myums.example.com:8443/auth-service/login/oauth2/code/ik45379f-ea33-413c-ed06-649f52d1a64d -
Short name of the UMS Server:
https://<SHORT NAME>:8443/auth-service/login/oauth2/code/<REGISTRATION ID>- example:https://myums:8443/auth-service/login/oauth2/code/ik45379f-ea33-413c-ed06-649f52d1a64d -
Local IP address:
https://<LOCAL IP ADDRESS>:8443/auth-service/login/oauth2/code/<REGISTRATION ID>- example:https://127.0.0.1:8443/auth-service/login/oauth2/code/ik45379f-ea33-413c-ed06-649f52d1a64d -
Local IP address (alternative):
https://<LOCAL IP ADDRESS>:8443/auth-service/login/oauth2/code/<REGISTRATION ID>- example:https://127.0.1.1:8443/auth-service/login/oauth2/code/ik45379f-ea33-413c-ed06-649f52d1a64d -
“localhost” (used when the Server field in the login dialog of the UMS Console is empty):
https://localhost:8443/auth-service/login/oauth2/code/<REGISTRATION ID>- example:https://localhost:8443/auth-service/login/oauth2/code/ik45379f-ea33-413c-ed06-649f52d1a64d
-
-
Click Save to save your redirect URIs.
Configuring the Token
-
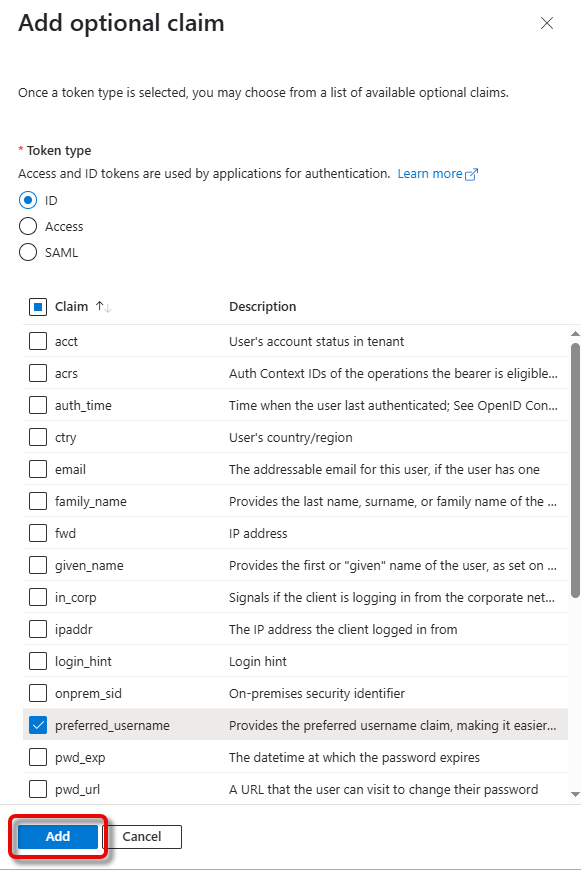
In Microsoft Entra ID, go to Token configuration and click Add optional claim.

-
Select ID as the Token type and preferred_username as the Claim, and click Add.
-
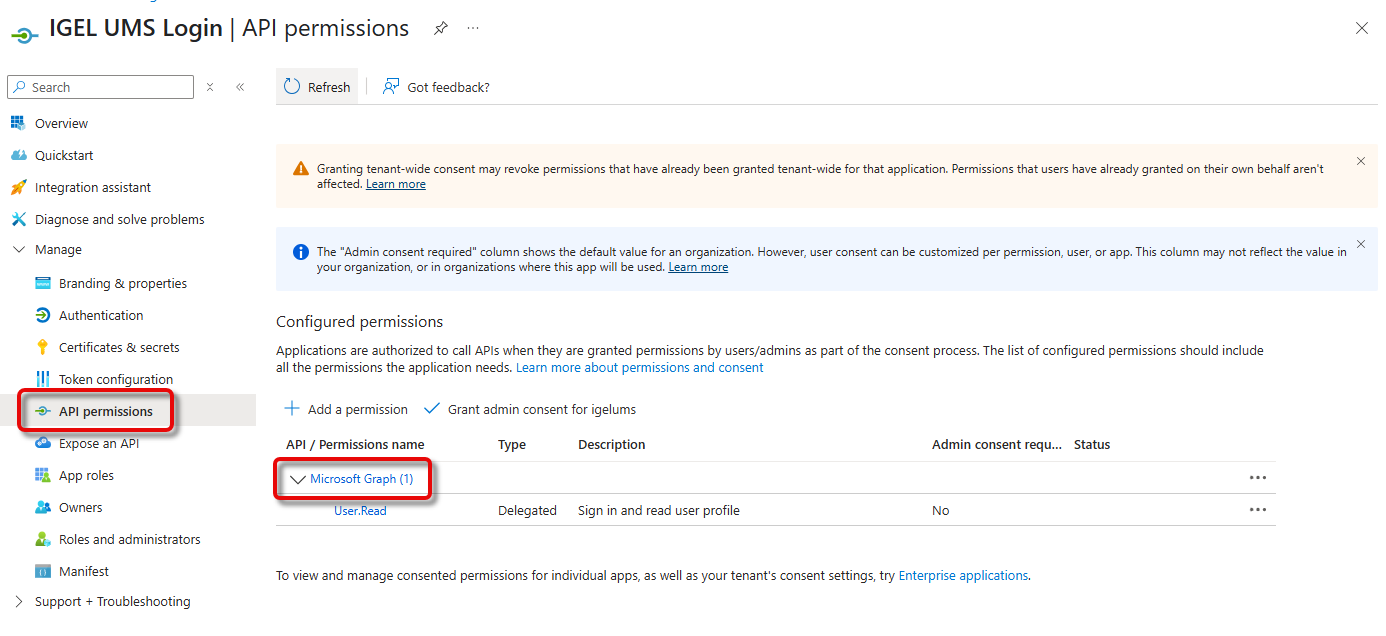
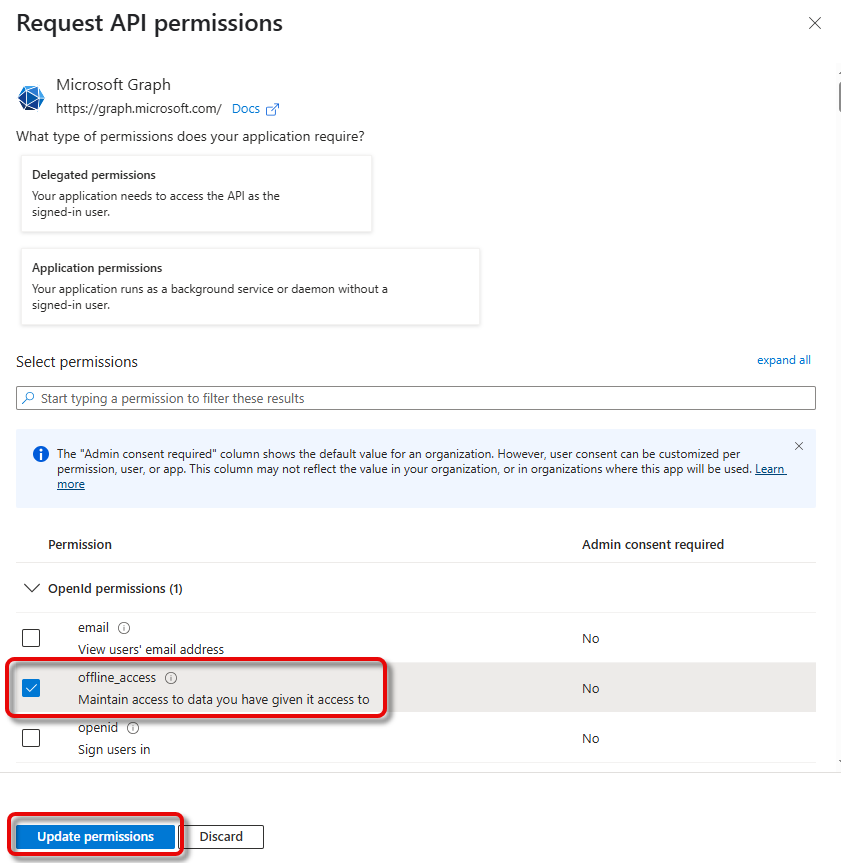
Go to API permissions and click Microsoft Graph.
-
Select offline_access and click Update permissions. This permission is needed for refreshing the tokens.
Configuring User Role Mapping in Microsoft Entra ID
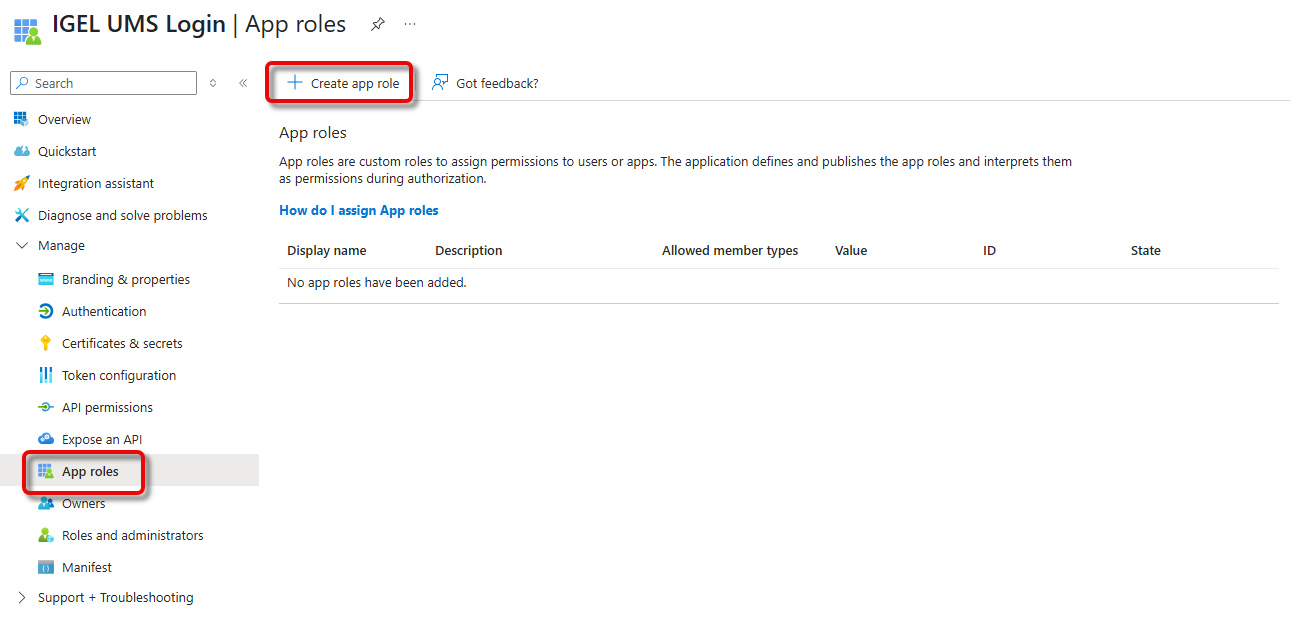
-
Go to App roles and click Create app role.
-
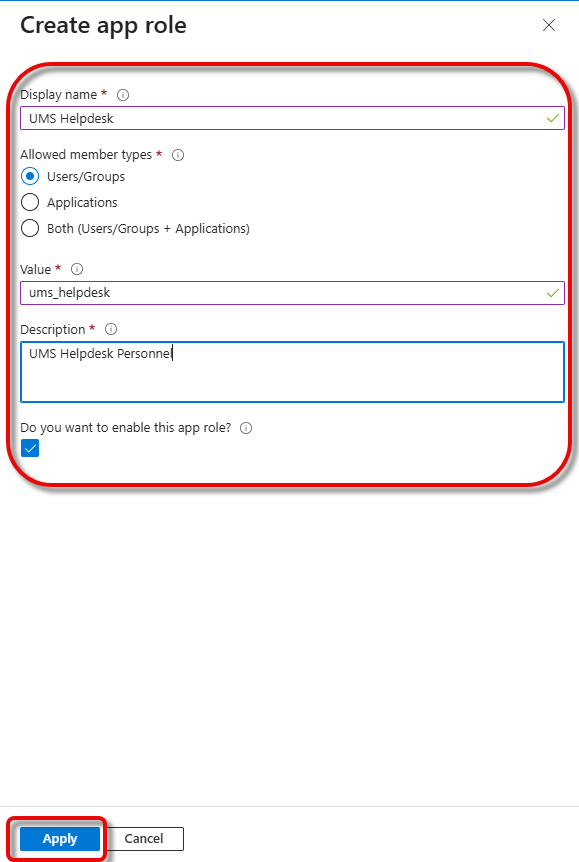
Provide the following data and click Apply.
-
Display name: Descriptive name for the app role
-
Allowed member types: Select Users/Groups.
-
Value: Name that will be included in the “roles” claim of the token that will identify a user
-
Description: Describes the app role
-
Do you want to enable this app role: Leave this enabled
-
-
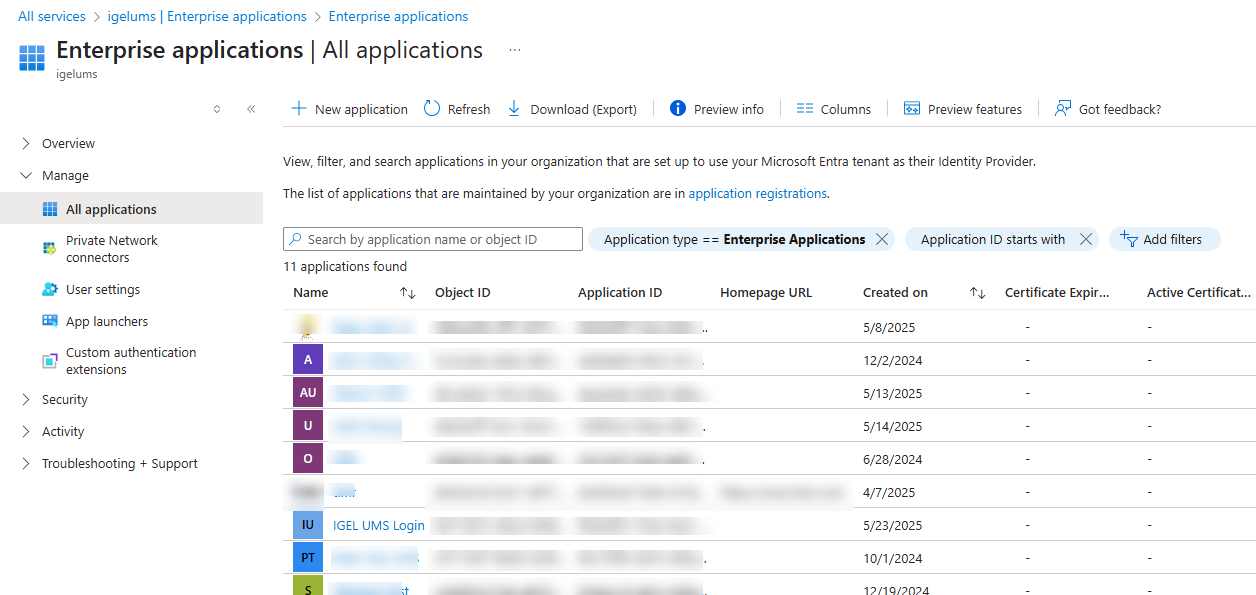
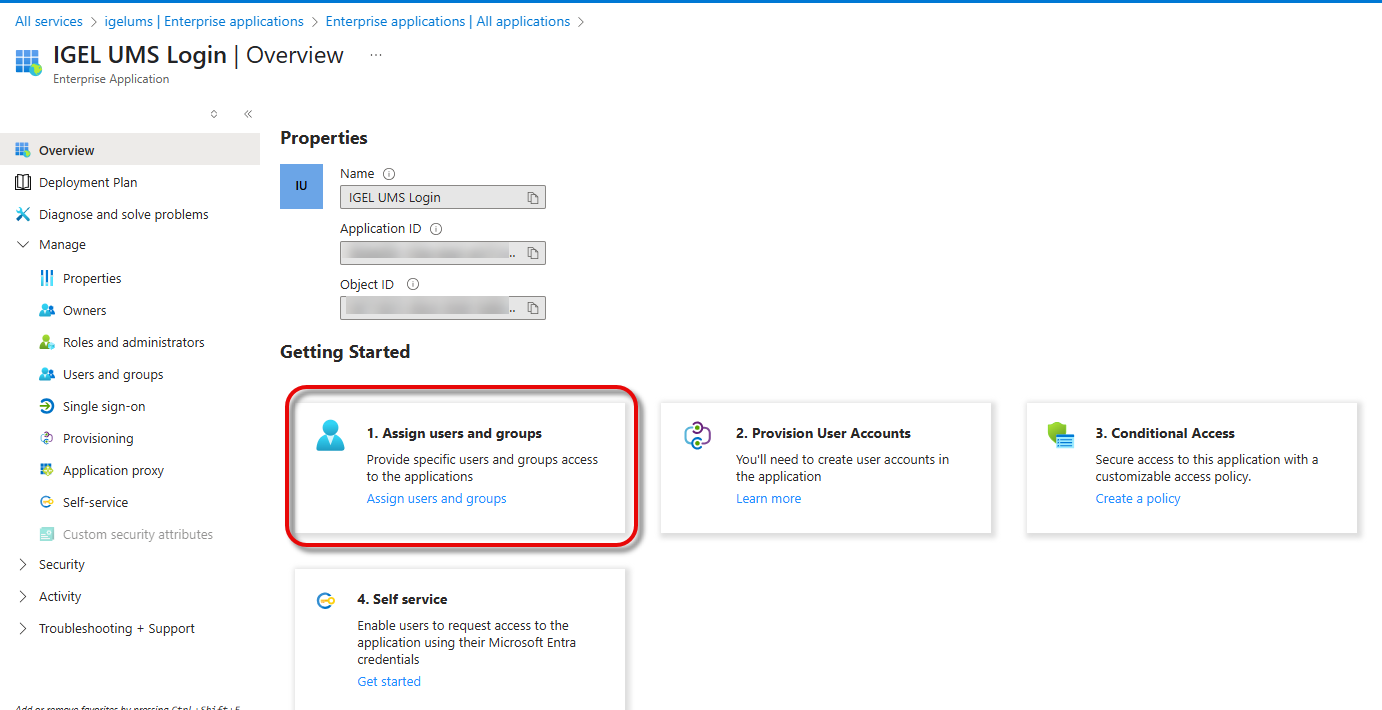
From your tenant’s main page, go to Enterprise applications and select your application.
-
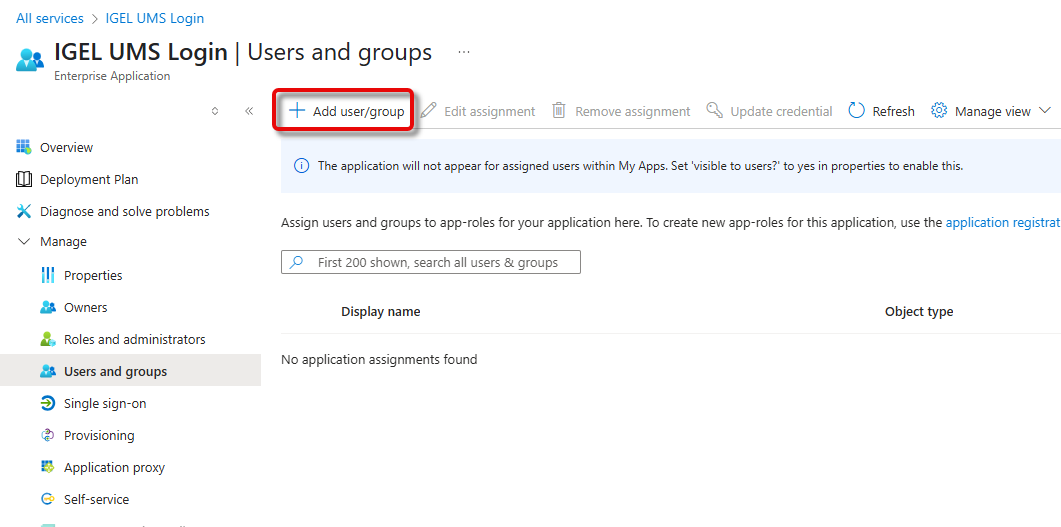
Click Assign users and groups.
-
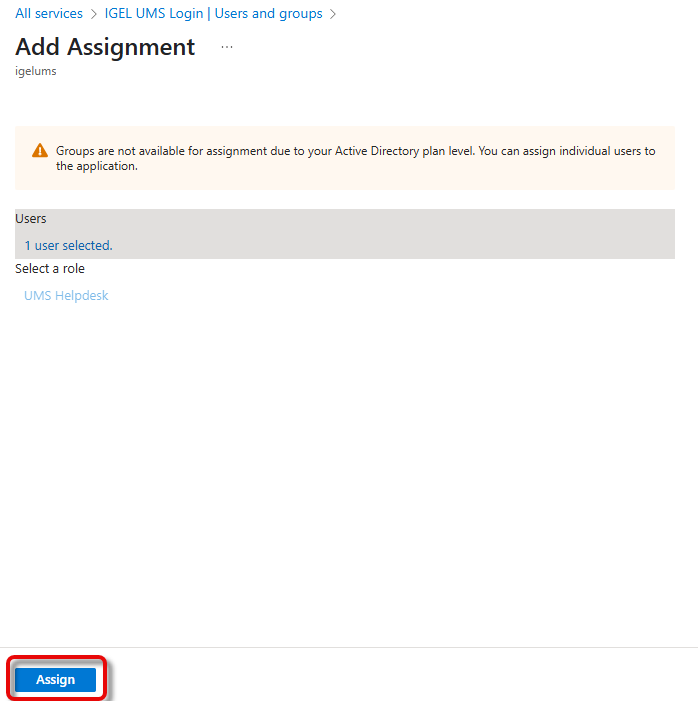
Click Add user/group.
-
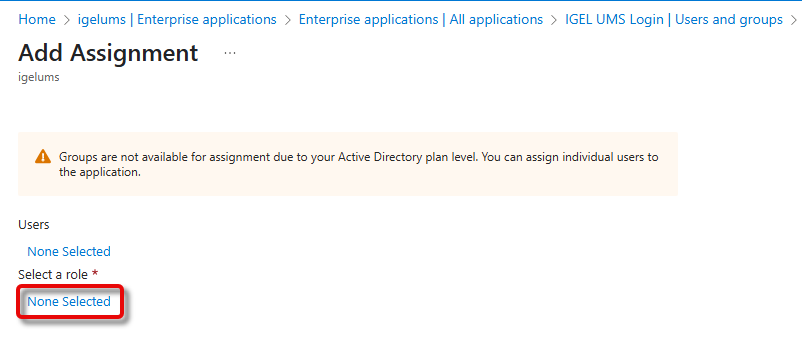
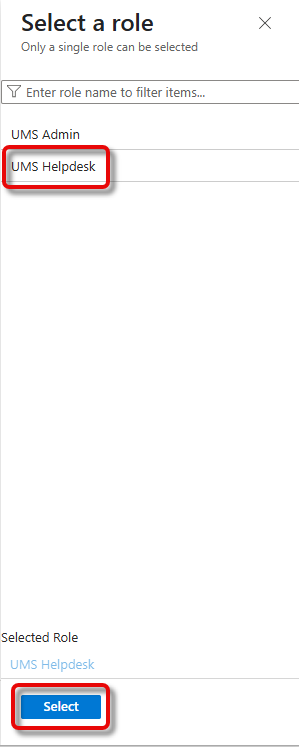
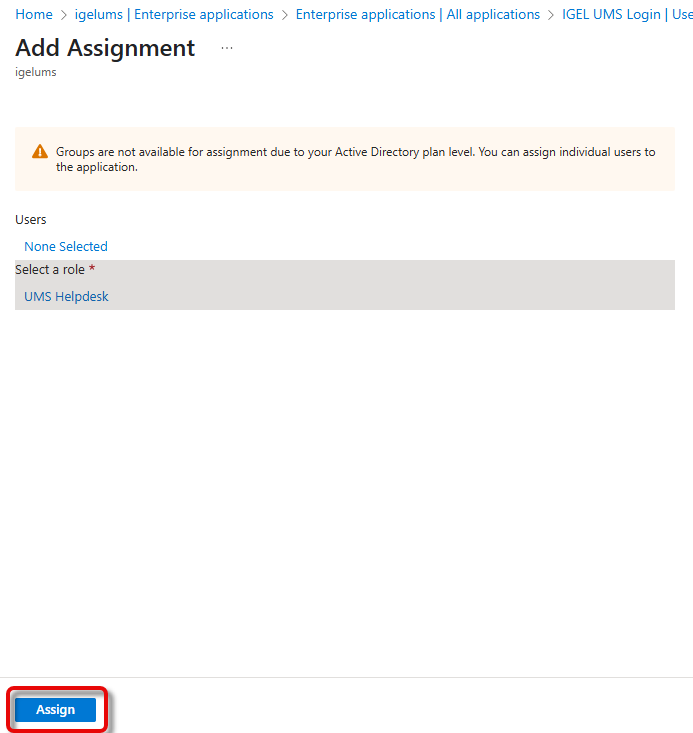
If an app role already exists, you must first select the role you want to add the user to: Under Select a role, click None Selected, select the appropriate role, click Select, and then Assign.
-
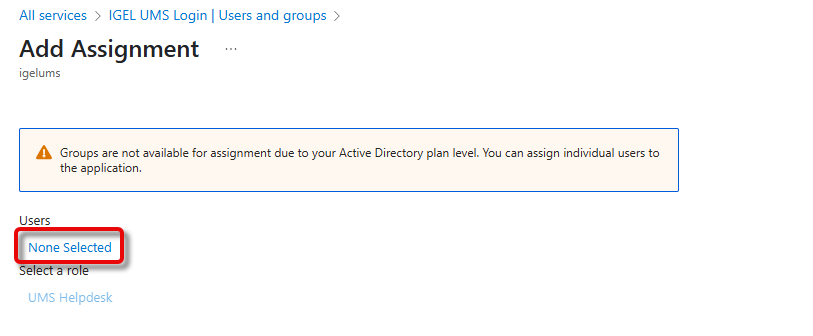
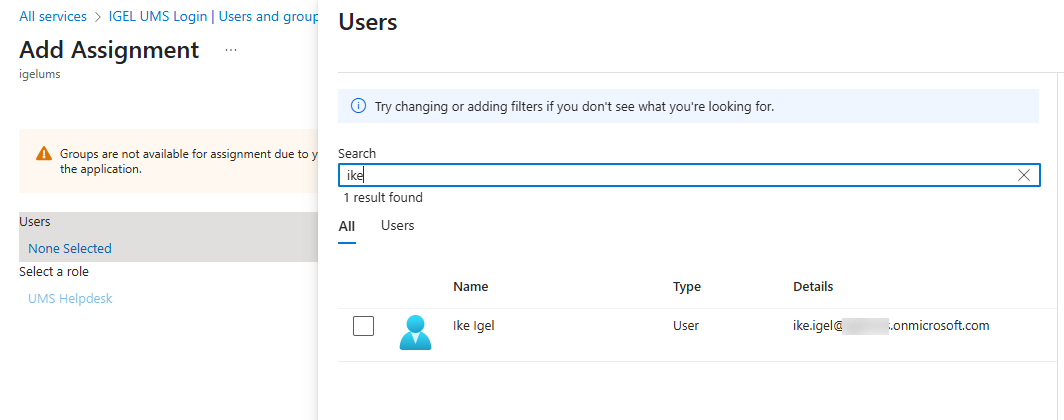
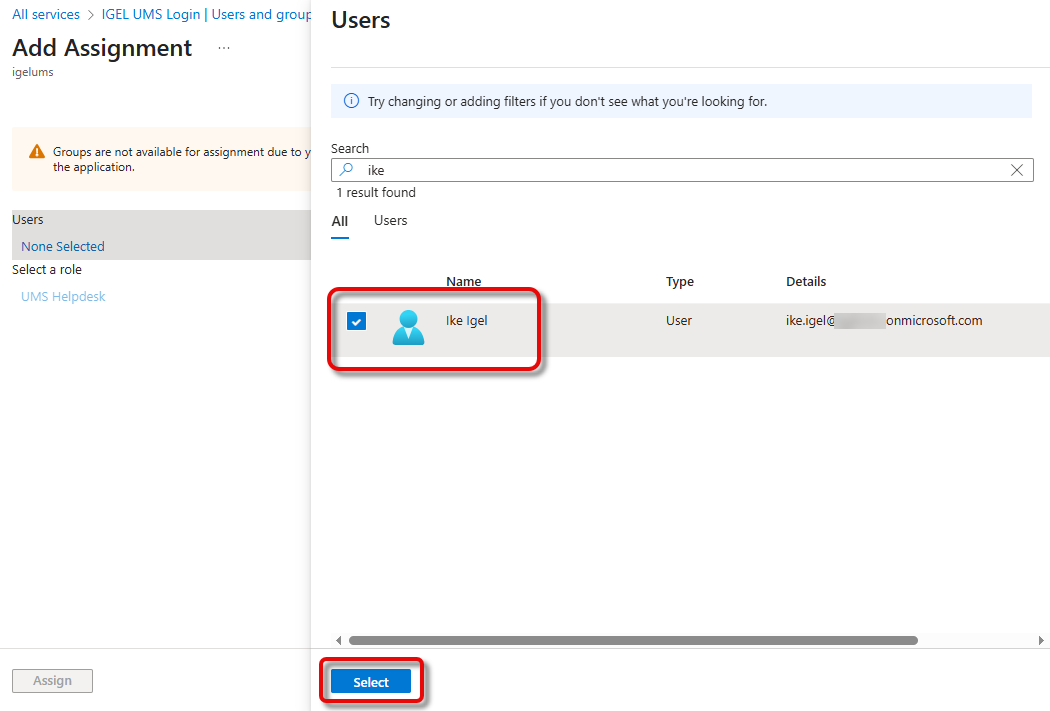
Under Users, click None Selected, search for the desired user, and then select the user.
-
Confirm the assignment with Assign.
Mapping the Roles in Microsoft Entra to UMS Groups
-
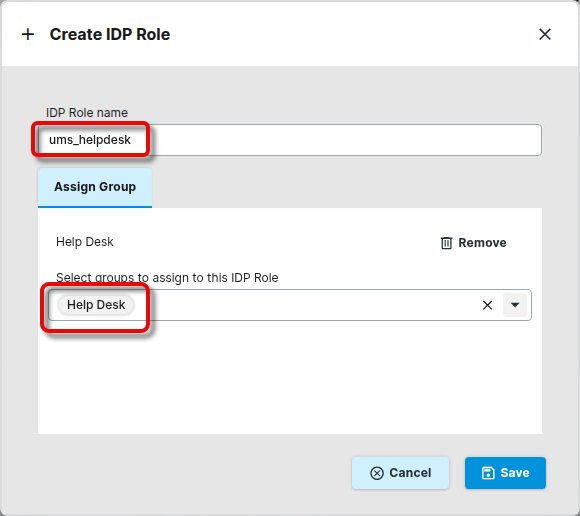
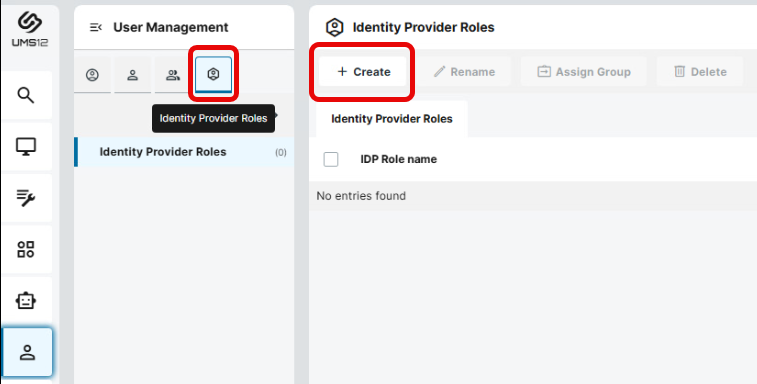
In the UMS Web App > User Management, select Identity Provider Roles


-
Edit the settings as follows:
-
IDP Role name: The Value of the app role you have configured in Microsoft Entra ID. Please note that this value is case-sensitive.
-
Assign Group: The UMS group you want to map to the app role
-
Continue with Adapting the Mapped Role Claim for Microsoft Entra ID.
Adapting the Mapped Role Claim for Microsoft Entra ID
The roles/groups defined within the IdP must be mapped to the IdP roles within the UMS. This is done via the token that is exchanged during the login process. By default, the UMS maps the roles/groups contained in the token claim ums_roles to IdP roles in the UMS.
Since Microsoft Entra does not support custom claims, we must edit the claim, which is done in the configuration file.
-
Open
<INSTALLLATION PATH>/rmguiserver/conf/appconfig/application.yml(example for Windows:C:\Program Files\IGEL\RemoteManager\rmguiserver\conf\appconfig\application.yml; example for Linux:/opt/IGEL/RemoteManager/rmguiserver/conf/appconfig/application.yml) and edit it as follows:
igel:
  auth-service:
    idp:
      claimNameRoles: roles
  client-cert-forwarding:
    enabled: false
    client-cert-forwarded-header: X-SSL-CERT
-
Restart the UMS Server.
-
On Windows: Services > IGEL RMGUIServer
-
On Linux:
sudo systemctl restart igel-ums-server
-
UMS Login with Okta
Creating an Application in Okta
-
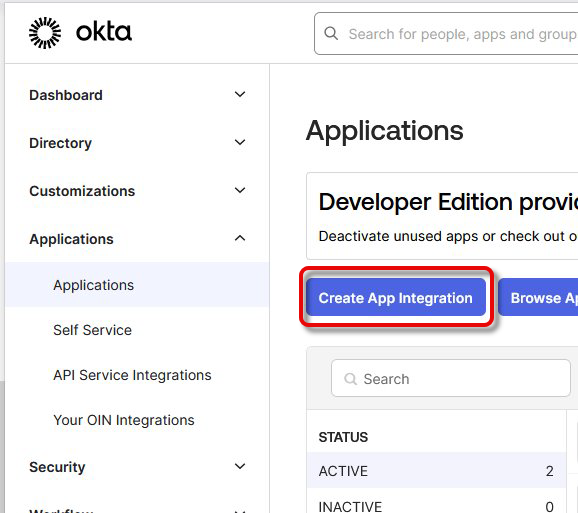
Log in to your Okta portal and navigate to Applications > Applications.
-
Click Create App Integration.
-
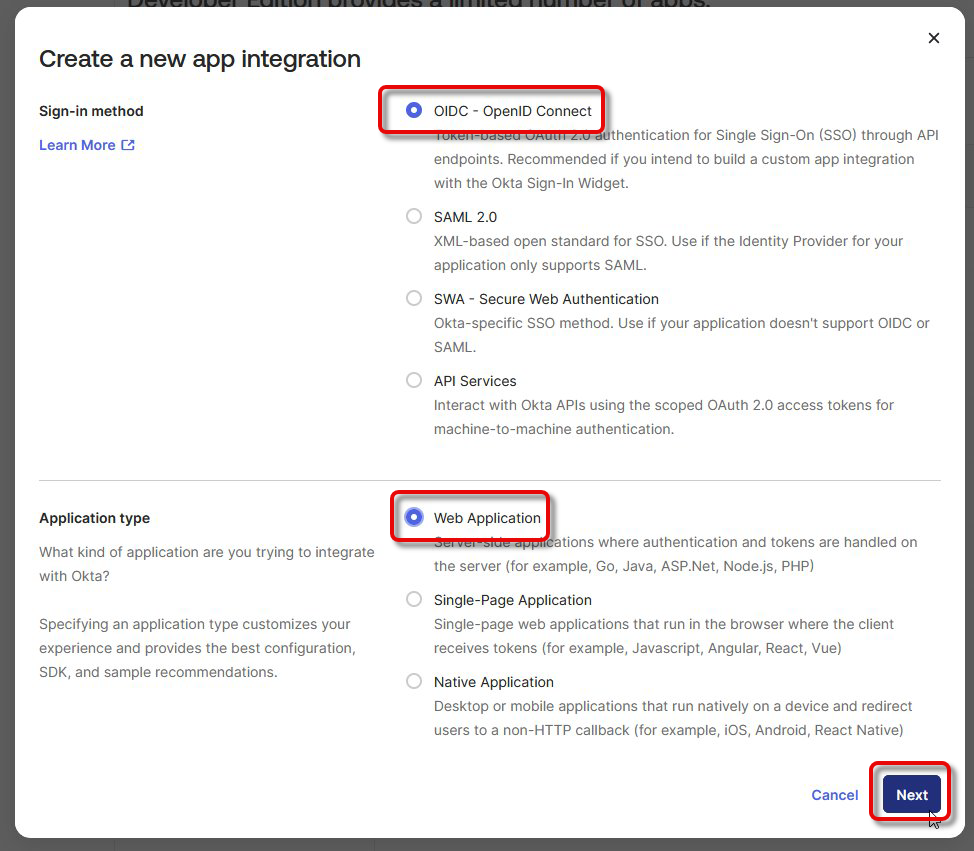
Edit the settings as follows and click Next.
-
Set Sign-in method to OIDC - OpenID Connect.
-
Set the Application type to Web Application.
-
-
Under Assignments, select which users are allowed to access the application and save your application.
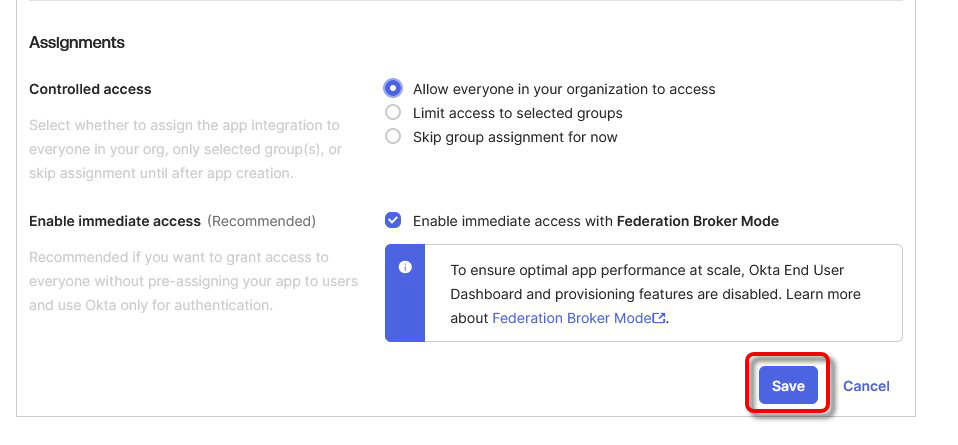
-
Save your application.
-
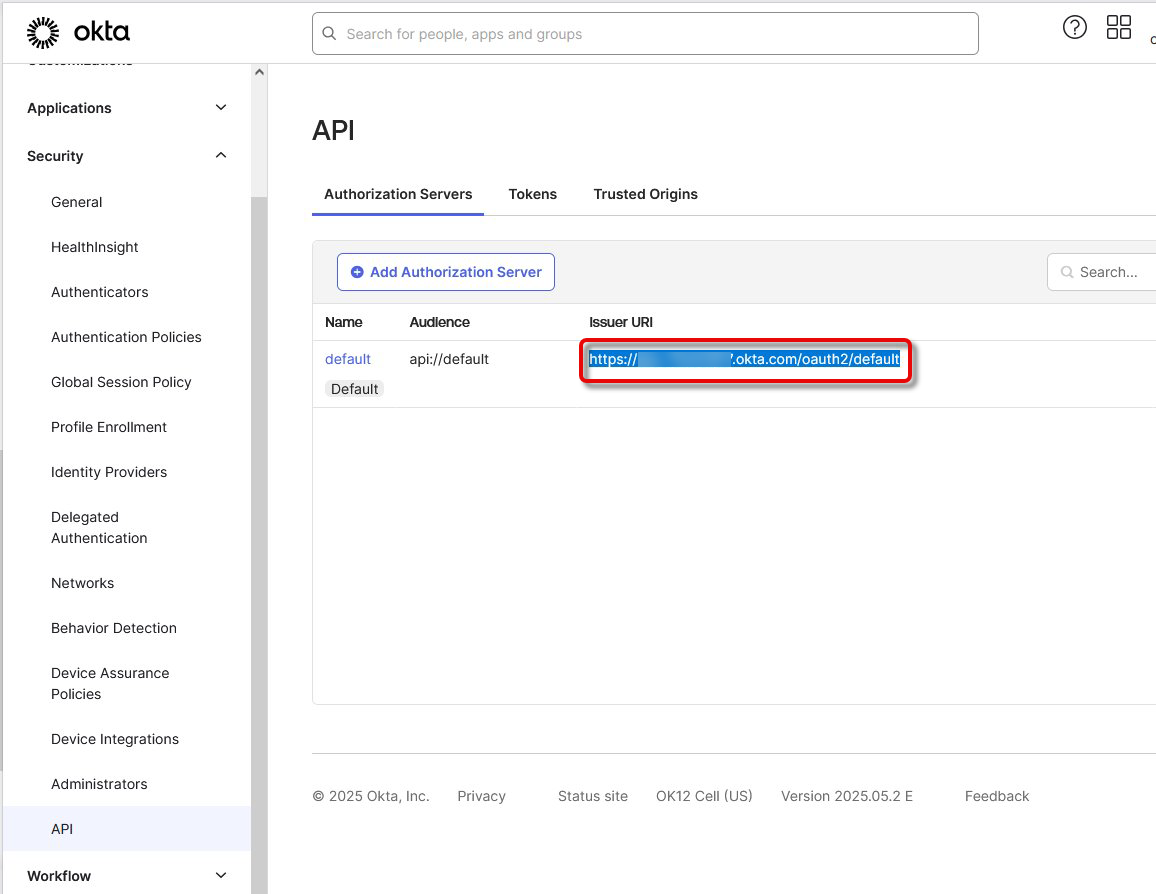
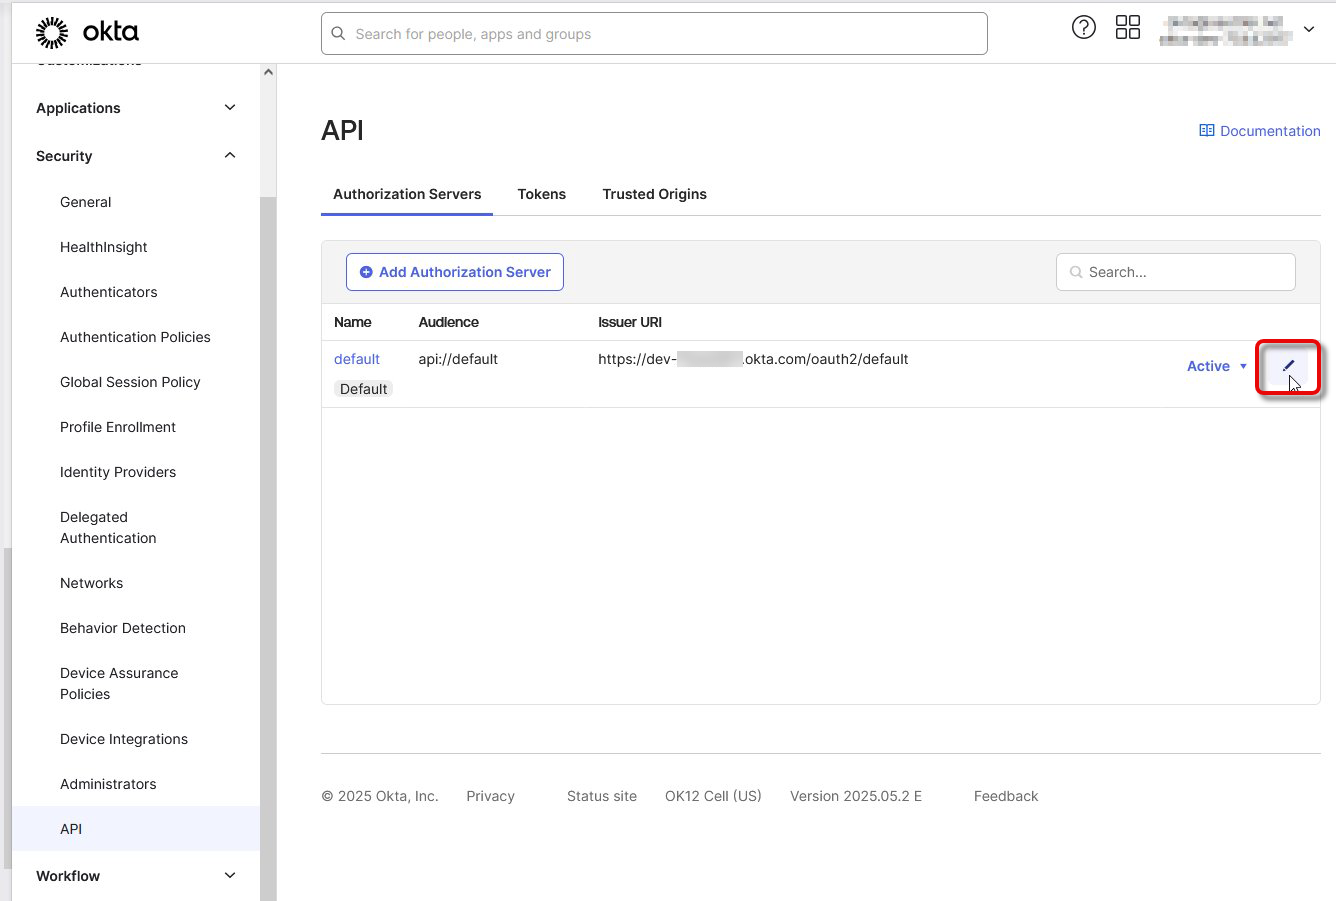
Go to Security > API and copy the Issuer URI of your authorization server (typically default).
-
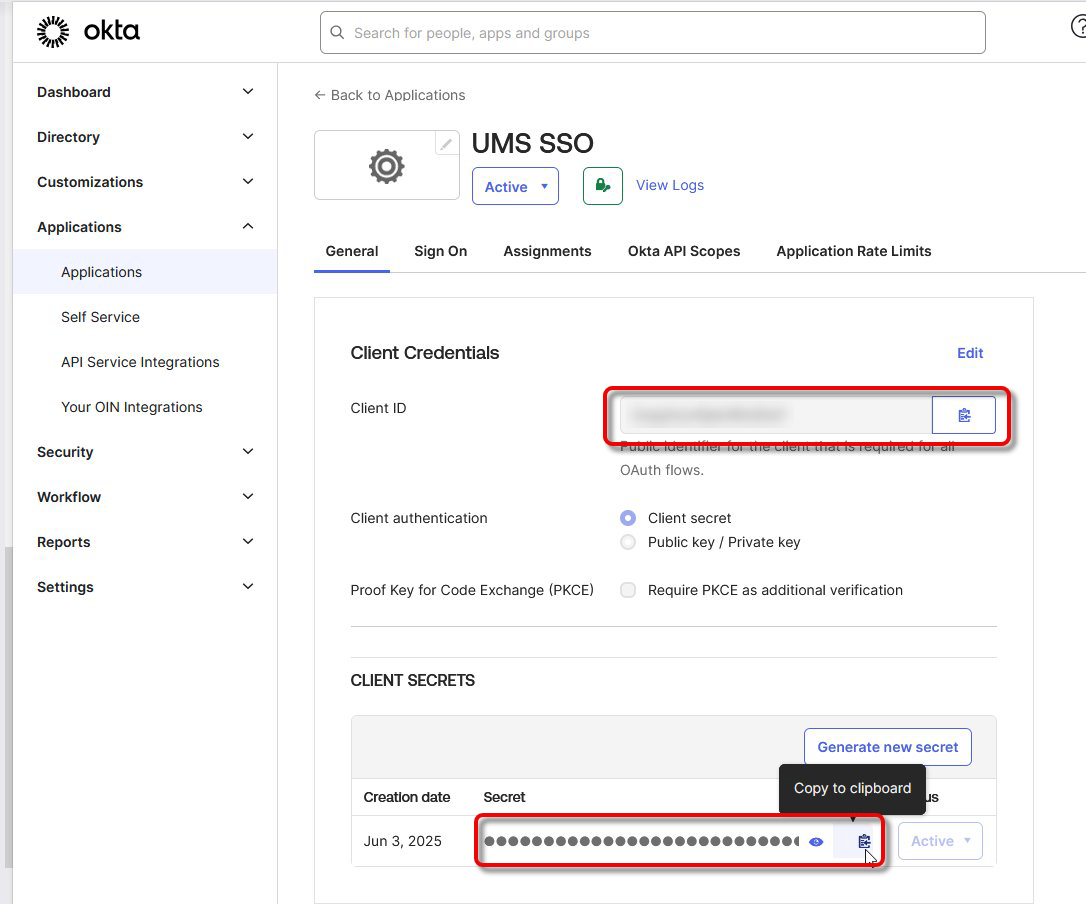
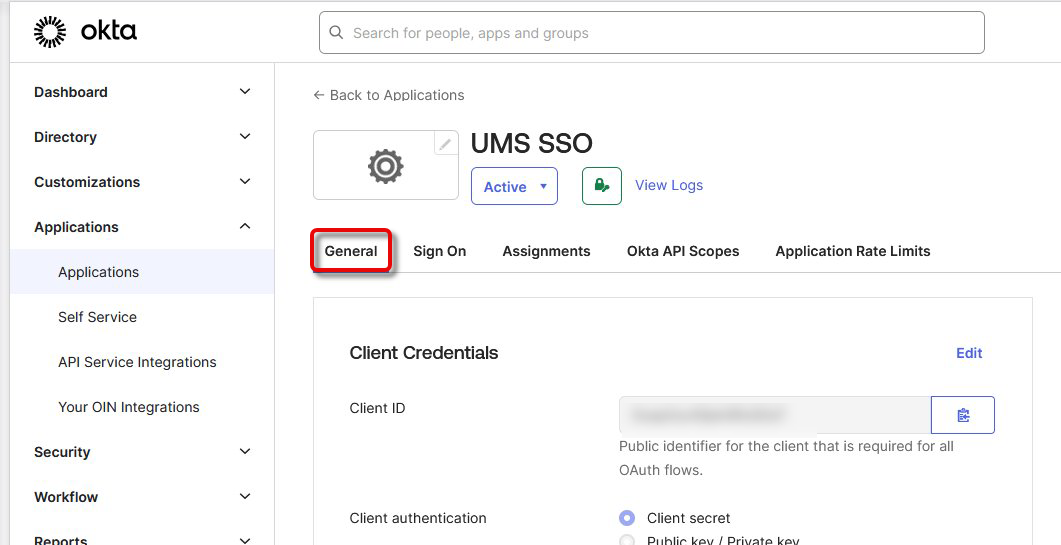
Open the General tab and copy the following data for your application:
-
Client ID
-
Client Secret
-
Configuring User Role Mapping in Okta
For the following procedure, we assume that a group is already defined in Okta.
-
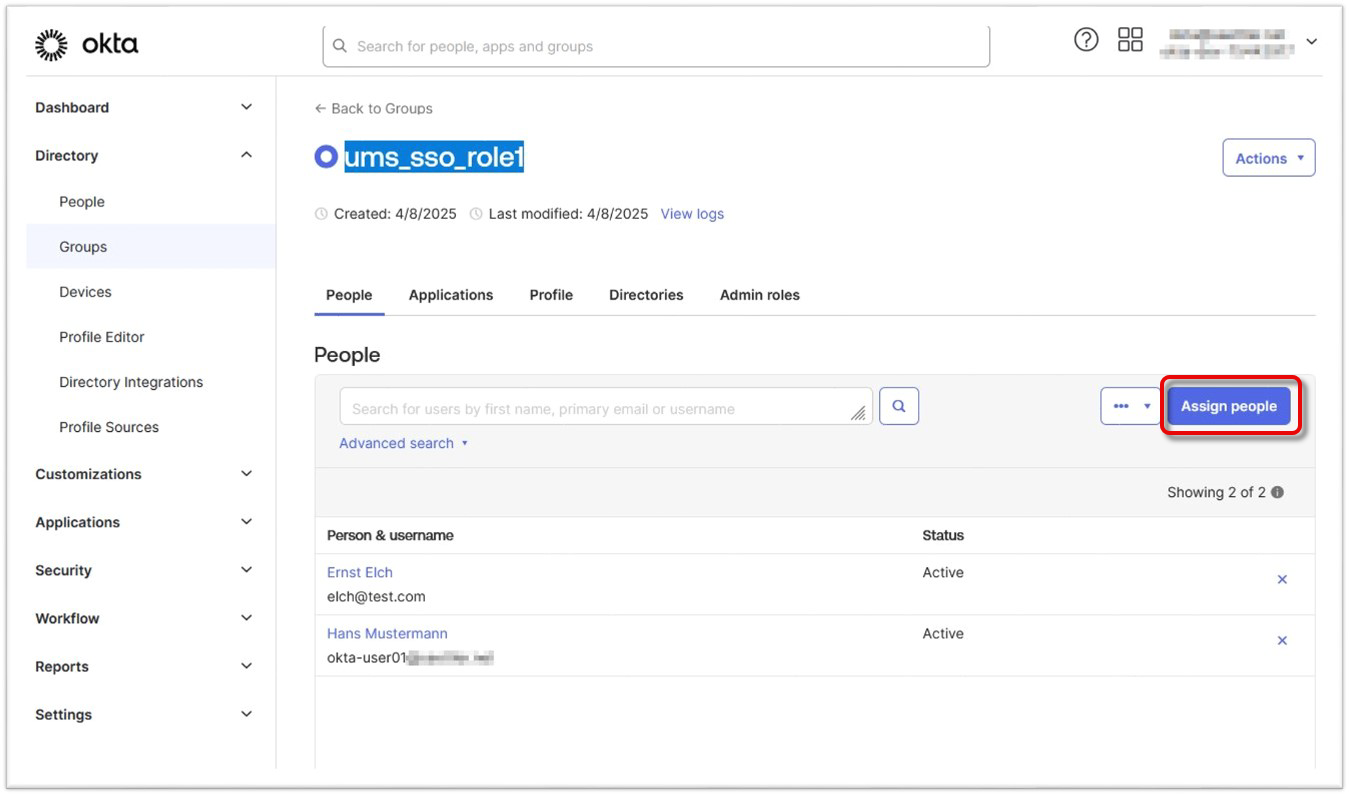
In the Okta portal, go to Directory > Groups and add the relevant users to your group.
-
Switch to Security > API and edit your authorization server (typically default).
-
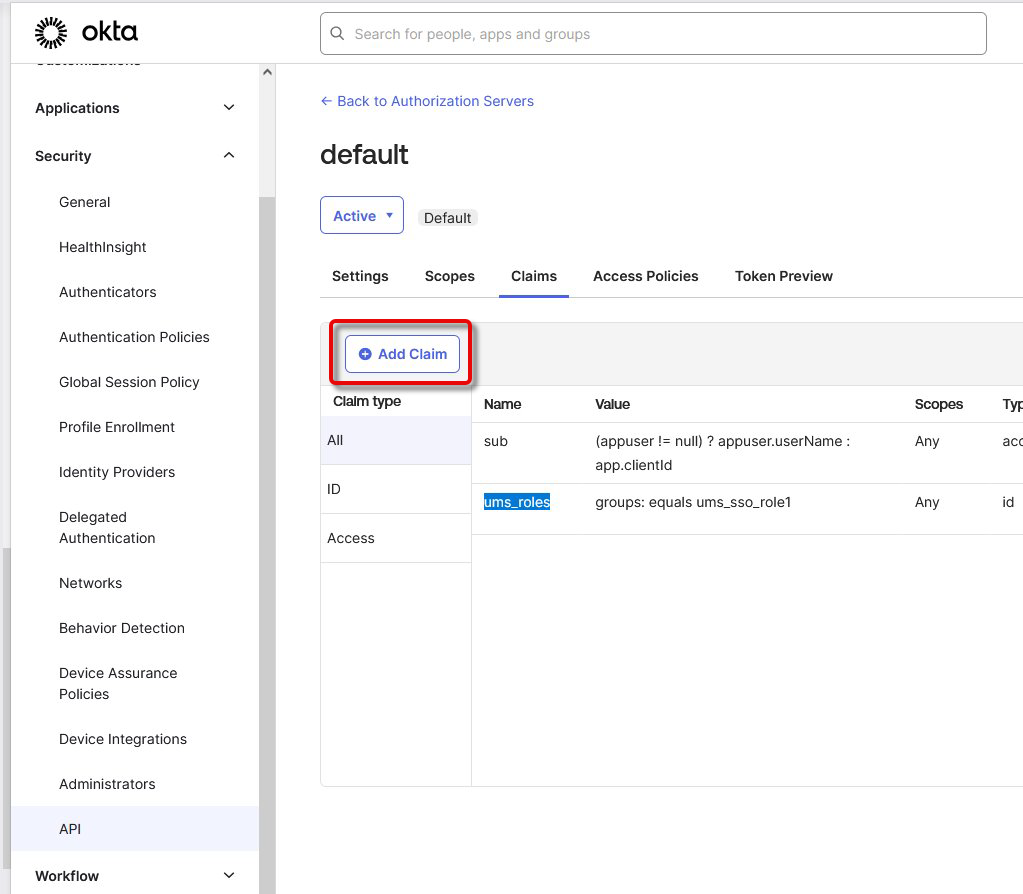
Open the tab Claims and add a new claim with the following settings:
-
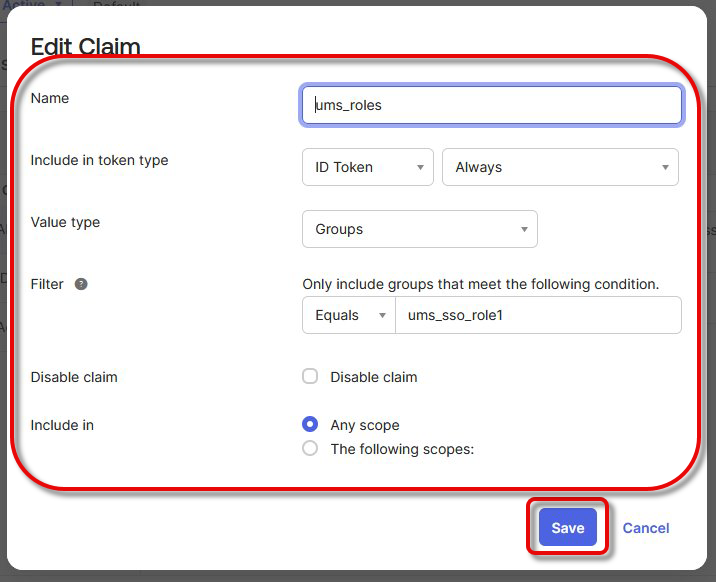
Set the Name to “ums_roles”.
-
Set Include in token type to ID Token and Always.
-
Set Value type to Groups.
-
To assign your group to the claim, set Filter > Equals to the name of the group.
-
Use Include in to define the scopes. At least “openid” and “profile” should be selected.
-
Configuring Your Connection to Okta in the UMS Web App
-
Open the UMS Web App, go to User Management, and click
-
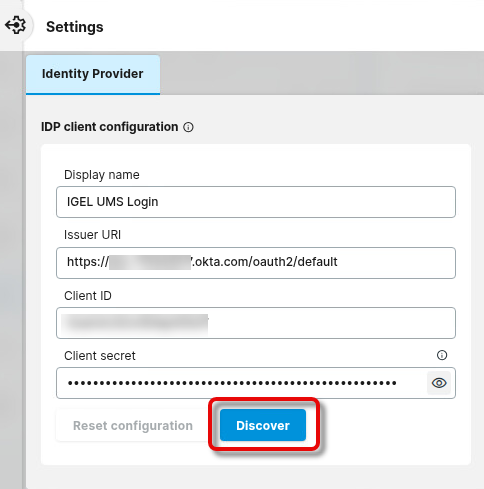
Enter the following data from the application you have created in Okta and click Discover.
-
Display name: The name of your application
-
Issuer URI: The issuer URI of your authentication server
-
Client ID: The client ID for your application
-
Client secret: The secret you have created for your application
-
-
In the Identify Provider Configuration Details window, copy the Redirect URI and close the window.
Configuring the Redirect URL of the UMS in Okta
-
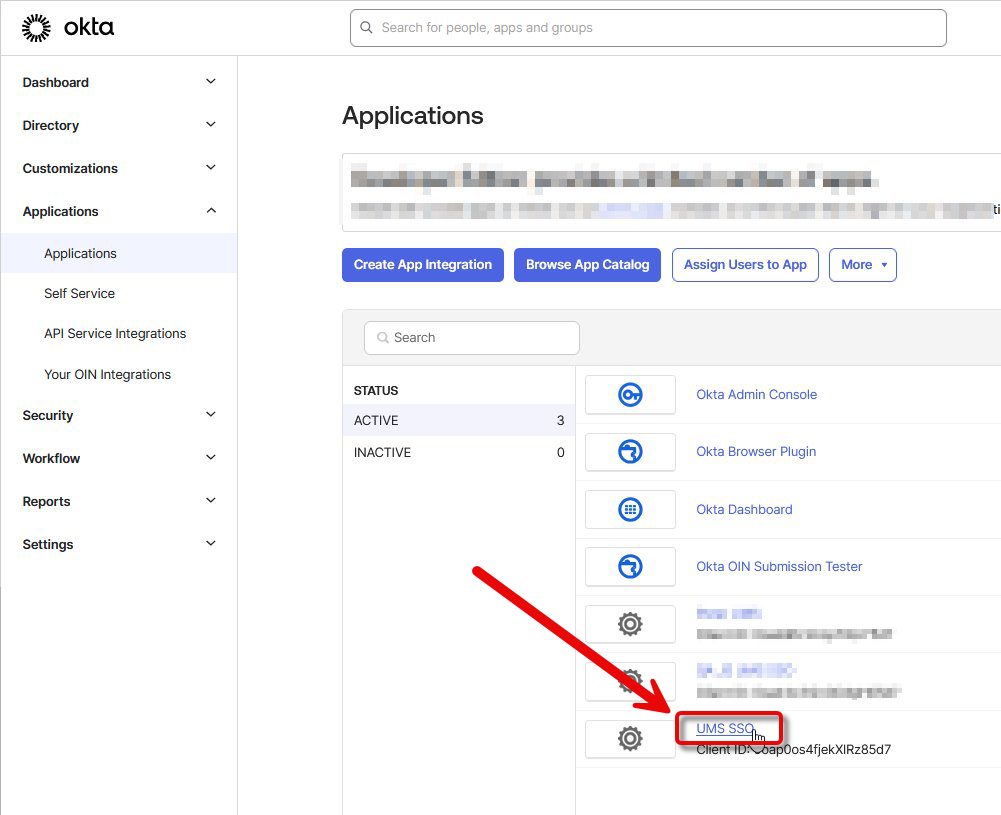
In the Okta portal, go to Applications > Applications and open your application.
-
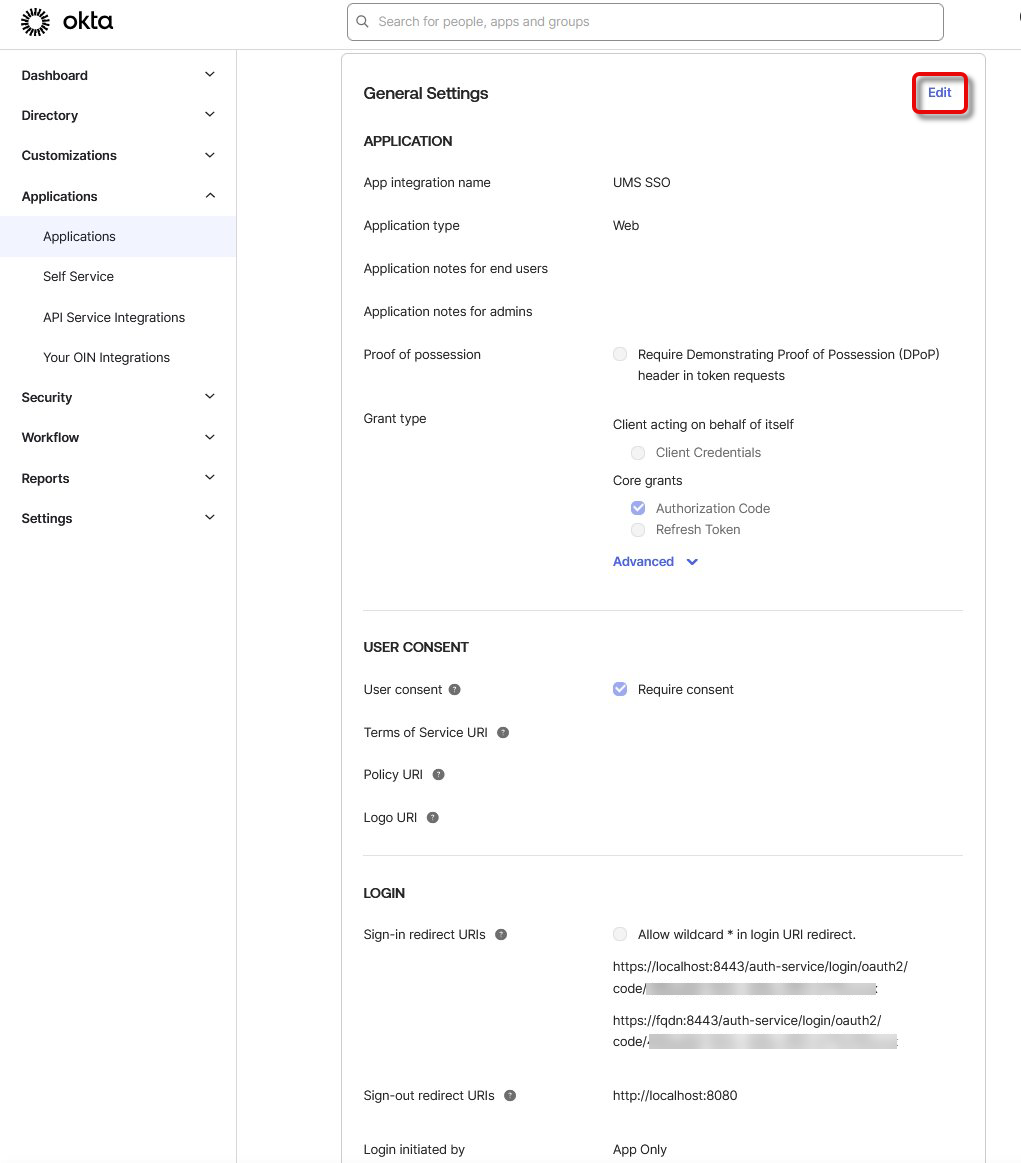
Select the tab General, scroll down to General Settings, and click Edit.
-
In the section LOGIN, under Sign-in redirect URIs, enter the login URIs. All URIs that can be used for login must be added here, according to the following patterns:
-
IP address of the UMS Server:
https://<IP ADDRESS>:8443/auth-service/login/oauth2/code/<REGISTRATION ID>- example:https://123.123.123.123:8443/auth-service/login/oauth2/code/ik45379f-ea33-413c-ed06-649f52d1a64d -
FQDN of the UMS Server:
https://<FQDN>:8443/auth-service/login/oauth2/code/<REGISTRATION ID>- example:https://myums.example.com:8443/auth-service/login/oauth2/code/ik45379f-ea33-413c-ed06-649f52d1a64d -
Short name of the UMS Server:
https://<SHORT NAME>:8443/auth-service/login/oauth2/code/<REGISTRATION ID>- example:https://myums:8443/auth-service/login/oauth2/code/ik45379f-ea33-413c-ed06-649f52d1a64d -
Local IP address:
https://<LOCAL IP ADDRESS>:8443/auth-service/login/oauth2/code/<REGISTRATION ID>- example:https://127.0.0.1:8443/auth-service/login/oauth2/code/ik45379f-ea33-413c-ed06-649f52d1a64d -
“localhost” (used when the Server field in the login dialog of the UMS Console is empty):
https://localhost:8443/auth-service/login/oauth2/code/<REGISTRATION ID>- example:https://localhost:8443/auth-service/login/oauth2/code/ik45379f-ea33-413c-ed06-649f52d1a64d
-
Mapping the Roles in Okta to UMS Groups
-
In the UMS Web App > User Management, select Identity Provider Roles

-
Edit the settings as follows:
-
IDP Role name: The Name of the app role you have configured in Okta. Please note that this value is case-sensitive.
-
Assign Group: The UMS group you want to map to the app role
UMS Login with Ping Identity
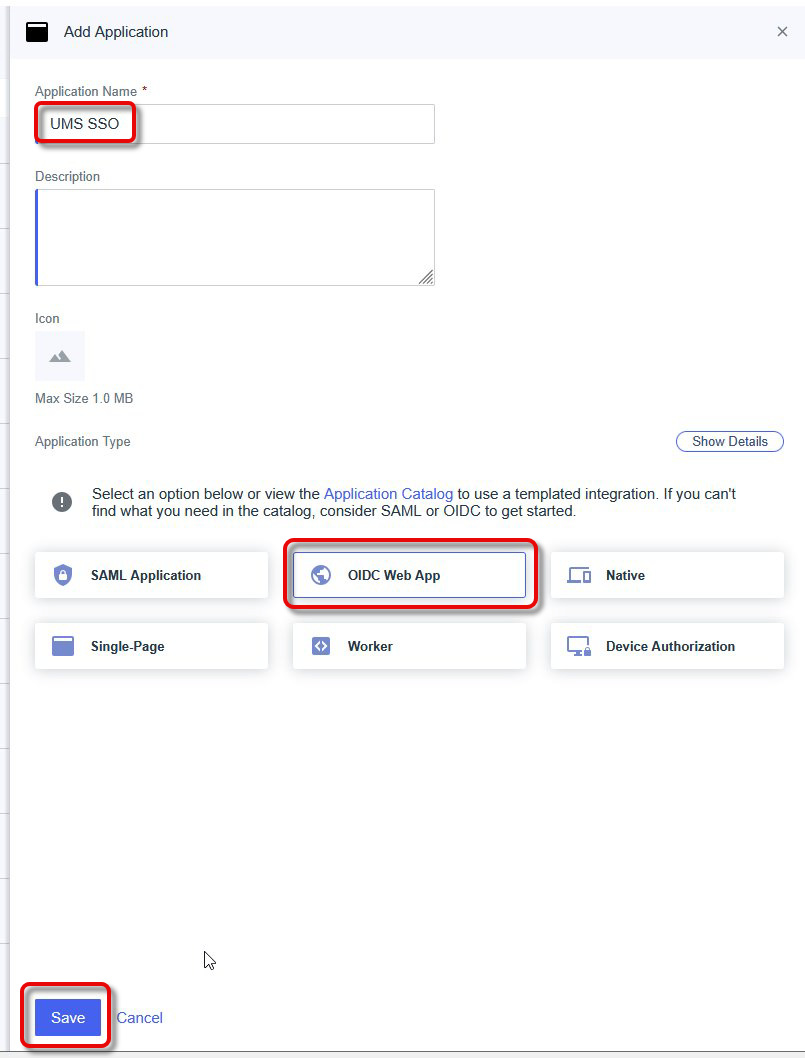
Creating an Application in PingIdentity
-
Log in to the PingIdentity portal, go to Applications > Applications, and click


-
Define an Application Name and select OIDC WebApp as the app type.
-
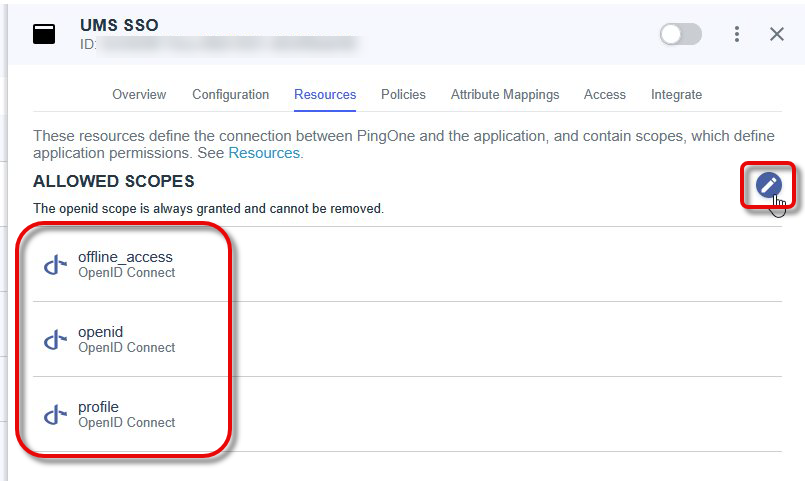
Go to Resources and select the following Allowed Scopes:
-
offline_access
-
openid
-
profile
-
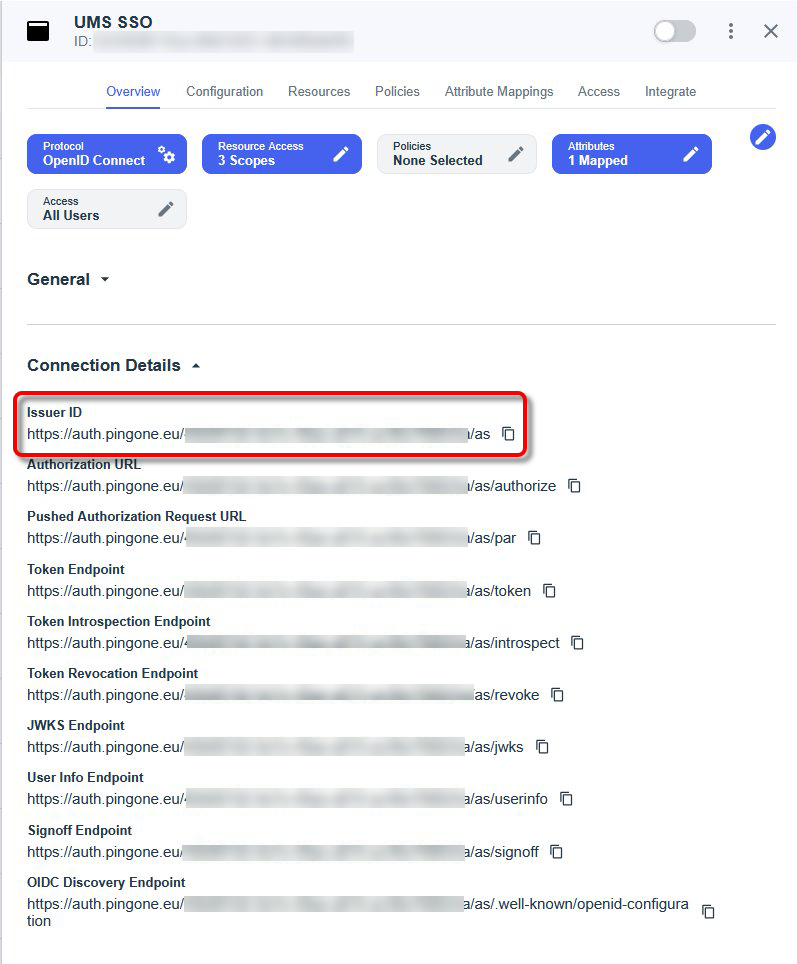
-
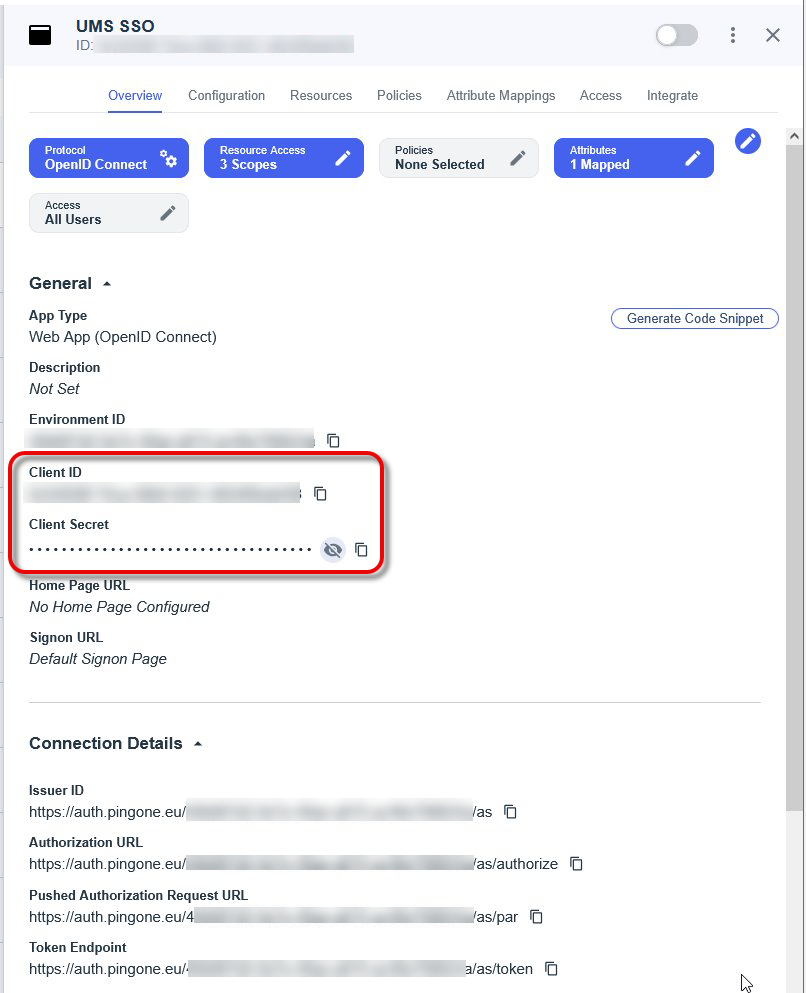
Open the tab Overview, expand the connection details, and copy the Issuer URI.
-
From the section General, copy the following data:
-
Client ID
-
Client Secret
-
Configuring User Role Mapping in PingIdentity
-
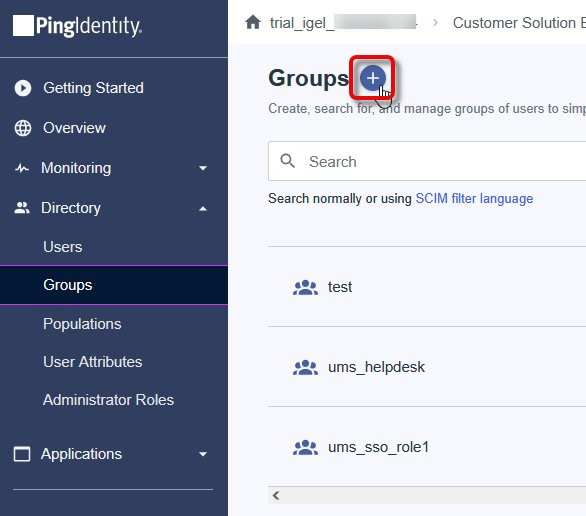
Go to Directory > Groups and create a group.
-
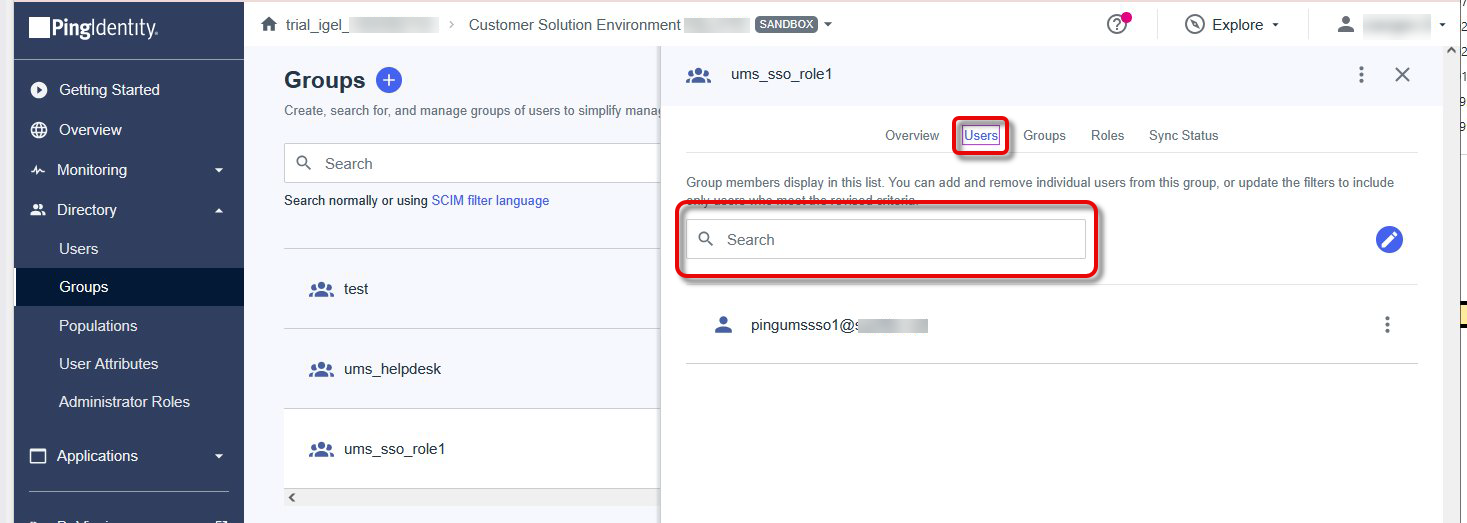
Open the tab Users and add users to your group.
-
In your application, open the tab Attribute Mappings and map the attribute ums_roles to Group Names.

Configuring Your Connection to PingIdentity in the UMS Web App
-
Open the UMS Web App, go to User Management, and click
-
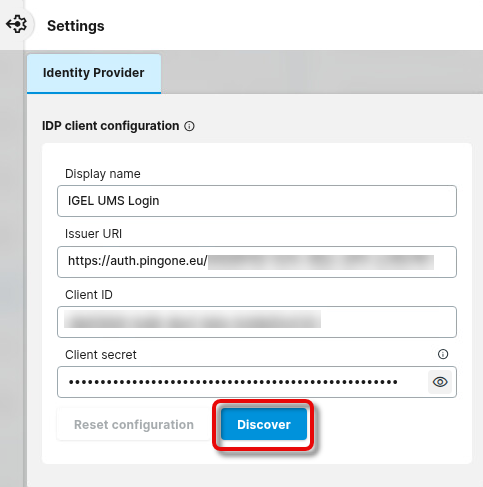
Enter the following data from the application you have created in Okta and click Discover.
-
Display name: The name of your application
-
Issuer URI: The issuer URI of your authentication server
-
Client ID: The client ID for your application
-
Client secret: The secret you have created for your application
-
-
In the Identify Provider Configuration Details window, copy the Redirect URI and close the window.
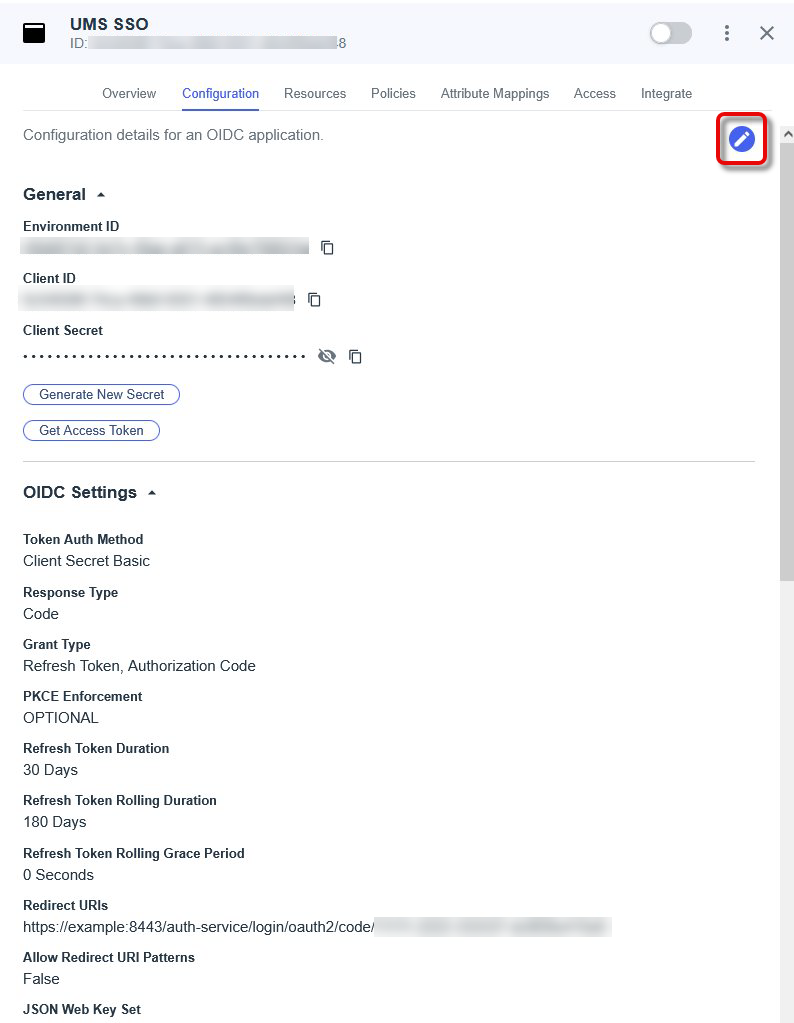
Configuring the Redirect URL of the UMS in PingIdentity
-
In the PingIdentity portal, open the tab Configuration and click

-
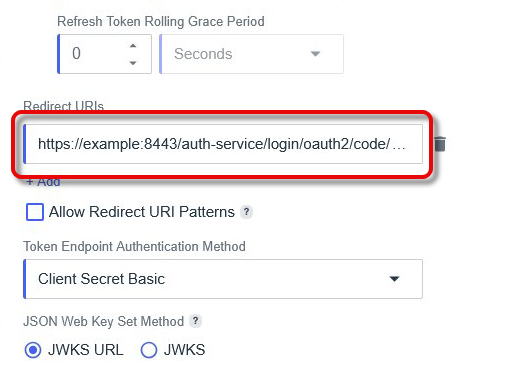
Add all URIs that can be used for login, according to the following patterns:
-
IP address of the UMS Server:
https://<IP ADDRESS>:8443/auth-service/login/oauth2/code/<REGISTRATION ID>- example:https://123.123.123.123:8443/auth-service/login/oauth2/code/ik45379f-ea33-413c-ed06-649f52d1a64d -
FQDN of the UMS Server:
https://<FQDN>:8443/auth-service/login/oauth2/code/<REGISTRATION ID>- example:https://myums.example.com:8443/auth-service/login/oauth2/code/ik45379f-ea33-413c-ed06-649f52d1a64d -
Short name of the UMS Server:
https://<SHORT NAME>:8443/auth-service/login/oauth2/code/<REGISTRATION ID>- example:https://myums:8443/auth-service/login/oauth2/code/ik45379f-ea33-413c-ed06-649f52d1a64d -
Local IP address:
https://<LOCAL IP ADDRESS>:8443/auth-service/login/oauth2/code/<REGISTRATION ID>- example:https://127.0.0.1:8443/auth-service/login/oauth2/code/ik45379f-ea33-413c-ed06-649f52d1a64d -
“localhost” (used when the Server field in the login dialog of the UMS Console is empty):
https://localhost:8443/auth-service/login/oauth2/code/<REGISTRATION ID>- example:https://localhost:8443/auth-service/login/oauth2/code/ik45379f-ea33-413c-ed06-649f52d1a64d
-
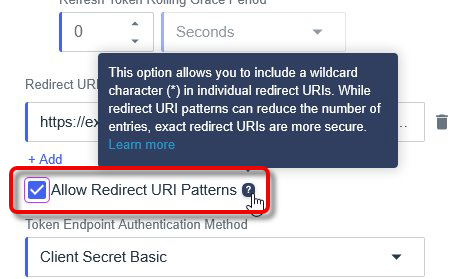
If you allow Redirect URI patterns, you can add wildcards (e.g., for subdomains or registration ID)
-
Open the tab Overview and enable the application.

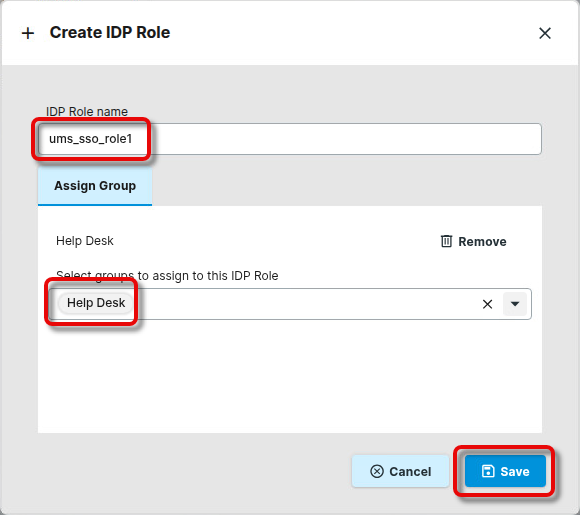
Mapping the Roles in PingIdentity to UMS Groups
-
In the UMS Web App > User Management, select Identity Provider Roles
-
Edit the settings as follows:
-
IDP Role name: The name of the group you have configured in PingIdentity. Please note that this value is case-sensitive.
-
Assign Group: The UMS group you want to map to the app role