With the IGEL App Creator Portal, you can create apps for IGEL OS 12 by using a recipe and, as needed, additional binaries or other files.
The recipe contains the scripts and metadata files necessary to build an app that can be installed and run on the IGEL OS Base System. While some recipes are available directly on the IGEL Creator Portal, you can obtain further recipes from the IGEL community.
Legal Note
IGEL is not responsible for, nor grants a license to, the applications created via the App Creator Portal.
IT IS YOUR SOLE RESPONSIBILITY TO OBTAIN ALL NECESSARY RIGHTS TO THE COMPONENTS PRIOR TO CREATING AN APPLICATION.
For more information, see our Terms and Conditions:
https://www.igel.com/terms-conditions/
In addition, the App Creator Portal will sign your app and provide the corresponding certificate. When you deploy this certificate to the device, the IGEL OS Base System will allow the app to be installed. Please note that there are two types of certificates:
-
If your company has IGEL Enterprise Edition licenses, you receive a certificate exclusively for your company. This includes a private key. With a company certificate, the apps you have created can only be installed on your company’s devices.
-
If your company has one of the other licenses, you receive a Community certificate. With a Community certificate, your created apps can be installed on any device.
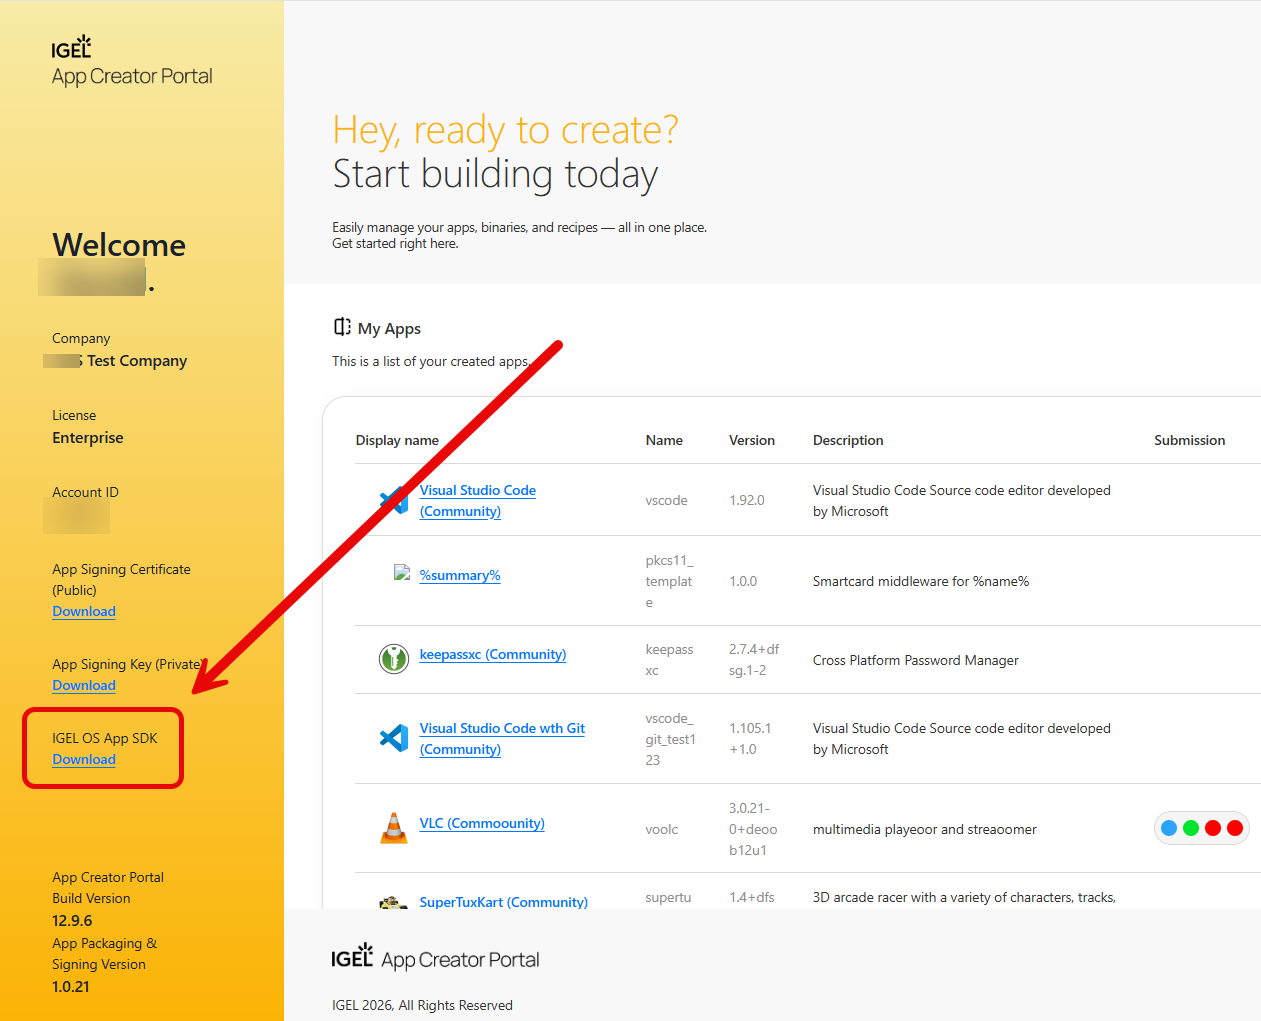
As an alternative to using the App Creator Portal, you can create an app for IGEL OS in your local environment. You can download the IGEL OS App SDK required for this from the App Creator Portal. The IGEL OS App SDK is available as a Docker image.
Access to the IGEL App Creator Portal
To log in to the IGEL App Creator Portal, you need an account and have the App Creator role or the Super Admin role assigned. This is done in the IGEL Customer Portal. For details, see Managing Users and Roles in the IGEL Customer Portal.
Requirements
-
UMS 12.04 or higher
-
IGEL OS 12.5 or higher
-
If you want to create your app with the IGEL App Creator Portal:
-
The recipe for your app, if not already available in the App Creator Portal
-
Additional files, e.g., binaries, if required by your app
-
-
If you want to create your app with the IGEL OS App SDK:
-
A machine with Ubuntu Linux 18.04 or higher, or another Debian-based Linux distribution
-
Docker is installed on the machine
-
Login to the IGEL App Creator Portal
-
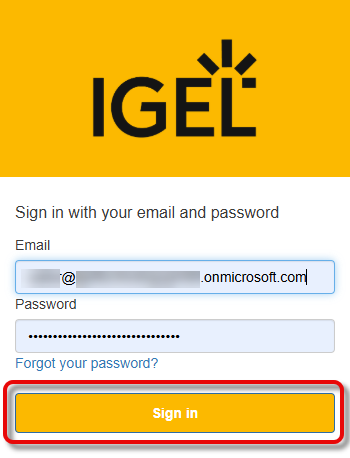
Click Let’s Login.

-
Enter your IGEL credentials.
-
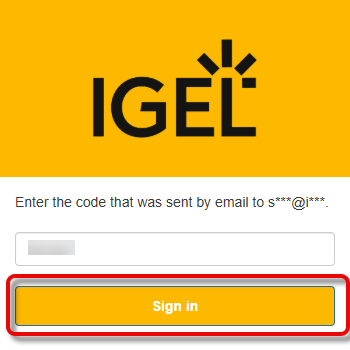
If you are asked for a code, check your email and enter the code that has been sent to you.
For IGEL Ready Technology Partners: Creating Your App with the IGEL OS App SDK
If you are an IGEL Ready Technology Partner, you can use the IGEL OS App SDK to create your app.
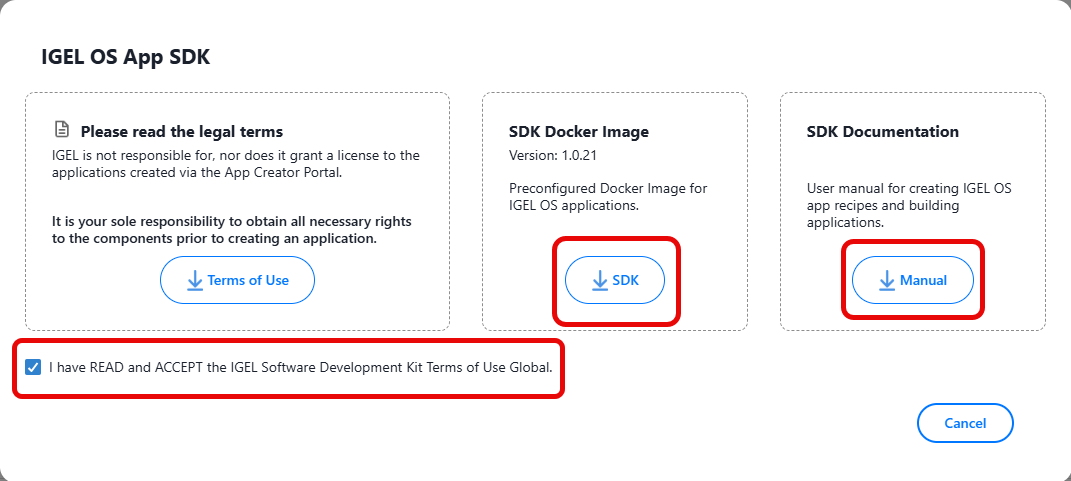
To obtain the relevant software and documentation:
-
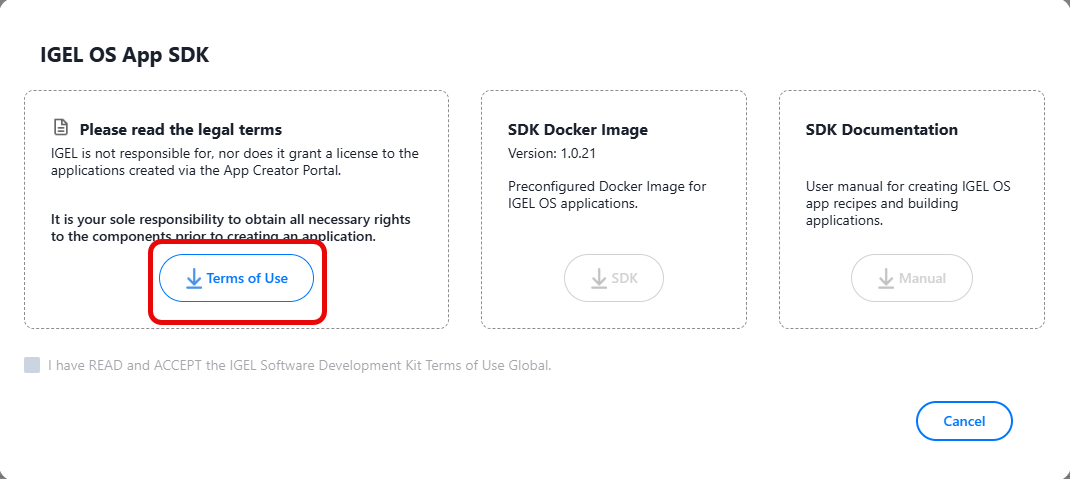
Under IGEL OS App SDK, click Download.
-
Download and read the Terms of Use document.
-
Confirm that you have read and accepted the legal terms, then download the SDK software as a Docker image and the accompanying Manual.
-
Copy the downloaded Docker image file (
igelpkg.tar) to your Linux machine and load the image into Docker:
sudo docker load < igelpkg.tar
-
Check if the image has been loaded correctly:
sudo docker images

For details on how to use igelpkg, see the manual you have downloaded (“Getting Started With the IGEL OS App SDK“).
Please note that the manual is currently being revised to include the latest SDK updates. The new version is expected in January 2026.
To get the certificates for signing the app you have created with IGEL OS SDK:
→ Download the App Signing Certificate (Public) and the App Signing Key (Private).

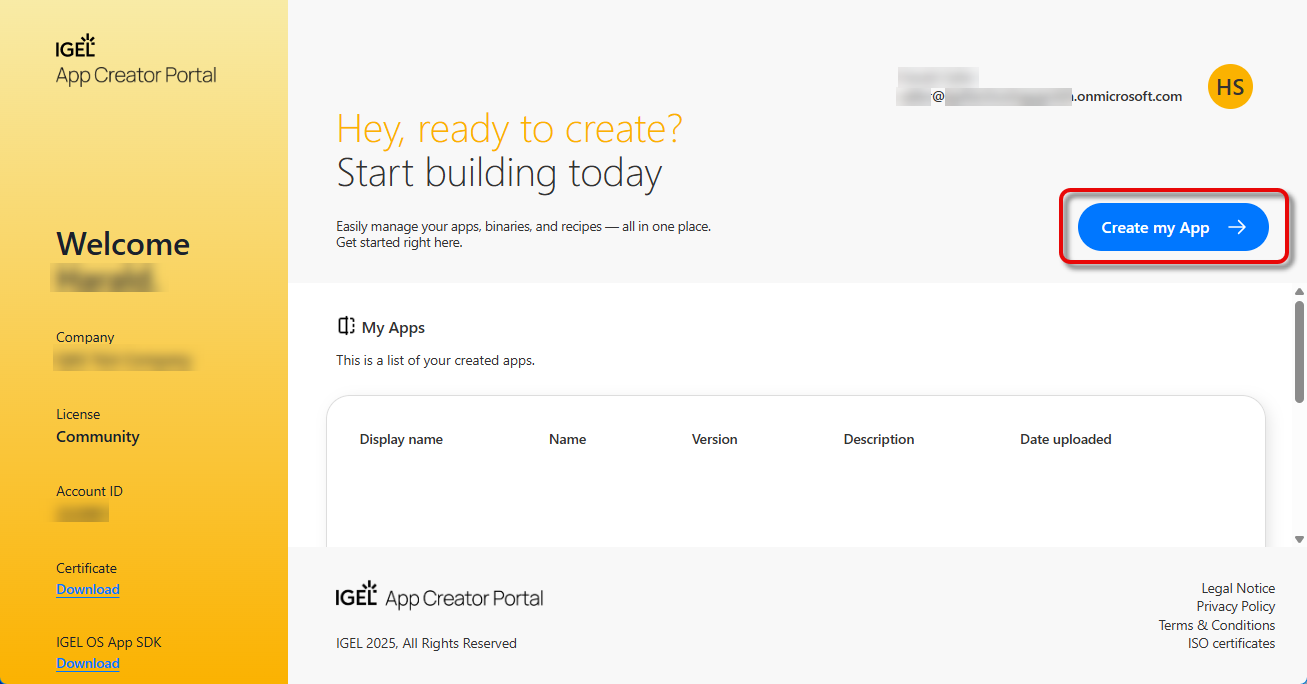
Creating Your App in the IGEL App Creator Portal
→ To start the creation process, click Create my App.
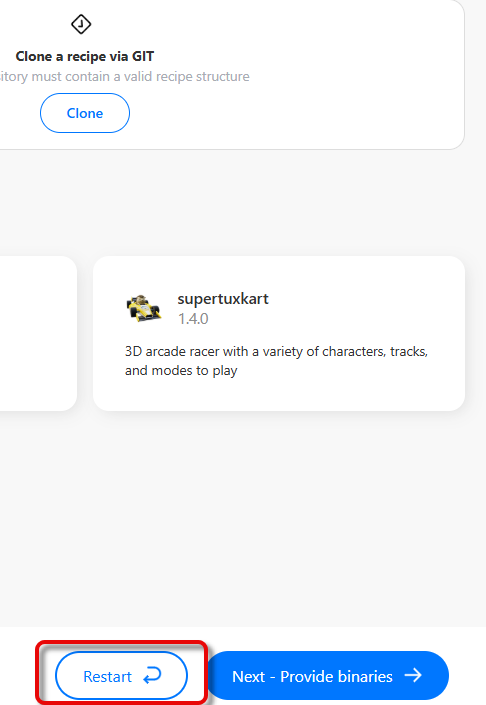
If you got stuck in the process and want to start from the beginning, click Restart.
STEP 1 Provide a recipe
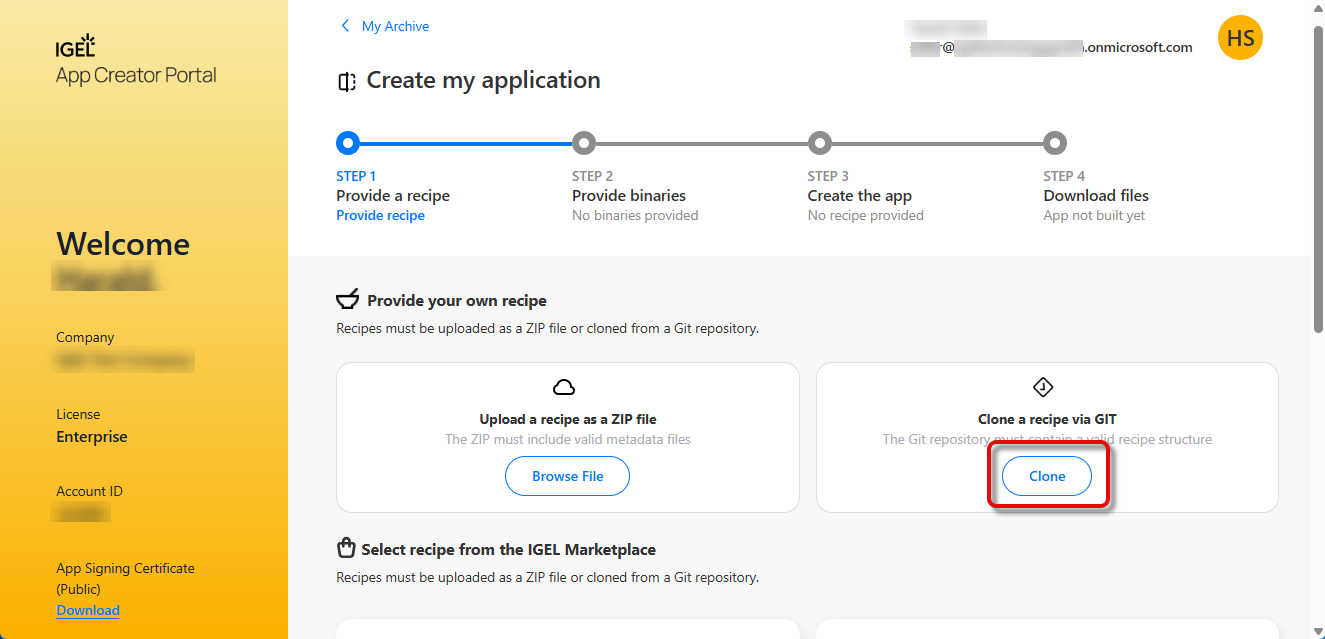
You have the following options to provide a recipe for building your app:
-
Upload a recipe from a local source as a ZIP file; see Upload a Recipe as a ZIP File
-
Clone a recipe from a GIT repository; see Cloning a Recipe from a Git Repository
-
Use a recipe that is already available on the App Creator Portal; see 1.1 Select Your Recipe
Provide Your Own Recipe
Upload a Recipe as ZIP File
Metadata Requirements
Before you upload a package, you may want to check or edit the metadata contained in the following files:
-
app.jsonshould contain the correct version and name for your app. -
app.jsonmust define a valid value for“version”while“public_version”must be empty or non-existent. -
igel/thirdparty.jsonmust contain the names of the binaries used in your app.
You can find a comprehensive description of the metadata at https://github.com/IGEL-Community/IGEL-OS-APP-RECIPES/blob/main/utils/IGEL-SDK-Reference-Manual.pdf.
Variables for Metadata
To make your app recipes easier to maintain, you can use variables for metadata values. Instead of defining these values directly in the recipe, you define them once in a separate file and reference them in JSON files of the recipe.
This way, if a value changes (for example, the version), you only need to update it in one place.
Currently, variables are supported for the following metadata items.
-
name -
version
→ To define the variables, add the file variable.json to the folder igel of your recipe and fill it with the following content:
{
    "name": "TECHNICAL NAME FOR YOUR APP",
    "version": "TECHNICAL VERSION"
}
Example:
{
    "name": "ACME SC",
    "version": "1.0.0"
}
→ To use the variables in your recipe’s metadata, put the corresponding placeholder, i.e., %name% or %version%, into the relevant metadata file in your recipe. In the following example, variables are used in app.json:
{
  "name": "%name%",
  "author": "ACME dev team",
  "categories": [
    "smartcard"
  ],
  "icons": {
    "app": "app.svg",
    "monochrome": "monochrome.svg"
  },
  "summary": {
    "en": "ACME Smartcard App"
  },
  "vendor": "ACME",
  "version": "%version%"
}
ZIP Format
Use a simple ZIP format without zip64 extensions or data descriptors.
-
Click Upload.
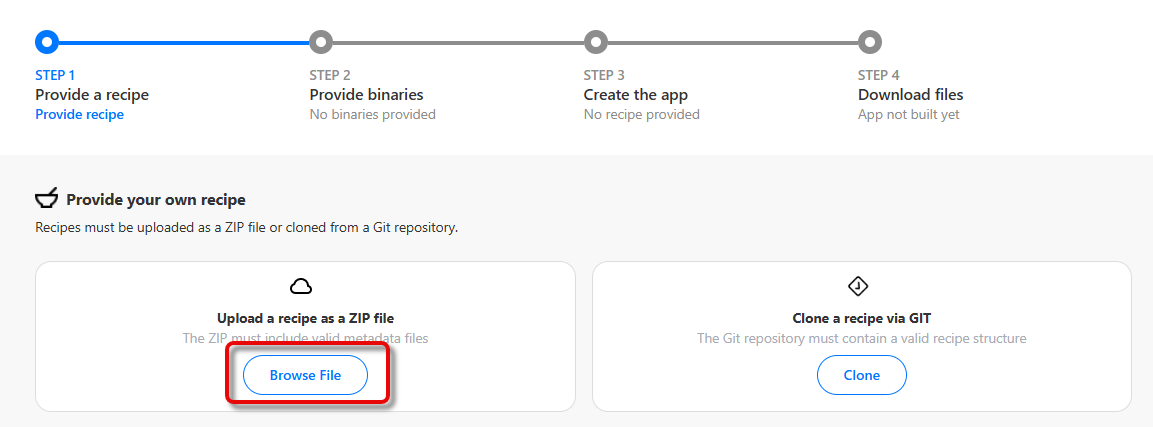
-
Click Browse File and select the recipe file on your system.
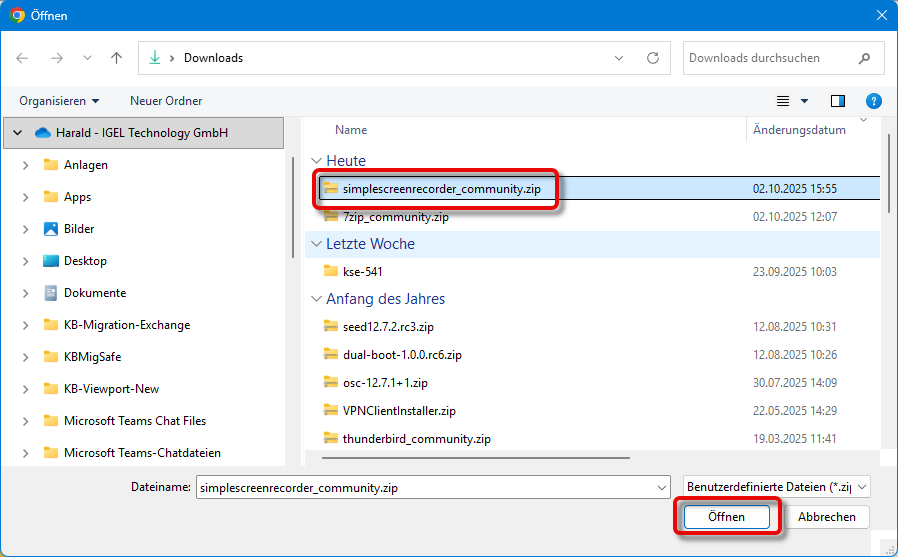
Your package file is unzipped and parsed.
If no additional files are required, you are taken to Step 3 Create the App.
If additional files are required, you are taken to Step 2 Provide Biles.
Clone a Recipe via GIT
-
Click Clone.
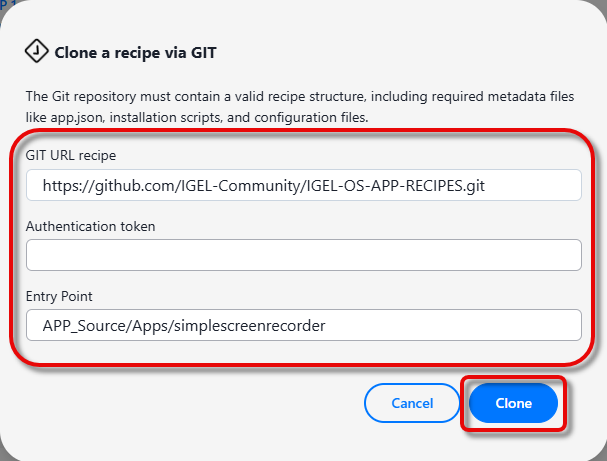
-
Enter the following data and then click Clone.
-
Clone Git Repository: The URL of the Git repository from which you want to fetch your recipe.
Example:https://github.com/IGEL-Community/IGEL-OS-APP-RECIPES.git -
Authentication Token: If the repository is private, enter the authentication token to access it. If it is public, leave this field empty. If you need to create a token:
-
Select Generate new token.
-
Select the scopes repo and read:packages.
-
Entry Point: Subdirectory containing the sources for your recipe.
Example:APP_Source/Apps/simplescreenrecorder
-
If no additional files are required, you are taken to Step 3 Create the app.
If additional files are required, you are taken to Step 2 Provide binaries.
Select Recipe from the IGEL Marketplace
-
Select the recipe you want to use.
-
If the app does not require any additional files, proceed with step Step 3 Create the app. If additional files are required, continue with Step 2 Provide Files.
STEP 2 Provide binaries
This step is required if your app needs additional files, like binaries.
Source URL for Binaries
Some of the recipes provided by IGEL require binaries. The download URL is in the corresponding Readme.md under https://github.com/IGEL-Community/IGEL-OS-APP-RECIPES/tree/main/APP_Source/Apps > [YOUR APP]
Example: For the app Thunderbird, the full path to the Readme.md file is https://github.com/IGEL-Community/IGEL-OS-APP-RECIPES/blob/main/APP_Source/Apps/thunderbird/README.md.
Allowed File Types
The following file types are accepted:
-
.tar -
.tgz -
.tar.gz -
.tar.xz -
.txz -
.xz -
.txz -
.gz -
.bz2 -
.zip -
.deb
File Name Must Be Unique, Upper and Lower Case Letters Not Sufficient
Files in the same directory must not differ only by case; they must have distinct names. Two files in the same directory that differ only by case will be treated as the same file.
-
Drag and drop the files into the dropbox field, or click on each field with a file name to use a file chooser for each file individually.
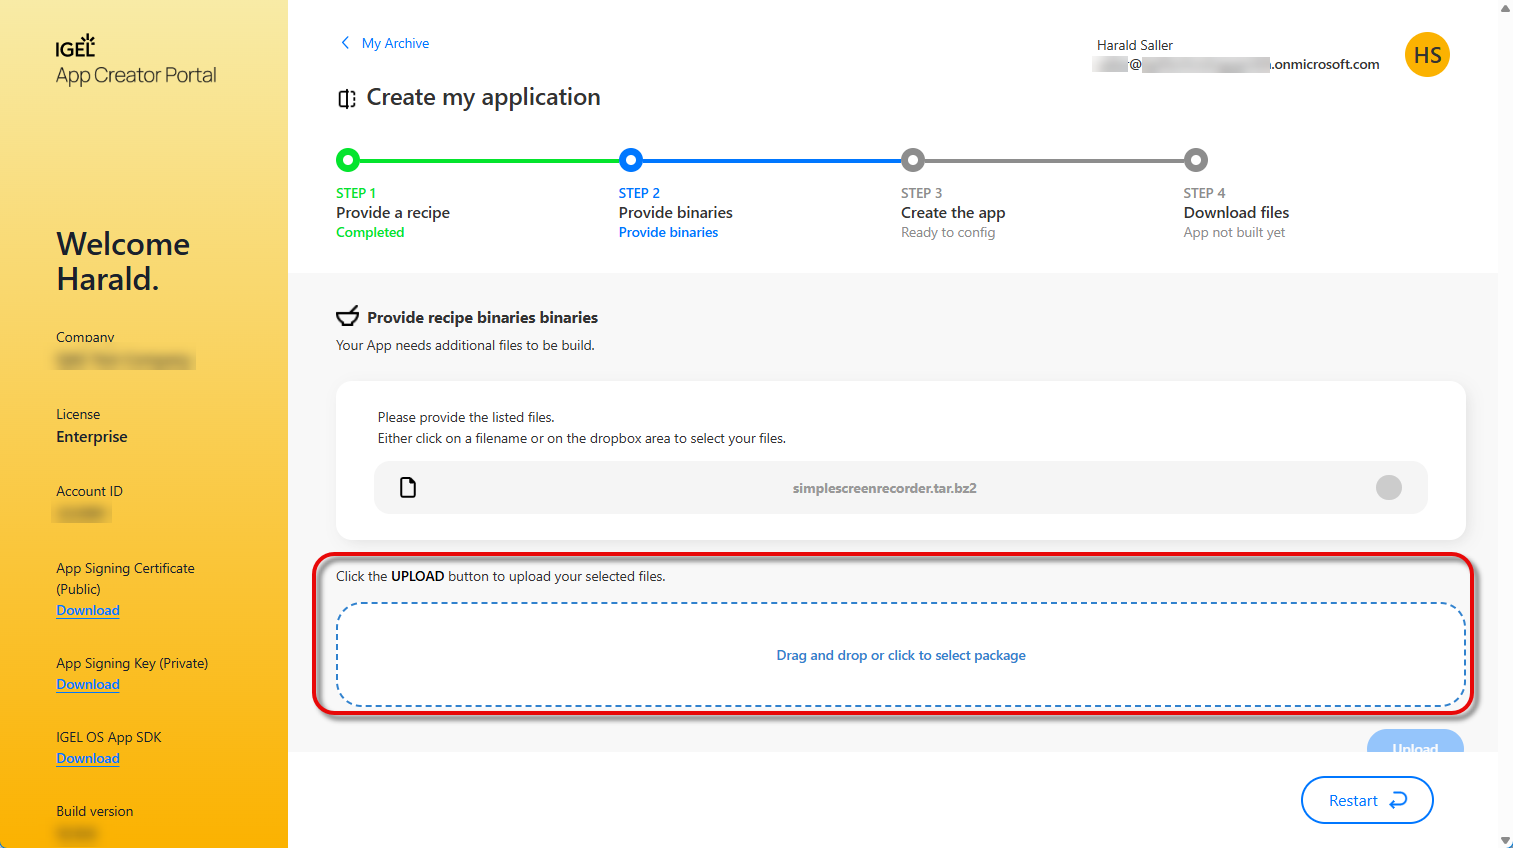
-
When the files are displayed, click Upload.
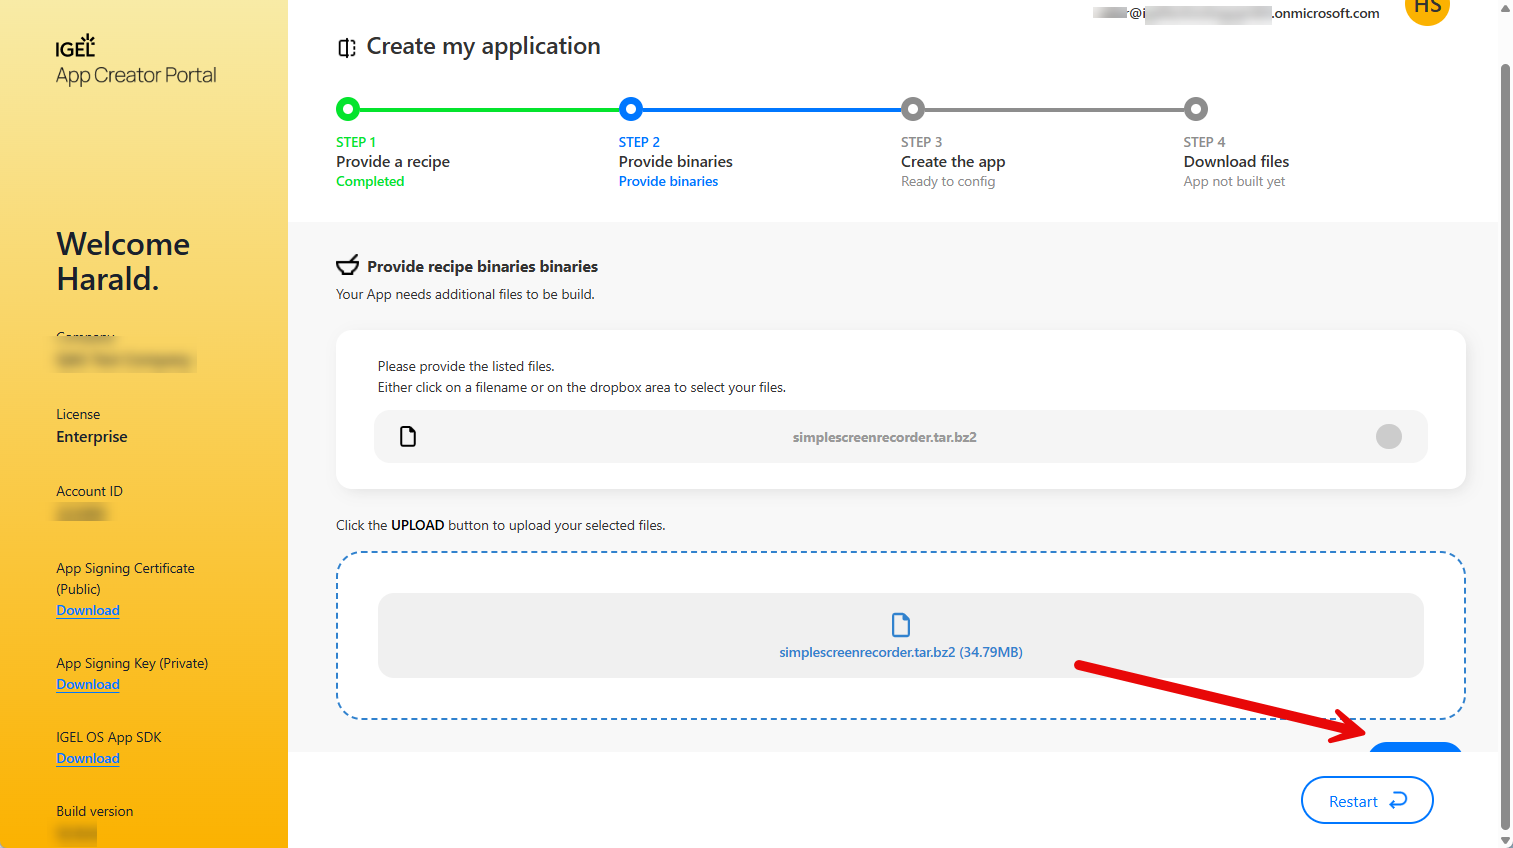
You are taken to STEP 3 Create the app.
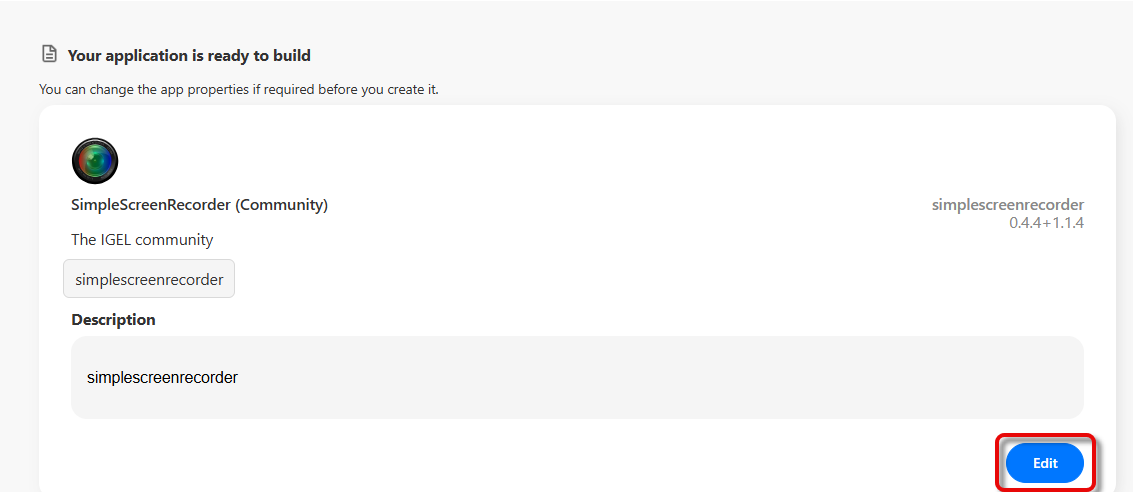
STEP 3 Create the app
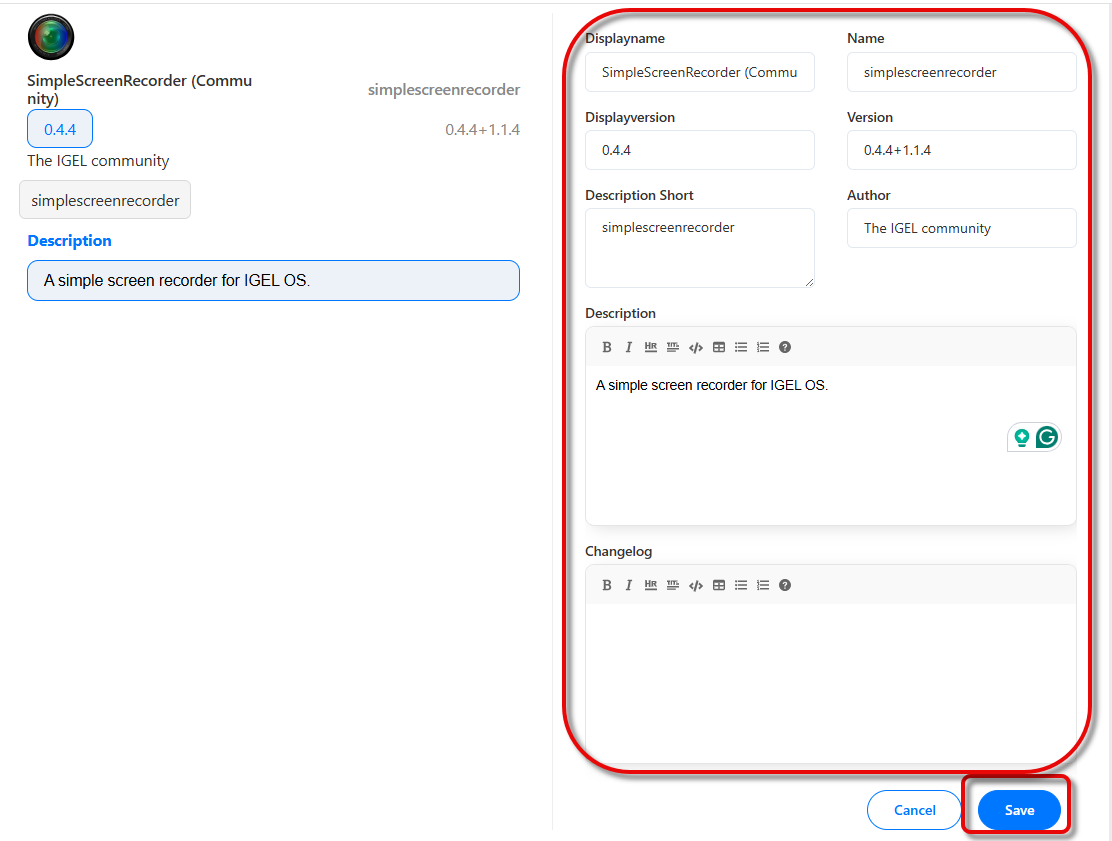
In this step, you can edit the metadata of your app and finally build the package.
-
If you want to edit the metadata of your app, click Edit and update the app’s metadata as desired.
-
Displayname: The name that is shown in the UMS and on the endpoint device
-
Name: The technical name of the app. It must fulfill the following criteria:
-
Alphanumerical characters in upper or lower case are allowed
-
Underscores are allowed, but not before the first character
-
The name must be between 3 and 42 characters long
-
-
Displayversion: The displayed app version
-
Version: The technical version. It must comply with the Semantic Versioning (SemVer) specifications, see https://semver.org/.
-
Author: The creator of the app package
-
Description: A short description of your app. Use the Markdown editor to format your text. Maximum length: 10,000 characters
-
Changelog: It is recommended to add a changelog file to your app package to inform your users about the changes between
subsequent versions (release notes). Use the Markdown editor to format your text. Maximum length: 10,000 characters
-
-
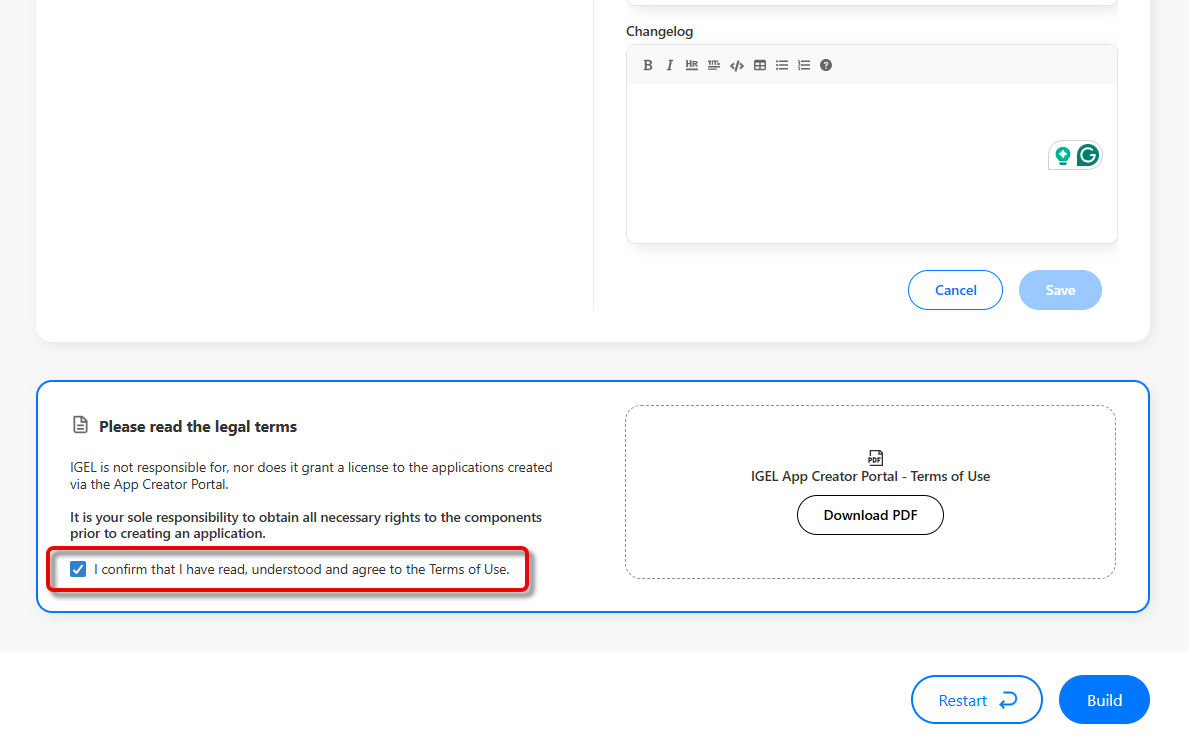
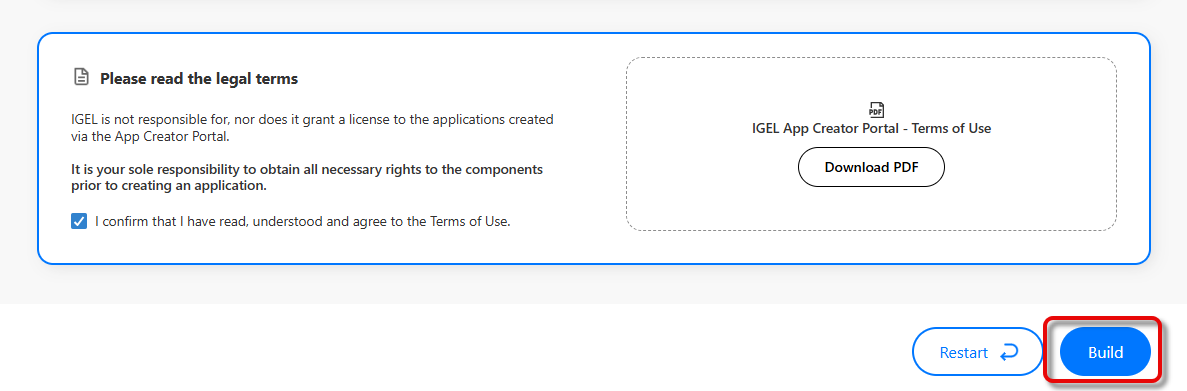
Download and read the legal terms and confirm that you agree to the Terms of Use.
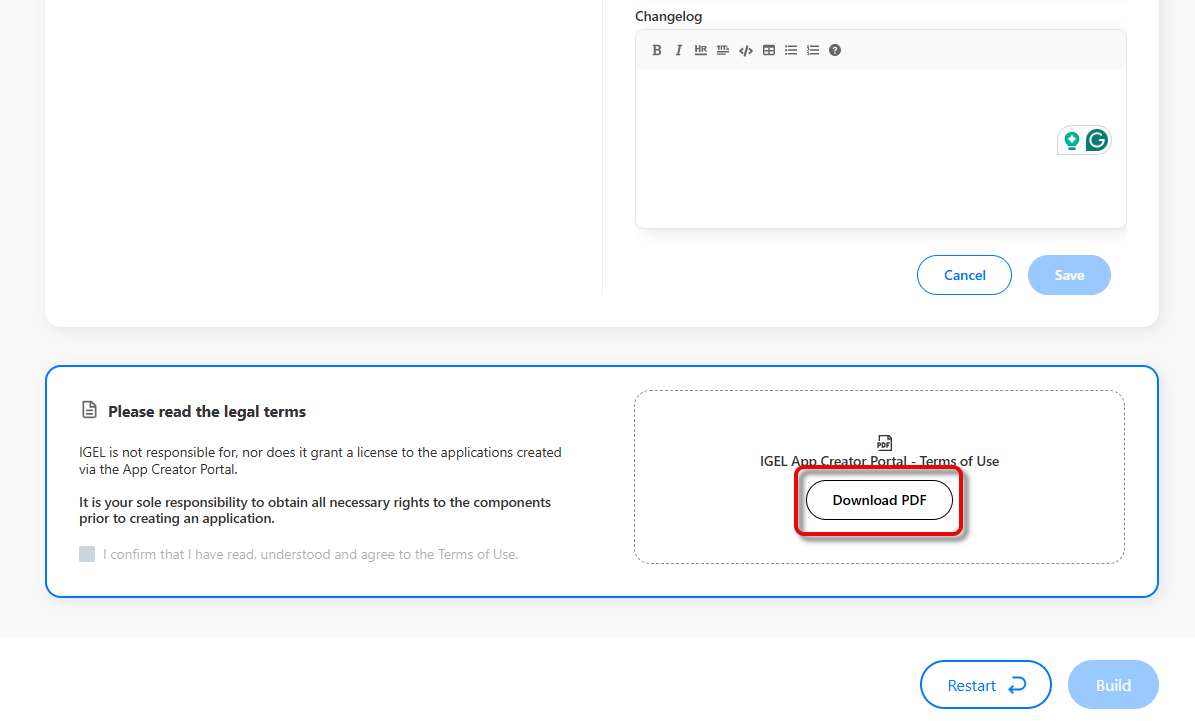
-
Click Build to build your app from the recipe.
Your app is built.
You are taken to Step 4 Download Files.
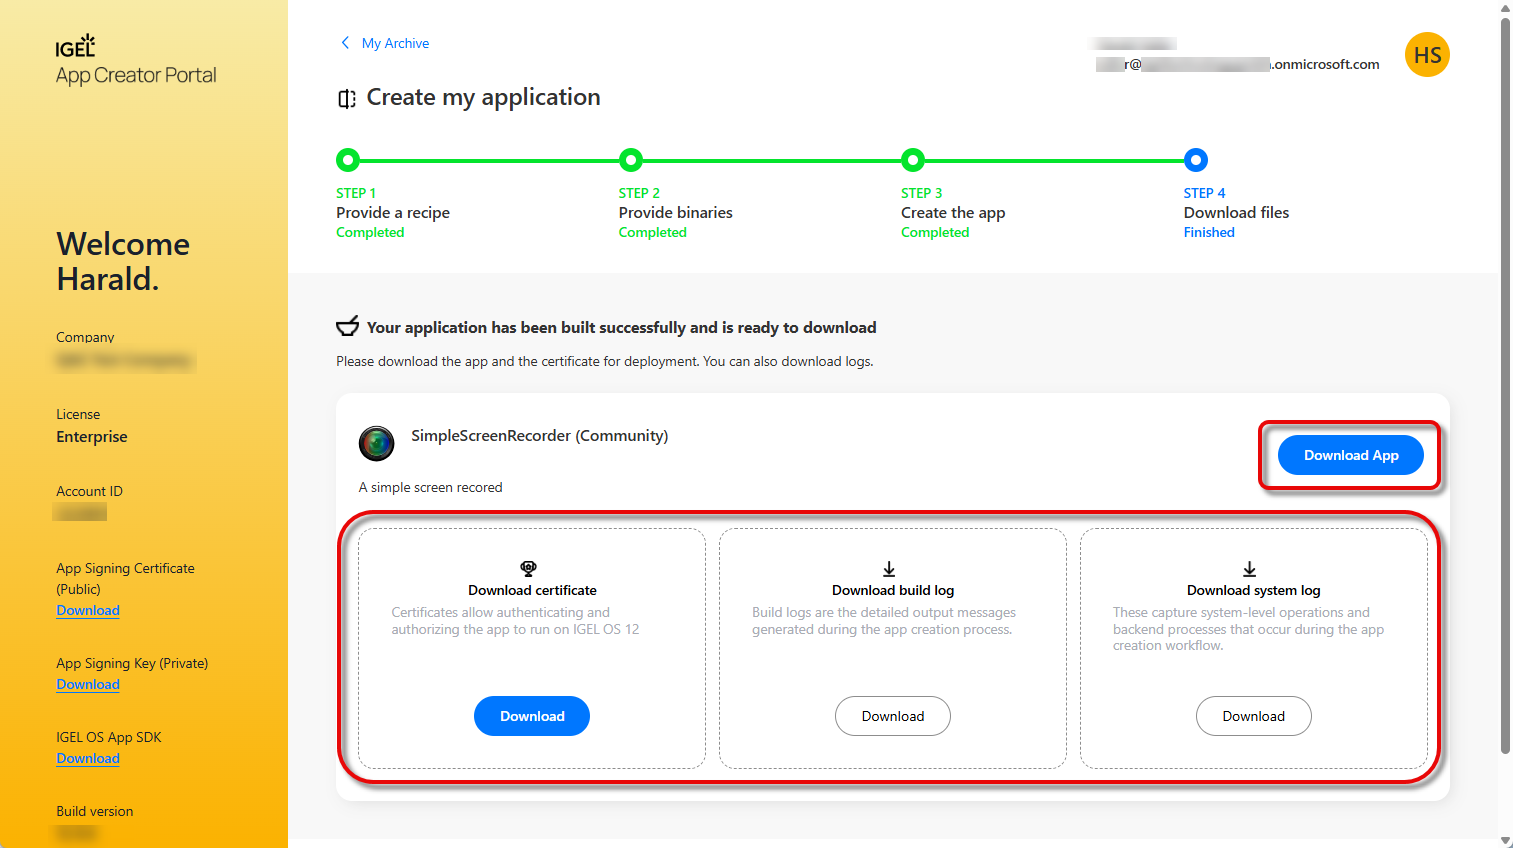
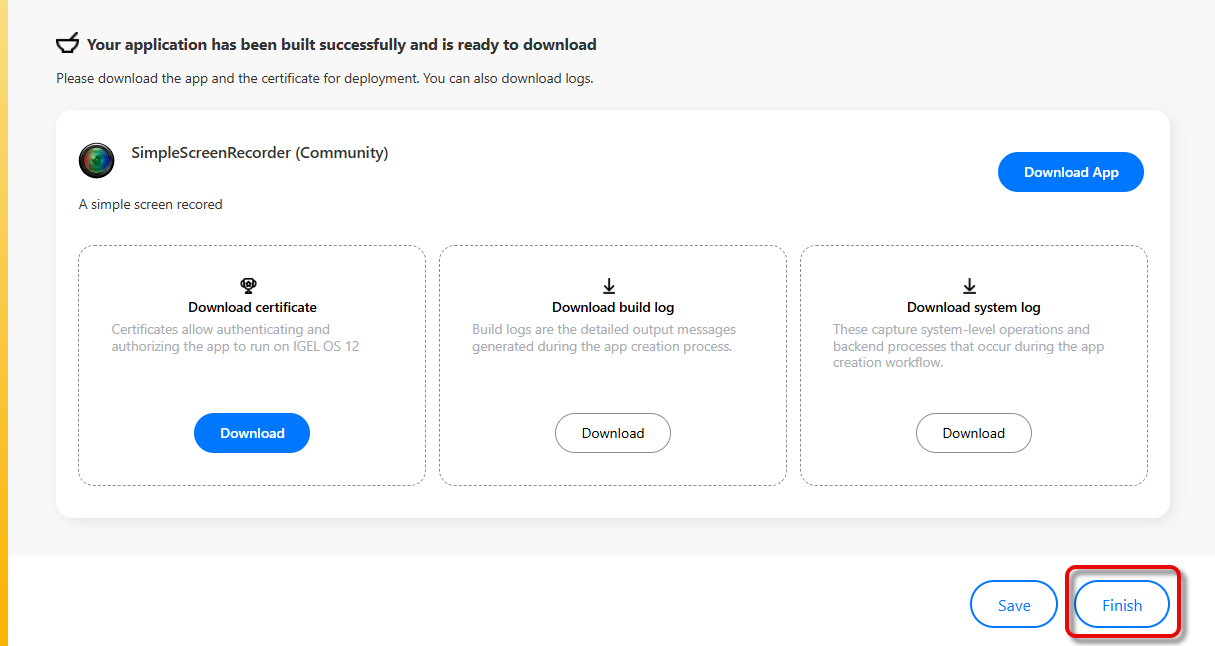
STEP 4 Download files
When the app has been built successfully, you can download the following files:
-
Download App: Your app in
.ipkgformat. For instructions on importing the app into your UMS, see https://kb.igel.com/en/universal-management-suite/current/how-to-export-and-upload-apps-to-the-igel-ums. -
Download Certificate: This certificate is required for installing the app on your endpoint devices. For instructions on deploying certificate files (and other files) with the UMS, see Files - Registering Files on the IGEL UMS Server and Transferring Them to Devices.
-
Download Build Logs: Log of the build process
-
System Logs: Log of the build process from the system’s point of view
→ To save your recipe in the IGEL App Portal so you can rebuild it later, click Save.
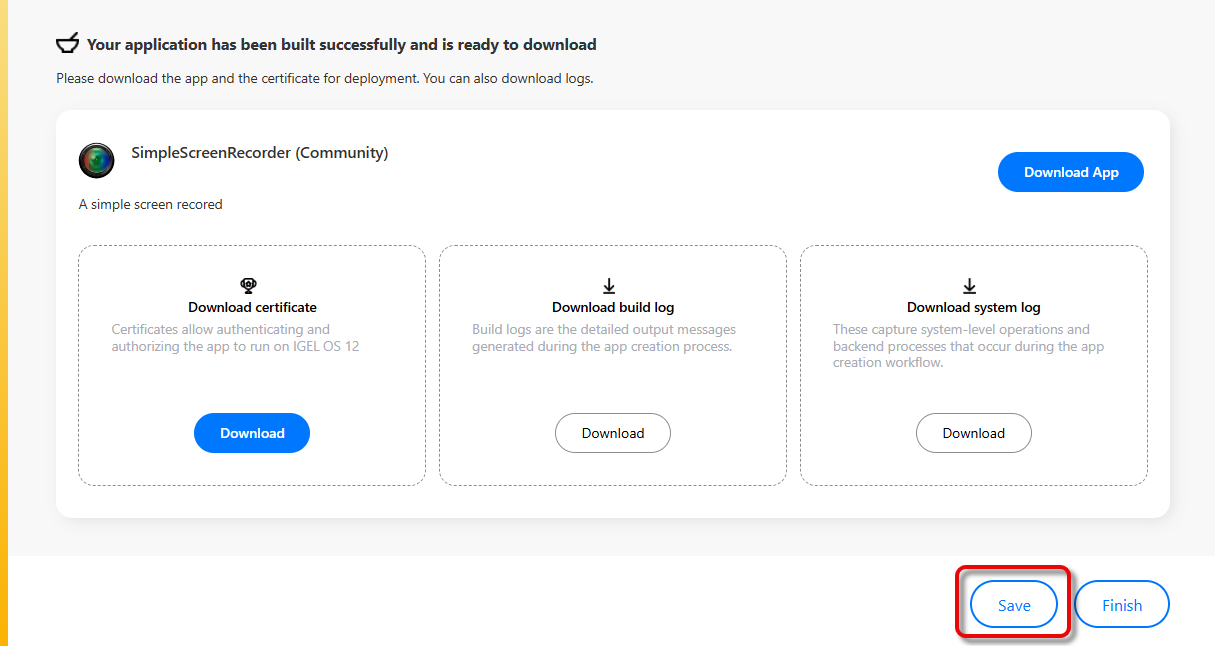
→ To complete the build process, click Finish.
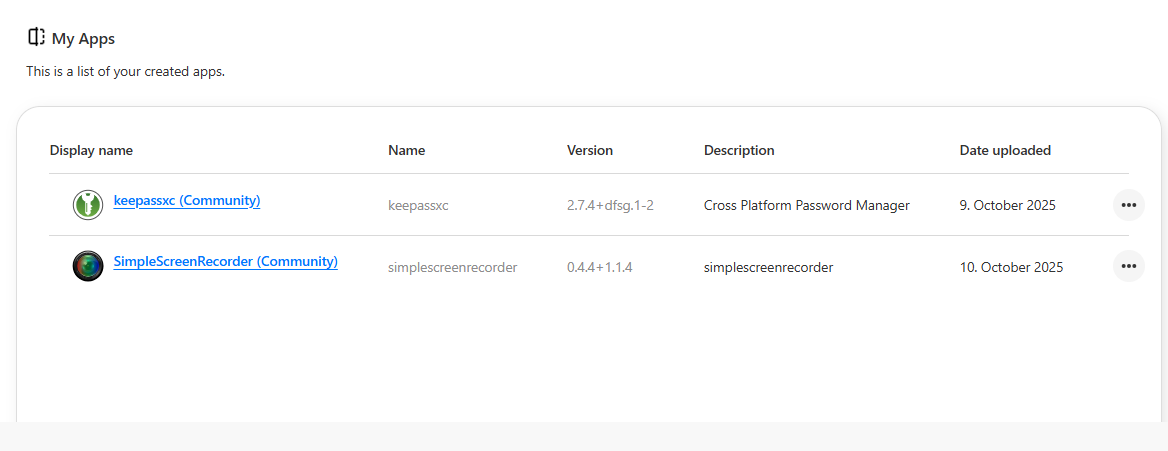
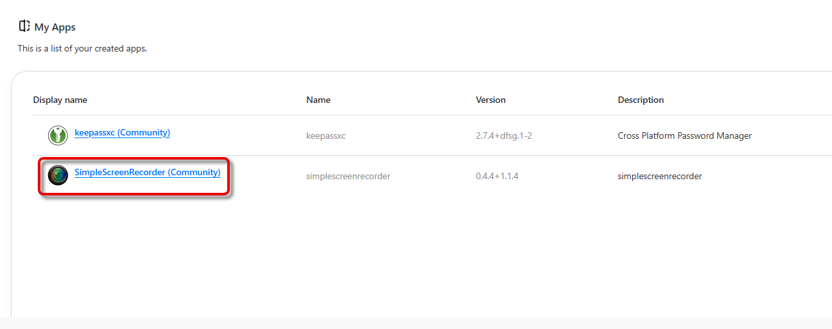
Managing Your Apps
When you have just logged in or completed the build process, all your apps are displayed under My Apps.
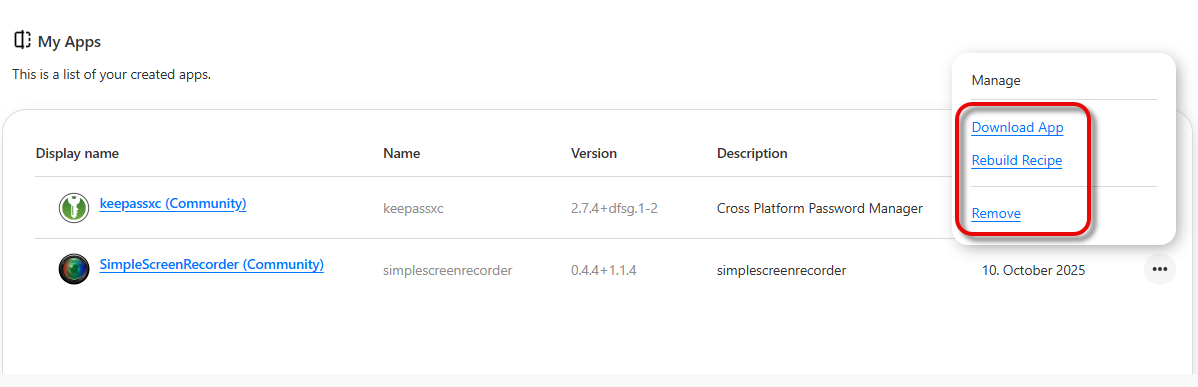
→ Click on the icon ![]()
-
Download App: Downloads the app to your system.
-
Rebuild Recipe: A copy of your recipe is created. You can edit this copy and create a new app from it. For details, see STEP 3 Create the app.
-
Remove: Removes the app from the IGEL App Creator Portal.
For IGEL Ready Technology Partners: Submitting Your App to IGEL
As an IGEL Ready Technology Partner, you can submit your IGEL OS app directly to IGEL through the App Creator Portal for validation and publication on the IGEL App Portal. IGEL will review your app, perform validation checks, and communicate each step of the process — including acceptance, security review, and publishing status — directly within the portal.
Please submit your app only if you are sure that it is in a final state.
Submitting an App
For further information about the IGEL Ready program, see IGEL Technology Partners.
To submit your app:
-
In the list of apps, select your app.
-
Click on the button labeled Application is ready for Submission.
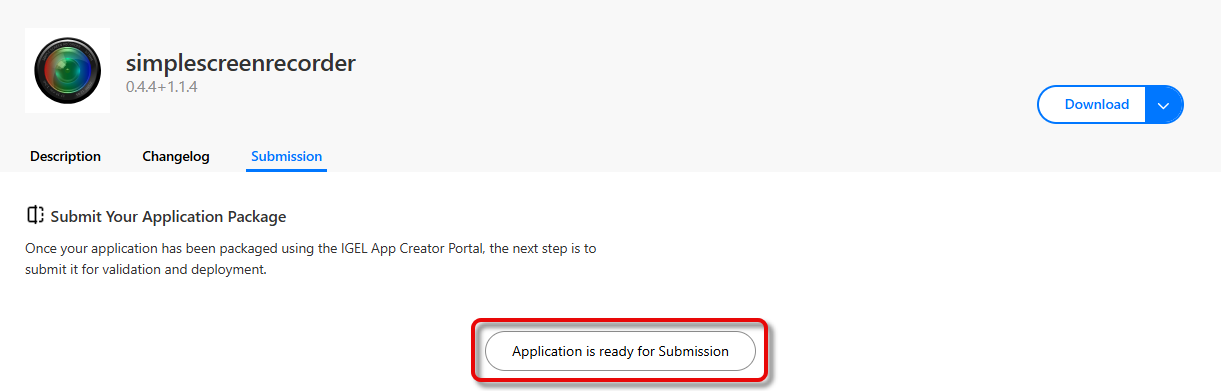
The status of your submission is displayed.
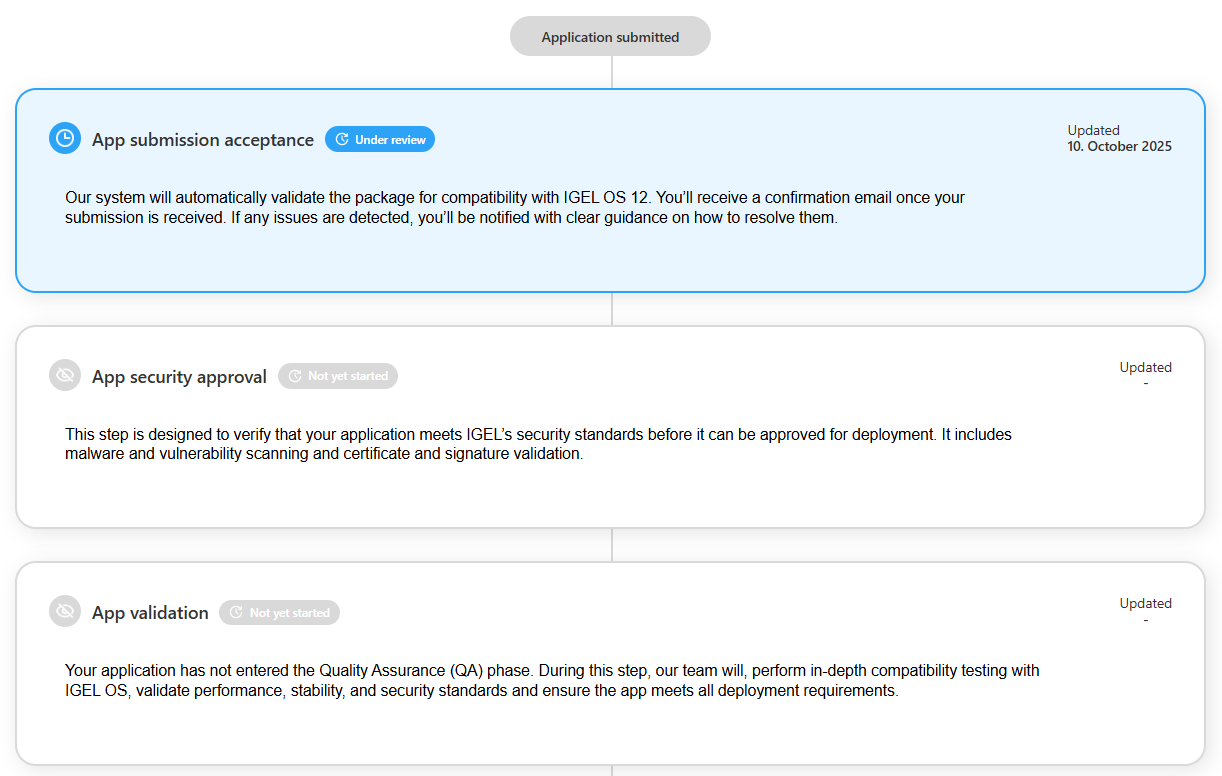
Reviewing the Status of a Submitted App
Under My Apps, the statuses of the apps you have submitted are shown in the column Submission.
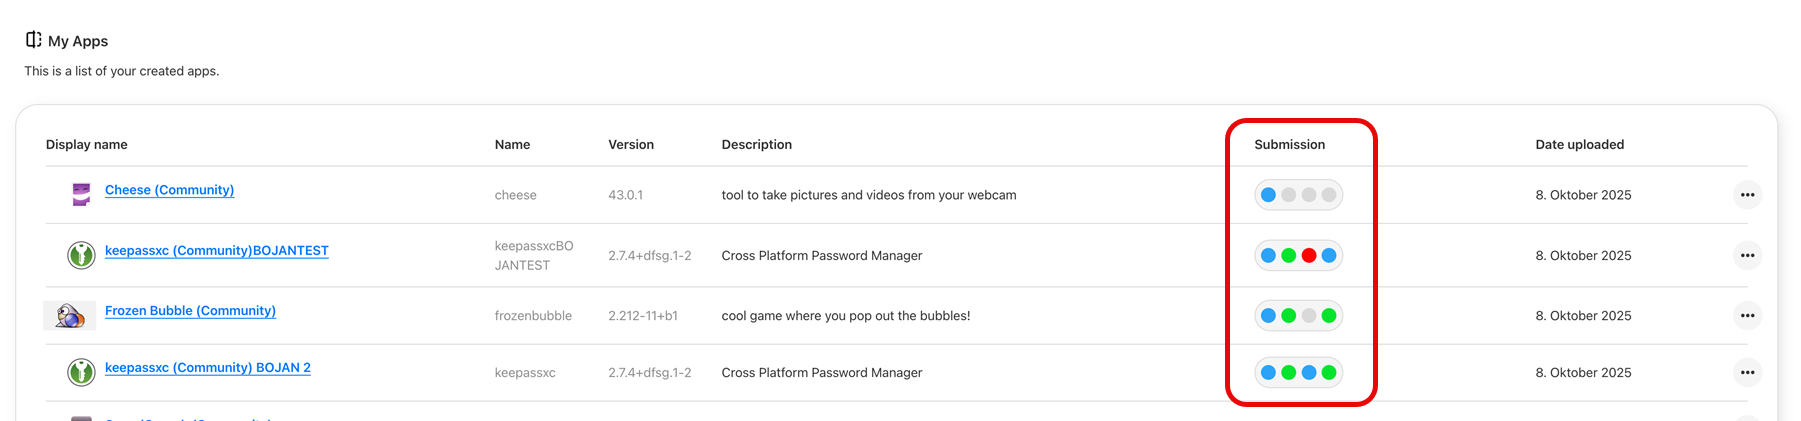
Each of the colored icons shows the status of a submission stage.
|
First icon: App submission acceptance |
Second icon: App security approval |
Third icon: App validation |
Fourth icon: App publishing |
|---|---|---|---|
|
|
|
|
|
|
|
|
|
|
|
|
|
|
|
|
|
|
|
|