Upgrading All Devices
Assigning the Upgrade Profile and the Universal Firmware Update to the Devices
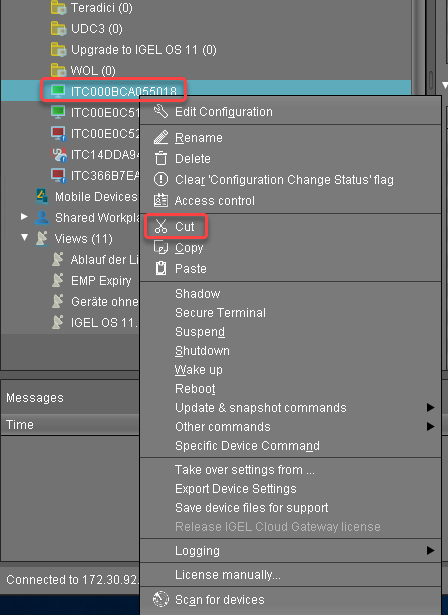
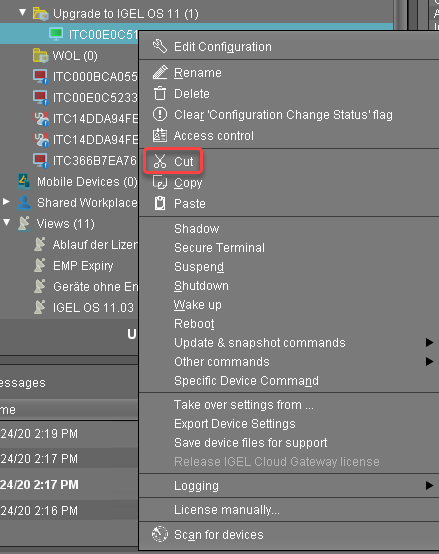
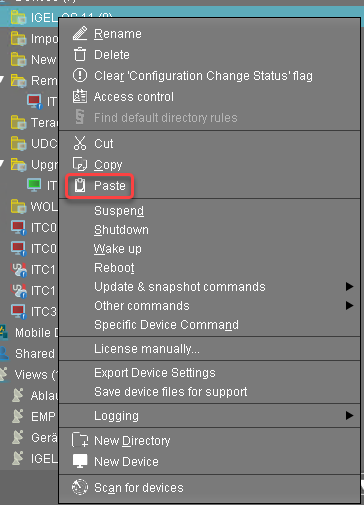
Put the devices that are to be upgraded into the directory you have created for the test devices. It is recommended to use cut and paste.

In the Update time dialog, select Now and click Ok.
The directory change, the upgrade profile and the Universal Firmware Update are communicated immediately to the devices.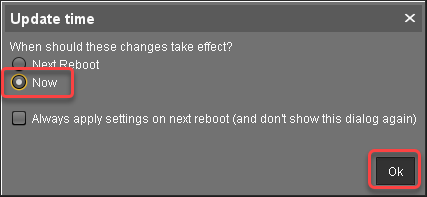
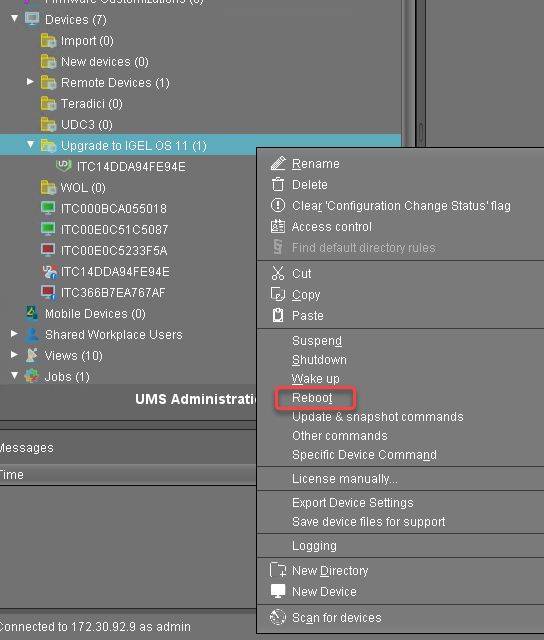
In the UMS, select the directory with the devices and select Reboot.
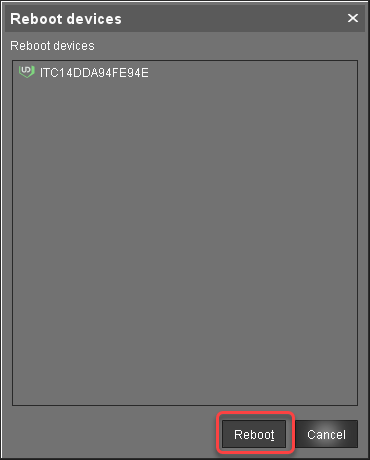
In the Reboot devices dialog, click Reboot.
If no IGEL OS 11 licenses have been deployed on the devices yet, the licenses are deployed within a few minutes. The upgrade will be started when the licenses are deployed. The maximum time period a device will wait for a license is configured by the parameter Timeout waiting for OS 11 license to start automatic upgrade; for details, see Creating an Upgrade Profile, step 8.
The parameter Automatic update check on boot makes the devices look for new firmware again. Although two Universal Firmware Updates are assigned to the devices, the UMS offers the IGEL OS 11 firmware, because the ID of the IGEL OS 11 firmware is higher than the ID of the IGEL OS 10 firmware.
Unassigning the Upgrade Profile and the Universal Firmware Update
To unassign the upgrade profile and the Universal Firmware Update, move the devices to a different folder.
In the Update time dialog, select Now and click Ok.
The directory change is communicated immediately to the device.
If a device had a Custom Partition before the upgrade, it has been downloaded and activated again after the upgrade profile has been unassigned.If applicable, restore the required custom applications; see If Applicable: Restoring Custom Partition and Custom Applications.
Update Can be Canceled After Timeout
An ongoing update can be canceled by the user if the “network online” status could not be reached within 10 seconds after the firmware update has been started. When the user has canceled the update, the normal desktop environment is started, just as before the update. This applies to the following cases:
Regular firmware update, e.g. from IGEL OS 11.03.500 to IGEL OS 11.04
A feature has been activated, e.g. VPN OpenConnect.
A Custom Partition has been activated or changed.
Check List
![]() All devices have been upgraded to IGEL OS 11.
All devices have been upgraded to IGEL OS 11.
![]() All required functionality is available, including custom applications.
All required functionality is available, including custom applications.