Download page How Can I Configure OpenVPN with an .ovpn or .conf File for IGEL OS Devices?.
How Can I Configure OpenVPN with an .ovpn or .conf File for IGEL OS Devices?
You can use the .ovpn or the .conf file from your firewall to configure OpenVPN for your IGEL OS device.
Solution Based on Experience from the Field
This article provides a solution that has not been approved by the IGEL Research and Development department. Therefore, official support cannot be provided by IGEL. Where applicable, test the solution before deploying it to a productive environment.
Creating a Profile
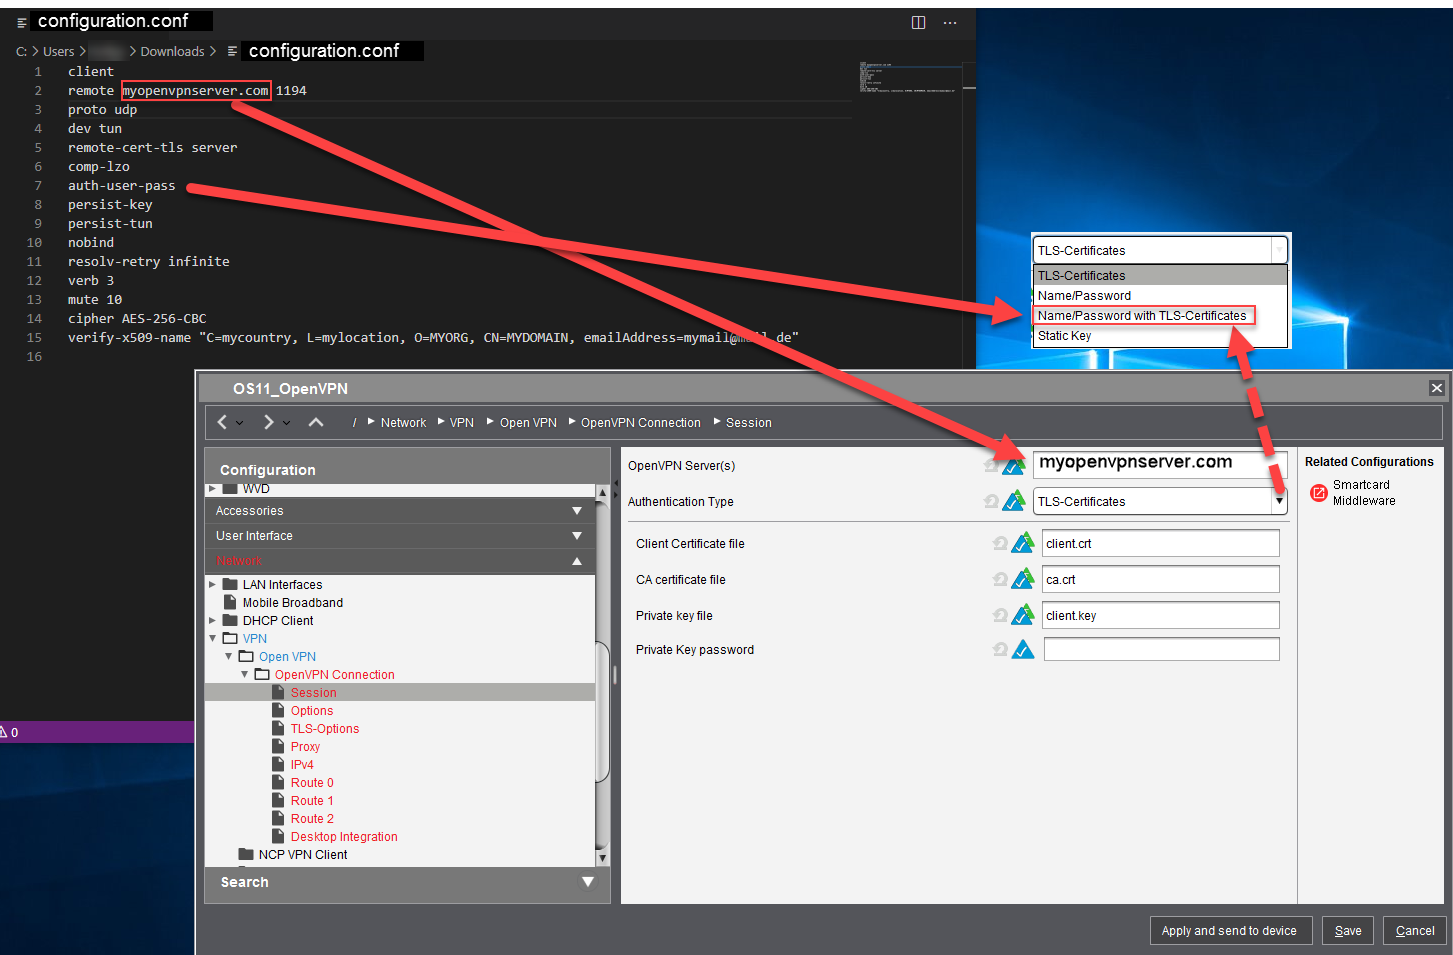
Open the .ovpn or the .conf file in “Microsoft Visual Studio Code” (freeware) or any other editor that can save files in UTF-8 and uses LF (not CR-LF) for a newline.
In the UMS, create a profile with an appropriate name, e.g. "OS11_OpenVPN".
Go to Network > VPN > Open VPN and click
to create an OpenVPN session.
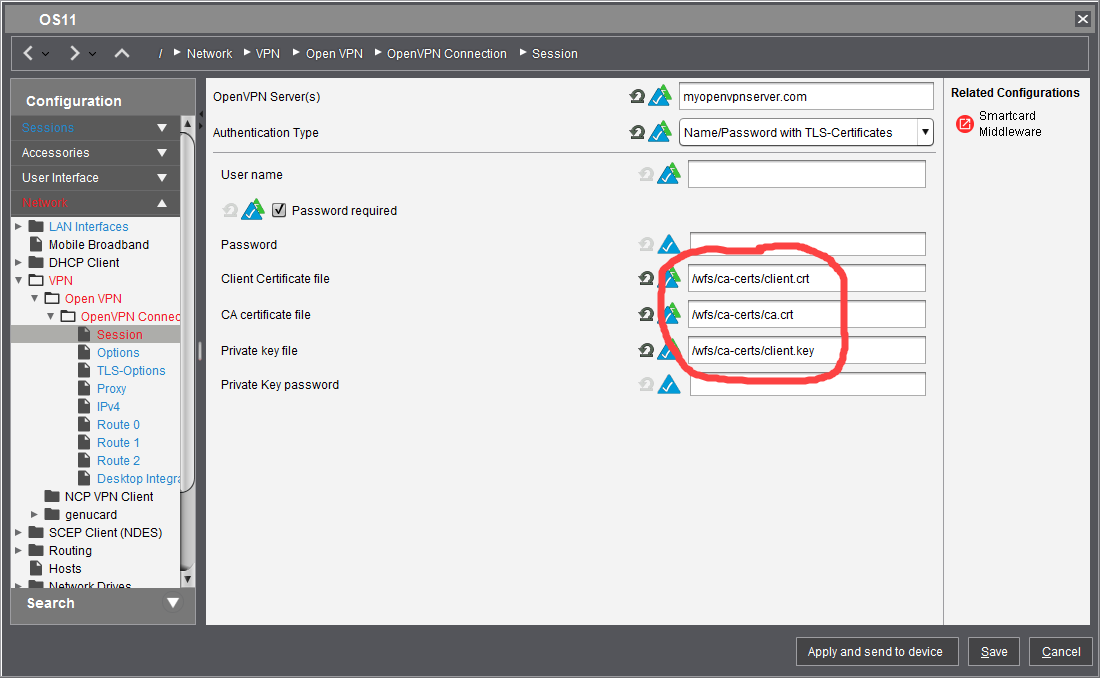
Edit the settings of Network > VPN > Open VPN > [your OpenVPN session] > Session as follows:
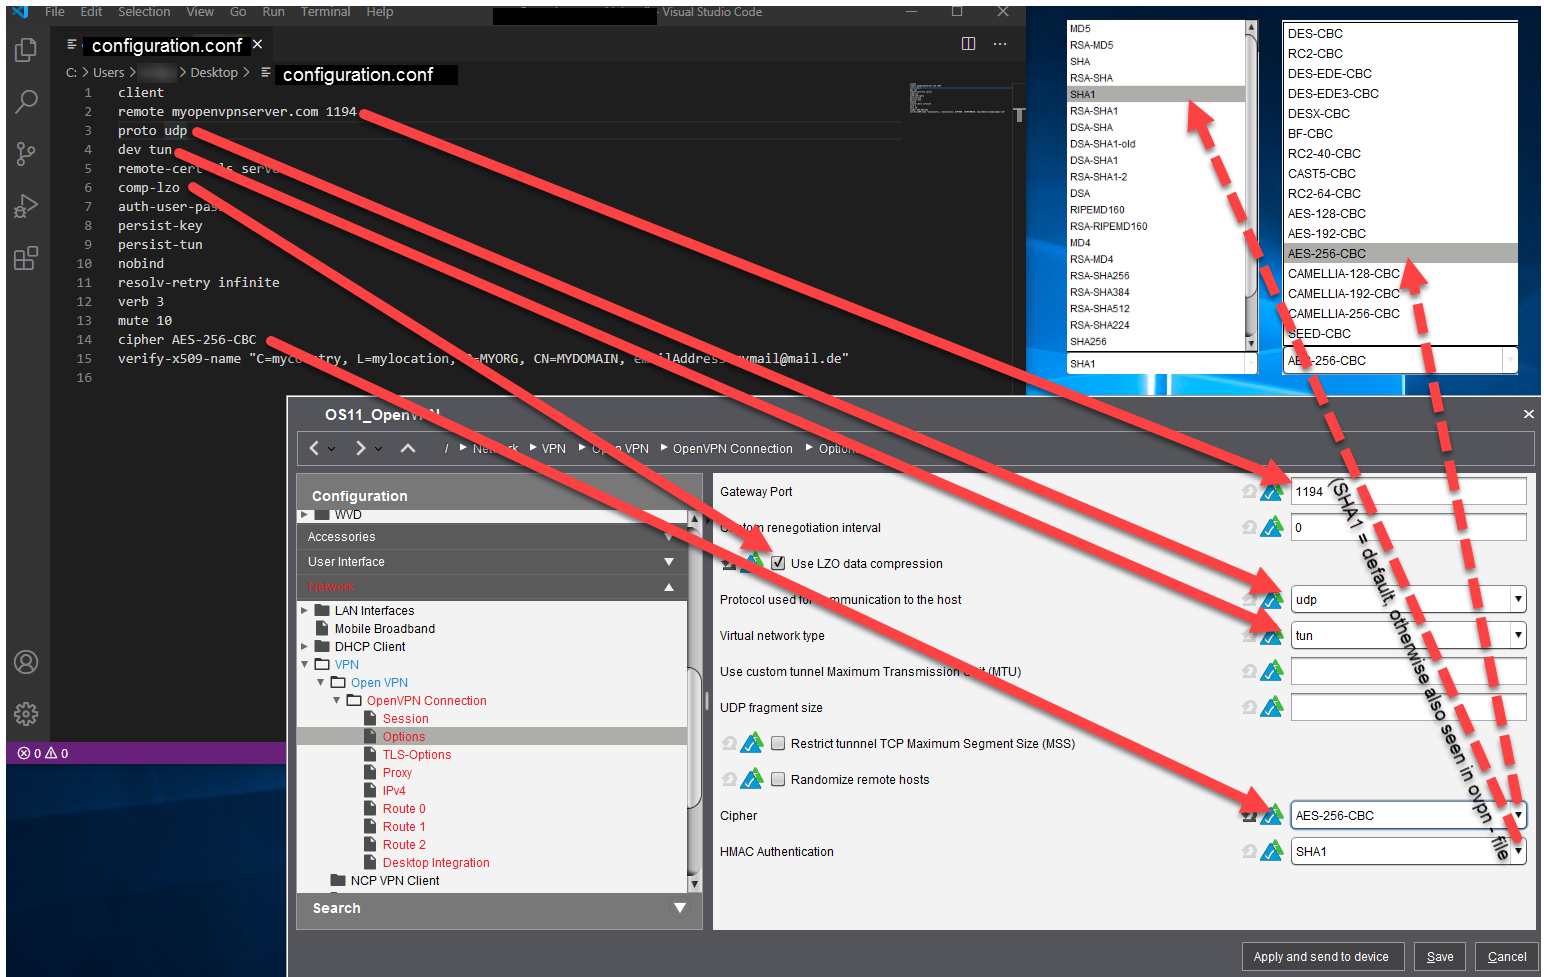
Go to Network > VPN > Open VPN > [your OpenVPN session] > Options and edit the settings as follows:
Go to Network > VPN > Open VPN > [your OpenVPN session] > TLS Options and edit the settings as follows:
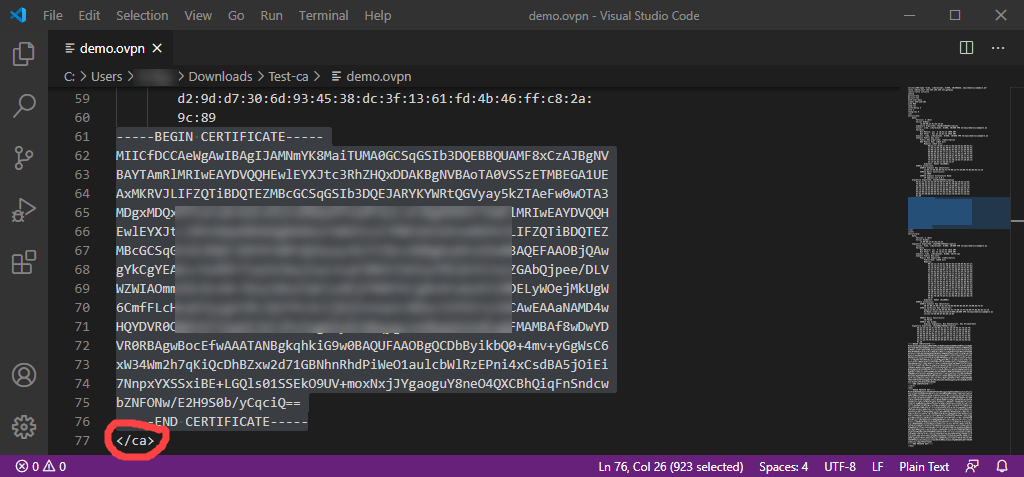
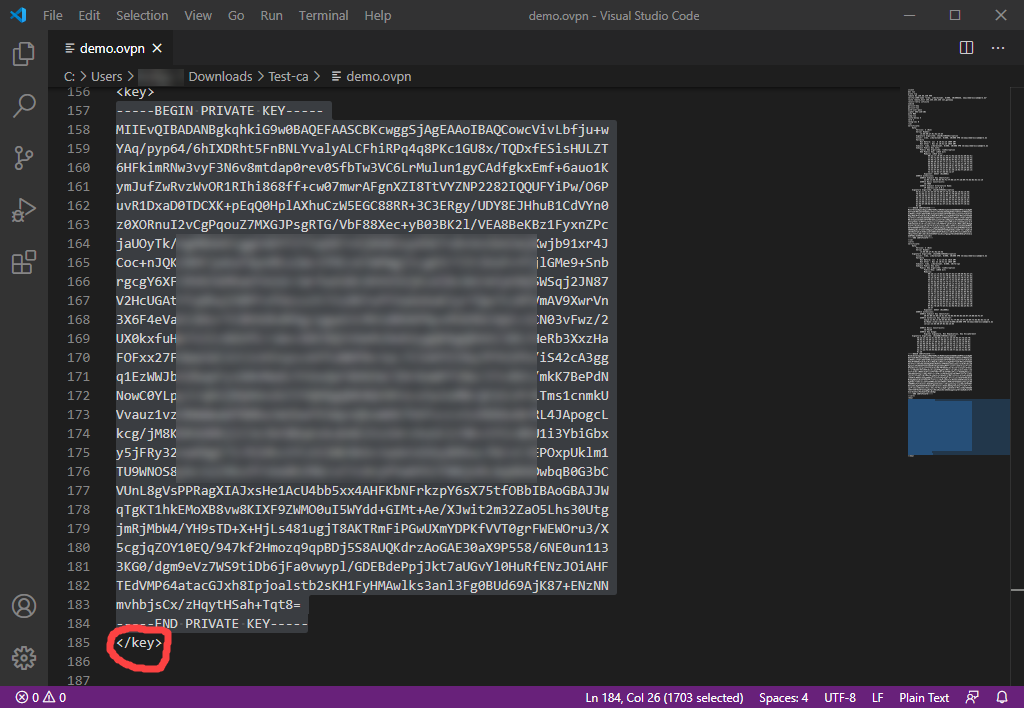
If the certificates and the key are embedded in your .ovpn file, extract the certificates and key as follows:
Open the .ovpn file in your editor (must be able to save as UTF-8 and use LF, not CR-LF, for a newline).
Go to the section tagged as <ca> ... </ca> and copy the marked certificate, including ----BEGIN CERTIFICATE----- and -----END CERTIFICATE-----.
Paste the text to the editor and save it to a file named ca.crt (file type "All files").
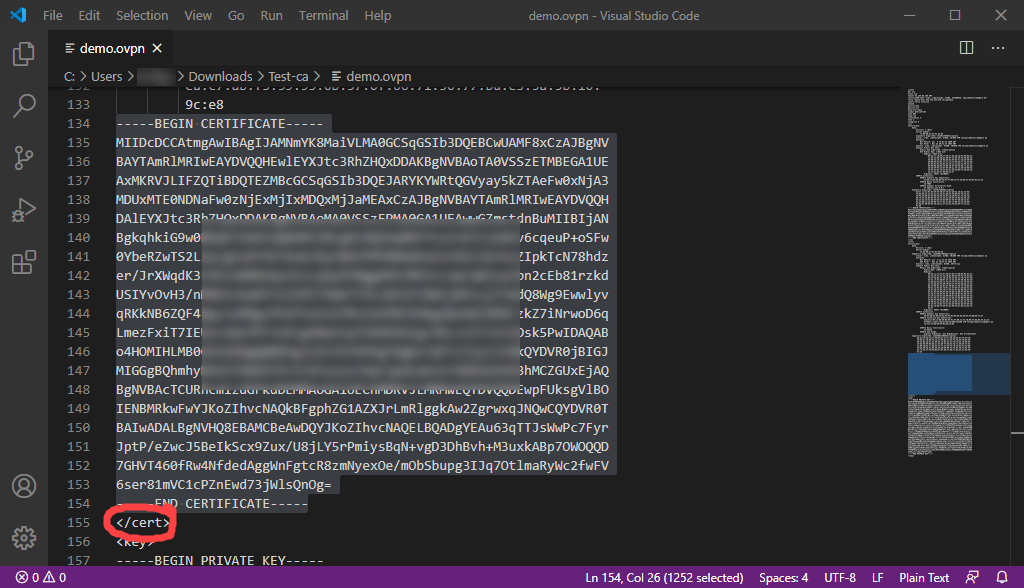
Go to the section tagged as <cert> ... </cert> and copy the marked certificate, including ----BEGIN CERTIFICATE----- and -----END CERTIFICATE-----.
Paste the text to the editor and save it to a file named client.crt (file type "All files").
Go to the section tagged as <key> ... </key> and copy the marked key, including ----BEGIN PRIVATE KEY----- and -----END PRIVATE KEY-----.
Paste the text to the editor and save it to a file named client.key (file type "All files").
Transferring the Files to the UMS
In the UMS, go to Files > [context menu] > New file and create a file object for each certificate/key file; set Classification to "Common Certificate (all purpose)".
Assign the file objects to the endpoint devices on which you want to use the OpenVPN connection.