How to Keep Your IGEL OS 12 System up to Date
Rationale
Software updates fix newly discovered vulnerabilities in the IGEL OS Base System and the apps installed. This means that keeping up with updates is one of the most important measures in securing IGEL OS systems.
Prerequisites
Your devices are managed by the Universal Management Suite (UMS) 12
Your Universal Management Suite (UMS) has access to the IGEL App Portal. It must be registered for this; see Registering the UMS.
Your devices have valid licenses
Receiving regular safety information
→ To get new ISNs and ISN updates delivered to your inbox, subscribe to the Security Announcements Mailing List. Go to http://igel.com and find the "Subscribe for Updates" form at the bottom of the page. This will initially subscribe you to all mailings from IGEL, but by using the unsubscribe link at the bottom of a mail, you can select which communications you wish to receive and which not.
Before You Begin
As the steps for the Base System differ from those for the other apps, the procedure is as follows:
Setting the UMS to Update Regularly
To ensure you have every version of your apps available in the UMS, we will set the UMS to import new versions automatically.
Follow these steps for each app installed on your devices. We will use the Base System as an example.
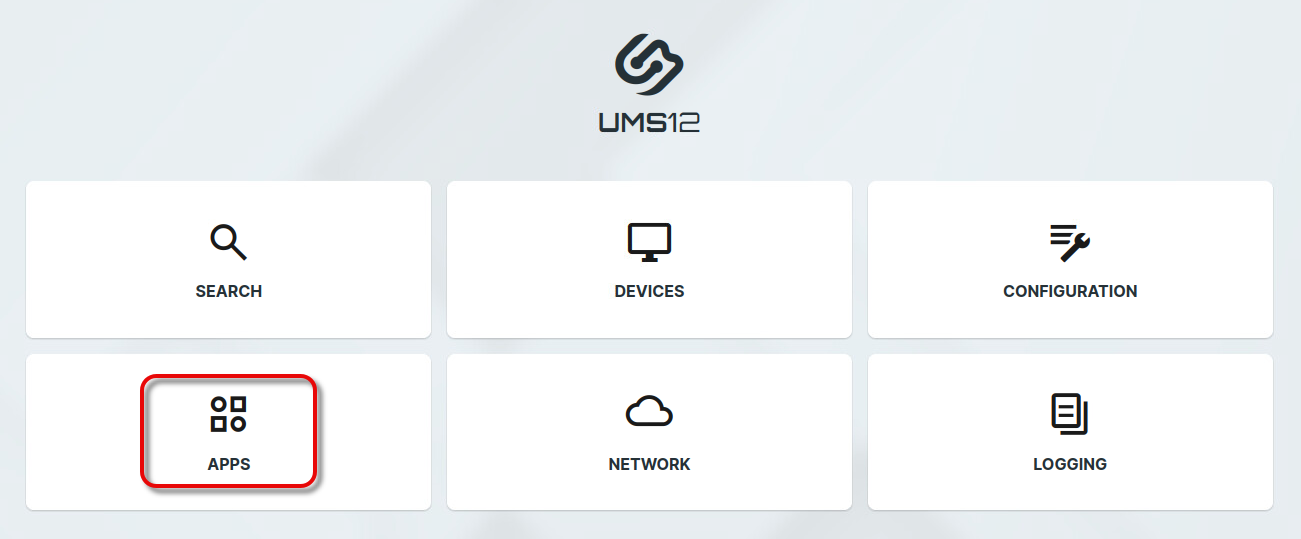
In your UMS Web App, go to APPS and then open the Update Settings.
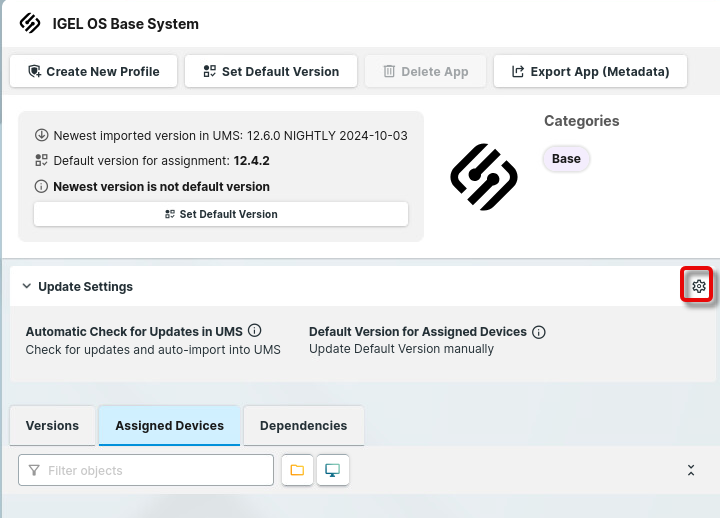
Enable Check for updates and auto-import into UMS and Update Default Version manually.
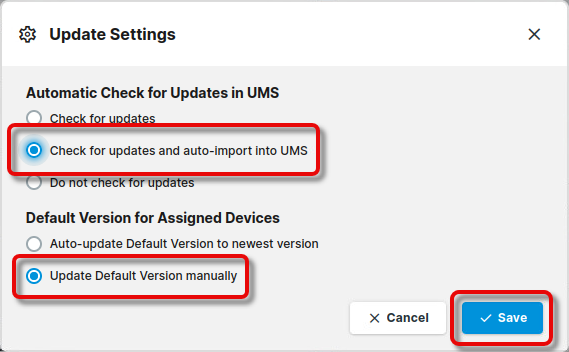
The UMS is now kept always up-to-date. The latest software versions are imported automatically. As Update Default Version manually is selected, the updates are not automatically rolled out to the devices.
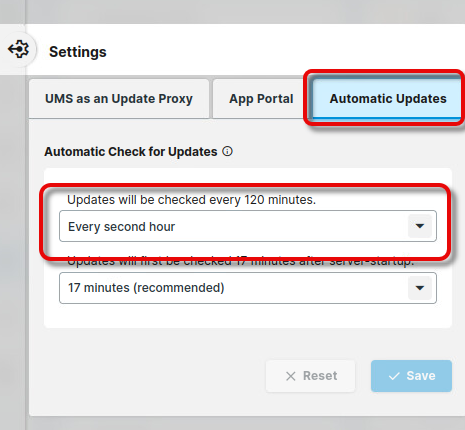
The default interval for update checks is 120 minutes. You can configure the interval via Settings > Automatic Updates:
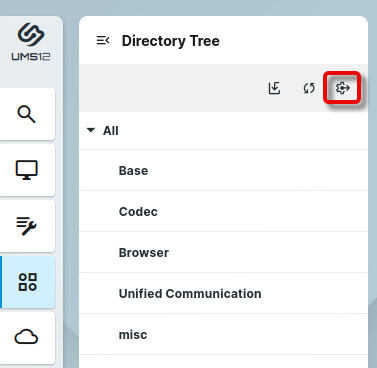
House Keeping: Delete Older, Unused Versions Regularly
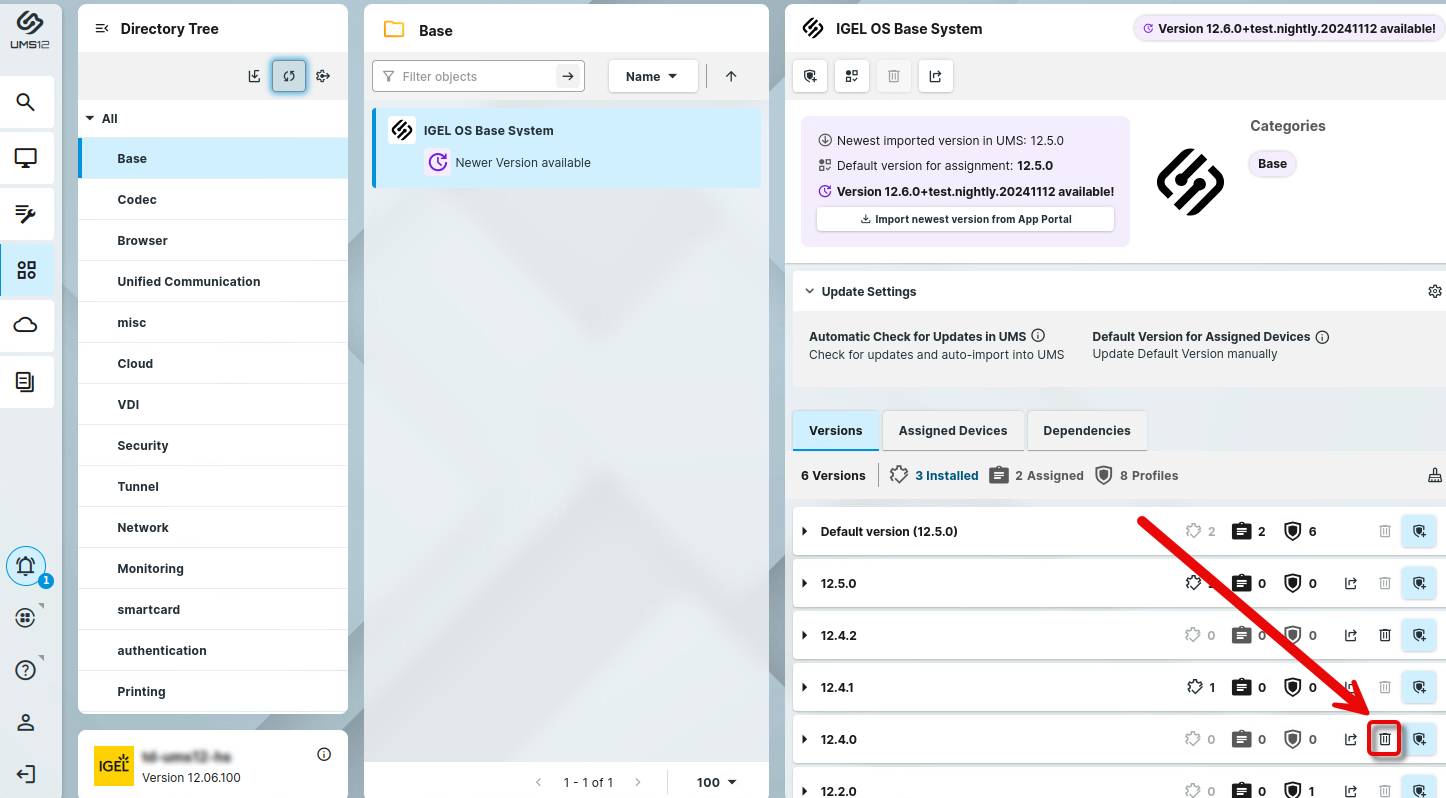
If you have configured your UMS to import every new version of your imported apps, as described above, you should dispose of older, unused versions. It is recommended to do this regularly.
→ In your UMS Web App, go to the app version in question and click![]() to remove it.
to remove it.
Setting up a Test Directory
For convenience, clarity, and error prevention, it is recommended to put test devices into a separate directory.
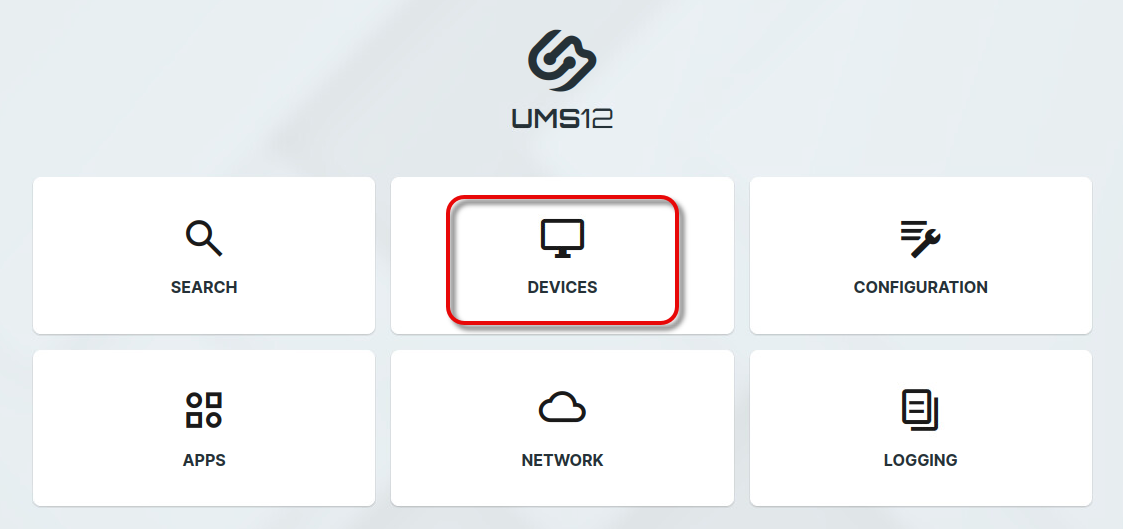
In your UMS Web App, go to DEVICES and create a directory for your test devices, e.g., "Update test”.
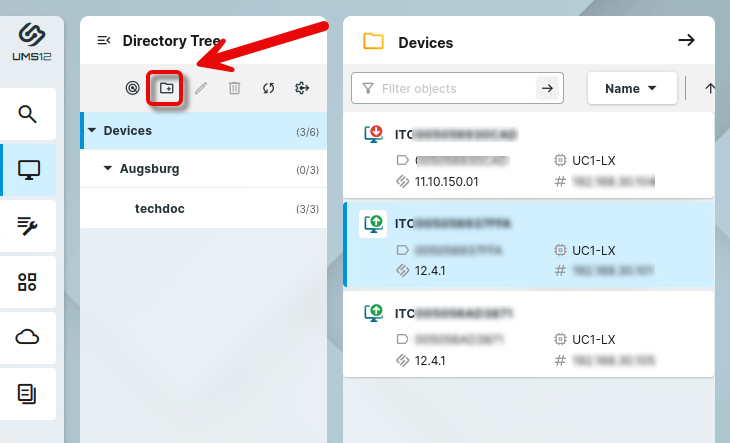
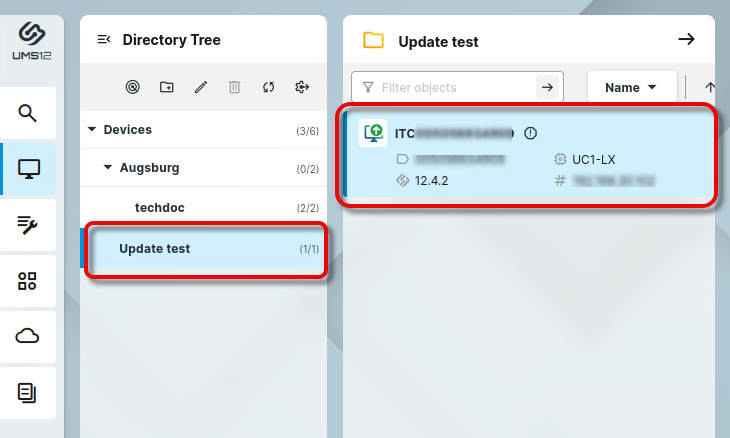
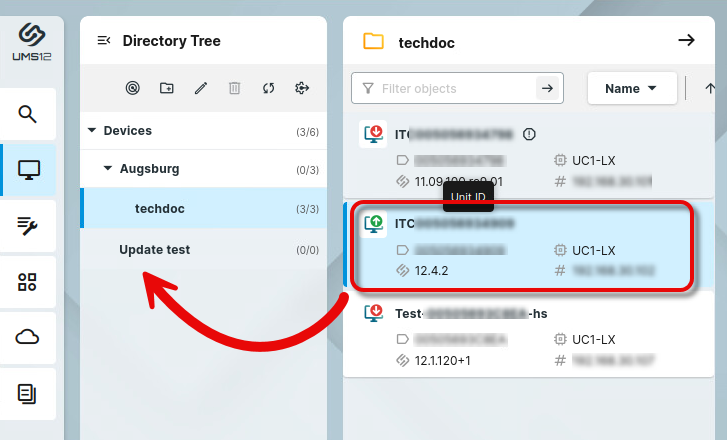
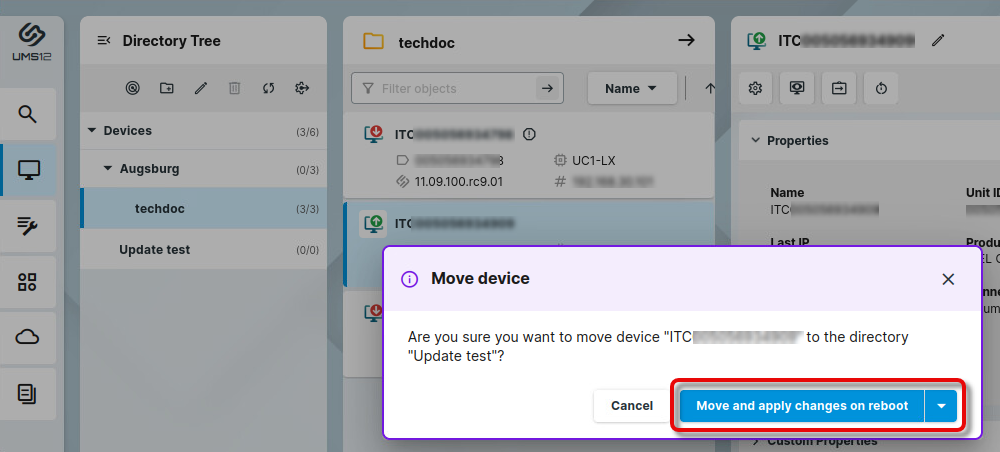
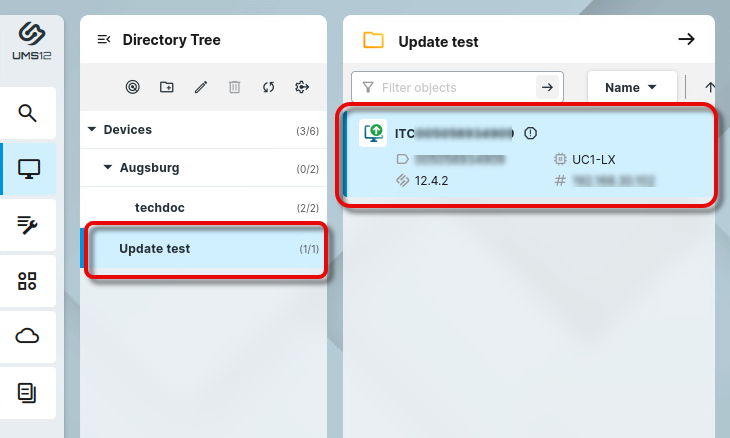
Find your test devices and put them into the new test directory using drag & drop..
Keeping the Base System up to Date
Testing the Base System Updates on One or a Few Devices
Unlike other apps, the Base System cannot be updated by setting the relevant profile to a specific IGEL OS Base System version. Therefore, we must proceed in two steps:
Create a test profile to make sure that an appropriate profile controls the new Base System version
Assign the new Base System version explicitly to the test devices
Creating the Test Profile
To create a test profile, we will duplicate the productive profile by exporting and re-importing it.
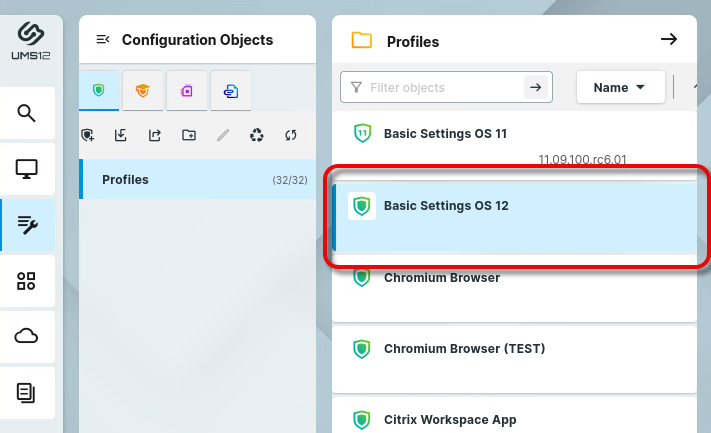
In your UMS Web App, go to the Configuration Objects and then find the relevant profile.
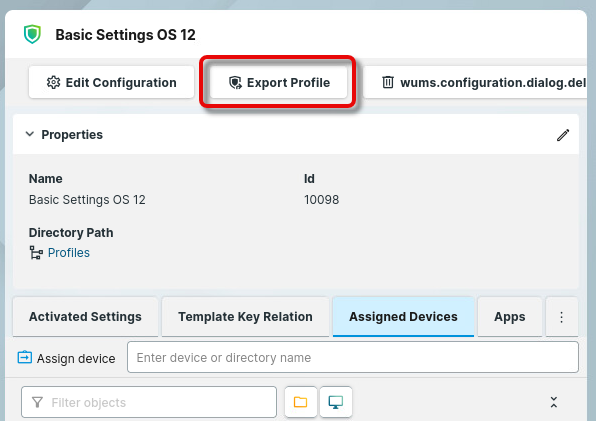
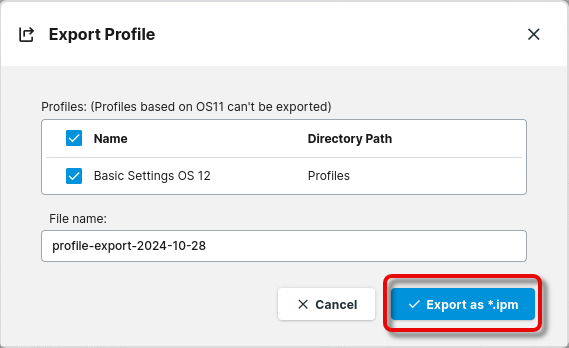
Click Export Profile and save the file on your machine.
Click
 and import the file.
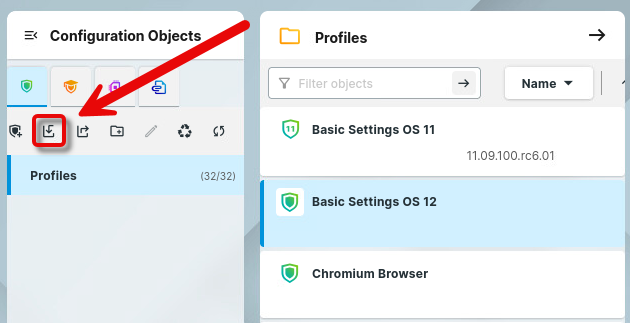
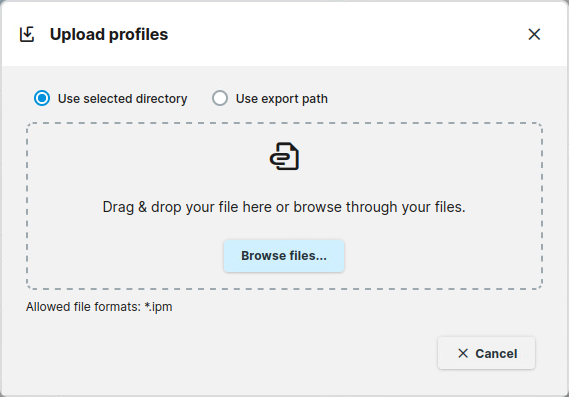
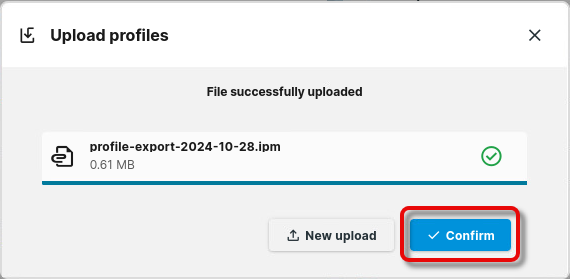
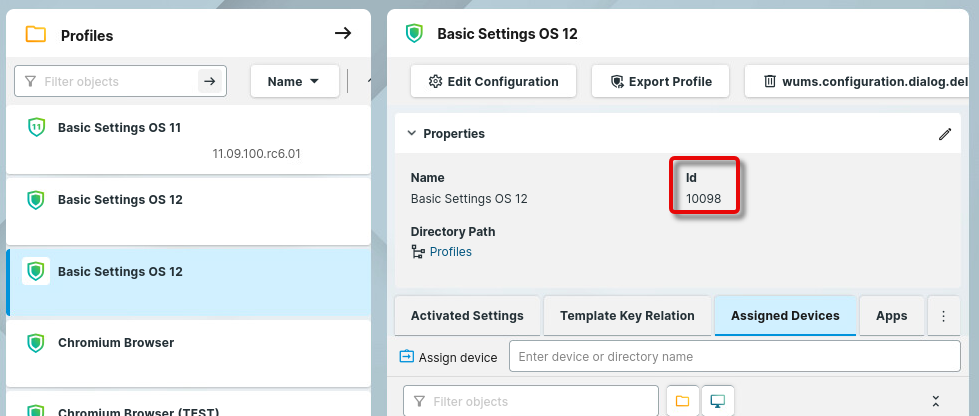
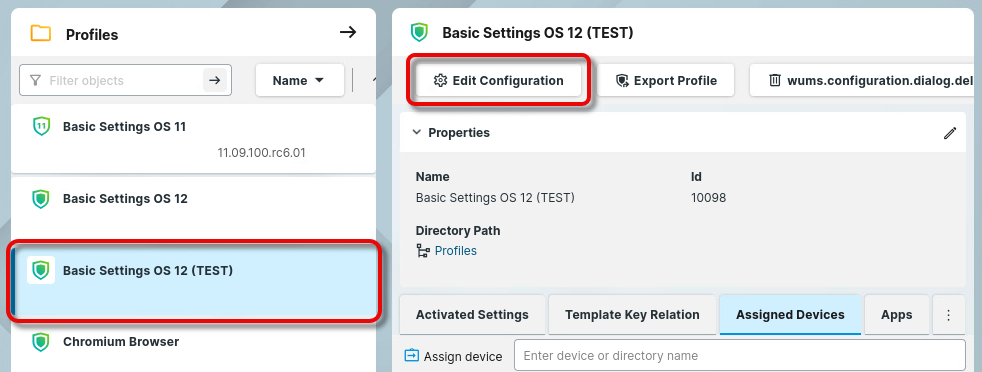
The imported profile is displayed underneath the original profile. The imported profile can be distinguished from the original one by its ID, which is higher.
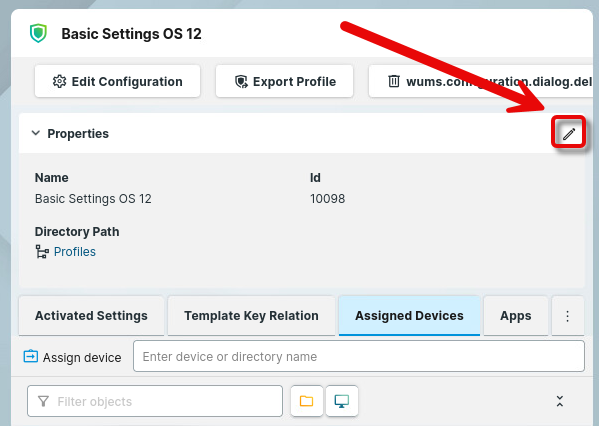
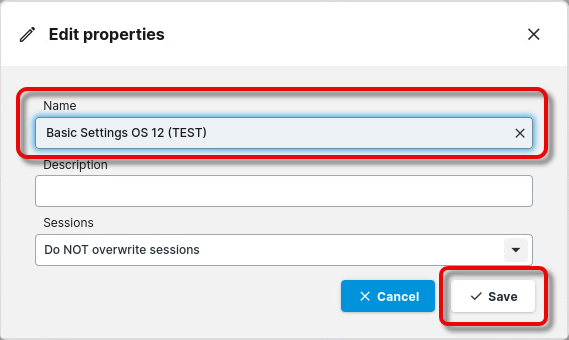
Select the imported profile, and click
 to change the name appropriately.
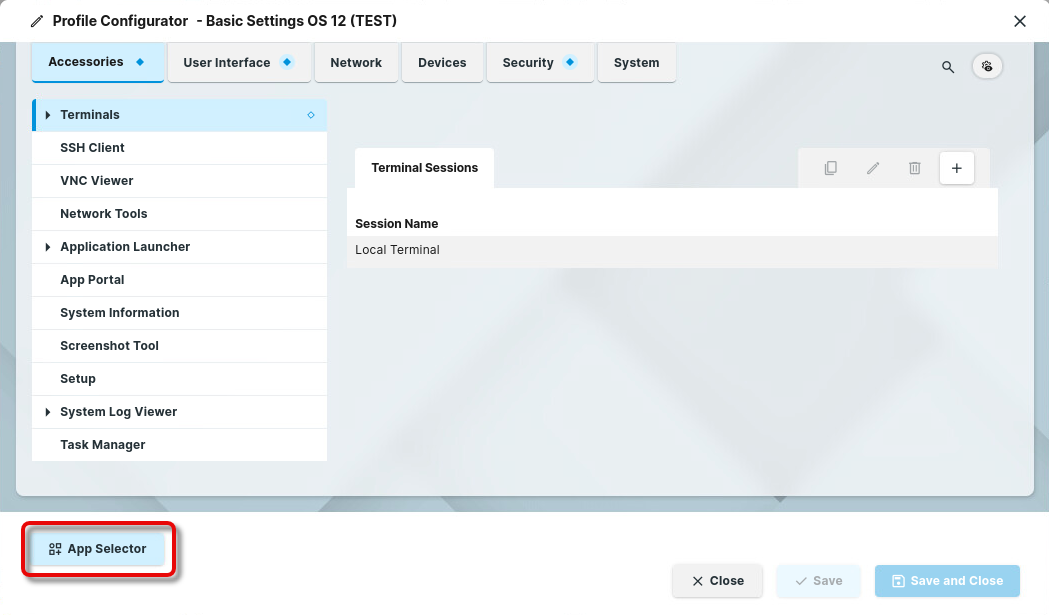
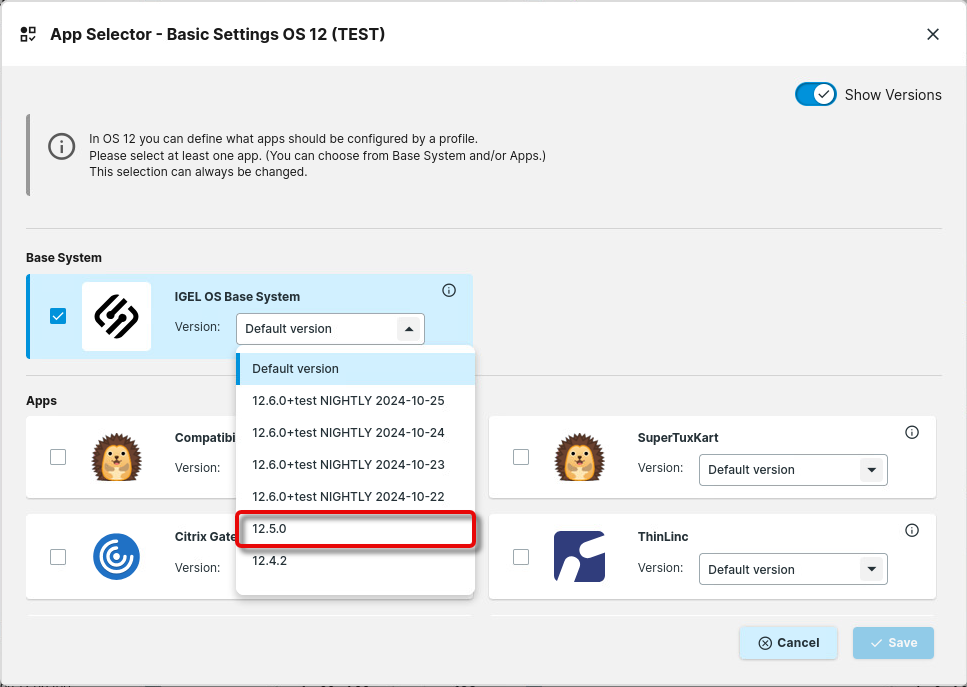
Set the app version of the test profile to the target version.
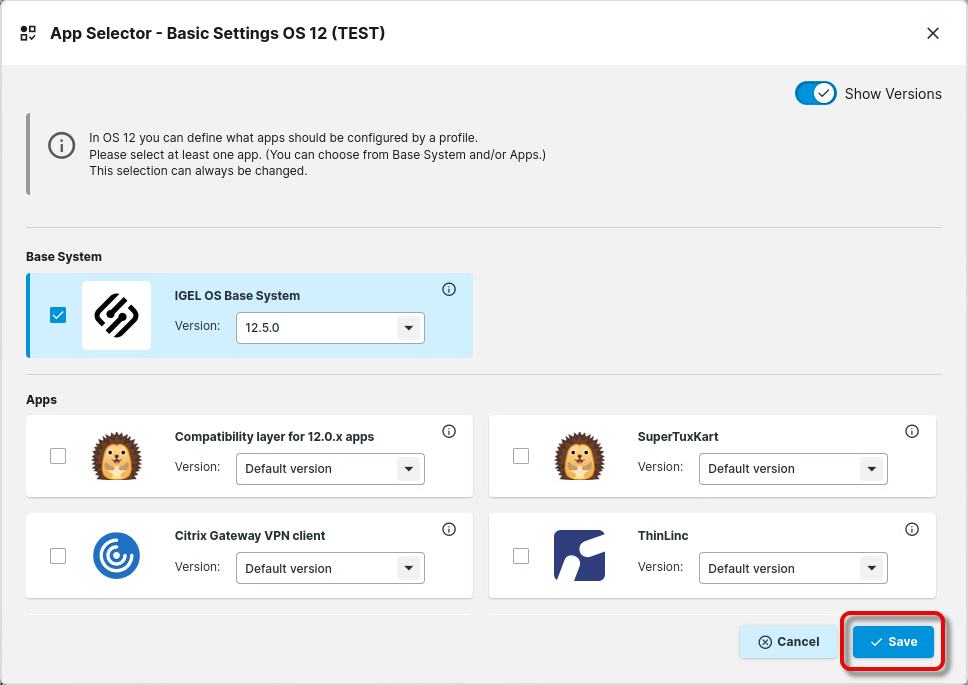
Assigning the Profiles to the Test Devices
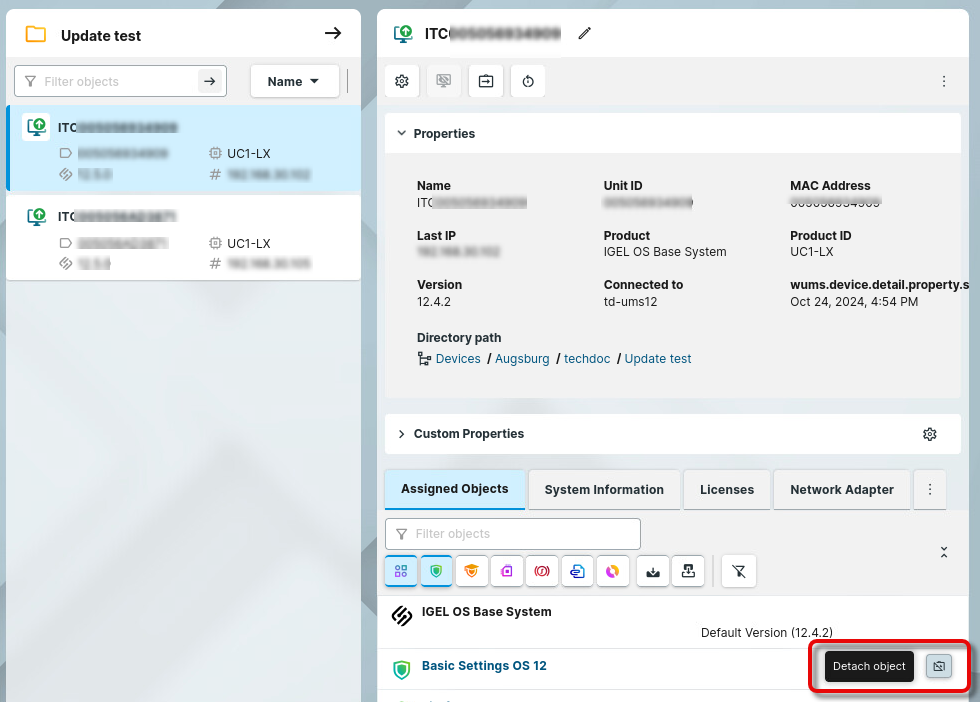
Find your test devices and detach the relevant productive profiles from each test device.

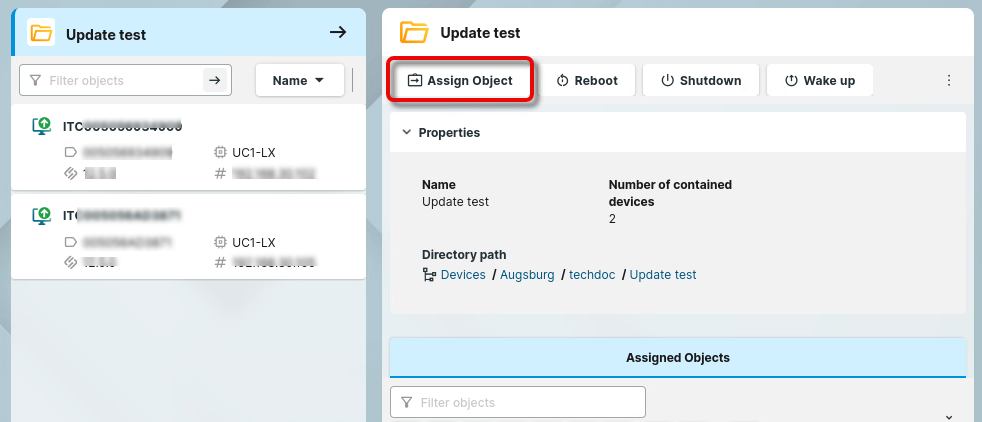
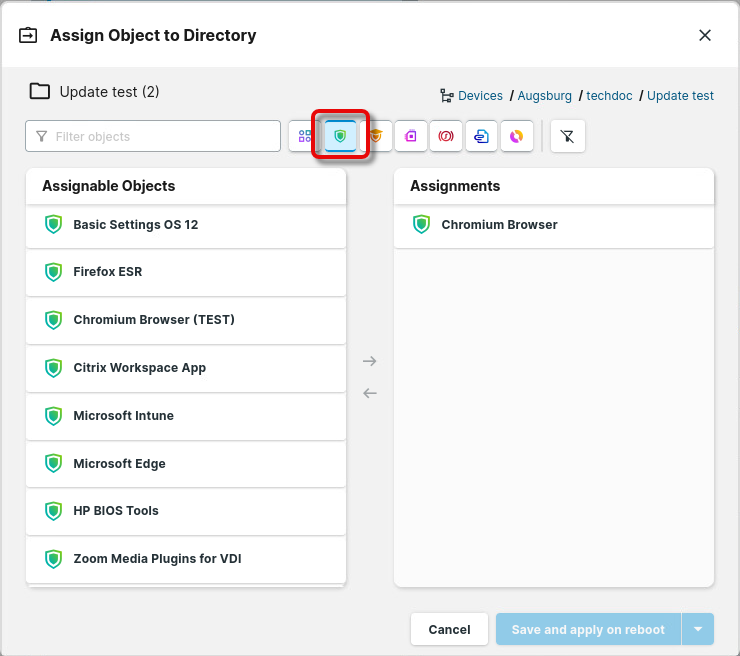
Assign the test profile to your test directory.
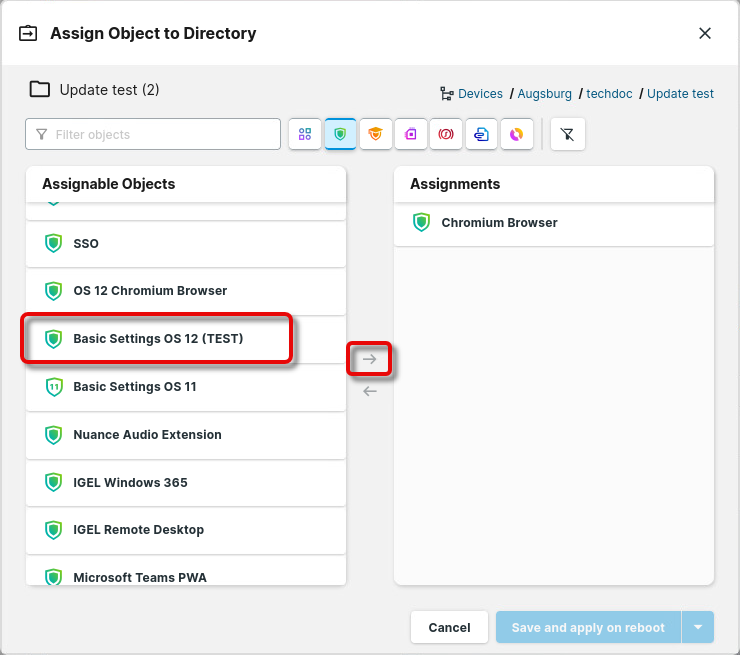
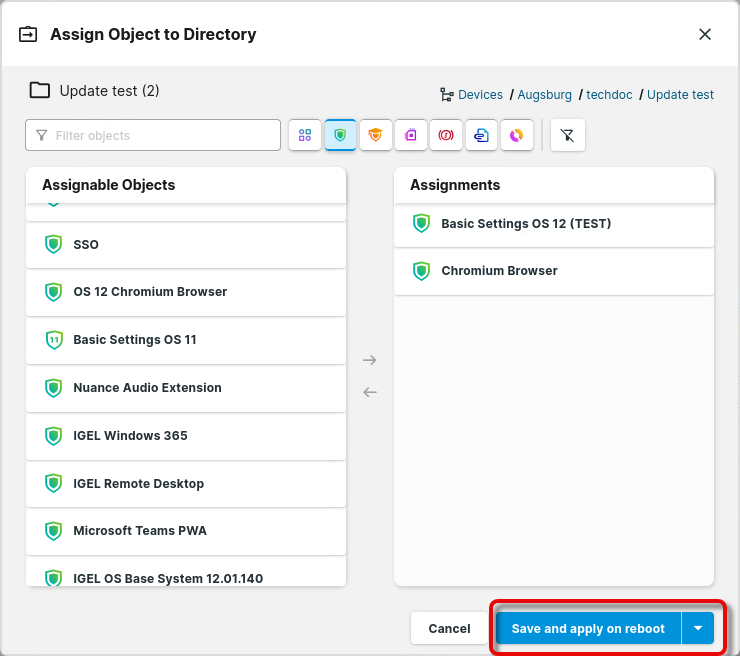
Assigning the New Base System Version to the Devices
Go to each of your test devices and check under Assigned Objects if a version of the IGEL OS Base System is assigned to the device.
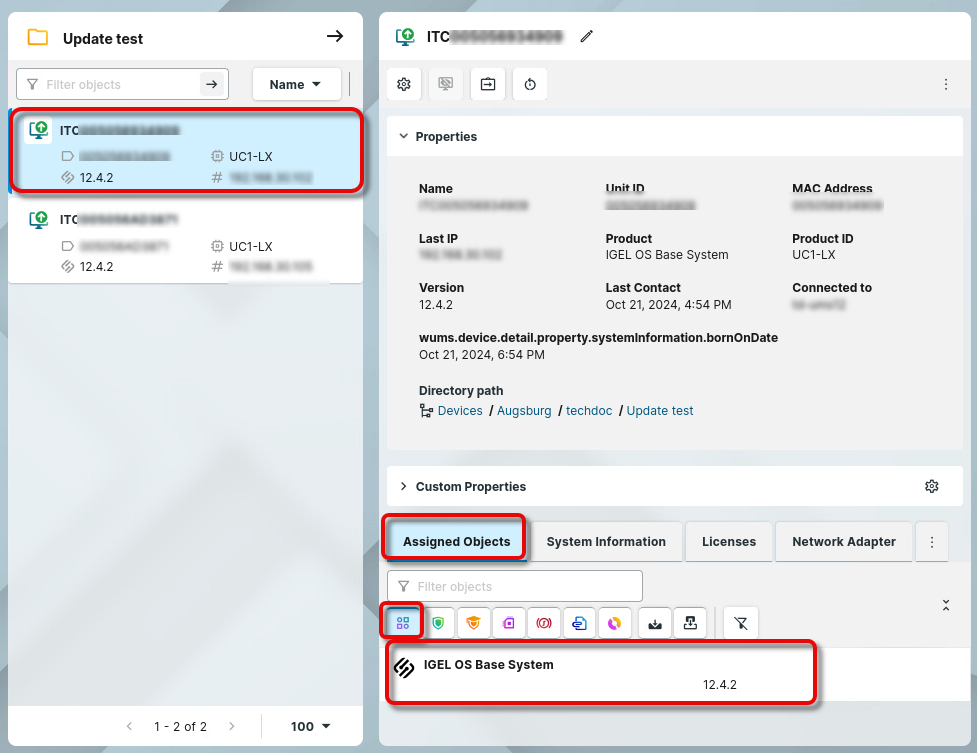
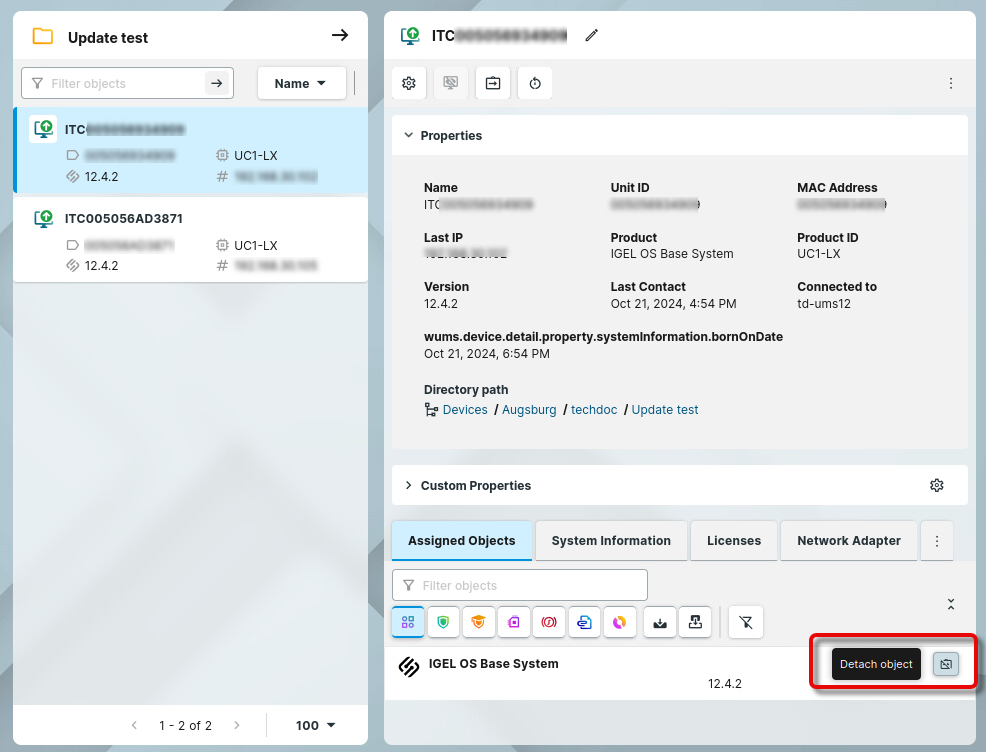
Move your mouse to the right side of the IGEL OS Base System entry; if a Detach object button (
 ) appears, click it and confirm your change.

Go to the test directory and click Assign Object.
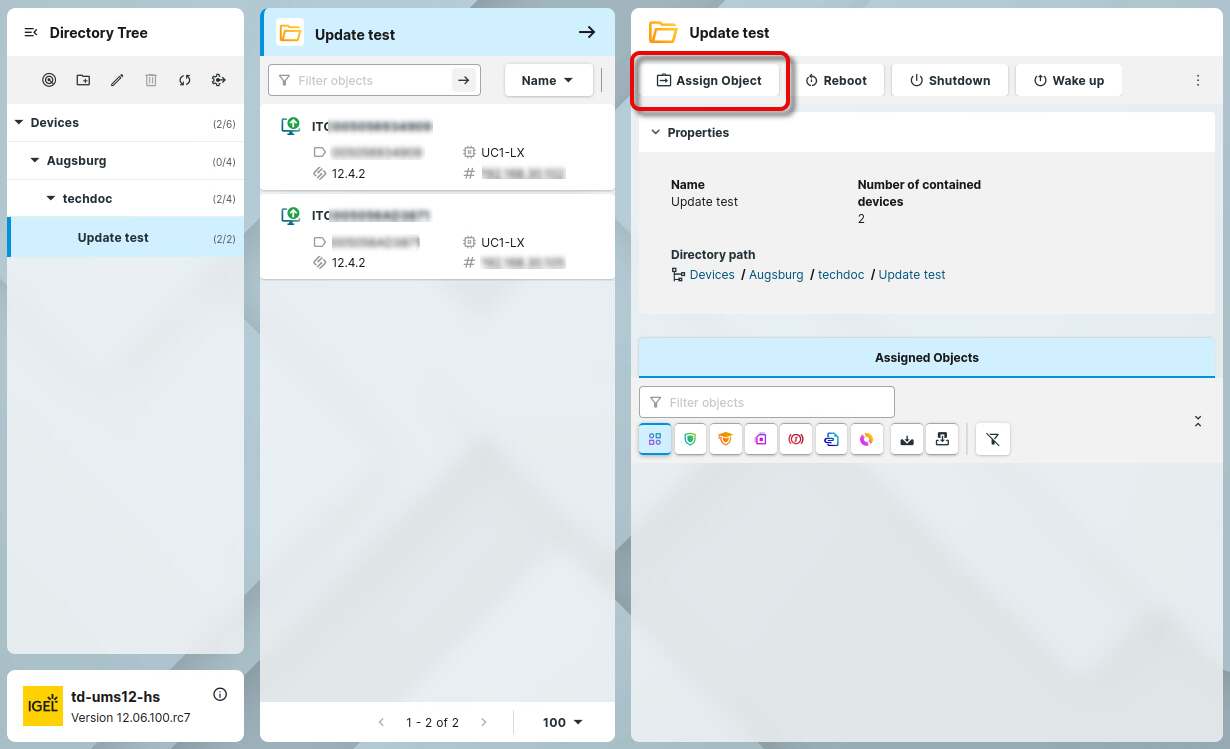
In the dialog Assign Object to Directory, choose the desired version of the IGEL OS Base System and assign it to the directory.
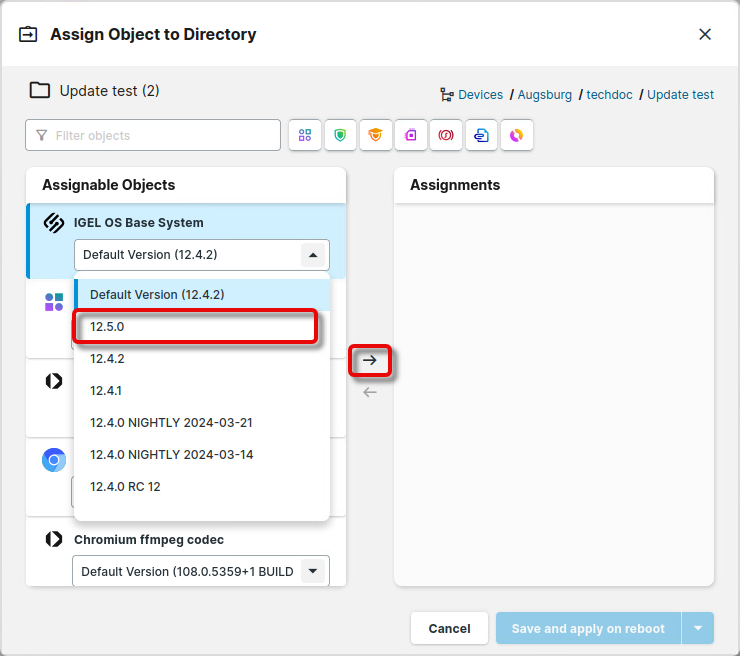
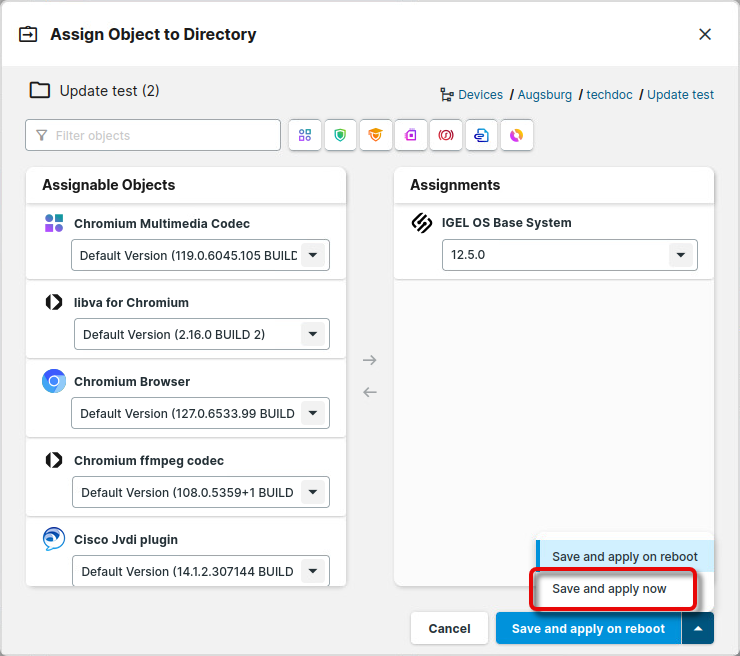
After a dialog timeout, the devices update to the new version of the IGEL OS Base System. You can perform your tests as appropriate.
Rolling out the Base System Update on All Devices
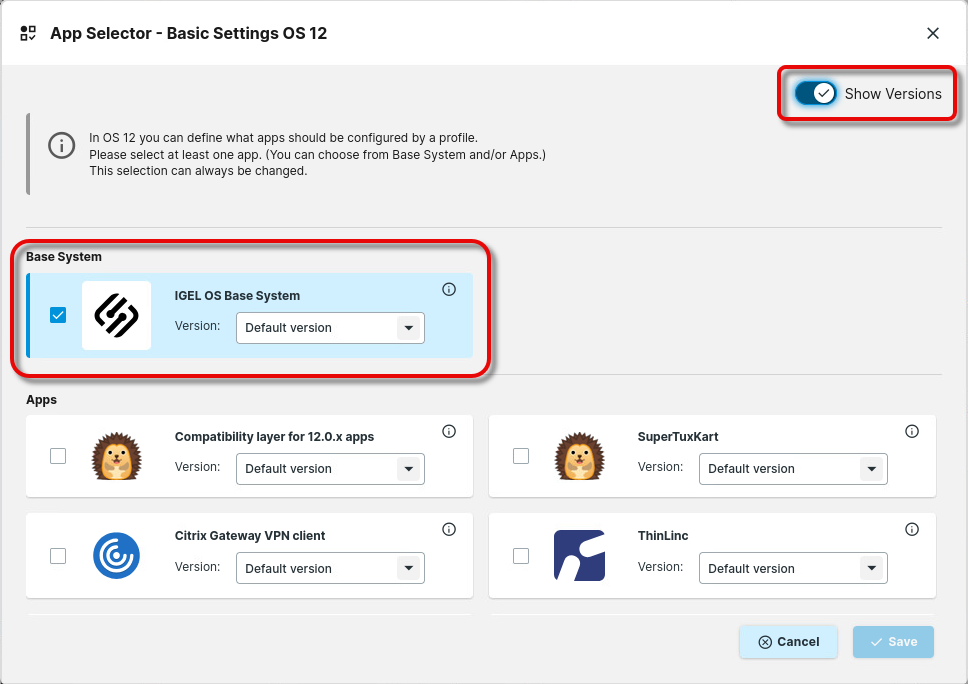
Go to your productive profile and ensure it is set to use the default version of the app.
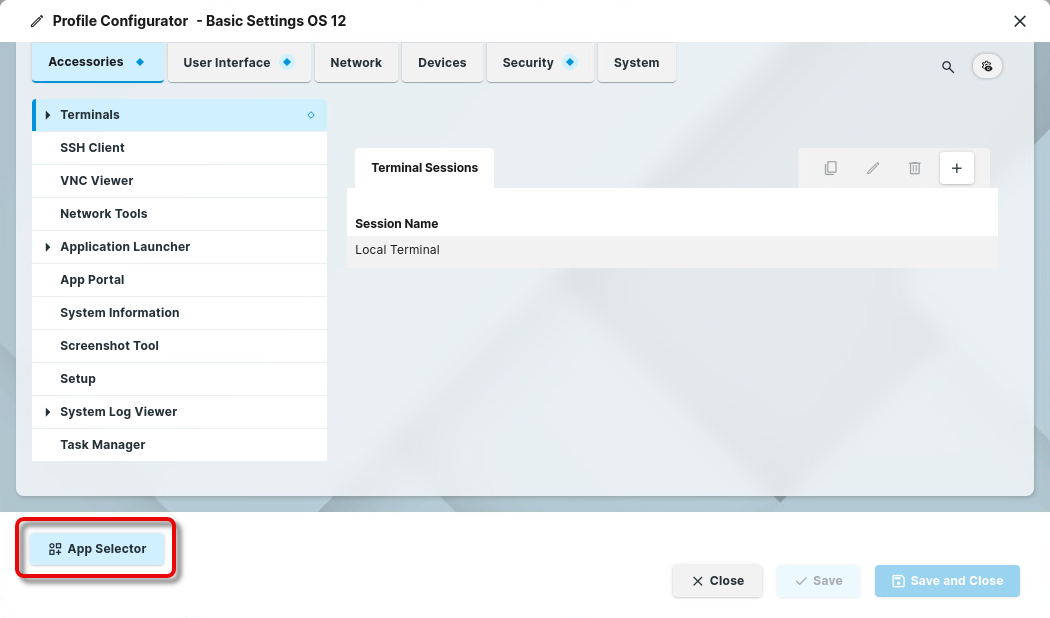
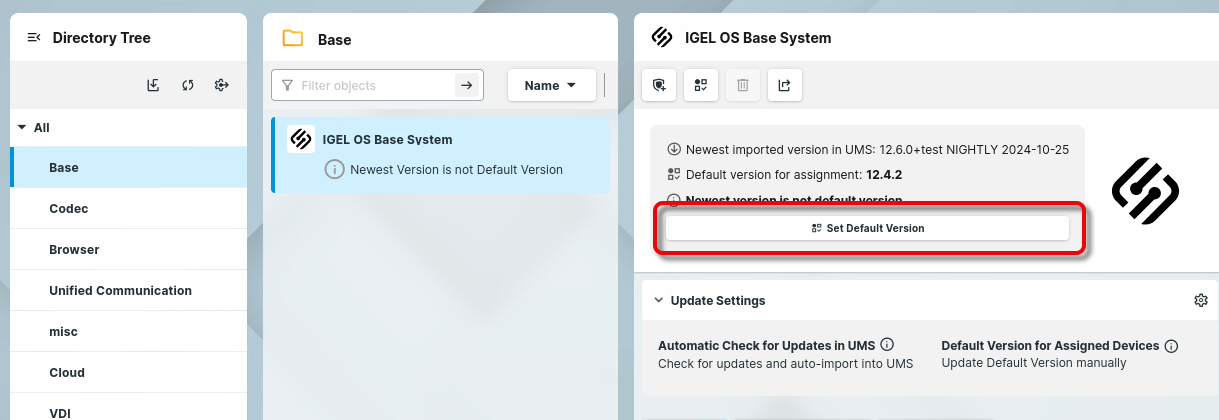
In the apps section, select the app to be updated, and click Set Default Version.
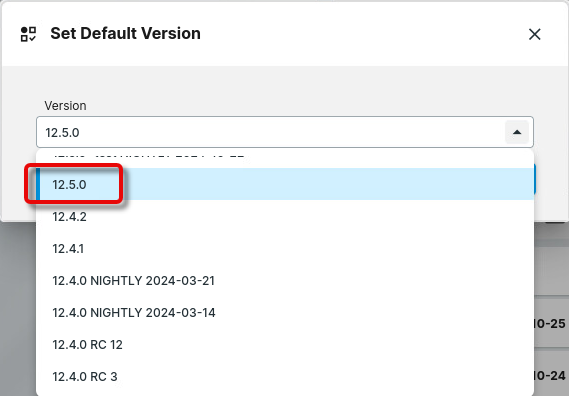
Set the default version to the version you have tested successfully.
Choose whether the update should take place immediately or on the next reboot.
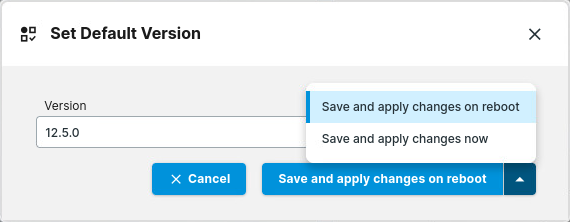
On reboot, the devices update their Base System to the default version.
Keeping the Other Apps up to Date
For the following procedure, we assume you have profiles for the apps to be updated. To ensure that all apps are tested with the settings for productive operation, we create copies of the productive profiles.
We will use a profile for the Chromium browser as an example.
Testing the App Updates on One or a Few Devices
Creating the Test Profiles
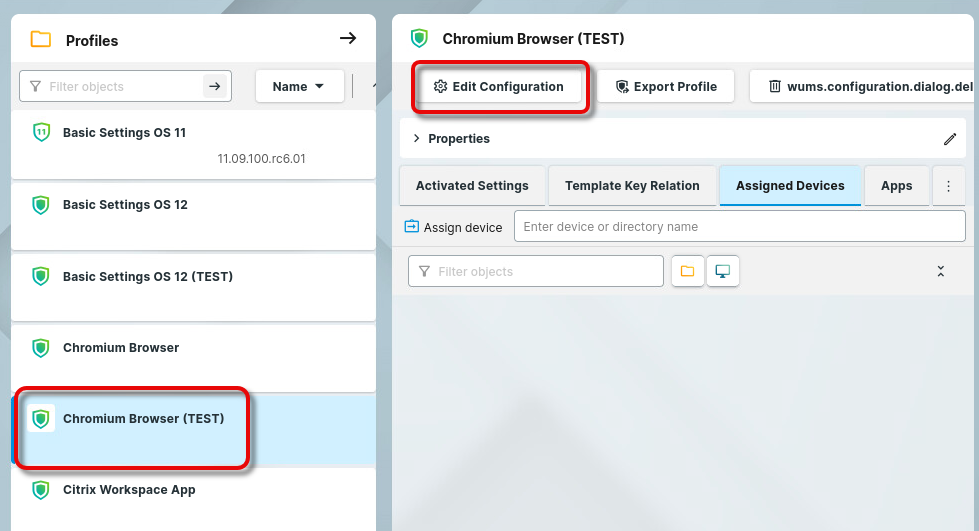
To create a test profile, we will duplicate the productive profile by exporting and re-importing it.
In your UMS Web App, go to the Configuration Objects and then find the relevant profile.
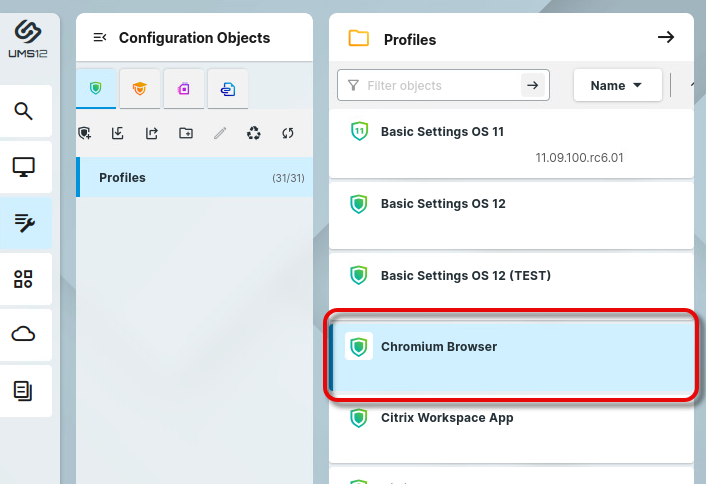
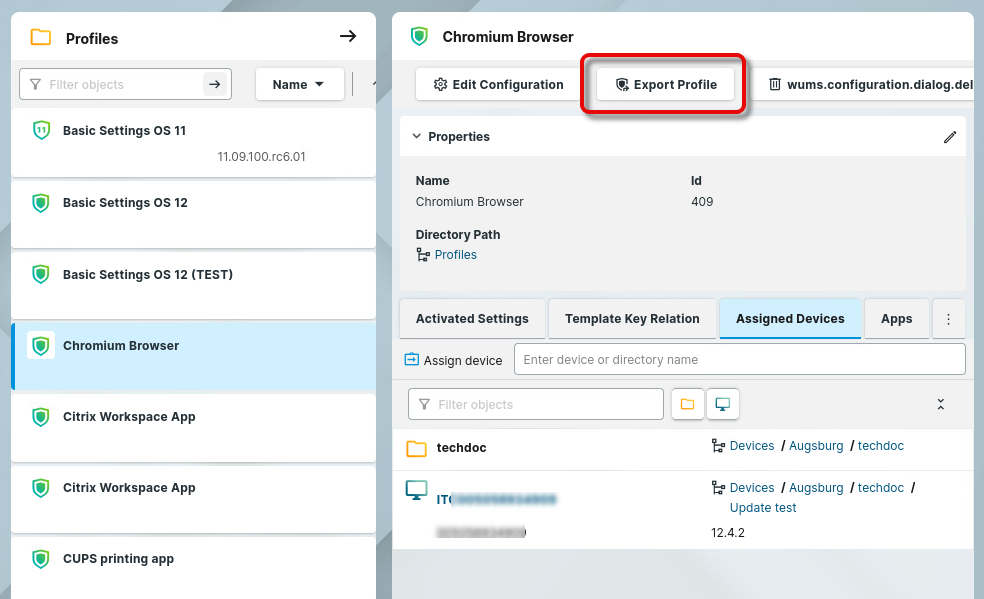
Click Export Profile and save the file on your machine.
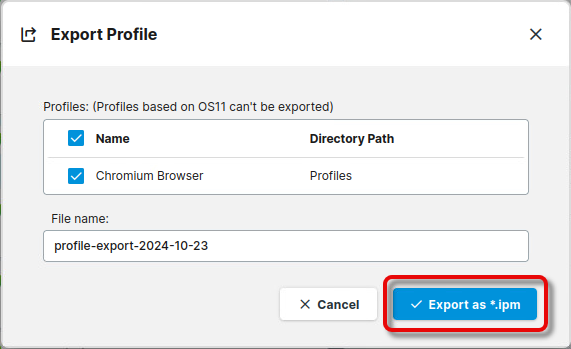
Click
 and import the file.
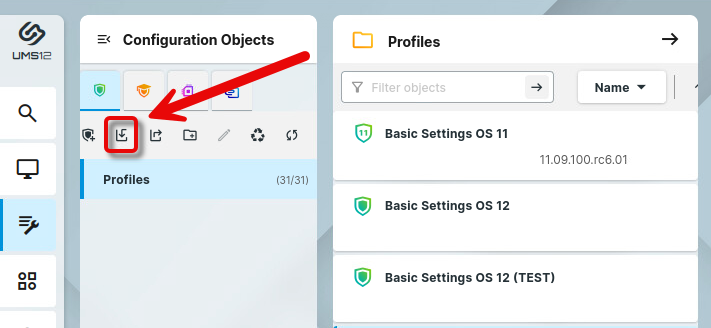

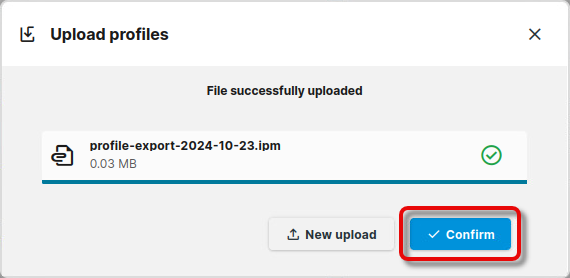
The imported profile is displayed underneath the original profile. The imported profile can be distinguished from the original one by its ID, which is higher.
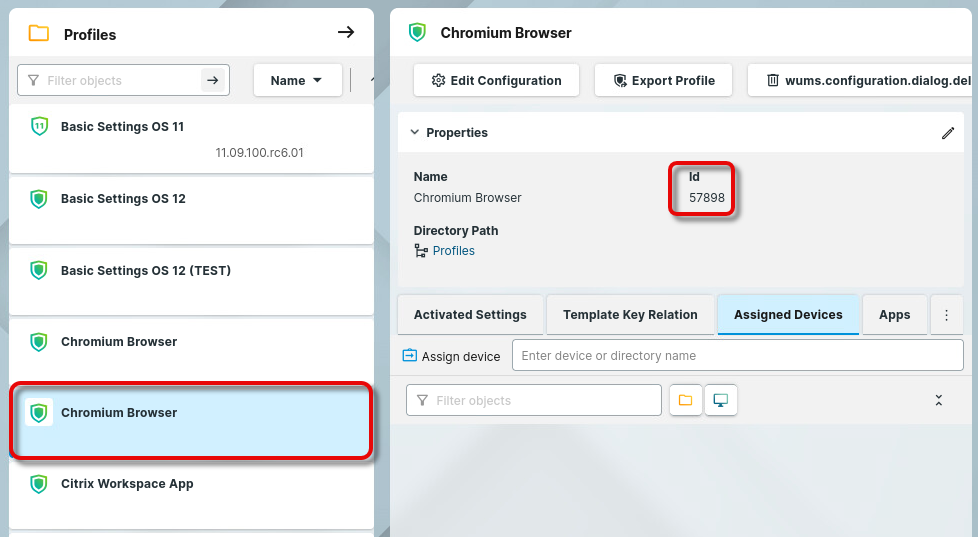
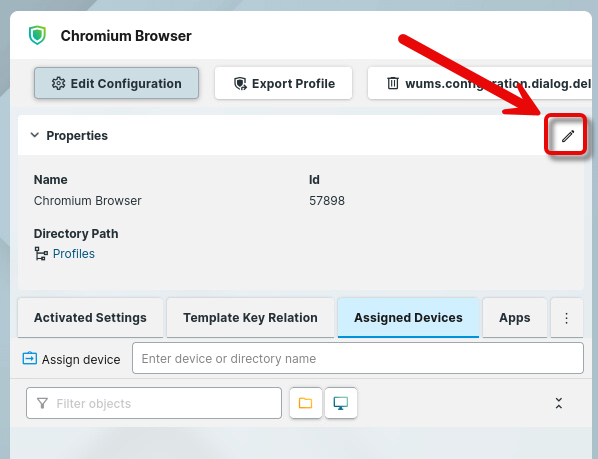
Select the imported profile, and click
 to change the name appropriately.
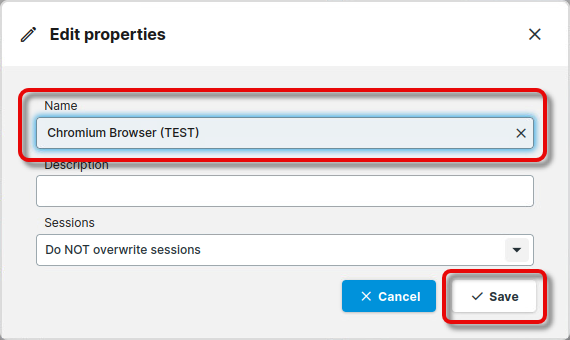
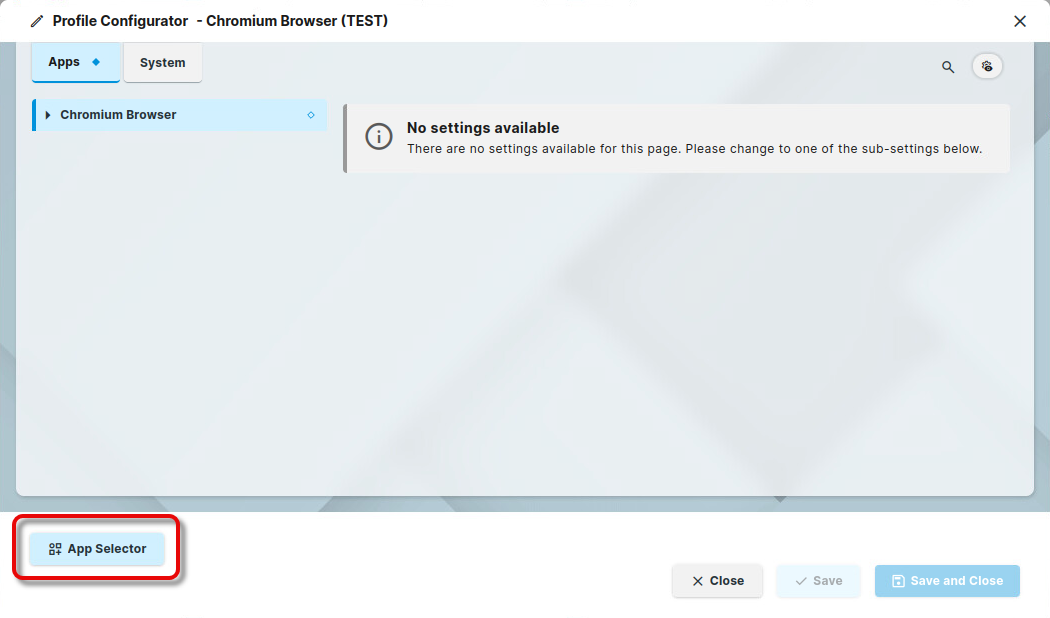
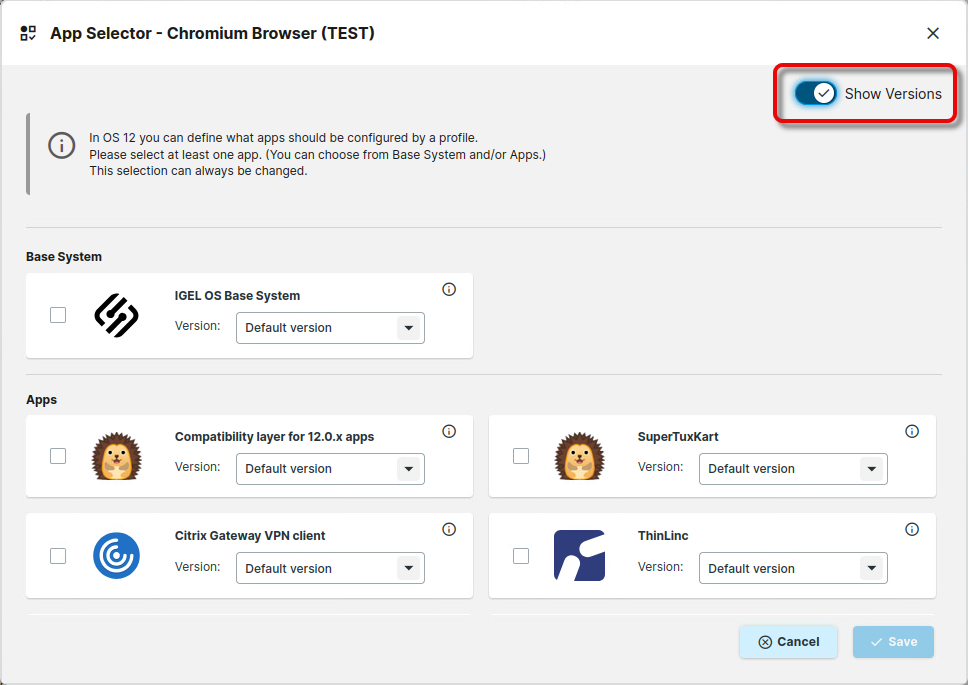
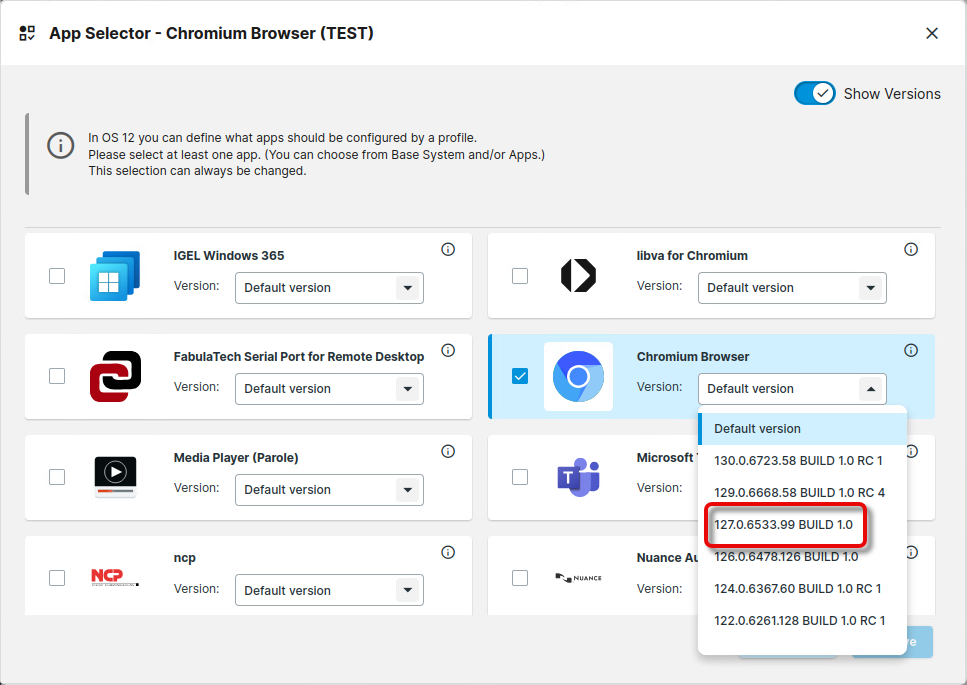
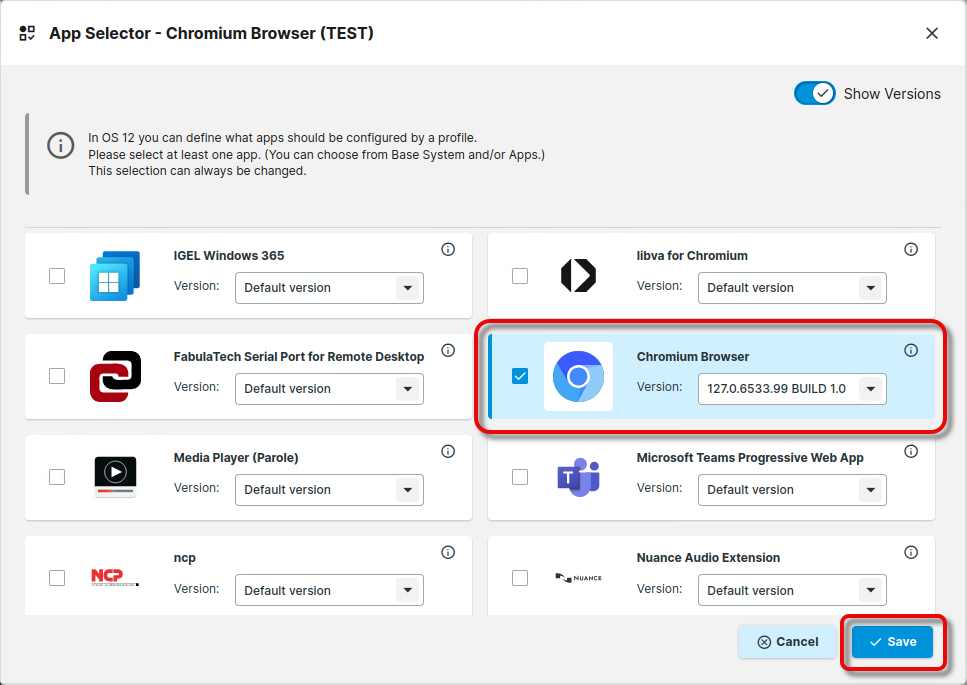
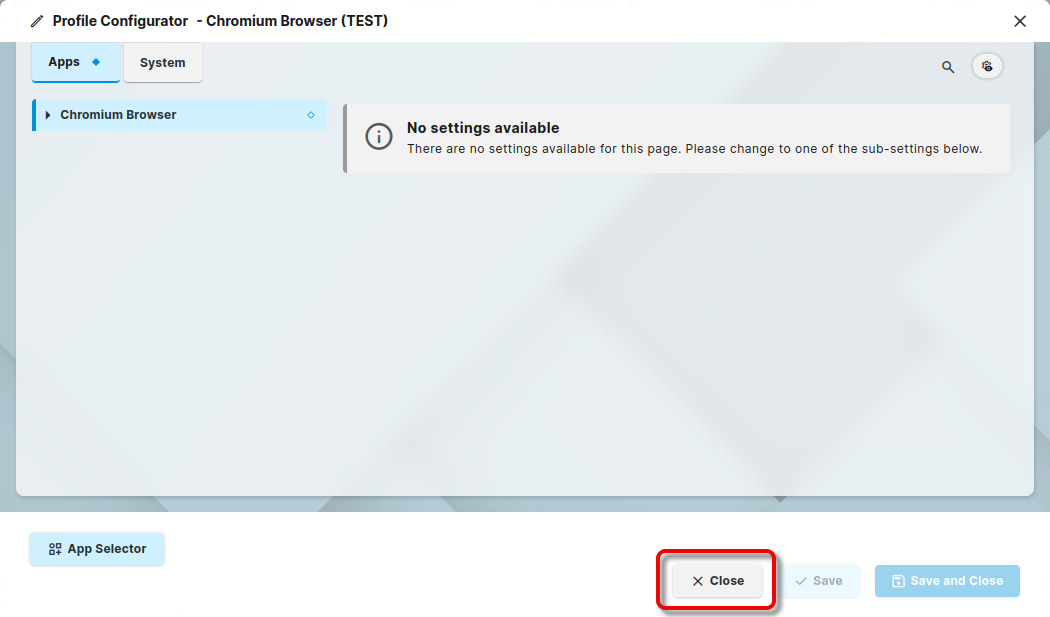
Set the app version of the test profile to the target version.
Assigning the Profiles to the Test Devices
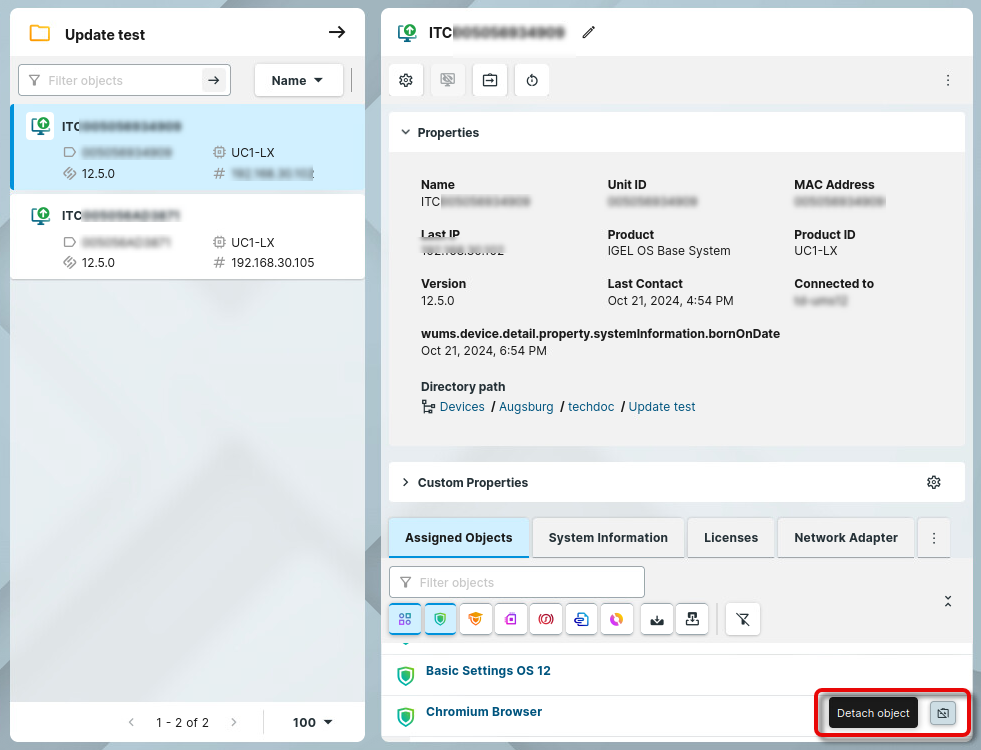
Find your test devices and detach the relevant productive profiles from each test device.

Assign the test profile to your test directory.
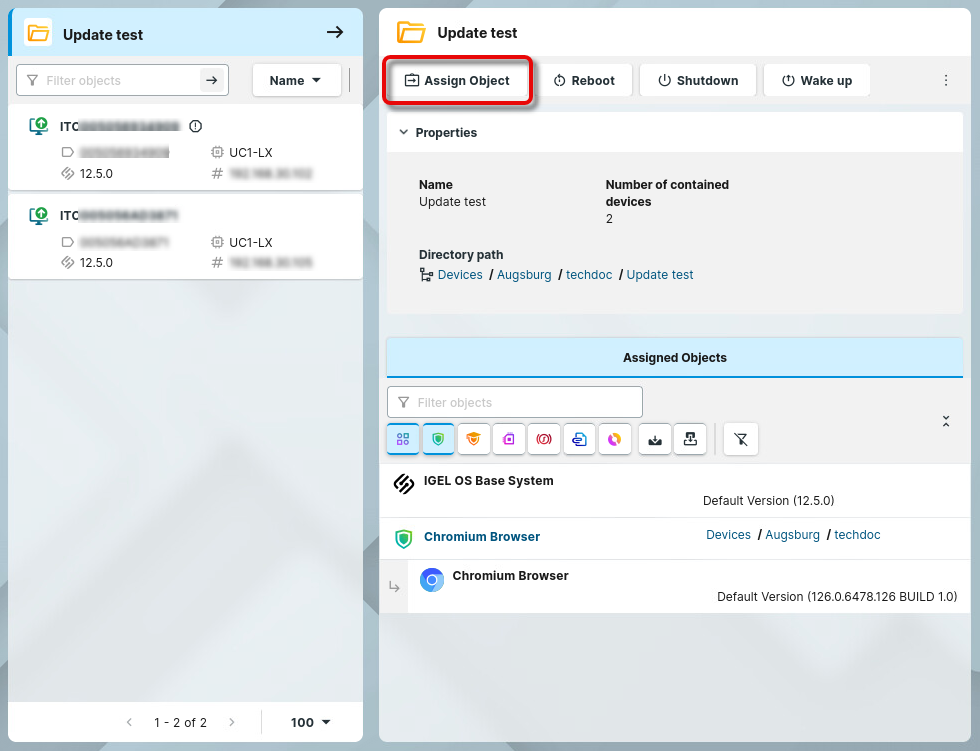
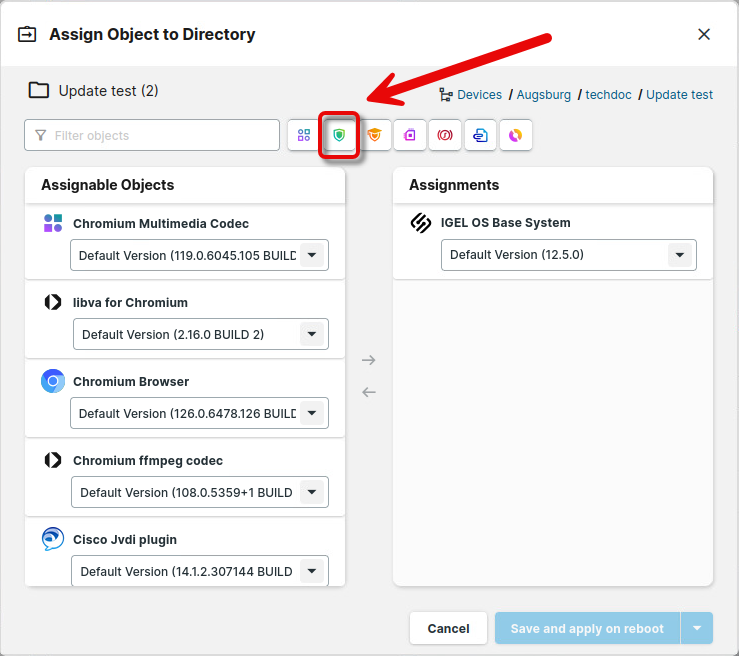
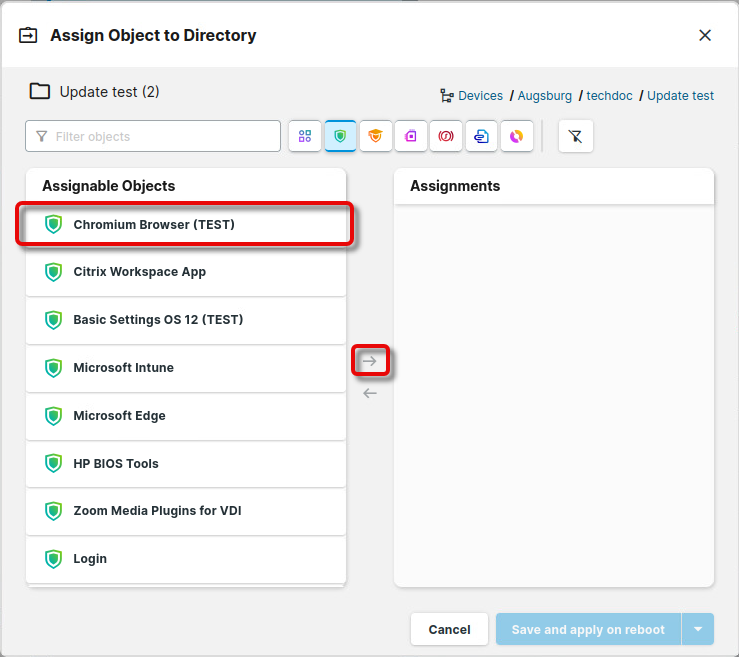
After a dialog timeout, the device reboots to install the new version of the app. You can perform your tests as appropriate.
Rolling out the App Update on All Devices
Go to your productive profile and ensure it is set to use the default version of the app.
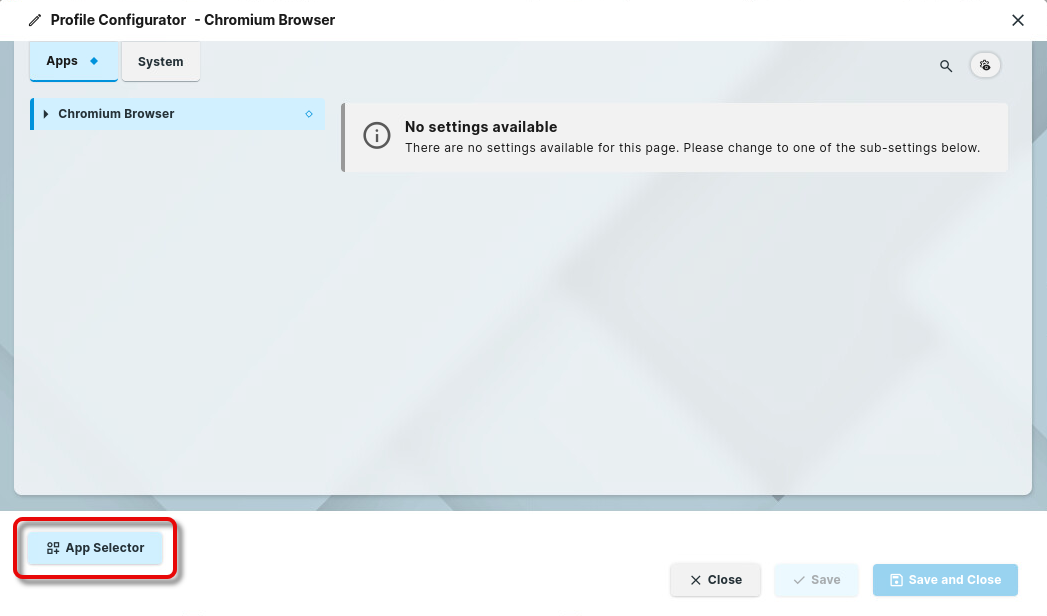
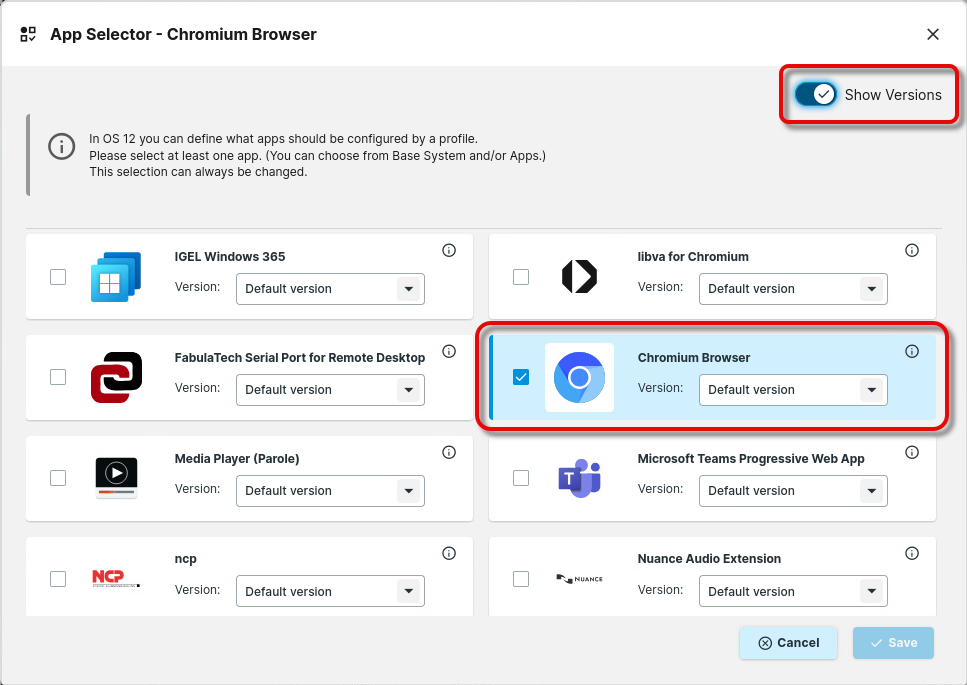
In the apps section, select the app to be updated, and click Set Default Version.
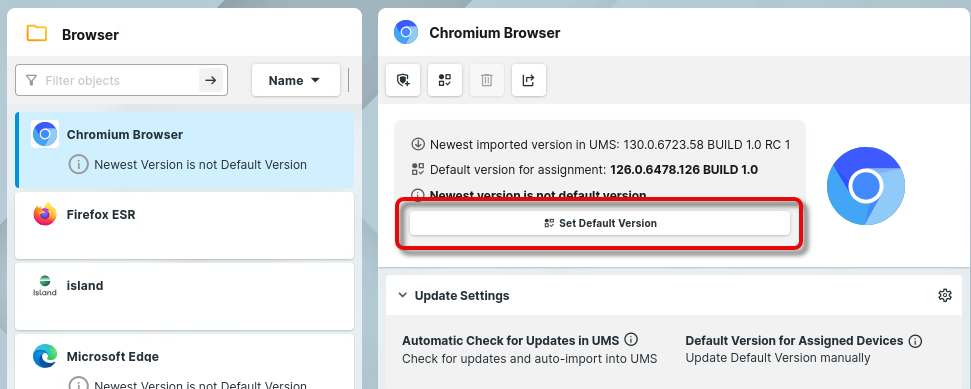
Set the default version to the version you have tested successfully.
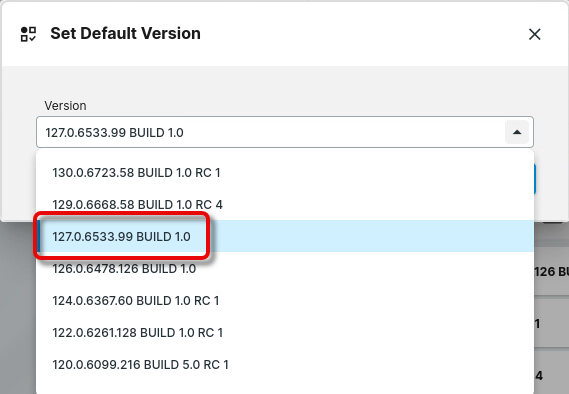
Choose whether the update should take place immediately or on the next reboot.

On reboot, the devices update their Base System to the default version.
