Configuration - Centralized Management of Device Settings in the IGEL UMS Web App
In the Configuration area of the IGEL Universal Management Suite (UMS) Web App, you can create and manage configuration objects, such as profiles and files, to support the centralized management of device settings. In this article we introduce the area and the general use. You can find more detailed or specific information in the following articles:
Menu path: UMS Web App > Configuration

1 | Configuration Objects | The objects are grouped according to their types into the following tabs:
To use priority profiles, they have to be enabled under Network > Settings > UMS Features, see Network Settings in the IGEL UMS Web App. Once enabled, you can create priority profiles in the same way as the standard profiles, see How to Create and Assign Profiles in the IGEL UMS Web App. Depending on the selected tab, you have different action buttons at the top of the list, but you can always structure the objects into a directory structure. The structure tree shows all created directories and subdirectories with information on the contained objects. The format (x/y) specifies: x - the number of objects contained directly in the directory and y - the total number of objects in the directory & all subdirectories of this directory. → To create a directory, click → To rename a directory, click → To delete a directory, click → To expand/minimize the list of subdirectories of a directory, click the arrow icon next to the directory name, or double click the directory element. → To move a configuration object to another directory, select the object and move it per drag & drop to the desired directory. → To refresh the Configuration Objects tree, click → To move a directory to another directory, select the directory and move it per drag & drop to the desired directory or use [Ctrl + X], [Ctrl + V]. It is currently not possible to copy objects in the UMS Web App. For profiles, you can use the export and import profile function instead. See Exporting and Importing Profiles in the IGEL UMS Web App. |
2 | Object List | When you select a directory in the tree, the object list shows all the objects contained in that directory.  |
3 | Management Panel | The content of the panel changes based on the selected item.
|


Profile Management Panel
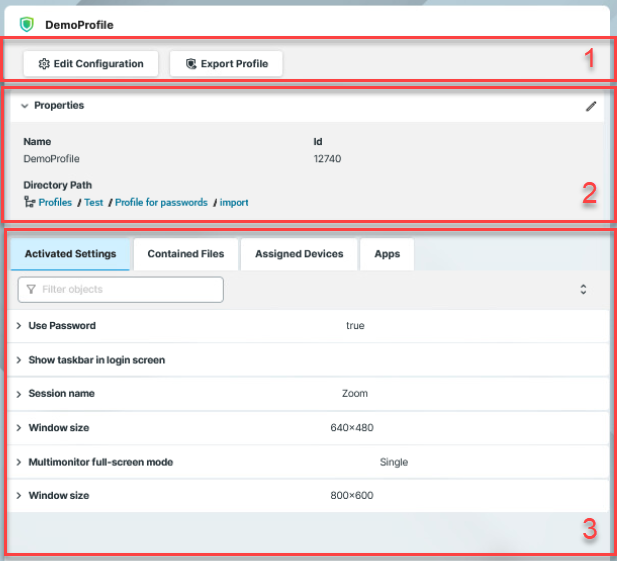
1 | Action Buttons | → To edit the configuration parameters of a profile, double click the profile in the object list, or select the profile and click Edit Configuration in the information panel. → To export the profile, click Export Profile. |
2 | Profile information | For profiles, the information panel shows the Properties of the selected profile, e.g. its Name, Version it is based on (for IGEL OS 11 profiles only), etc. Id Profile ID. If several profiles are assigned to a device on an equal basis, the newer profile with the higher profile ID has priority. For more information on prioritization of profiles, see Order of Effectiveness of Profiles and Prioritization of Profiles in the IGEL UMS. Directory Path Full directory path for the selected profile → To edit the properties, click 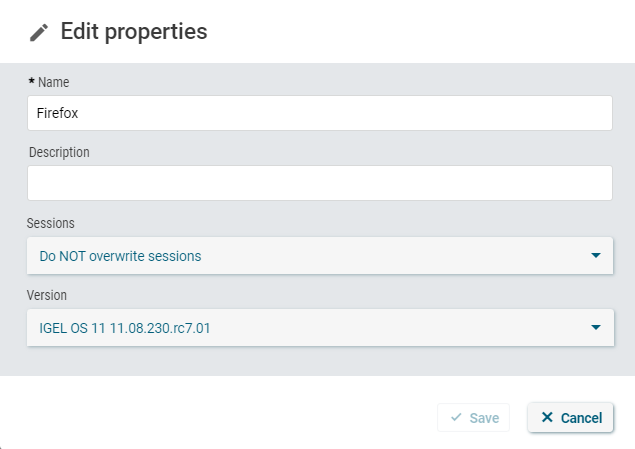 Overwrite sessions option should be activated only in exceptional cases. With this option, you can override free instances of all other profiles. Detailed information on this option can be found under Creating Profiles in the IGEL UMS. |
3 | Activated Settings | Shows all configuration settings activated in the selected profile. Key → Click the i-icon to open the tooltip. Display name Value → If a parameter receives a value from a template key (see Template Profiles in the IGEL UMS), click Settings activated for the newly created profiles as well as setting changes are displayed in the UMS Web App under Activated Settings not immediately, but after the next reindexing, which is executed, in this case, with a one-day interval. |
Template Key Relation | Shows template keys used in the profile, see Template Profiles in the IGEL UMS and How to Use Template Keys in Profiles. Template Key Parameter Example of template expressions:
| |
Contained Files | Shows all files assigned to the selected profile. For details on the file upload, see Upload and Assign Files in the IGEL UMS Web App. 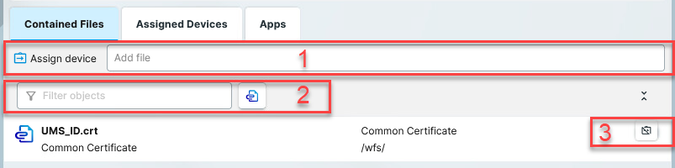 1: Here you can quickly add a file to the profile. → Enter the name of the file and select in the list. 2: Filters the files added to the profile according to the entered string. 3: Detaches the selected file from the profile. | |
Assigned Devices | Shows all devices the selected profile is assigned to. 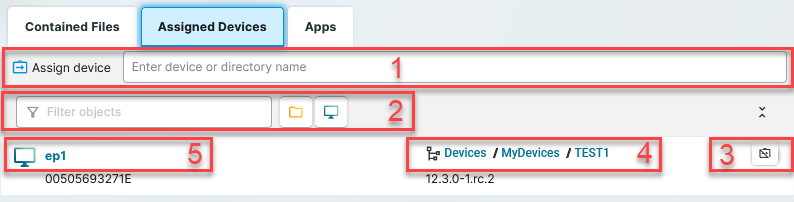 1: Here you can quickly assign the profile to a device or a device directory. → Enter the name of the device or device directory and click the name in the list. 2: Filters the devices / device directories assigned to the selected profile. The filter criteria are linked with the operator AND. → Click 3: Detaches the selected device / device directory from the profile. 4: Jumps to the corresponding device directory and shows all Assigned Objects for it. 5: Jumps to the corresponding device and shows all Assigned Objects for it. | |
Apps | Shows which apps / app versions are configured by the selected OS 12 profile. |


File Management Panel
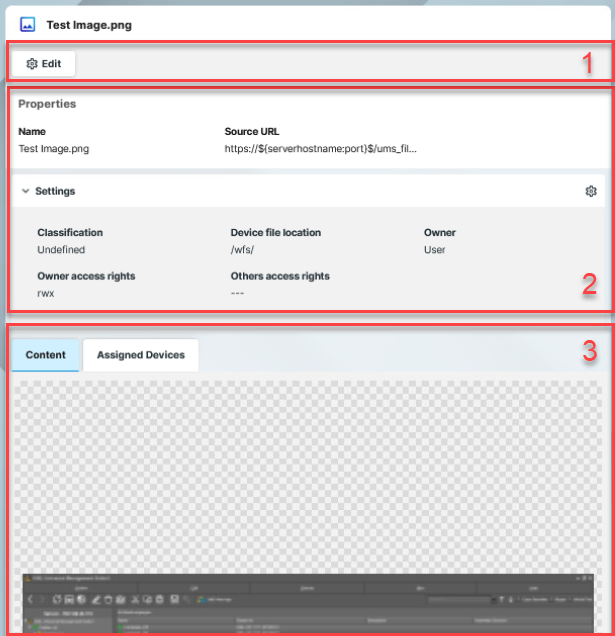
1 | Actions | → To edit the properties and settings of the file, click Edit. |
2 | File Information | For files, the information panel shows the Properties and Settings of the selected file, e.g. its Name or Source URL. The values are defined during the upload of the file, and can be edited later. For details on the settings, see Upload and Assign Files in the IGEL UMS Web App. When you upload a file with a filename that already exists, the new filename gets modified according to the format {filename}({n}), where n specifies how many files exist with the same name. For example, Logo(1).png, Logo(2).png. In the UMS Web App, this is only visible in the Source URL but not in the Name of the file. |
3 | Content | Displays a preview of the files uploaded through the UMS Web App. For example, an image preview or certificate content. |
Assigned Devices | Shows all the devices the selected file is assigned to. → To quickly assign the file to a device or a device directory, enter the name of the device or device directory and click the name in the list. For details, see Upload and Assign Files in the IGEL UMS Web App. → You can filter the devices / device directories assigned. The filter criteria are linked with the operator AND. Click → Detach the selected device / device directory by clicking → Click the name of the device in the list to jump to the corresponding device and see all Assigned Objects for it. → Click the name of the directory to jump to the corresponding device directory and see all Assigned Objects for it. |
Corporate Identity Customizations
Using Corporate Identity Customizations (CICs) in the UMS Web App, you can customize the user interface of your IGEL OS devices to suit your corporate design. For details, see How to Use Corporate Identity Customizations in IGEL UMS Web App .
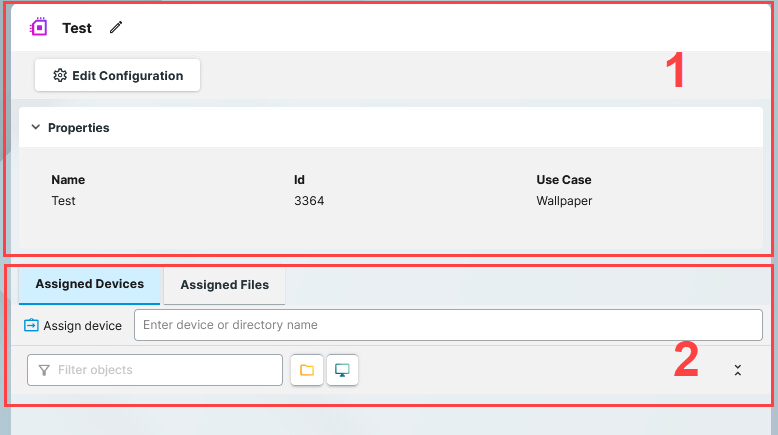
1 | CIC Information | The information panel shows the Properties of the selected CIC, e.g. its Name and Use case. → Click → Click Edit Configuration to configure the CIC. |
2 | Assigned Devices | Shows all the devices the selected CIC is assigned to. → To quickly assign the CIC to a device, enter the name of the device or device directory and click the name in the list. You can also assign CICs just like any other objects in the Devices area. For more information on assigning objects, see How to Assign Objects in the IGEL UMS Web App . 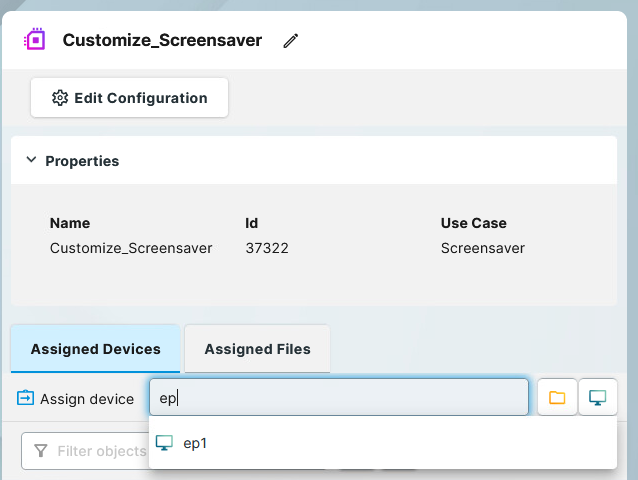 → You can filter the list of assigned devices / device directories. The filter criteria are linked with the operator AND. Click → Detach the selected device / device directory by clicking → Click the name of the device in the list to jump to the corresponding device and see all Assigned Objects for it. → Click the name of the directory to jump to the corresponding device directory and see all Assigned Objects for it. |
Assigned Files | Shows a list of files used in the selected CIC with size information. → You can filter the list of devices / device directories assigned. The filter criteria are linked with the operator AND. Click |