How to Create and Assign Profiles in the IGEL UMS Web App
In the IGEL UMS Web App, you can create profiles for configuring settings for your devices. For general information on profiles, see Profiles in the IGEL UMS.
Menu path: UMS Web App > Configuration
Profiles for IGEL OS 12 and IGEL OS 11 Devices
The procedure for creating profiles for IGEL OS 12 and IGEL OS 11 devices is different. If you want to configure, for example, Chromium browser settings for your IGEL OS 12 and IGEL OS 11 devices, you have to create two profiles – one for OS 12 devices and another for OS 11 devices.
Profiles for IGEL OS 12 devices can only be created and changed in the UMS Web App. It is not possible to create/edit them in the UMS Console.
Profiles for IGEL OS 11 devices can be created and edited in the UMS Console and the UMS Web App.
The direct assignment of OS 12 profiles to OS 11 devices is not possible, and vice versa. If you assign an OS 12 profile to an OS 11 device indirectly, i.e. via a directory structure, the settings from the OS 12 profile are ignored for the OS 11 device (and vice versa).
Direct and Indirect Assignment of Objects in the IGEL UMS
Objects in the IGEL UMS can be assigned directly or indirectly:
Directly assigned objects have been assigned to an individual device or directory.
Indirectly assigned objects have been "inherited" via the directory structure.
Whether a profile is assigned directly or indirectly influences the priority of a profile, see Order of Effectiveness of Profiles.
Note the following:
If you assign a profile to a directory, it is indirectly assigned to each device in this directory including the subdirectories.
If you subsequently move a device to this directory, the directory profiles will affect this device too.
If you remove a device from this directory, the profile will no longer influence this device and the local settings for the device will be restored.
Creating Profiles for IGEL OS 12 Devices
Before creating profiles for IGEL OS 12 devices, you have to import the required apps from the IGEL App Portal; see How to Import IGEL OS Apps from the IGEL App Portal.
Alternatively, at least one IGEL OS 12 device with the required apps has to be already registered with the UMS Server. IGEL OS base system as well as all locally installed apps are then automatically recognized by the UMS. See e.g. Installing IGEL OS Apps Locally on the Device .
As soon as there are apps listed under UMS Web App > Apps, you can create a profile to configure settings for your devices.
There are two methods to create a profile:
Via Configuration > Configuration Tree > Create new profile (used to configure several apps. A profile configures ALL versions of an app, unless the version is specified.)
Via Apps > Create new profile (used to quickly configure a profile for the selected app.)
Profiles cannot currently be deleted in the UMS Web App. Use the UMS Console, instead.
For apps which have no configurable parameters (e.g. codecs), it is not possible to create a profile.
Option 1: Create an OS 12 Profile via Configuration
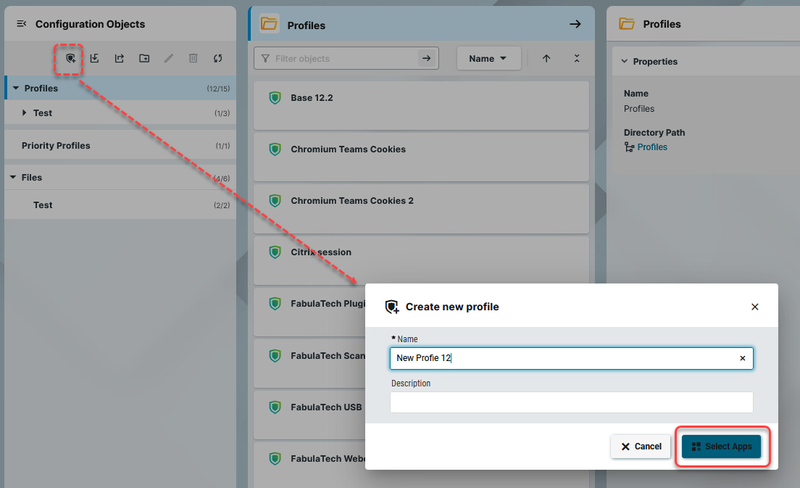
Under UMS Web App > Configuration, click Create new profile button.
Select OS 12 (shown only if there are OS 11 devices registered in the UMS) and enter the name of the profile. If desired, add the description for the profile.
Click Select Apps.
In the App Selector, select the app(s) you want to configure. It is ALWAYS necessary to select at least one app when creating a profile for IGEL OS 12 devices.
If you want to create profiles configuring IGEL OS base system settings (e.g. corporate design, SSO, accesories, etc.) before any of your IGEL OS 12 devices is registered with the UMS, import the IGEL OS base system app. The latest app version is recommended. Alone for the purpose of profile creation, the subsequent assignment of the IGEL OS base system app to a device / device directory is NOT necessary.
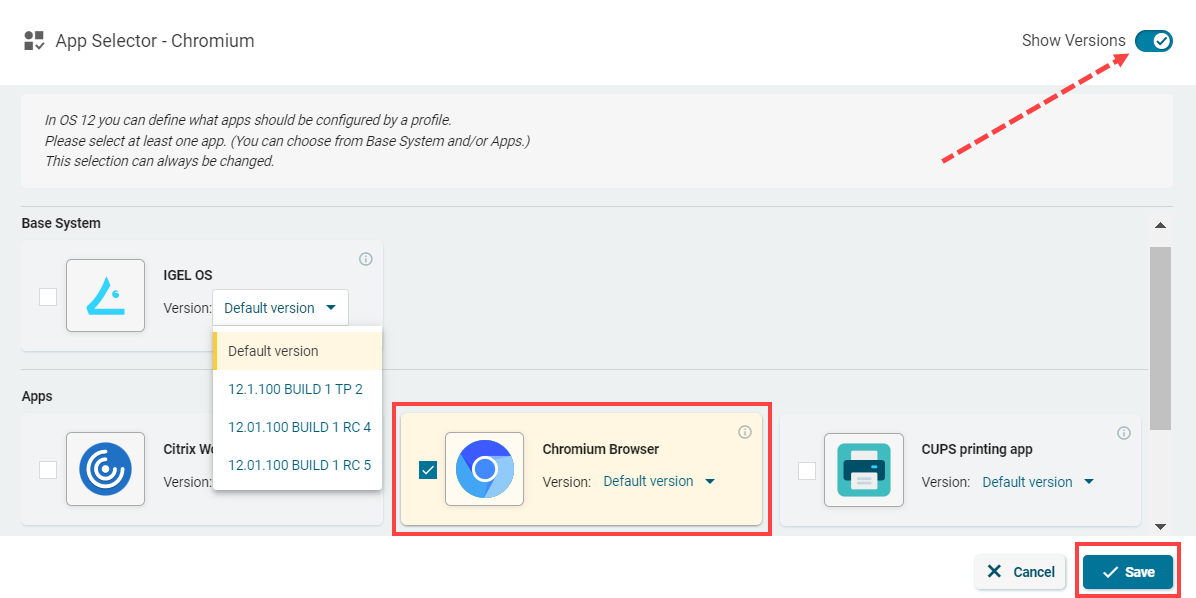
If you want to configure a profile for a specific app version, activate Show Versions and select the required version.
An app version selected here will be assigned to a device, see Assigning OS 12 Profiles to Devices, or Implicit App Assignment via Profiles.
The best practice is to use the Default Version, see How to Set a Default Version of an App in the IGEL UMS Web App.
Click Save.
The profile will be saved and listed under Configuration > Profiles, even if you will not configure any settings in the next step.Configure the desired settings.
The configuration dialog shows only those settings that can be configured for the selected app(s). If you want to change the scope of the profile (i.e. redefine which apps should be configured by the profile), click App Selector .
.
The parameter is inactive and will not be configured by the profile.
IMPORTANT: When you deactivate the parameter, the value will be automatically set back to the default value.

The parameter is active and the set value will be configured by the profile. 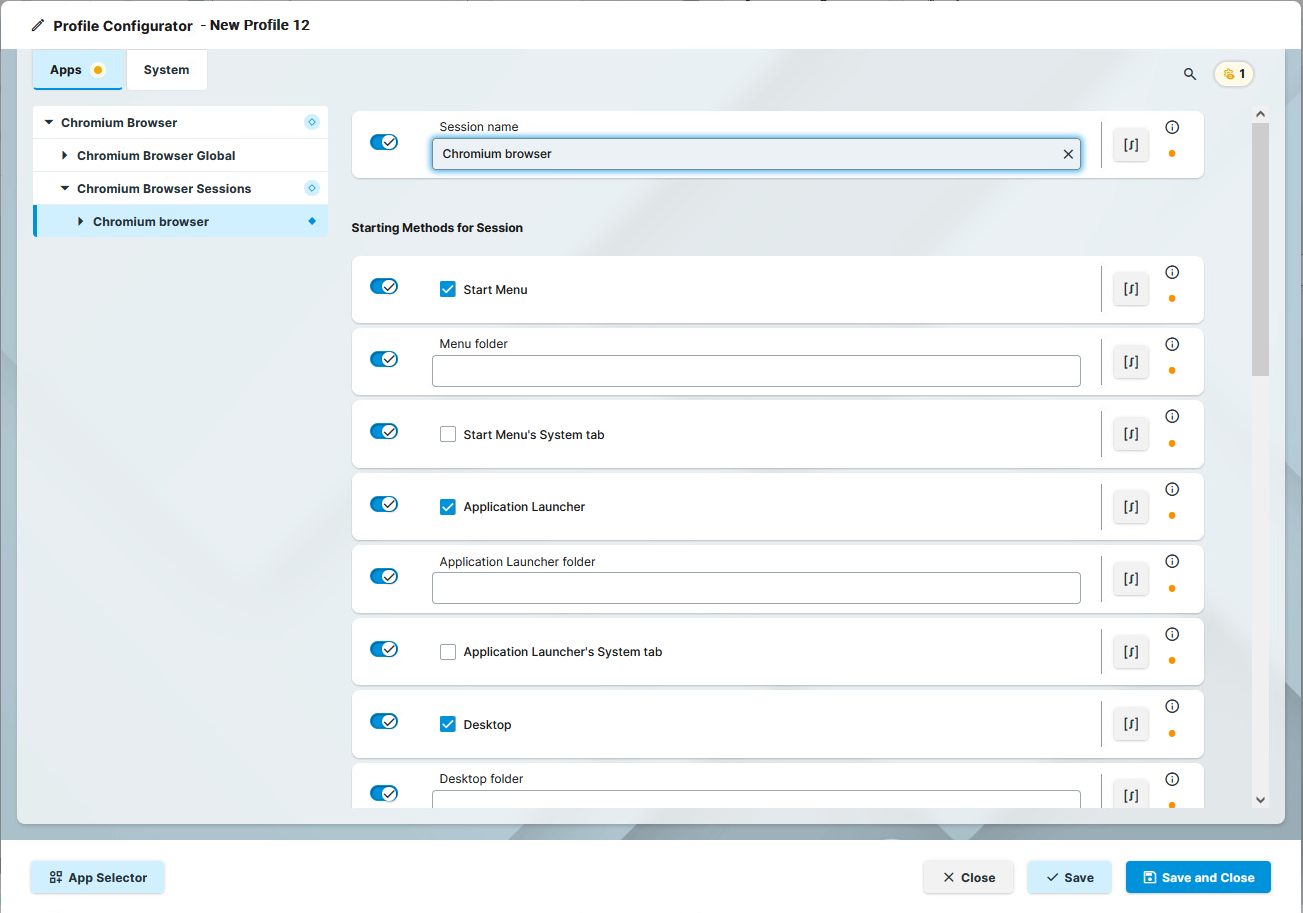
Save the changes.
Assign the profile to the required device / device directory. See Assigning OS 12 Profiles to Devices, or Implicit App Assignment via Profiles.
Option 2: Create an OS 12 Profile via Apps
To quickly create a profile for an imported app, proceed as follows:
Under UMS Web App > Apps, select the required app and click Create new profile.
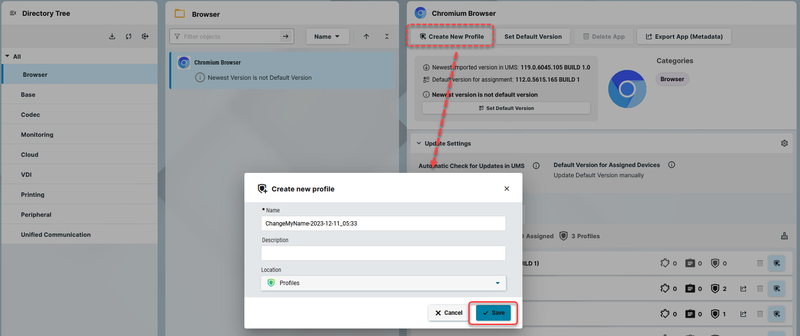
Enter the name of the profile and specify the desired directory for storing the profile under Location. If desired, add the description for the profile.
Click Save.
The profile will be saved and listed under Configuration > Profiles, even if you will not configure any settings in the next step.Configure the desired settings.
The configuration dialog shows only those settings that can be configured for the selected app. If you want to change the scope of the profile (i.e. redefine which apps should be configured by the profile), click App Selector .
.The parameter is inactive and will not be configured by the profile.
IMPORTANT: When you deactivate the parameter, the value will be automatically set back to the default value.
The parameter is active and the set value will be configured by the profile.
Save the changes.
Assign the profile to the required device / device directory. See Assigning OS 12 Profiles to Devices, or Implicit App Assignment via Profiles.
Assigning OS 12 Profiles to Devices, or Implicit App Assignment via Profiles
Implicit App Assignment via Profiles
An app is automatically assigned to a device via a profile which configures this app. Exception: IGEL OS Base System app
The app version that will be installed on the device via the implicit assignment if several profiles configure this app (but in different versions) is defined by the priority rules for profiles, see Prioritization of Profiles in the IGEL UMS and Summary - Prioritization of IGEL UMS Profiles. Note that the explicitly assigned app, i.e. app / app version selected as an object in the Assign object dialog, ALWAYS overwrites the implicitly assigned app. See How to Assign Apps to IGEL OS Devices via the UMS Web App.
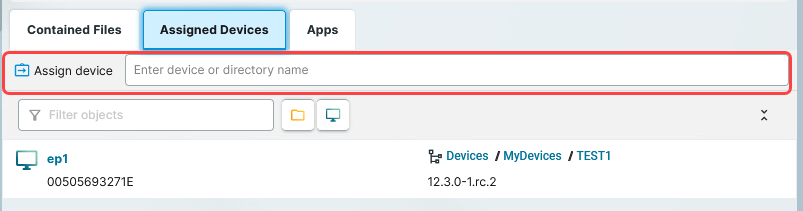
To quickly assign a profile to a device / device directory, you can use the Assign device function under Configuration > [name of the profile] > Assigned Devices. To use this option, you should already know the name of the device / device directory or its part.
To assign profiles to a device / device directory, proceed as follows:
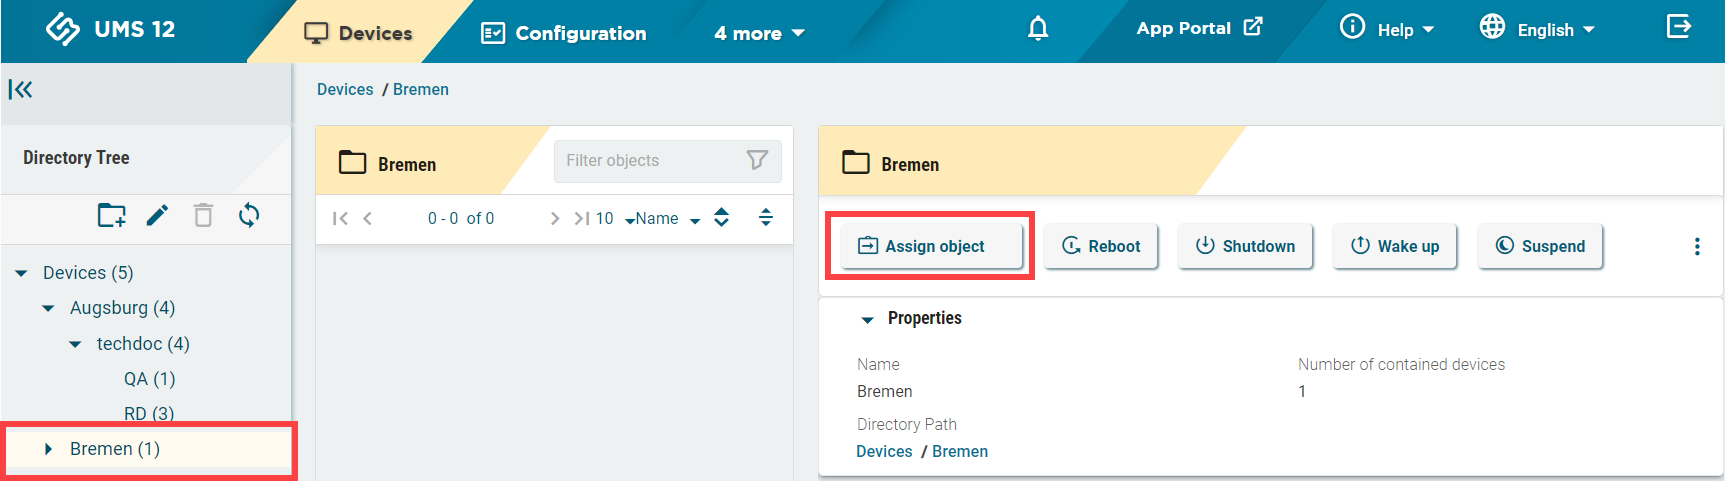
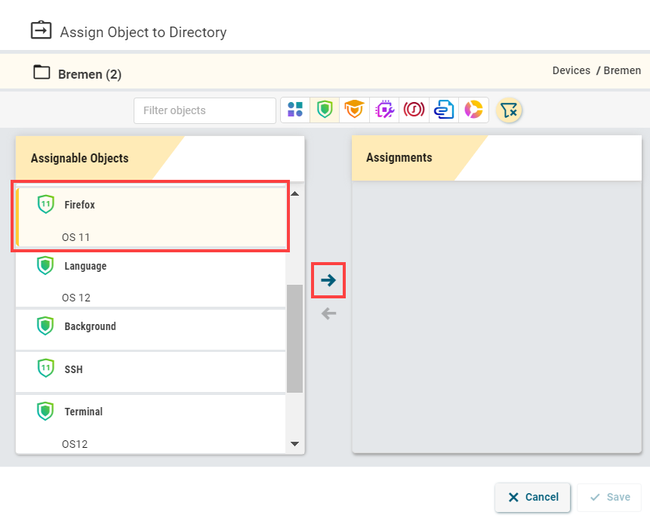
Under UMS Web App > Devices, select a device or device directory and click Assign Object.
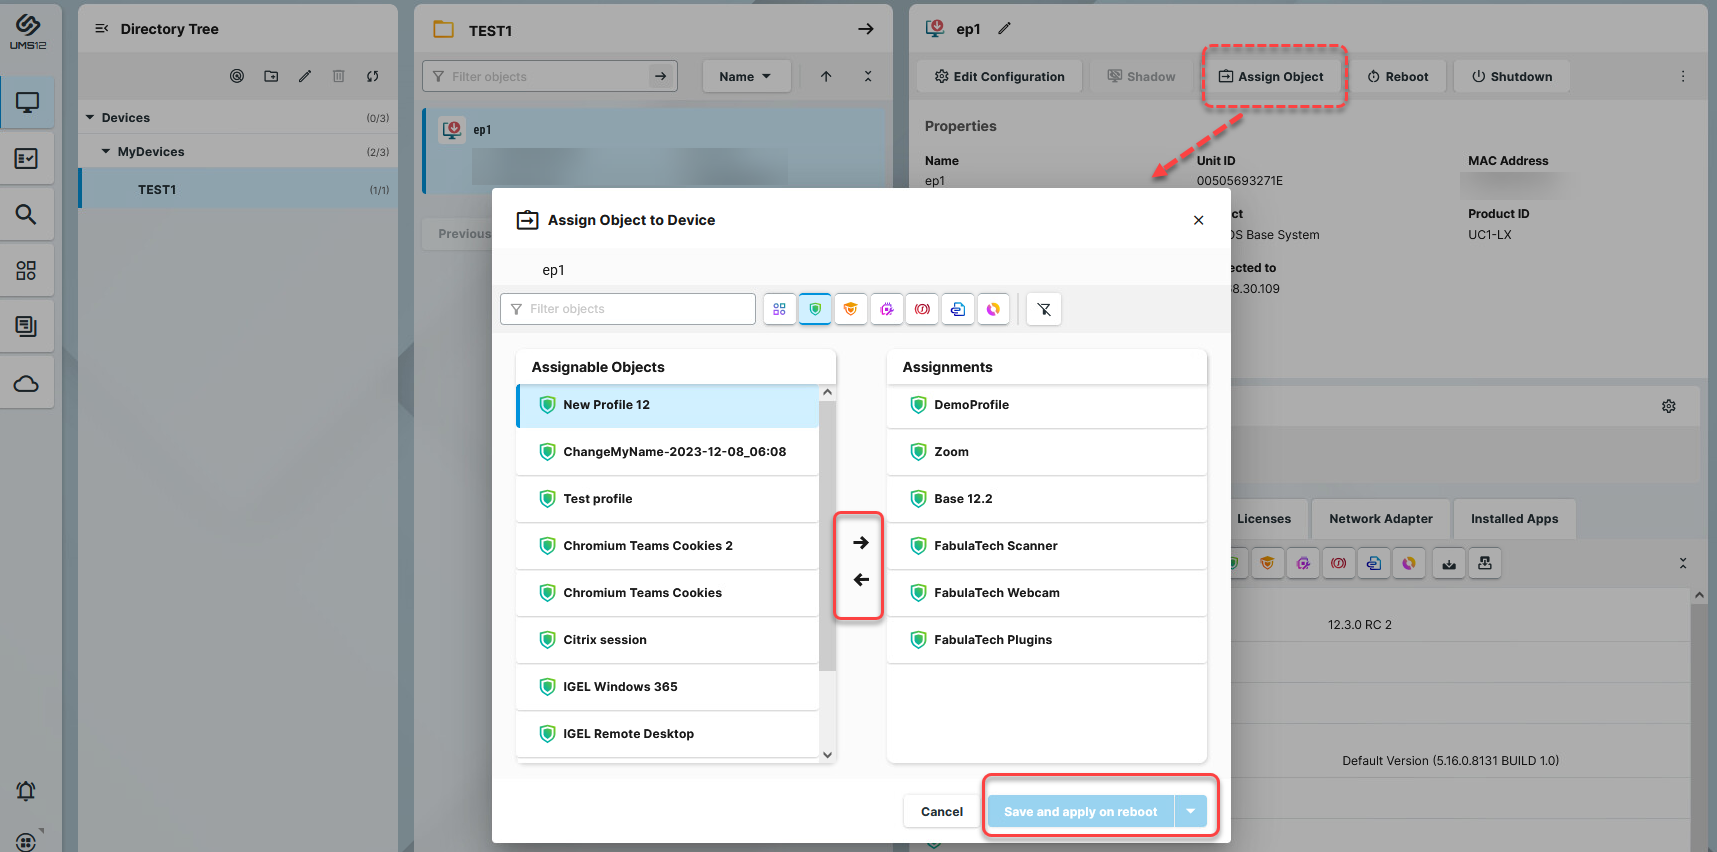
Select the profile you want to assign to the device / device directory and use the arrow button or drag & drop.
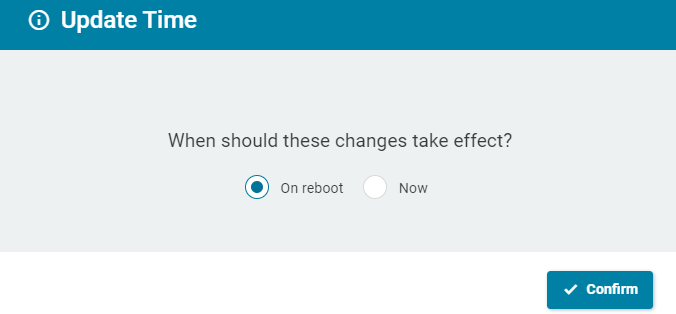
Decide when the changes should become effective, and save by selecting Save and apply on reboot or Save and apply now.
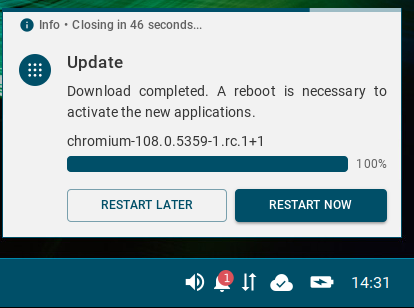
An app assigned via the profile will be downloaded by the device.
By default, apps / app versions are automatically activated at the next reboot. The user will receive a corresponding notification.
Example:
If you have configured the background app update, an Update command must be sent, instead. For details, see How to Configure the Background App Update in the IGEL UMS Web App.
The assigned profile and the app assigned to the device via this profile are displayed under Devices > Assigned Objects.
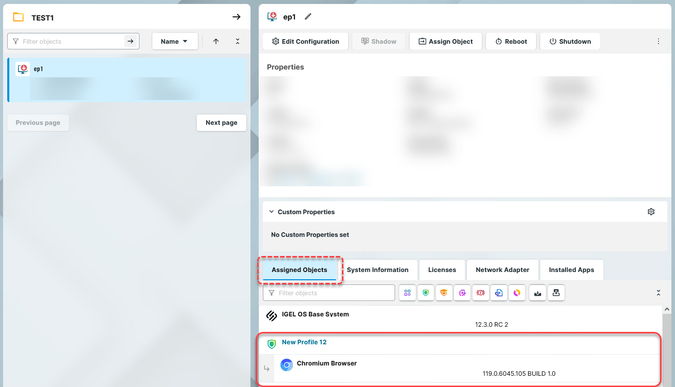
To check the installed apps on a device, go to Devices > Installed Apps; see Checking Installed Apps via the IGEL UMS Web App.
Creating Profiles for IGEL OS 11 Devices
For how to create IGEL OS 11 profiles in the UMS Console, see Creating Profiles in the IGEL UMS.
To create a profile for IGEL OS 11 devices via the UMS Web App, proceed as follows:
In the UMS Web App > Configuration, click Create new profile button.
Select OS 11 (shown only if there are OS 11 devices registered in the UMS).
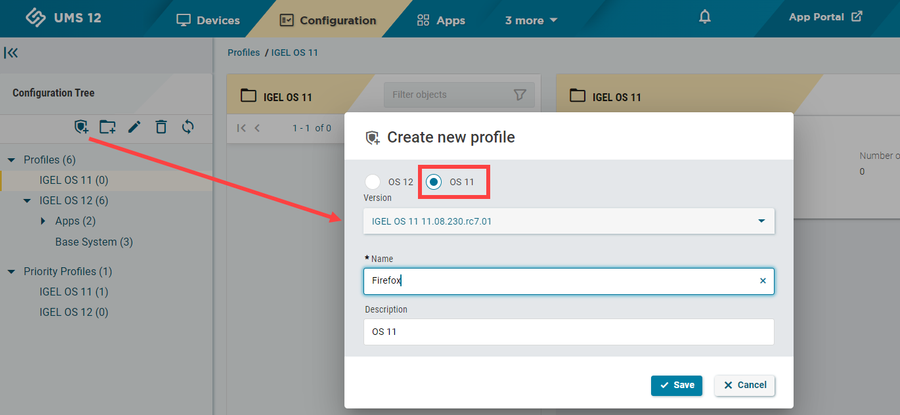
Select the firmware version the profile is based on.
Enter the name of the profile.
If desired, add the description for the profile.
Click Save.
The profile will be saved and listed under Configuration > Profiles, even if you will not configure any settings in the next step.Configure the desired settings.
The parameter is inactive and will not be configured by the profile.
IMPORTANT: When you deactivate the parameter, the value will be automatically set back to the default value.
The parameter is active and the set value will be configured by the profile. 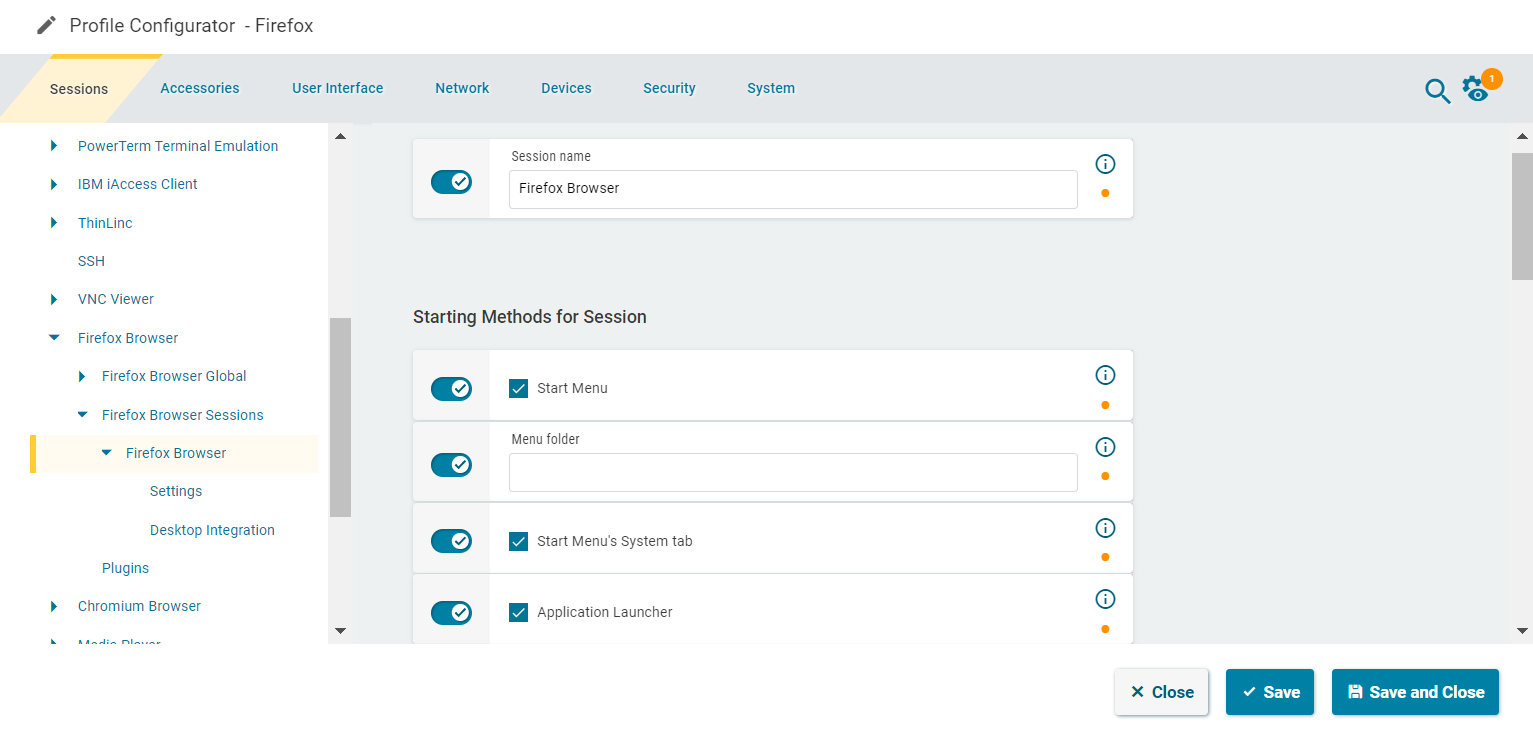
Save the changes.
Assign the profile to a device / device directory; see the instructions below.
Assigning OS 11 Profiles to Devices
To quickly assign a profile to a device / device directory, you can use the Assign device function under Configuration > [name of the profile] > Assigned Devices. To use this option, you should already know the name of the device / device directory or its part.
To assign a profile, go to Devices > [name of the device / device directory] > Assign object.
Select the required profile and use the arrow button or drag & drop.
Save the changes.
Decide when the changes should become effective.