Download PDF
Download page How to Use Template Profiles in IGEL UMS Web App.
How to Use Template Profiles in IGEL UMS Web App
You can use template keys in profiles to avoid having to set up numerous profiles which differ only in terms of a few points. The template keys contain parameters that are to receive divergent values for different devices. In addition, there are static template keys that receive their values from the device. The profiles containing template keys are called template profiles.
Template keys, values and template profiles created in the Console are also available in the UMS Web App, and vice versa. The following are only available in the UMS Console:
- Deleting template keys, template key directories and values
- Moving template keys from one directory to another
- Exporting and importing template keys
- Using Value groups
For details on the listed features, see Template Profiles in the IGEL UMS.
Overview
The following steps give you an overview of how template profiles are used in the UMS Web App:
- Activating the Enable template profiles option in the UMS Console or in the UMS Web App. For details, see Activating Template Profiles in the IGEL UMS.
Creating a template profile by adding template keys and values as described below.

In the IGEL Web App we always use the Profile Configurator to create template keys and values. For more information on how to create profiles, see How to Create and Assign Profiles in the IGEL UMS Web App.
- Assigning the template profile and the template values in the Devices area. For more information on how to assign them, see How to Create and Assign Profiles in the IGEL UMS Web App and Assigning Objects in the IGEL UMS Web App.
Creating a Template Profile
To use template keys and values in profiles, proceed as follows:
- Edit an existing profile or create a new profile.
- In the Profile Configurator, go to the parameter for which you want to use the template key.
Activate the parameter and click the template key icon at the right side to open the Template Keys sidebar.

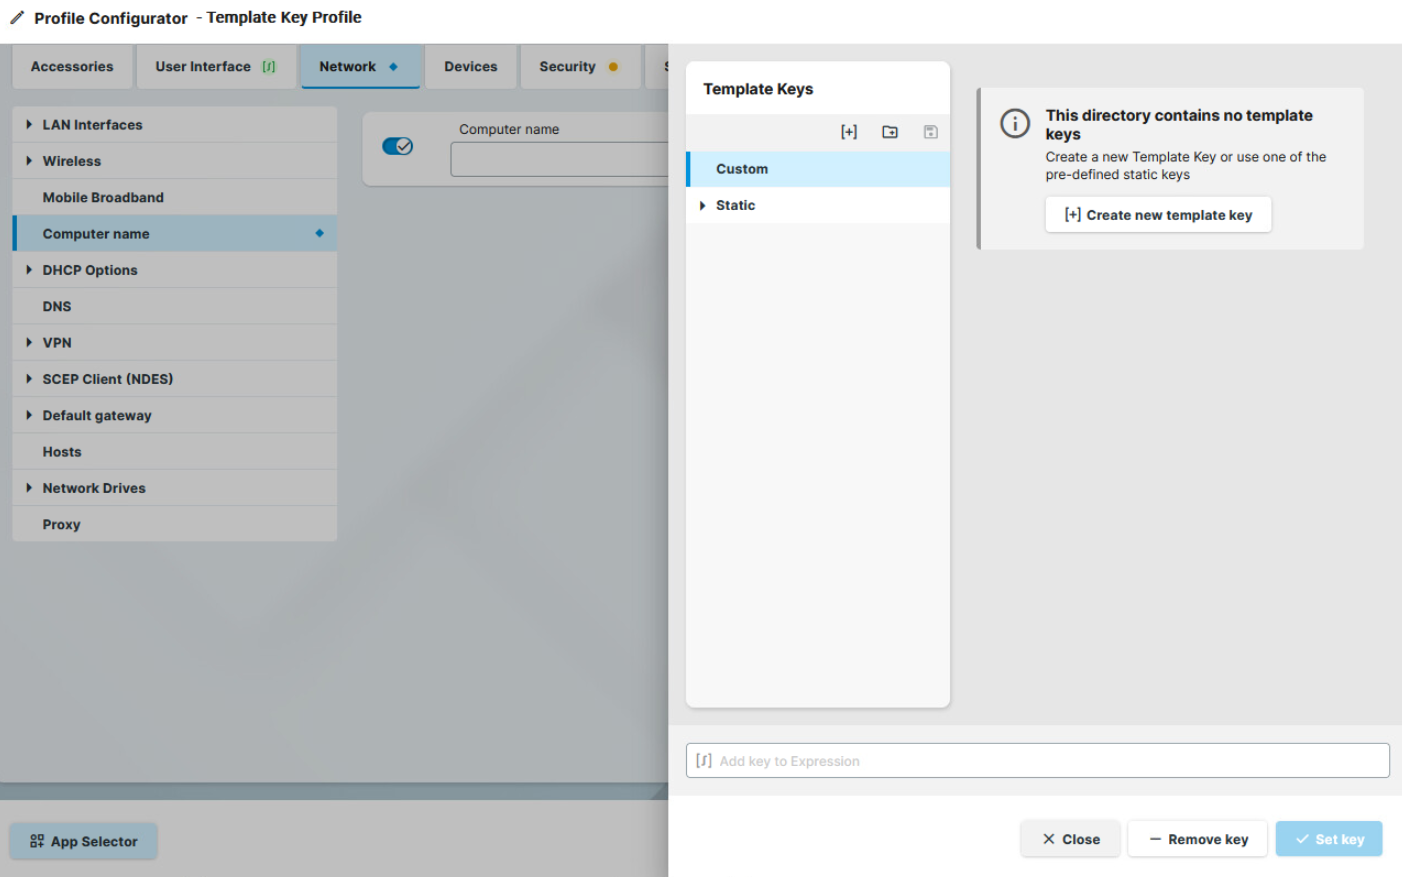 Certain parameters cannot be configured with template keys and only offer the option inactive or active. This applies for example to passwords or parameters which depend on other configuration settings.
The following template key types are listed in the Template Keys tree node:
Custom
Here you can create your template keys and directories and template key values.
Static
The values of static template keys are received directly from the device. Static template keys are marked with the § symbol. The following static template keys are available:
- MAC: MAC address of the device
- HOSTNAME: Host name of the device
- UNITID: Unit ID of the device
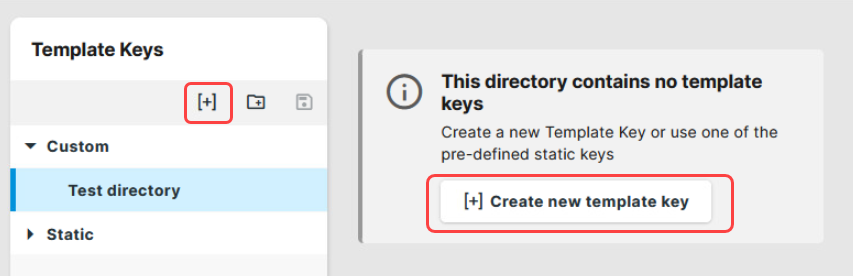
- To organize your template keys under directories, create the directories first:
- Click
 Create new directory.
 - Give a name to your directory. The name cannot be empty and it cannot be more than 200 characters long.
Click
 Save.
Save.
- You can only delete template keys, template key directories and values in the UMS Console.
- You can only move template keys from one directory to another in the UMS Console.
- Click
To create template keys:
- Select the directory under which you want to create the template key.
- Click Create new template key.
Give a Name to the key.
The given name:cannot be empty.
has to be unique.
cannot be more than 200 characters long.
- Optionally, give a Description.
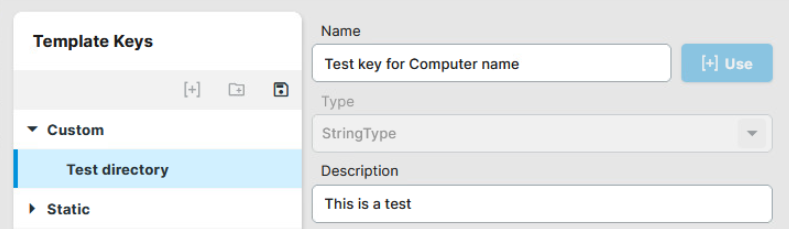 The Type for the key is stipulated by the parameter. For example, the type is going to be StringType for a parameter with a string field.
- Select the directory under which you want to create the template key.
- To add values to the template keys:
- Click + Add.
- Define the desired parameter value in the Value field, or in case of parameters with a fixed value range, select from the available value options.
Add a Description.
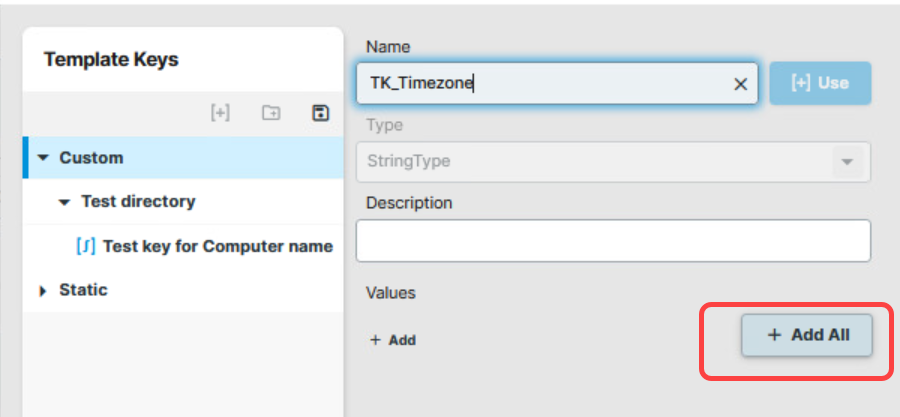
In case of parameters with a fixed value range such as selection menu or checkbox, the available options will be provided for selection. Click + Add All to add all predefined values to the template key. You can change the predefined description of the parameters according to your needs.
Using + Add All can be helpful when parameters are known by their predefined Descriptions rather then their Values, for example, the Timezone parameter. With all the Descriptions listed, it is easier to find the predefined Value that you are looking for.
- Click Save.
- Click + Add.
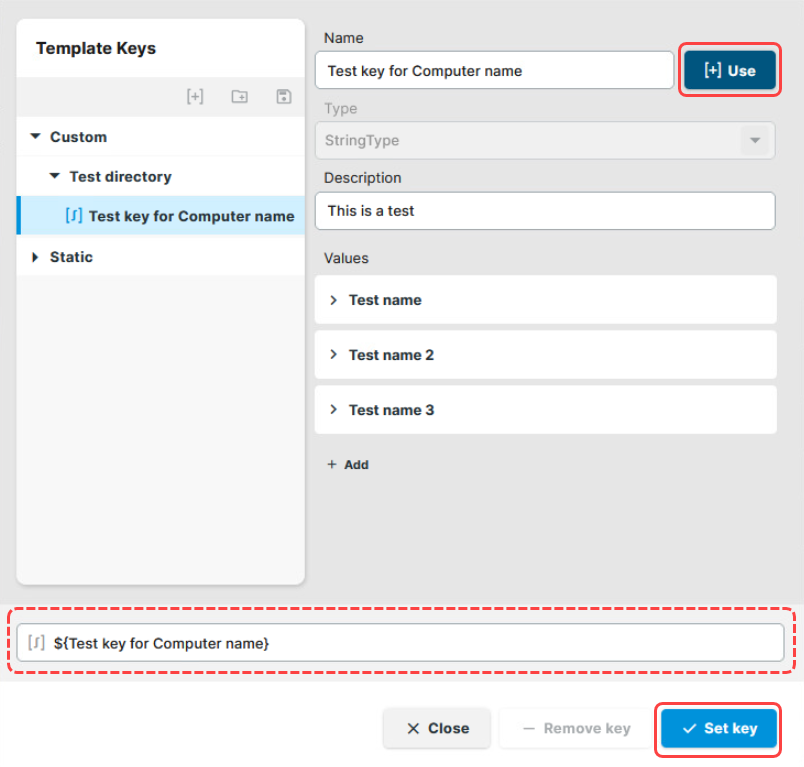
Select the Template Key for the parameter and click [+] Use. The key is displayed at the bottom.
You can also combine template keys by typing the keys manually:

When you assign the values, both keys will be resolved and the displayed value will be a combination of both.
- Click Set key to apply the key with its values and return to the profile.
The key is shown in the profile parameter:
The use of template keys is marked in the Profile Configurator with the following symbols:

There is a saved template key change in one of the child pages. 
There is a saved template key change in the page.
There is a saved template key change in the tab. - Save the template profile and continue with assigning the profile and values to the devices.