IGEL UMS Installation under Linux
This article describes the complete procedure for installing the standard IGEL Universal Management Suite (UMS) with an embedded database under Linux. If your required installation differs, you can select individual components, e.g. for a standalone UMS Console installation. You can check the installation requirements under Installation Requirements for the IGEL UMS.
For the supported operating systems, see the "Supported Environment" section of the release notes.
The procedure for installing the IGEL UMS under Linux is as follows:
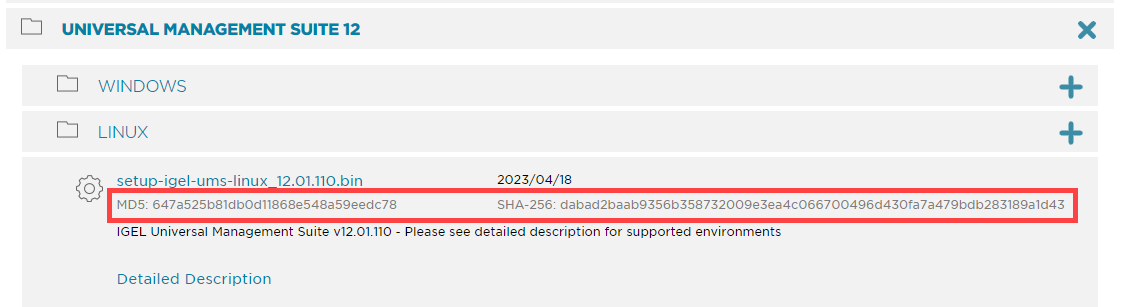
Download the current version of the IGEL Universal Management Suite from the IGEL Download Server.
For integrity and security purposes, it is recommended to verify the checksum of the downloaded software.
Open a terminal emulator such as xterm and switch to the directory in which the installation file
setup-igel-ums-linux-[Version].binis located.Check whether the installation file is executable. If not, it can be made executable with the following command:
chmod u+x setup*.binYou will needroot/sudorights to carry out the installation.Execute the installation file as
rootor withsudo:sudo ./setup-igel-ums-linux-[Version].bin
This unzips the files into the/tmpdirectory, starts the included Java Virtual Machine, and removes the temporary files once the installation has been completed.Start the installation procedure by pressing Enter.
You can cancel the installation at any time by pressing the [Esc] key twice.Read and confirm the license agreement.
Under Destination directory, select the directory in which the UMS is to be installed. (Default:
/opt/IGEL/RemoteManager)If you are updating an existing UMS installation: Under Database backup, select a file for the backup of the embedded database. If you have already created a backup, you can select No (continue) in order to skip this step. See also Updating the IGEL UMS under Linux.
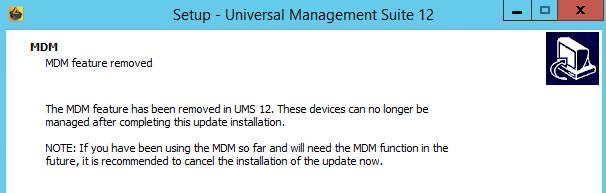
For Update Installations Only
As of UMS 12, the MDM feature is no longer available. Cancel the upgrade to UMS 12 if you still need the MDM feature:
Only if you have a Distributed UMS installation: During the update installation, it will be checked whether only one UMS Server is running and the others are stopped. If not, stop all UMS Servers except one and proceed with the update; otherwise, you risk losing data. After the update on this server is complete, you can update the remaining UMS Servers, either simultaneously or one after another.
Under Installation type, select the scope of installation:
Complete: UMS Server and UMS Console
Distributed UMS: Distributed UMS installation
HA Net: High Availability configuration
Client only: UMS Console only
Choose whether the IGEL UMS Web App should be installed. See Important Information for the IGEL UMS Web App.
Confirm the system requirements dialog if your system fulfills them.
Under Confirm server IP address, confirm or enter the IP address of the UMS Server. This IP address will be used for the creation of the UMS Server certificate on the initial startup.
This dialog is shown only on the first installation of a UMS version that includes this feature.If you do not adjust the IP address during the installation of the UMS, the web certificate of your UMS Server will contain the wrong IP, which results in problems with device registration, etc. To solve the issue, a new web certificate will have to be generated. See Troubleshooting Invalid Web Certificate and Errors by Device Registration after the Installation of the IGEL UMS 12 on Linux.
Under Data directory, select the directory in which Universal Firmware Updates and files are to be saved. (Default:
/opt/IGEL/RemoteManager)Files and firmware updates are stored in theums_filetransferdirectory. Custom file transfer directories are not supported.Under Database selection, select the desired database system.
Internal: The embedded database
Other: An external database server
The embedded database is suitable for most purposes. It is included in the standard installation.
The use of an external database system is recommended in the following cases:
- You manage a large network of devices.
- A dedicated database system is already in use in your company.
- You integrate the High Availability or the Distributed UMS solution.
For more information regarding the use of the IGEL UMS with external databases, see Connecting External Database Systems.
Under User name, enter a user name and password for the database connection.
The credentials for the database connection are created.The user name and password are case-sensitive.
Initially, the credentials entered here are also the credentials of the UMS superuser. After the installation, the credentials for the database user and those for the UMS superuser can be changed independently from each other. For more information about the UMS superuser, see Changing the UMS Superuser.
Specify whether you would like to create shortcuts for the UMS Console and UMS Administrator on the menu.
Check the summary of the installation settings and start the procedure by selecting Start installation.
If you have selected the standard installation, the UMS Server along with the embedded database will be installed and started.Once the installation procedure is complete, open the UMS Console via the menu or with the command
/opt/IGEL/RemoteManager/RemoteManager.shIt is generally NOT recommended to execute the command
RemoteManager.shwithsudo. On Red Hat Enterprise Linux 8,RemoteManager.shcan be executed only withoutsudo.Connect the UMS Console to the UMS Server by entering the login data for the database that you specified during the installation. For more information, see Connecting the UMS Console to the IGEL UMS Server.
To connect to the UMS Web App, see How to Log In to the IGEL UMS Web App.
It is recommended to check your antivirus software and, if installed, other management software like HP Device Manager for possible conflicts if
the installation of the IGEL UMS fails
the UMS Server service does not start when the installation is complete, and the manual start of the service fails. For details on how to start services, see IGEL UMS HA Services and Processes.
there are problems when connecting the UMS Console to the UMS Server
UMS 12 Communication Ports
If you are going to make network changes, consider the following ports and paths:
For IGEL OS 12 devices, TCP 8443
/device-connector/*is required.
SSL can be terminated at the reverse proxy / external load balancer (see IGEL Universal Management Suite Network Configuration ) or at the UMS Server.For importing IGEL OS 12 Apps to the UMS from the IGEL App Portal, the URL https://app.igel.com/ (TCP 443) is required.
For the UMS Web App, TCP 8443
/webapp/*and/wums-app/*are required.For the UMS Console, the root is required, i.e. TCP 8443
/*For IGEL OS 11 devices, TCP 30001 and TCP/UDP 30005 are required.
For more information on UMS ports, see IGEL UMS Communication Ports .
If You Use an External Load Balancer / Reverse Proxy
The FQDN and port of your external load balancer / reverse proxy must be specified in the UMS Console under UMS Administration > Global Configuration > Server Network Settings > Cluster Address. Information on the Cluster Address can be found under Server Network Settings in the IGEL UMS.
For the management of IGEL OS 12 devices, it is necessary to register your UMS after the installation, see Registering the IGEL UMS.
TechChannel