PDF
Download PDF
Download page Configuring Microsoft Entra ID as Identity Provider.
Configuring Microsoft Entra ID as Identity Provider
To configure Microsoft Entra ID as the identity provider, you need to do the following:
- Creating a Microsoft Entra Web Application That Will Serve as Identity Provider: We register an application in Microsoft Entra ID to use its services as an external identity provider.
- Registering Our Microsoft Entra Application in the IGEL Customer Portal: This will enable IGEL Cloud Services to use our Microsoft Entra Application as the external identity provider.
- Creating a User in the Microsoft Entra App: We create a user account in our application. These user credentials, consisting of an e-mail address and a password, will be entered by the user when onboarding his device.
Creating a Web Application That Will Serve as Identity Provider
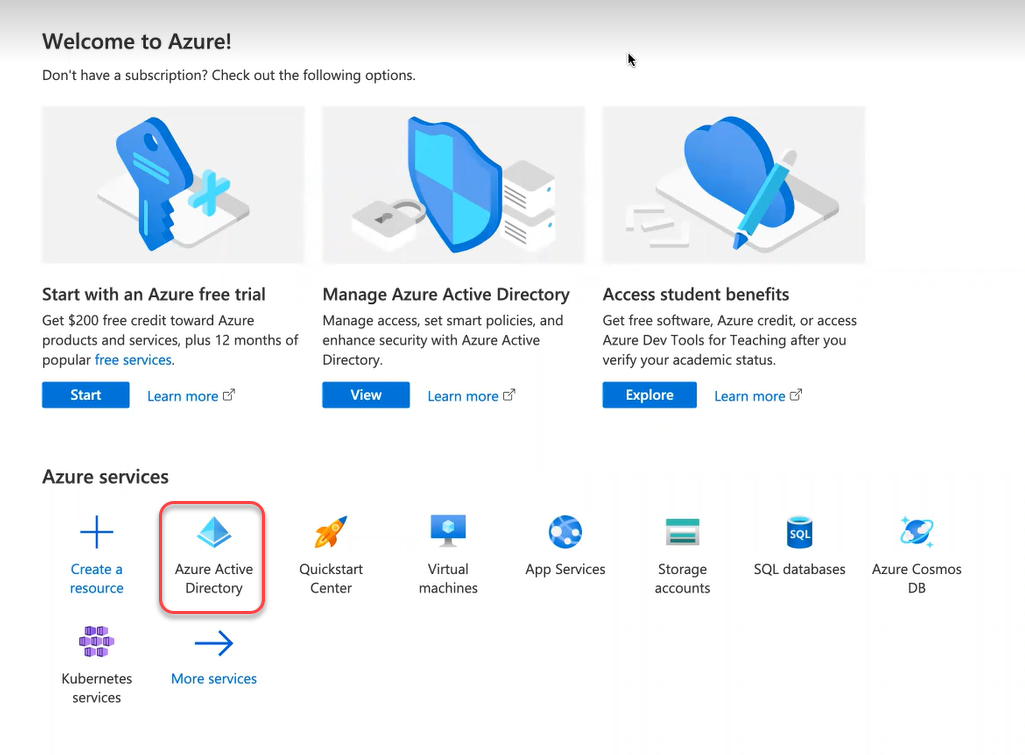
- Log in to your Microsoft Entra account and select the Microsoft Entra ID resource.
- Click App registrations and then new registration to register a new app.

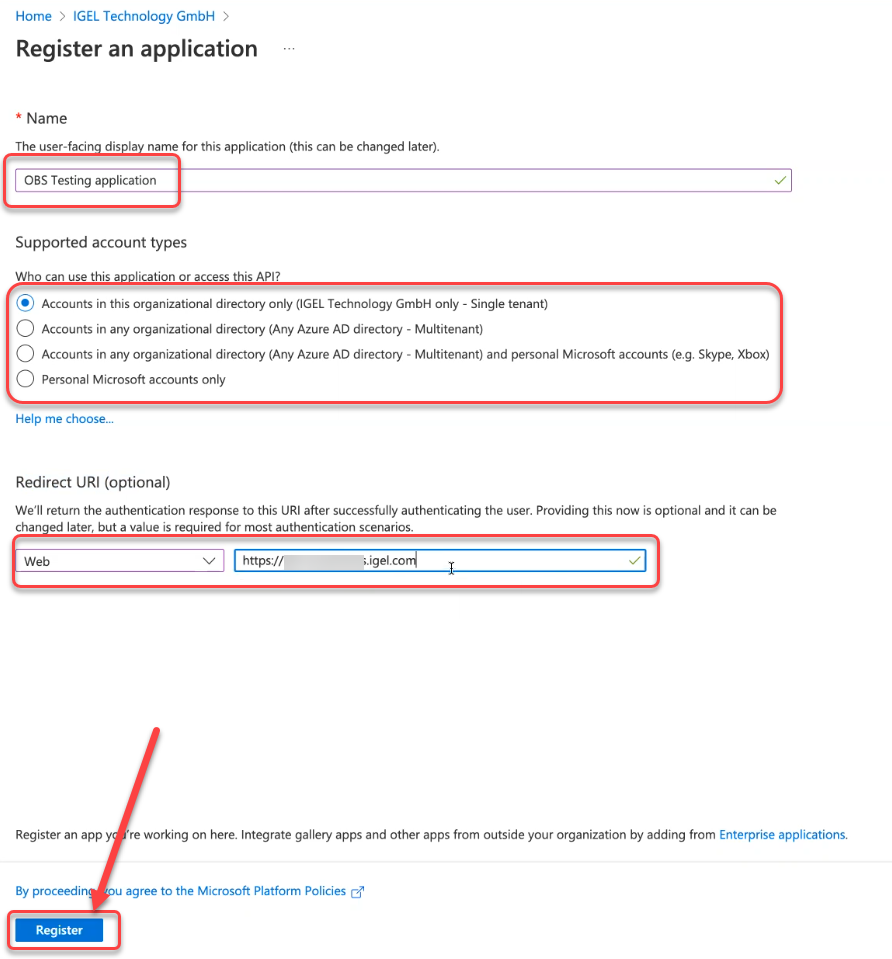
- Edit the data as follows and then click Register:
- Name: Display name for the app
- Supported account types: Set the permissions according to your requirements.
Redirect URI (optional): For our purposes, this setting is not optional but required. Set the first field to Web and, in the second field, provide the URI of the onboarding service. This is "https://obs.services.igel.com/".
The application is created.
When you are creating the user accounts for onboarding, consider the following note: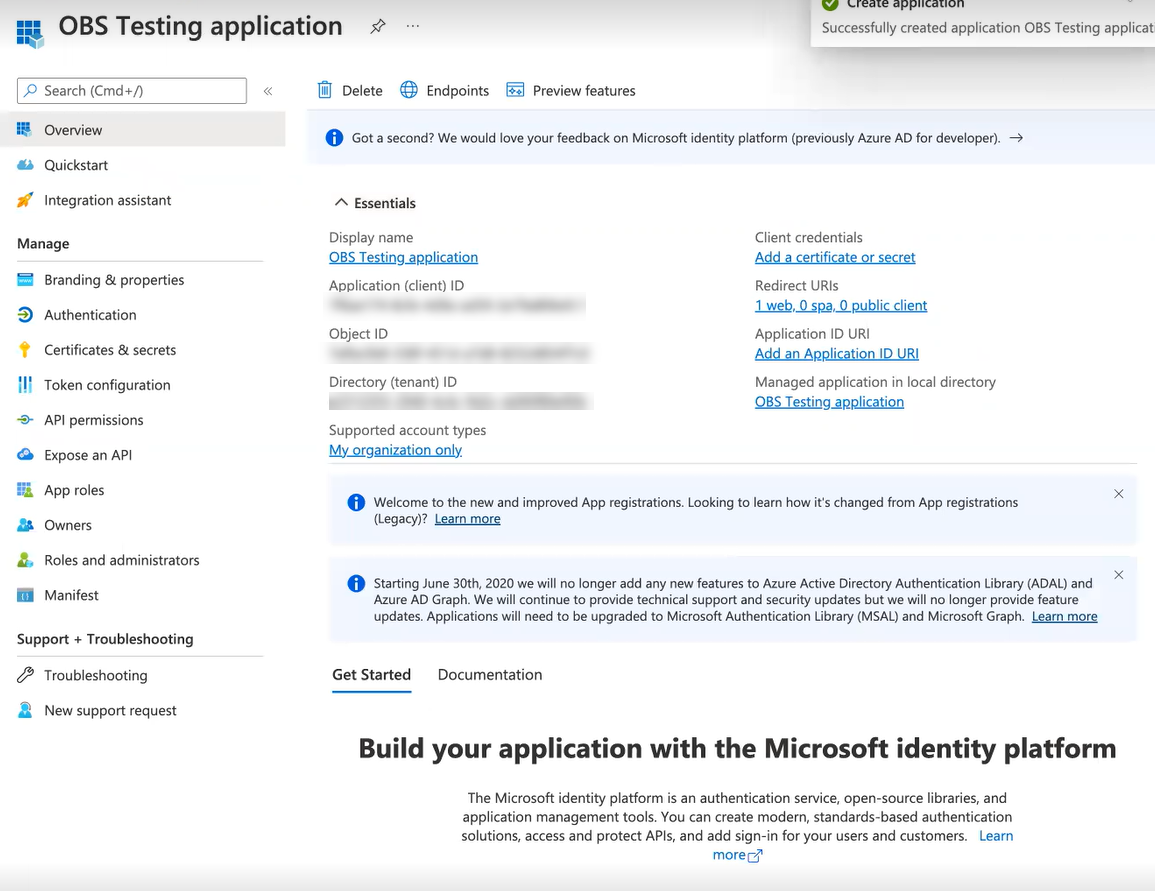
- Click Token configuration and then Add optional claim.
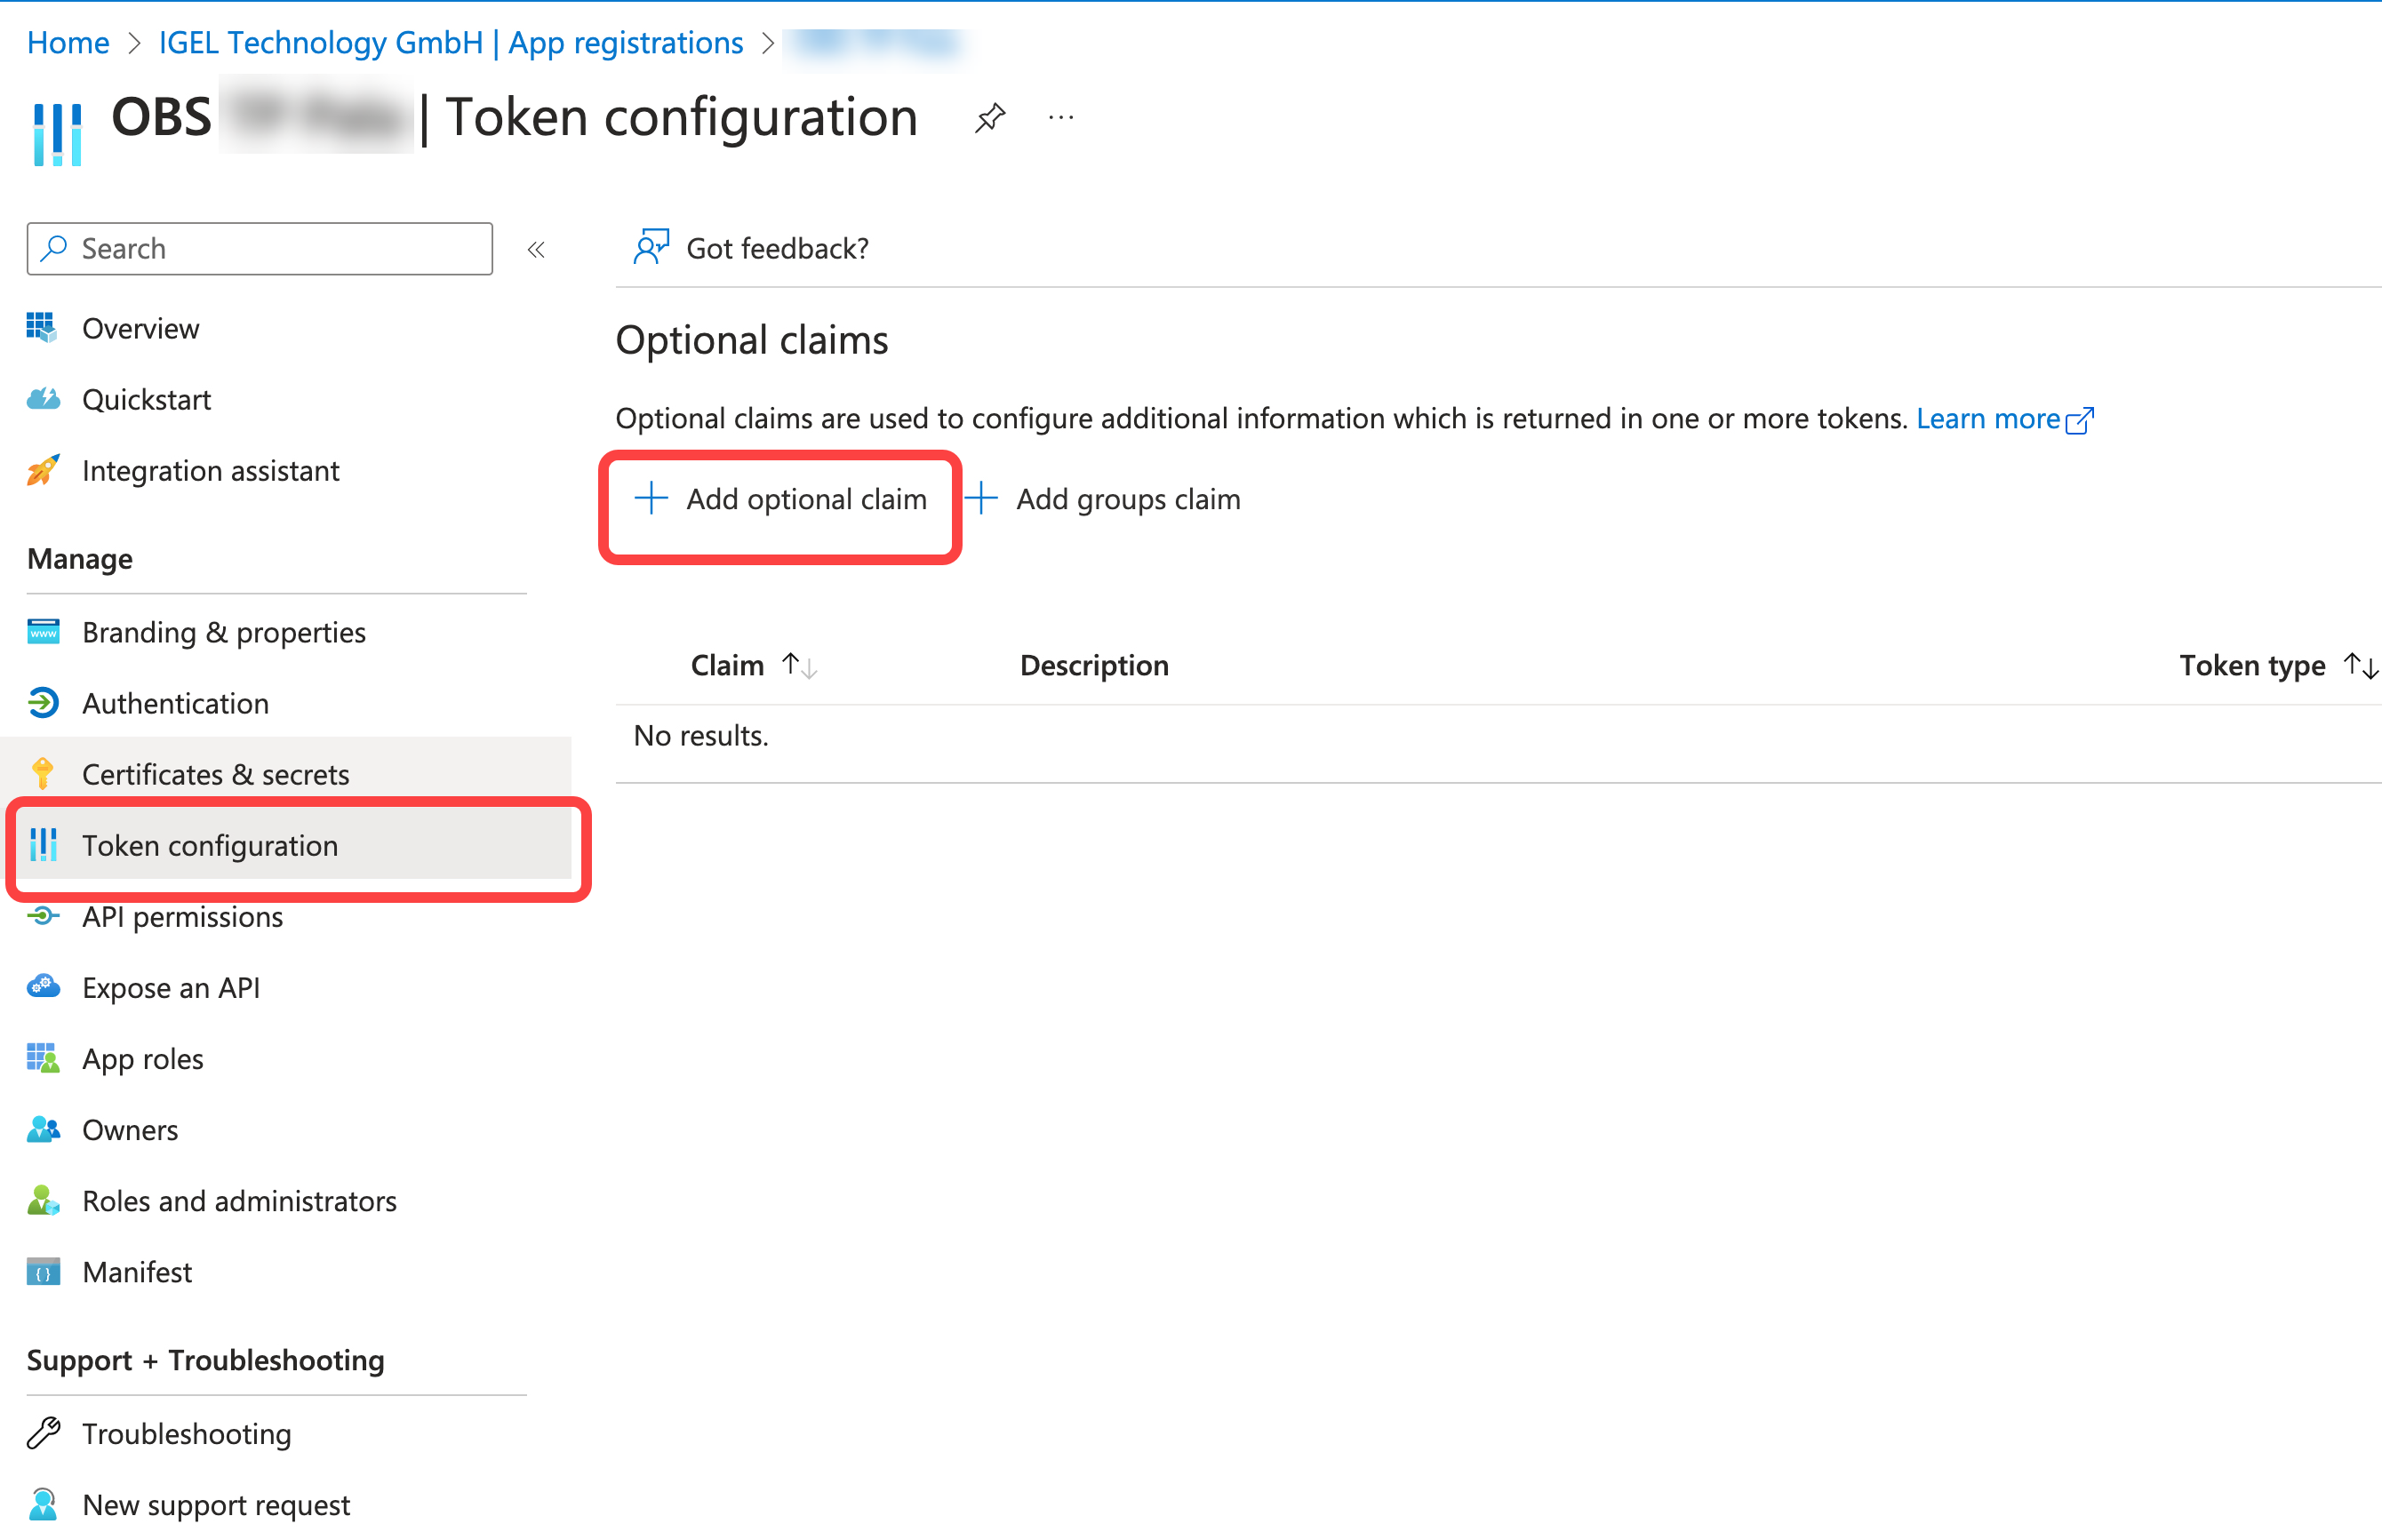
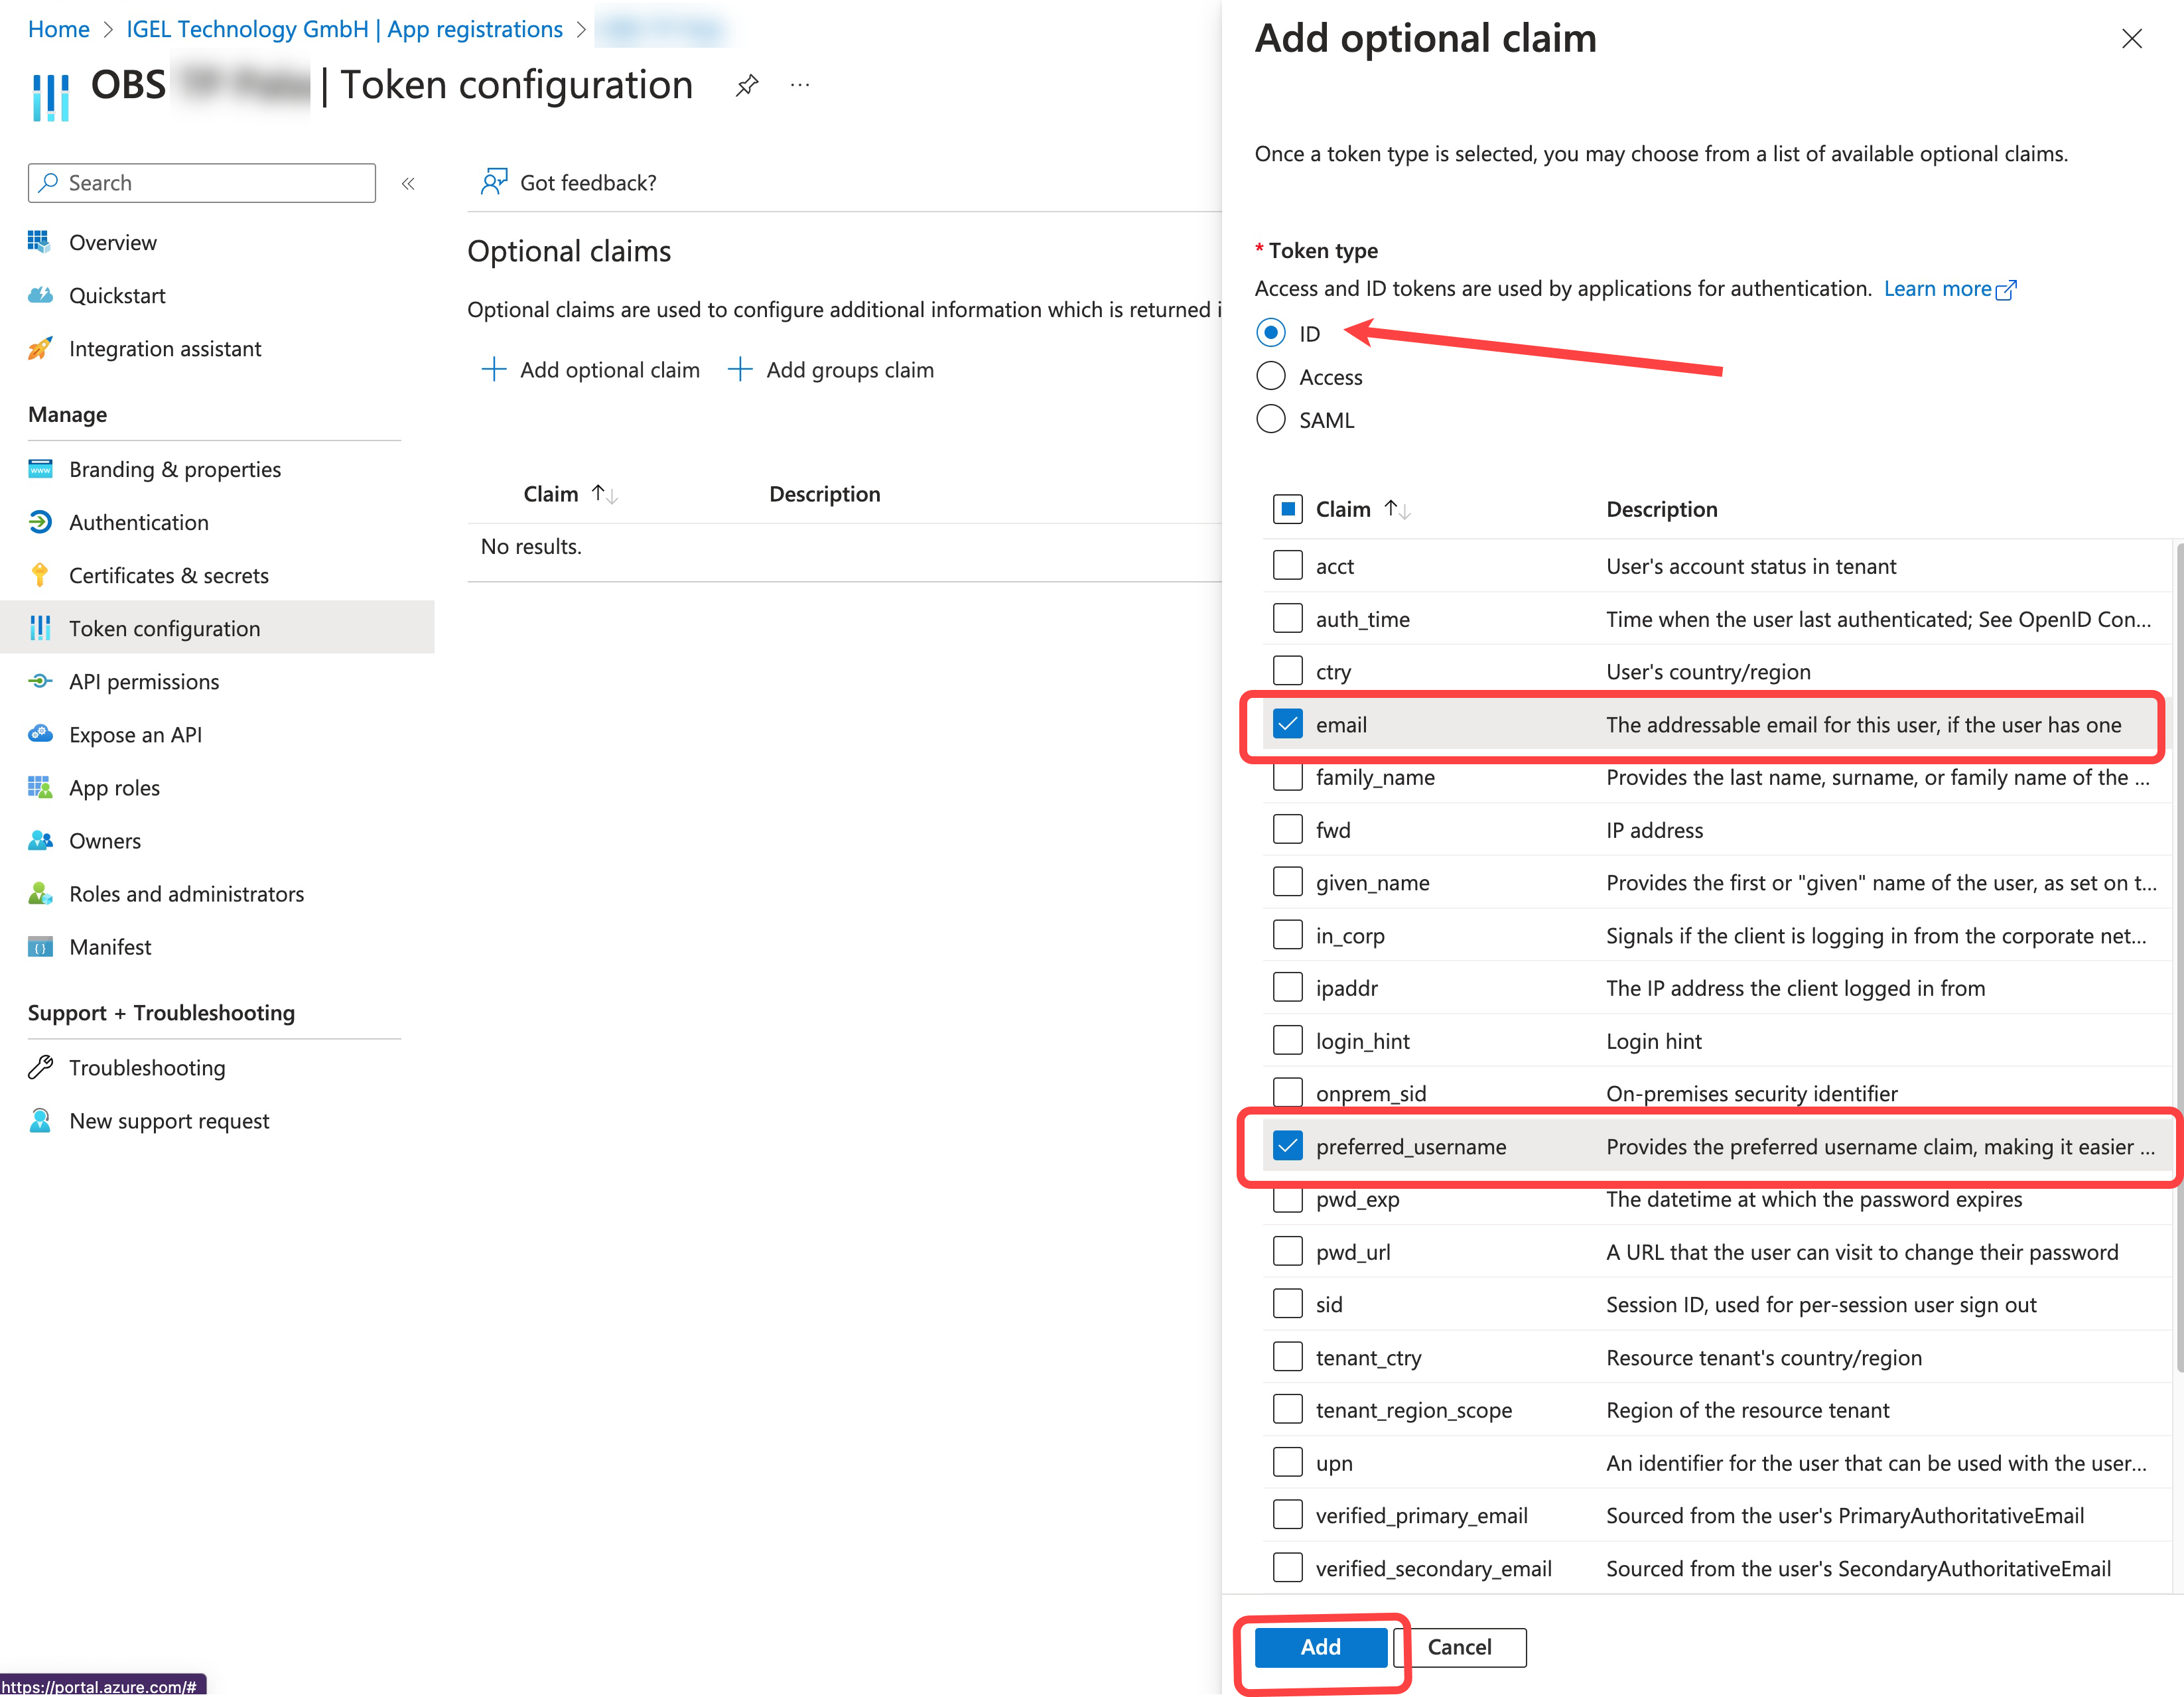
- In the Add optional claim window, select ID under Token type and activate:
- preferred_username
- Click Add.
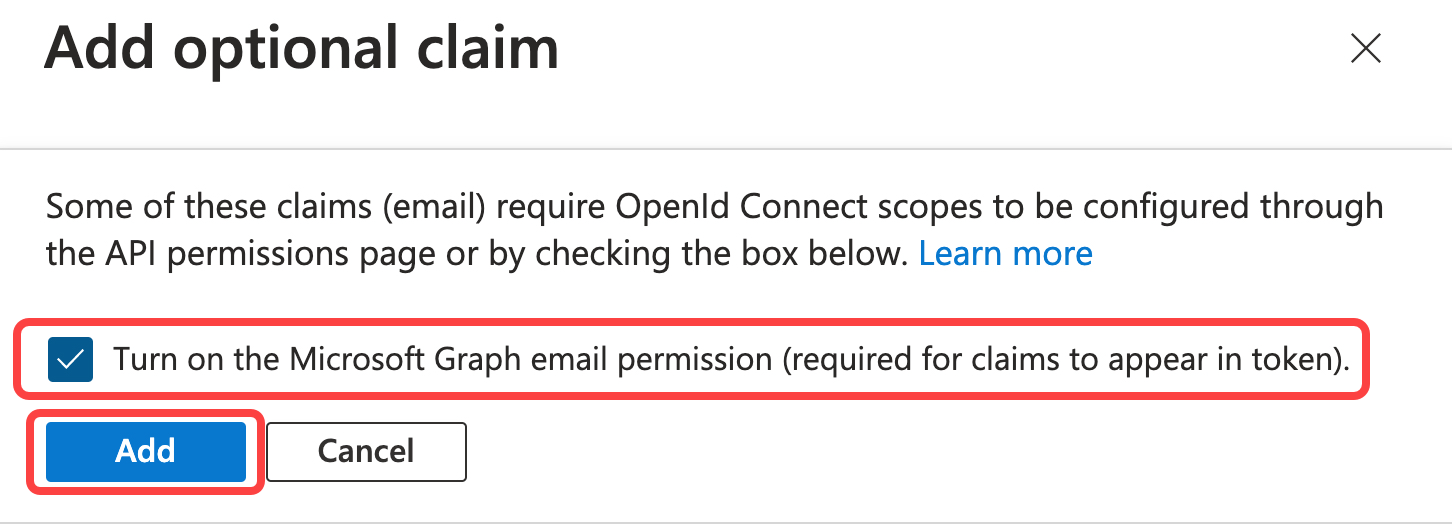
- Activate Turn on the Microsoft Graph email permission and click Add.
The token configuration is completed: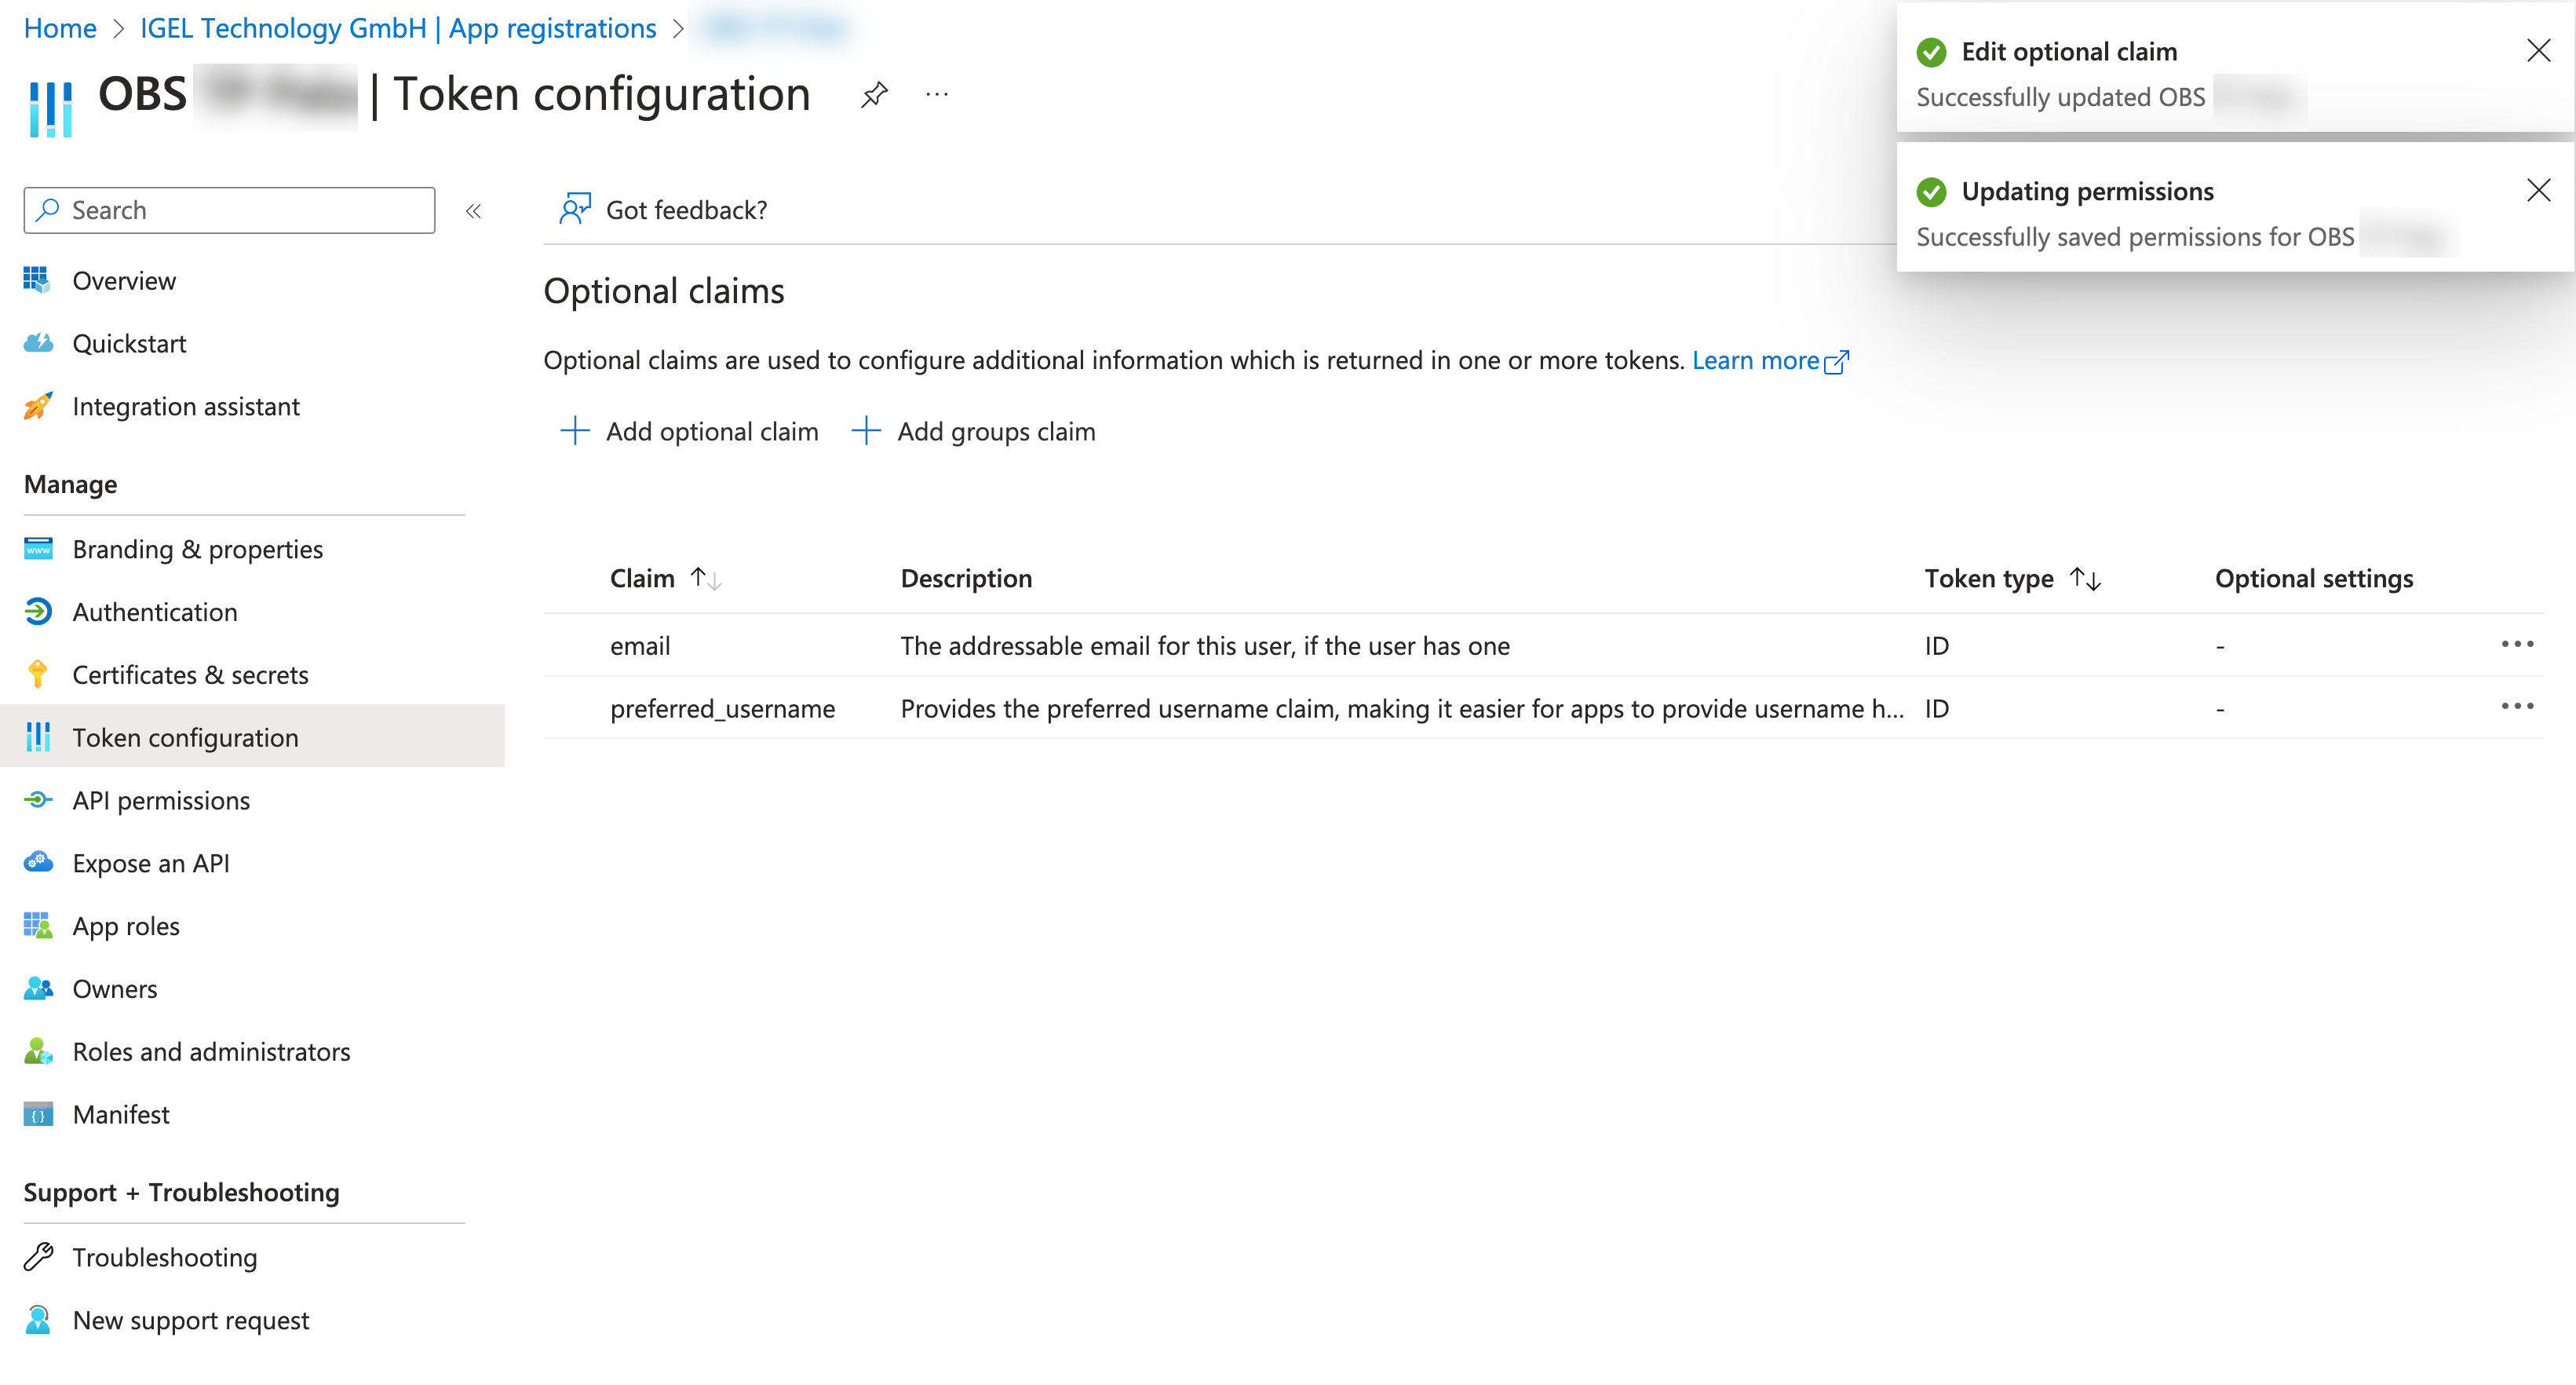
- Leave the browser tab open as we will need some of the data in the following steps.
Registering Our Entra App in the IGEL Customer Portal
- Open the
IGEL Customer Portal
in your browser, log in to your admin account, and select Users > IGEL OS IdP.

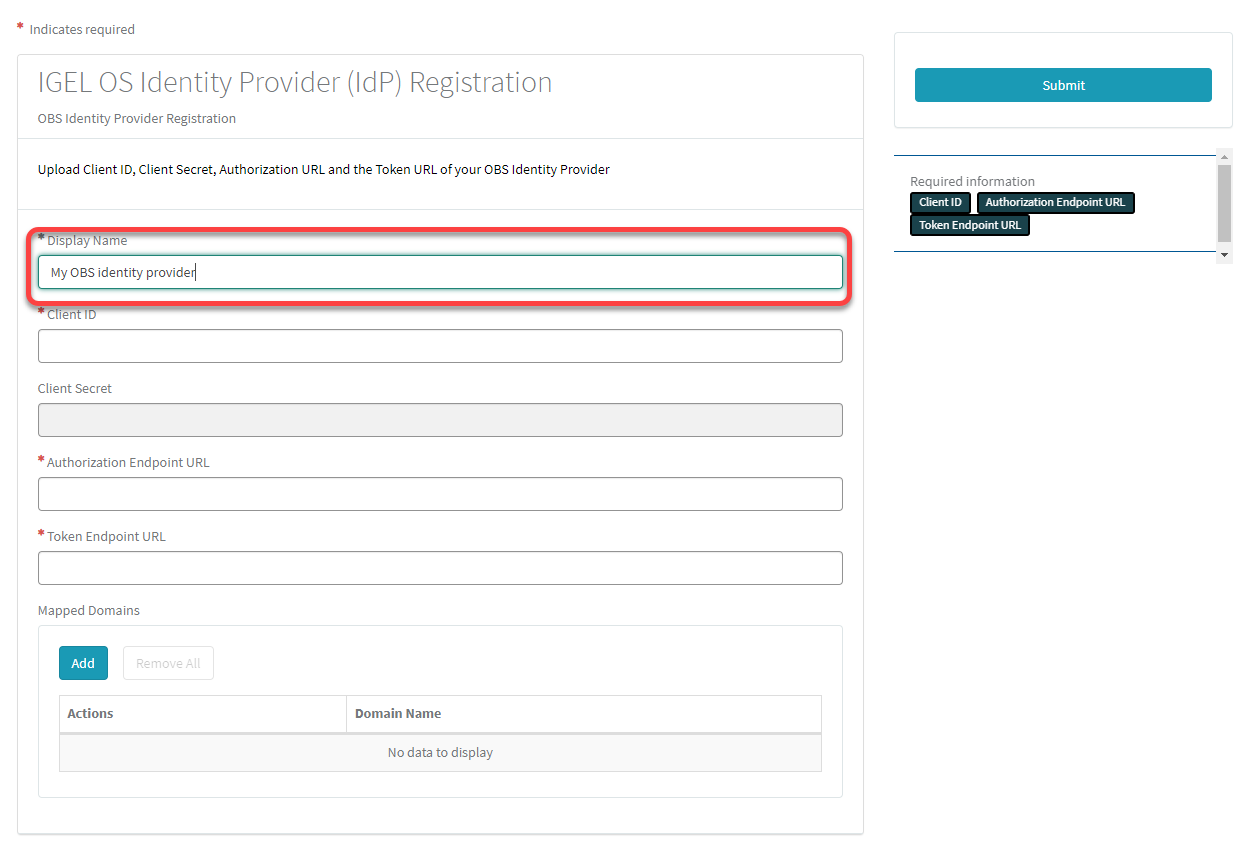
- Click Register IGEL OS IdP.

- Enter a Display name. This is the name under which your identity provider app will be displayed.
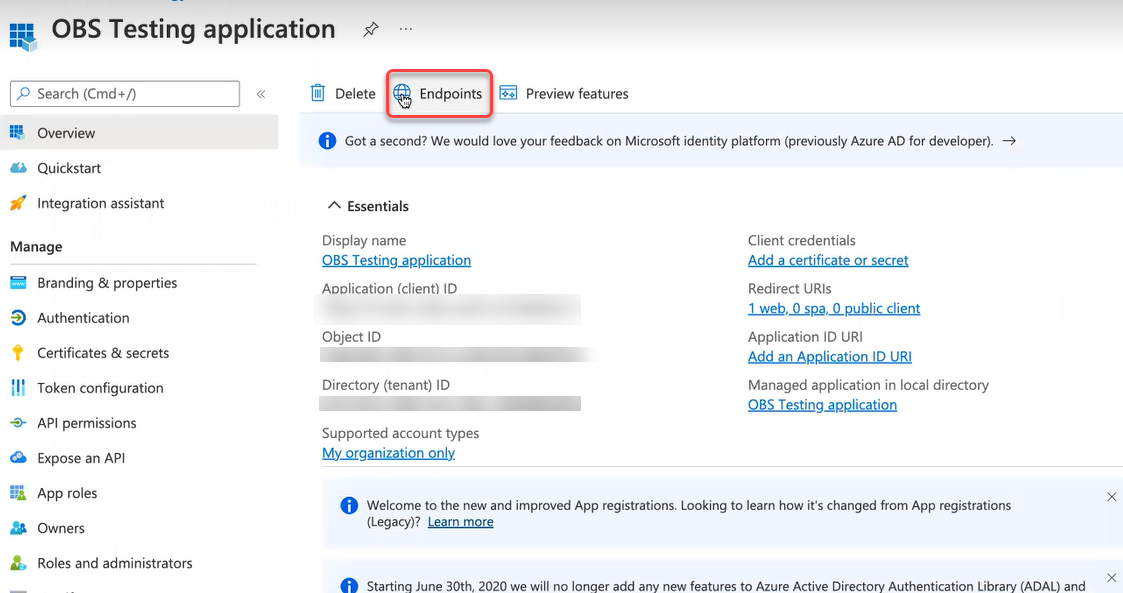
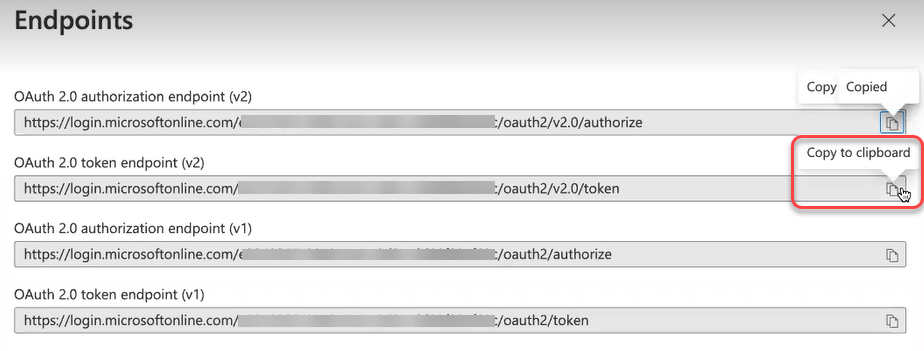
- Change to the tab with your Entra app (overview) and click Endpoints.
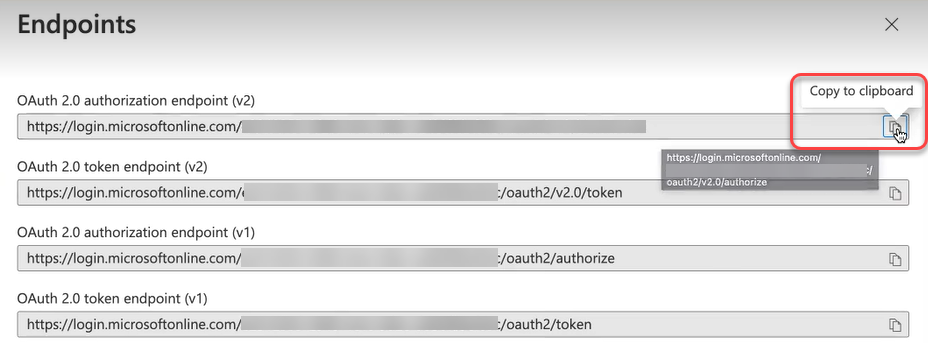
The endpoints for the app are shown. We will use the first 2 endpoints. - Copy the OAuth 2.0 authorization endpoint (v2) to the clipboard.
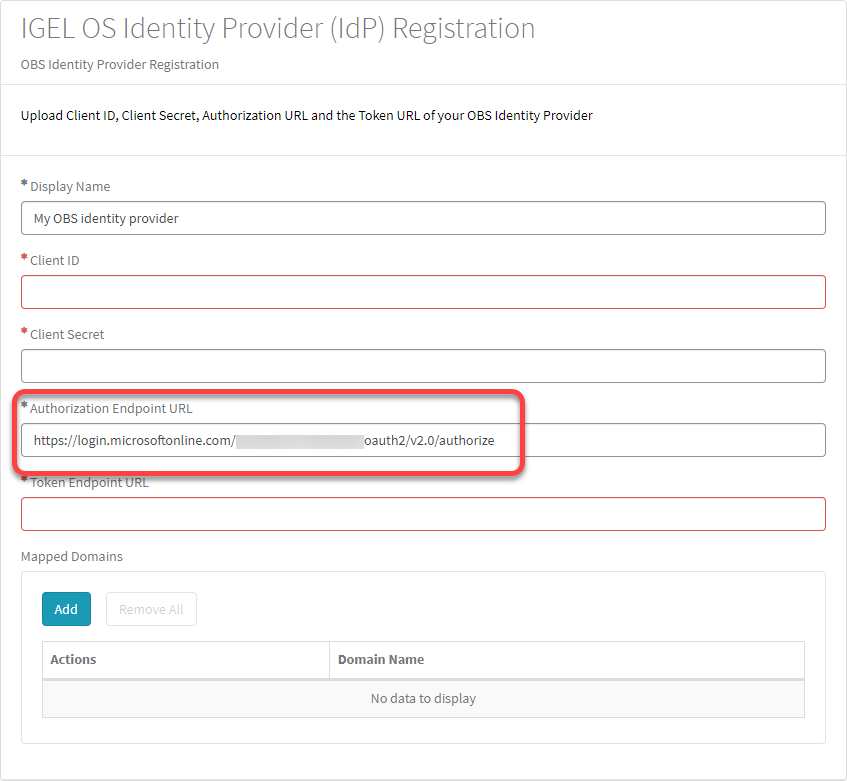
- Change to the IGEL Customer Portal (IGEL OS Identity Provider (IdP) Registration) tab and paste the authorization endpoint into the field Authorization Endpoint URL.
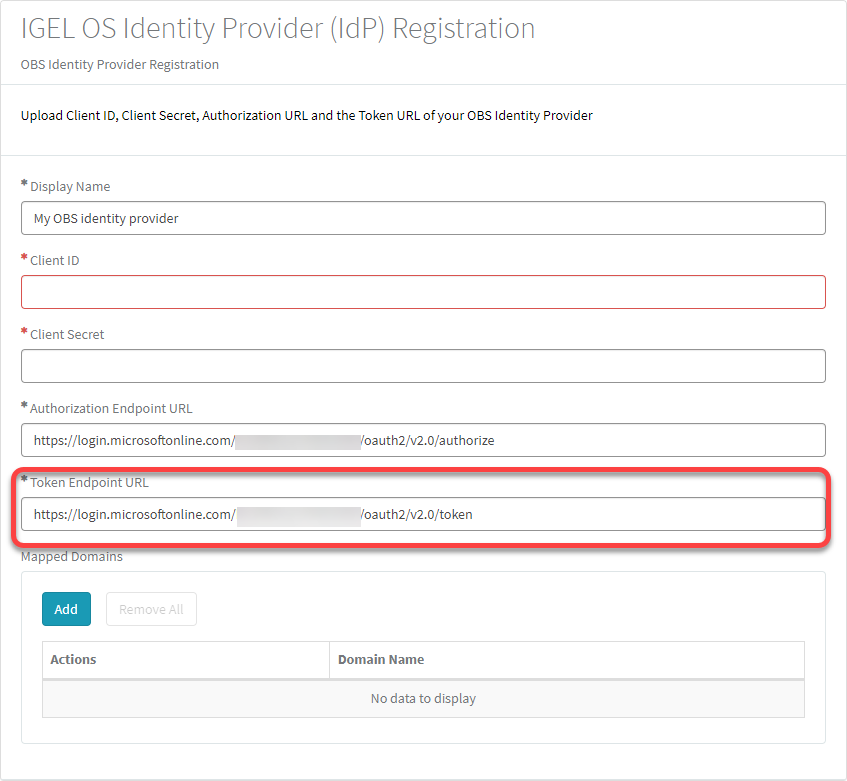
- Change to the tab with your Entra app (Endpoints) and copy the OAuth 2.0 token endpoint (v2) to the clipboard.
- Change to the IGEL Customer Portal (IGEL OS Identity Provider (IdP) Registration) tab and paste the token endpoint into the field Token Endpoint URL.
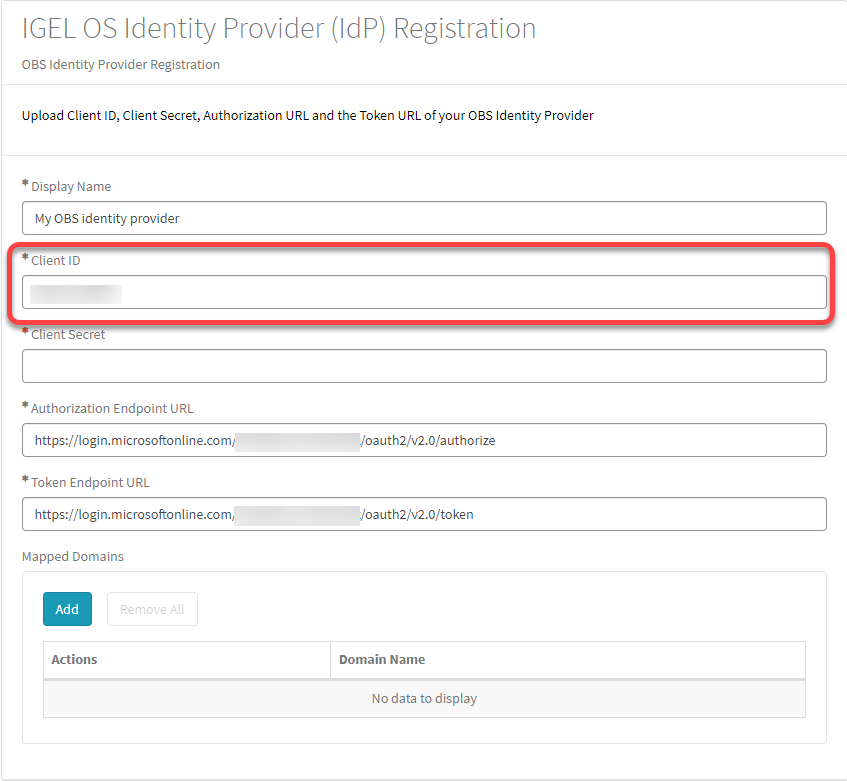
- Change to the tab with your Entra app, go to Overview, and copy the Application (client) ID to the clipboard.
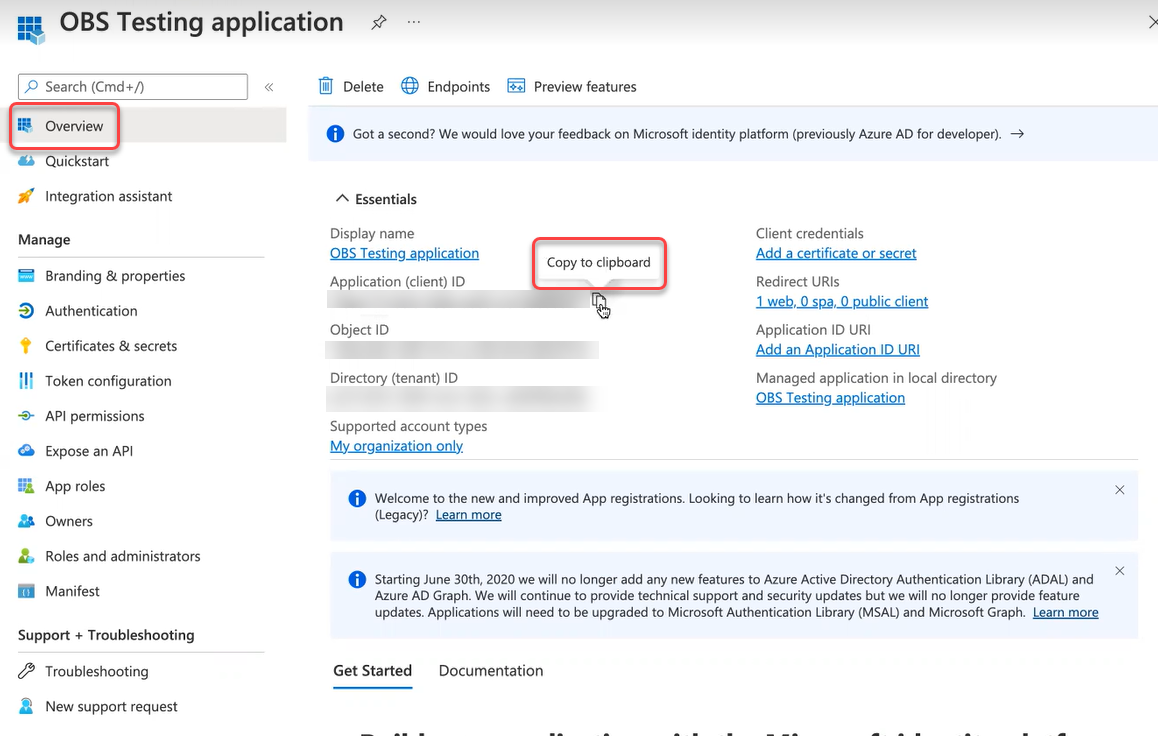
- Change to the IGEL Customer Portal (IGEL OS Identity Provider (IdP) Registration) tab and paste the token endpoint into the field Client ID.
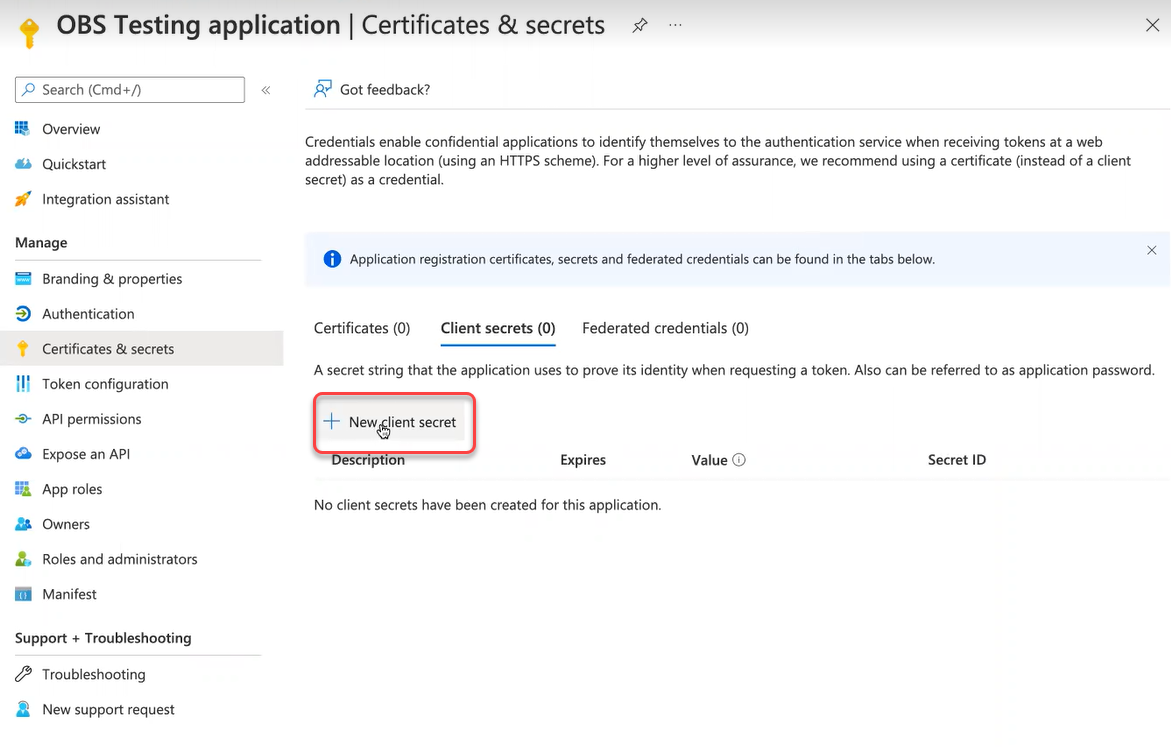
- Change to the tab with your Entra app (Overview) and click Add a certificate or secret.

You are taken to the Certificates & secrets page. - Click New client secret.
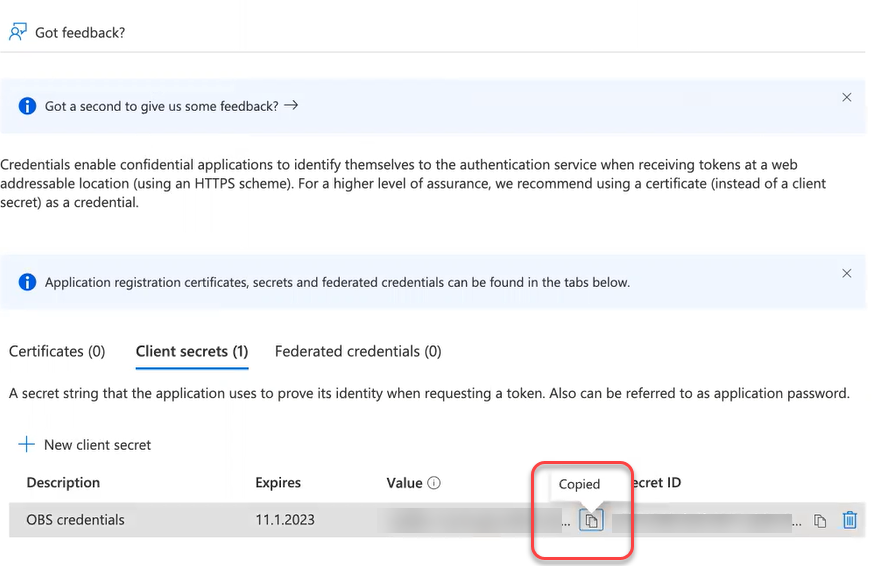
- IMPORTANT! Make sure you have a safe and secure location to store the client secret; it can only be read out once. If you lose it, you must change it.
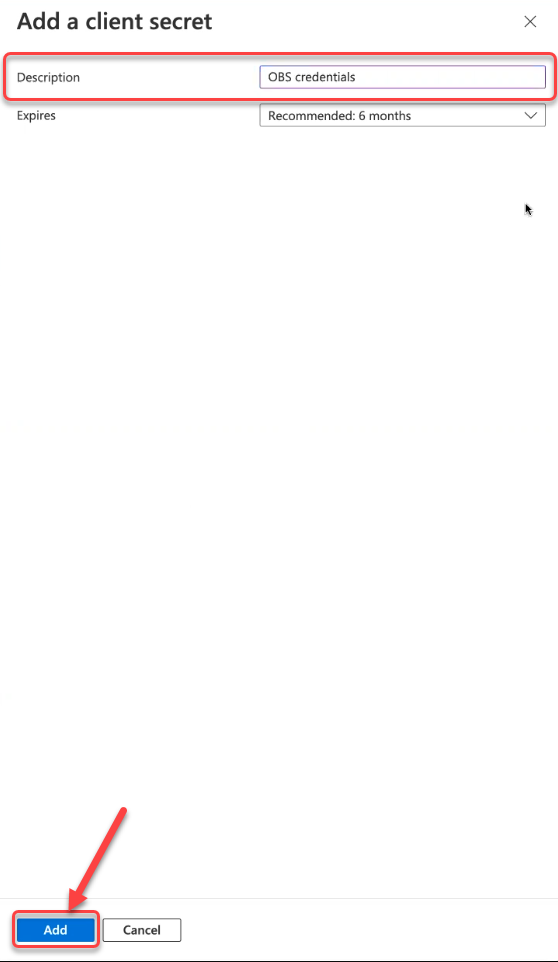
- Enter a description and then click Add.
- Copy the client secret to the clipboard.
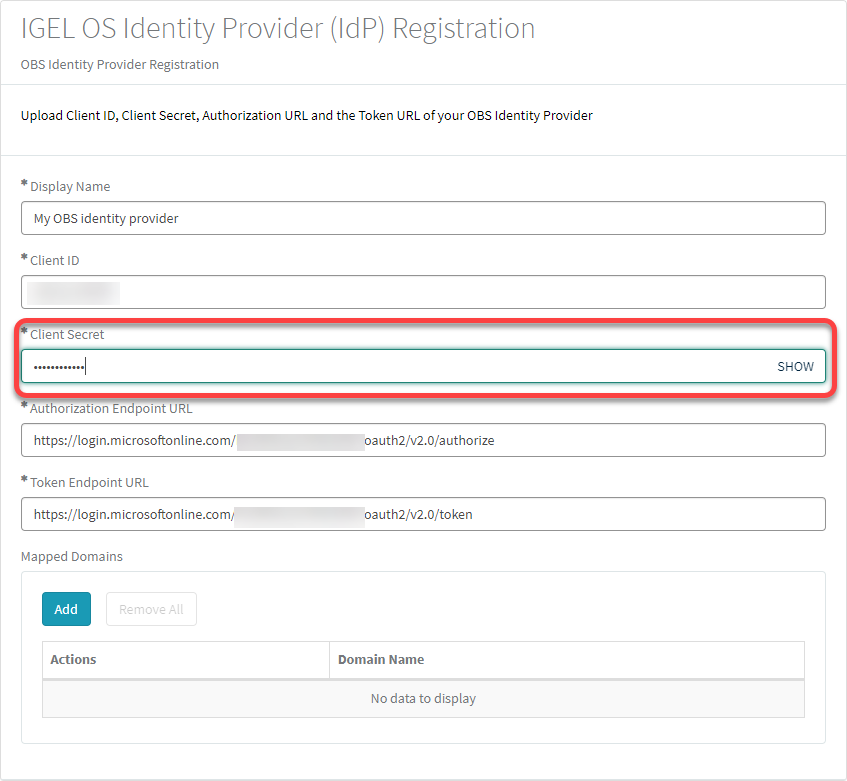
- Change to the IGEL Customer Portal (IGEL OS Identity Provider (IdP) Registration) tab and paste the client secret into the field Client secret.
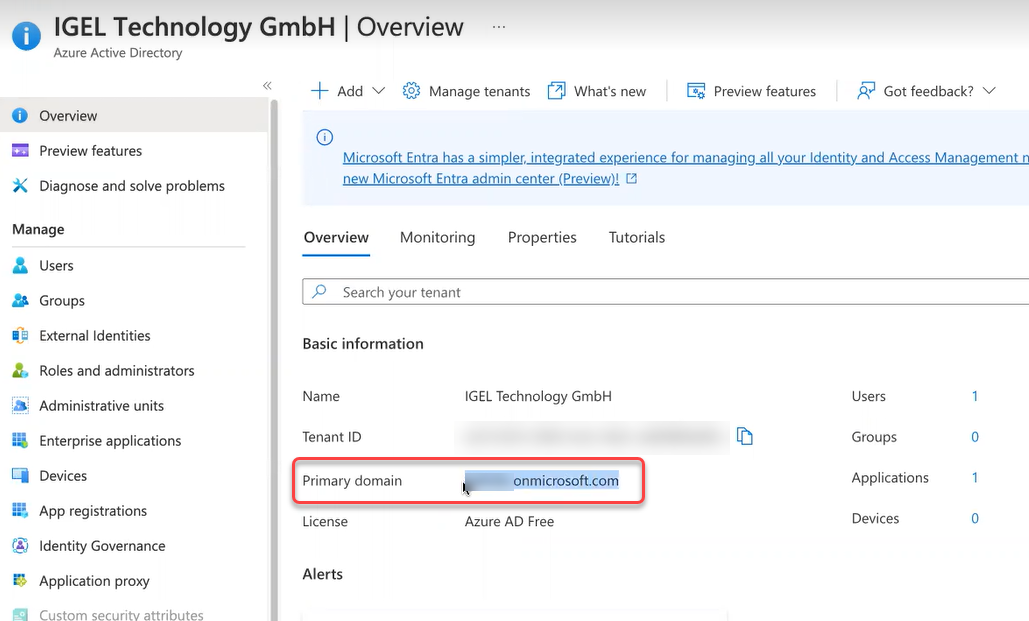
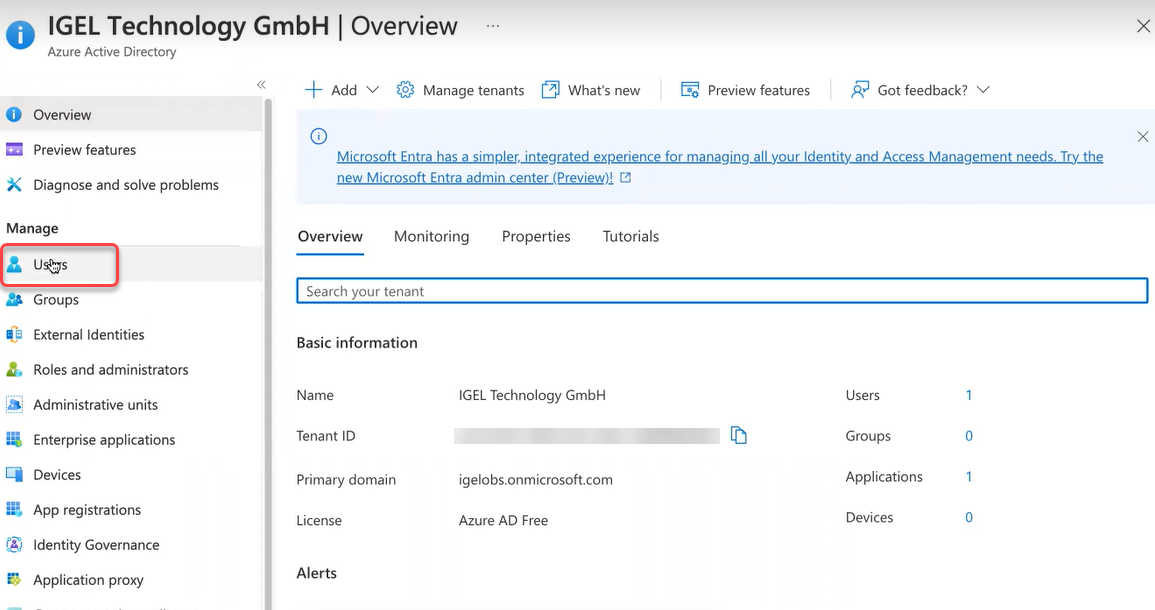
- Change to the tab with your Entra app and change to the overview of your Entra tenant.
- Copy the Primary domain to the clipboard.
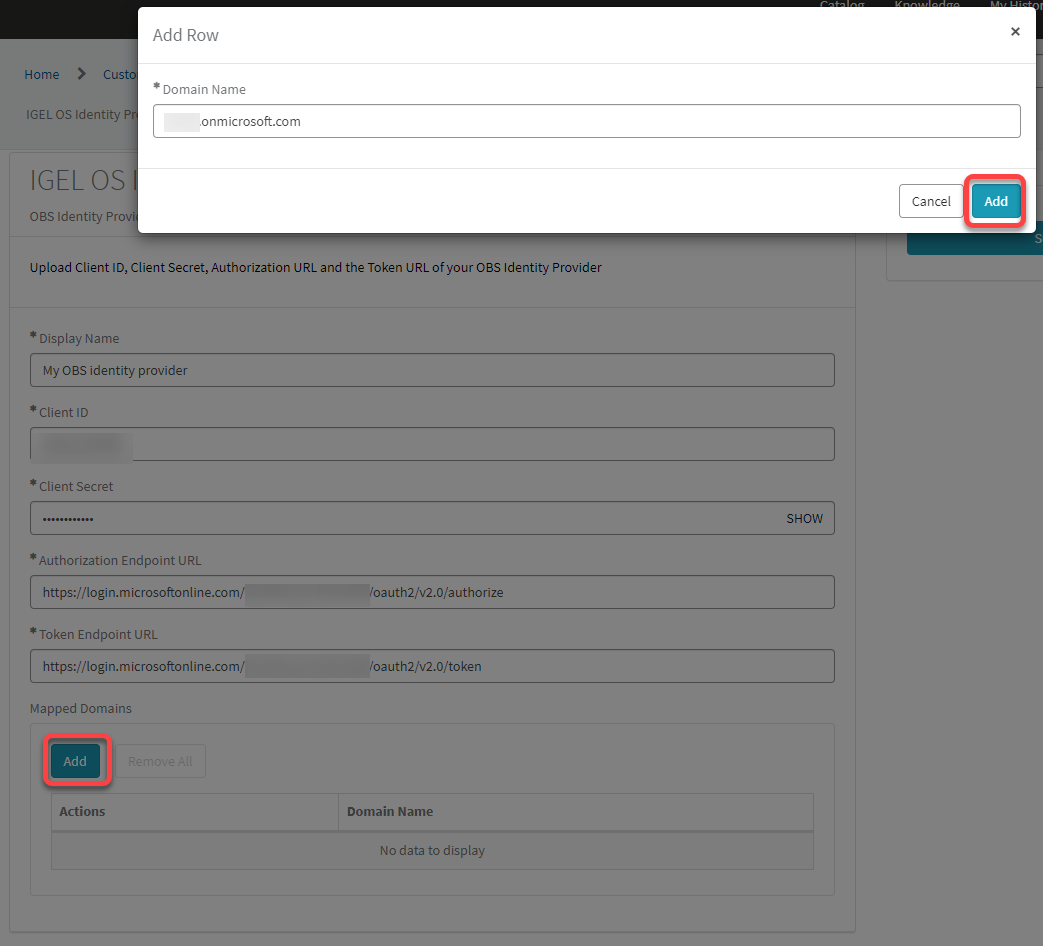
- Change to the IGEL Customer Portal (IGEL OS Identity Provider (IdP) Registration) tab, click Add, paste the primary domain from the clipboard into the field Domain name, and then click Add in the dialog.
- Click Submit.
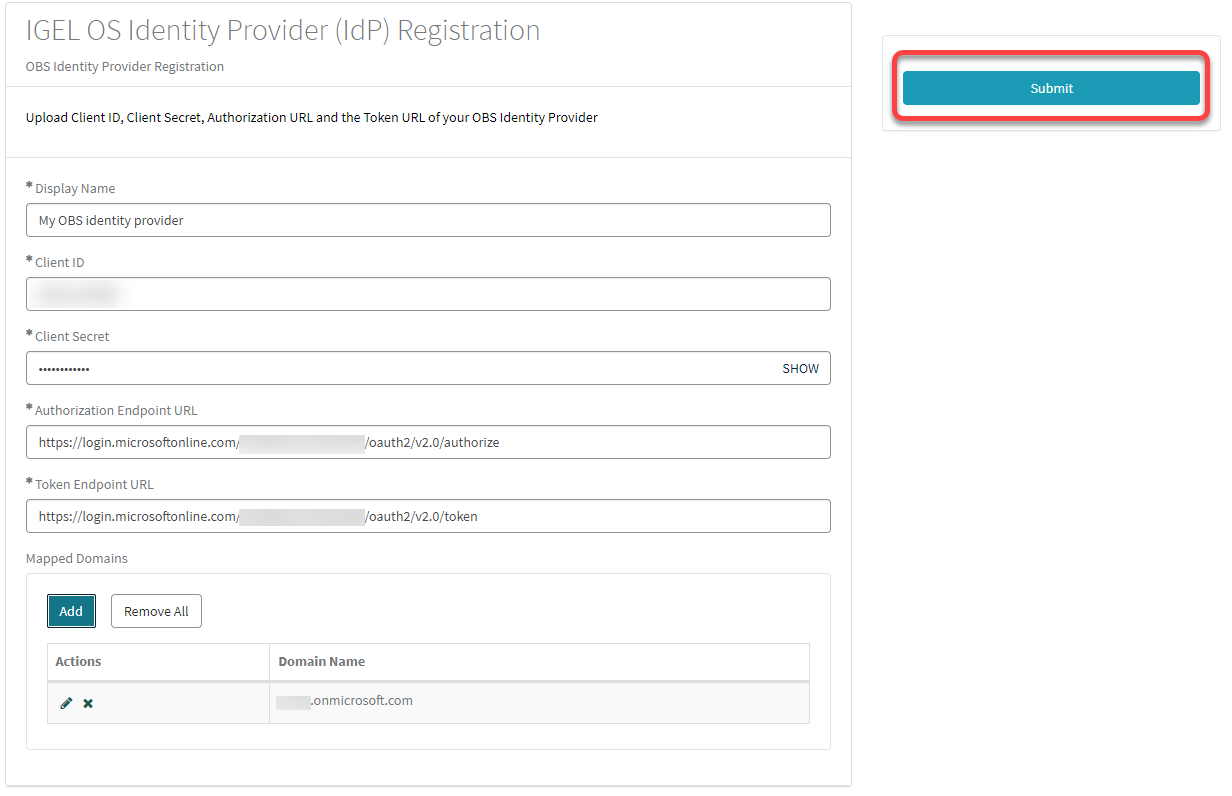
The data record is created.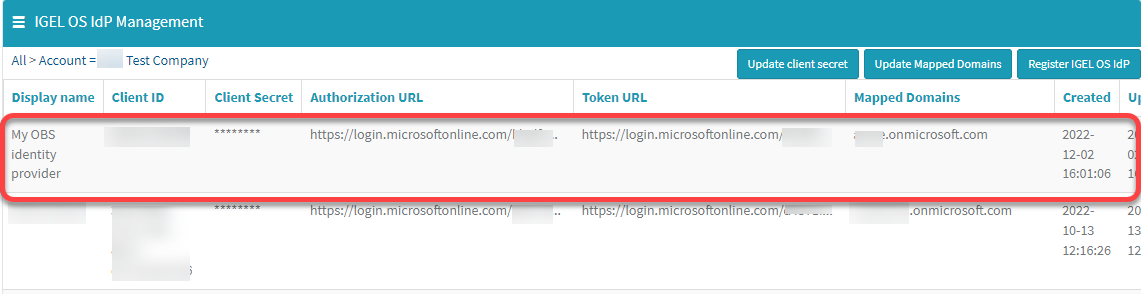
Creating a User in the Entra App
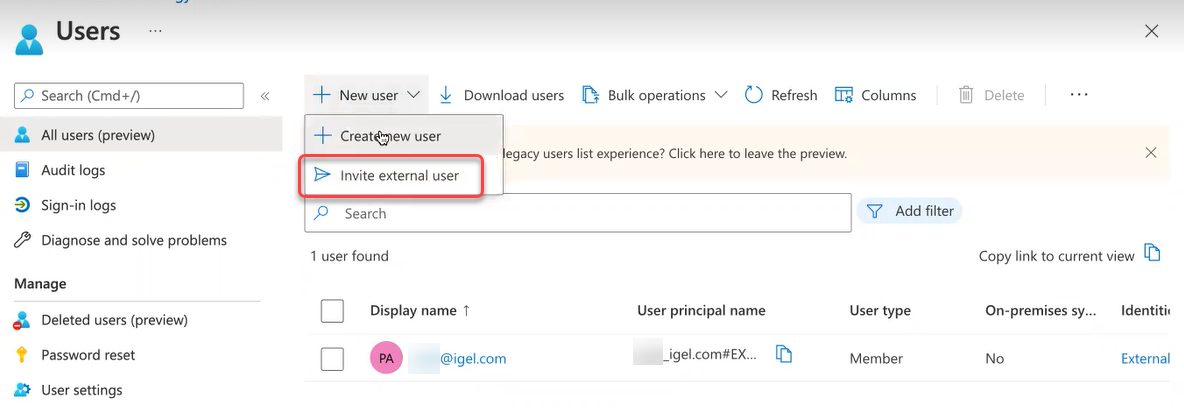
- Change to the Entra (tenant overview) tab and click Users.
- From the New user menu, select Create a new user.
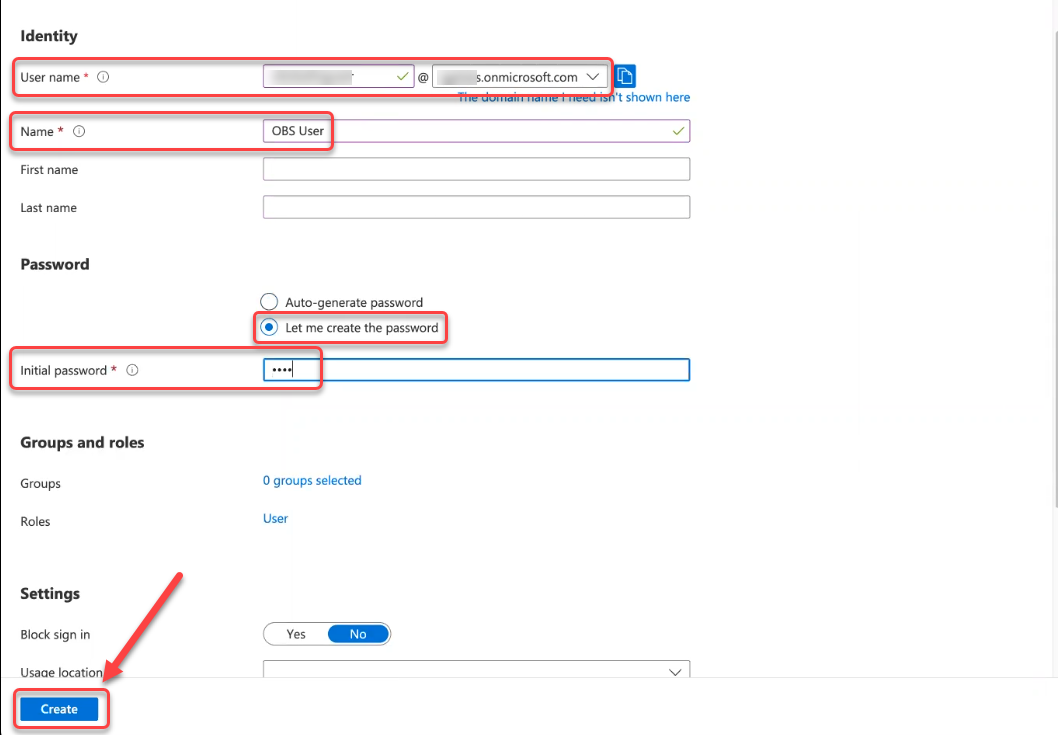
- Provide the necessary data and then click Create:
- User name: A valid e-mail address.
- Name: Display name
- Let me create the password: For our purposes, you can use this option.
- Initial password: Password to be used for the first login.