Launch the browser and bring up the web frontend of the PXE server via its IP address: http://[IP address of the server].
The default password is: igel. After logging in, change the password.
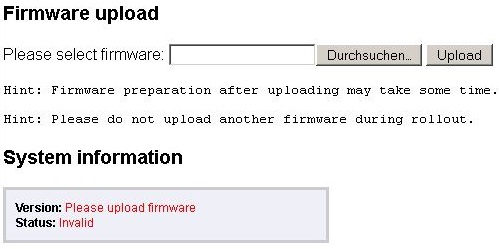
Upload the UDC2Stick_[version].zip file to the PXE server.
.
Warning: The upload procedure can take a few minutes! Wait until the system reports that the process is complete and the firmware was loaded successfully.
Wait while this is shown:
Wait until this message appears:
Only now was the upload successful and the firmware prepared for the rollout.
Bear in mind the effects that the new DHCP/PXE server can have on your network and the connected devices: Each computer that boots the image can install IGEL Universal Desktop OS 2. All locally saved data will be lost during the installation.
Ensure that no other DHCP servers are running within the network, otherwise this may result in malfunctions.
IGEL UDC will now be deployed as the boot image for each computer that boots with the PXE option.