Im Bereich Konfiguration des IGEL Universal Management Suite (UMS) Web App können Sie Konfigurationsobjekte wie Profile und Dateien erstellen und verwalten, um die zentrale Verwaltung von Geräteeinstellungen zu unterstützen. In diesem Artikel stellen wir den Bereich und die allgemeine Verwendung vor. Detailliertere oder spezifische Informationen finden Sie in den folgenden Artikeln:
-
Profile in der IGEL UMS Web App erstellen und zuweisen -
So prüfen Sie, welche Profile Parameter in der IGEL UMS Web App definieren -
Profile in der IGEL UMS Web App exportieren und importieren -
So verwenden Sie Templateprofile in der IGEL UMS Web App -
So verwenden Sie Corporate Identity Customizations in der IGEL UMS Web App -
Hochladen und Zuweisen von Dateien in der IGEL UMS Web App
Menüpfad: UMS Web App > Konfiguration

|
1 |
Konfigurationsobjekte |
Die Objekte sind je nach Typ in den folgenden Registerkarten gruppiert:
Um Priority Profile zu verwenden, müssen diese unter Netzwerk > Einstellungen > UMS Features aktiviert werden, siehe Netzwerkeinstellungen in der IGEL UMS Web App. Nach der Aktivierung können Sie Priority Profile auf dieselbe Weise wie Standardprofile erstellen, siehe So erstellen und zuweisen Sie Profile in der IGEL UMS Web App. Je nach ausgewählter Registerkarte stehen Ihnen oben in der Liste unterschiedliche Aktionsschaltflächen zur Verfügung, aber Sie können die Objekte immer in einer Verzeichnisstruktur organisieren. Der Strukturbaum zeigt alle erstellten Verzeichnisse und Unterverzeichnisse mit Informationen zu den enthaltenen Objekten an. Das Format (x/y) gibt an: x - die Anzahl der Objekte, die sich direkt im Verzeichnis befinden y - die Gesamtzahl der Objekte im Verzeichnis und in allen Unterverzeichnissen dieses Verzeichnisses
Klicken Sie hier, um mehr darüber zu erfahren, wie Sie Ihre Objekte in allen Registerkarten strukturieren können...→ Um ein Verzeichnis zu erstellen, klicken Sie auf → Um ein Verzeichnis umzubenennen, klicken Sie auf → Um ein Verzeichnis zu löschen, klicken Sie im Verwaltungspanel auf Verzeichnis löschen → Um den Papierkorb zu öffnen, klicken Sie auf → Um den Konfigurationsobjekte-Baum zu aktualisieren, klicken Sie auf → Um die Liste der Unterverzeichnisse eines Verzeichnisses ein- oder auszuklappen, klicken Sie auf das Pfeilsymbol neben dem Verzeichnisnamen oder doppelklicken Sie auf das Verzeichniselement. → Um ein Konfigurationsobjekt in ein anderes Verzeichnis zu verschieben, wählen Sie das Objekt aus und ziehen Sie es per Drag & Drop in das gewünschte Verzeichnis. → Um ein Verzeichnis in ein anderes Verzeichnis zu verschieben, wählen Sie das Verzeichnis aus und ziehen Sie es per Drag & Drop in das Zielverzeichnis oder verwenden Sie [Strg + X], [Strg + V]. Es ist derzeit nicht möglich, Objekte in der UMS Web App zu kopieren. Für Profile können Sie die Funktion Duplizieren oder alternativ die Export- und Importfunktion verwenden, siehe Profile exportieren und importieren in der IGEL UMS Web App. Für CICs können Sie ebenfalls die Export- und Importfunktion nutzen, siehe So verwenden Sie Corporate Identity Customizations in der IGEL UMS Web App. |
|
2 |
Objektliste |
Wenn Sie im Strukturbaum ein Verzeichnis auswählen, zeigt die Objektliste alle Objekte an, die sich in diesem Verzeichnis befinden. → Ein Rechtsklick auf ein Objekt öffnet ein Kontextmenü mit den verfügbaren Aktionen für das ausgewählte Objekt. Diese Aktionen entsprechen denen, die auch im Verwaltungspanel verfügbar sind. Weitere Details finden Sie in den Abschnitten: Profilverwaltung, Dateiverwaltung and Corporate Identity Customizations. 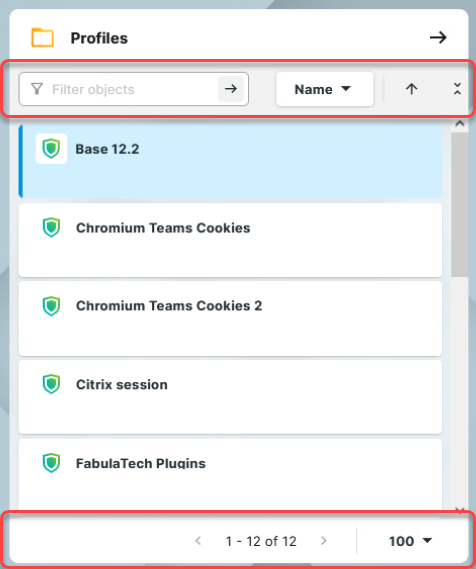
|
|
3 |
Management-Panel |
Der Inhalt des Panels ändert sich je nach ausgewähltem Element.
Wenn der Papierkorb aktiviert ist, wird das Objekt in den Papierkorb verschoben, wo Sie es wiederherstellen oder dauerhaft löschen können. Weitere Informationen finden Sie unter So verwenden Sie den Papierkorb in der IGEL UMS Web App.
|


Profile Management Panel
|
1 |
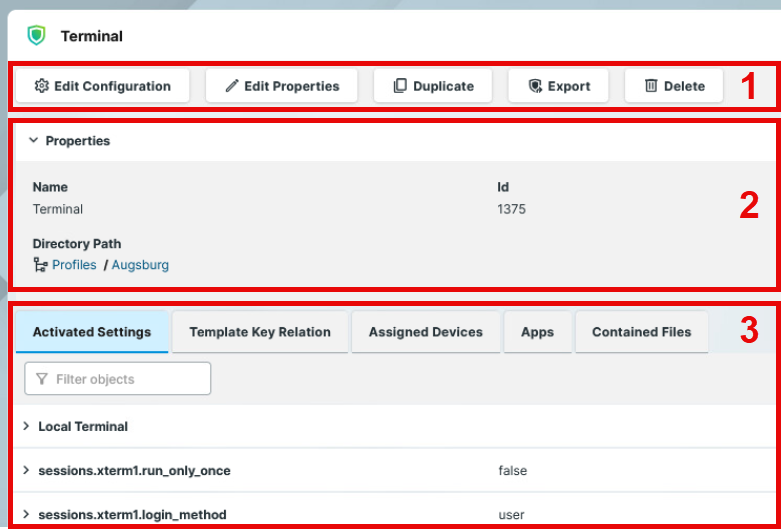
Aktionsschaltflächen |
→ Um die Konfigurationsparameter eines Profils zu bearbeiten, doppelklicken Sie auf das Profil in der Objektliste oder wählen Sie das Profil aus und klicken Sie auf Konfiguration bearbeiten bzw. den entsprechenden Kontextmenüeintrag. → Um das Profil umzubenennen oder andere Eigenschaften wie die Einstellung Sitzungen (NICHT) überschreiben zu bearbeiten, klicken Sie auf Eigenschaften bearbeiten. Die Option Sitzungen überschreiben sollte nur in Ausnahmefällen aktiviert werden. Mit dieser Option können Sie freie Instanzen aller anderen Profile überschreiben. Detaillierte Informationen zu dieser Option finden Sie unter Profile in der IGEL UMS erstellen.
→ Um ein Profil zu kopieren, klicken Sie auf Duplizieren. Ein neues Profil mit denselben Einstellungen und Eigenschaften wie das Originalprofil wird erstellt. Für die Funktion Duplizieren benötigen Sie Lese- und Schreibrechte für das Objekt und den übergeordneten Ordner. Weitere Informationen zu Berechtigungen finden Sie unter Objektbezogene Zugriffsrechte and So erstellen Sie Administratorkonten in der IGEL UMS. → Um das Profil zu exportieren, klicken Sie auf Exportieren. Weitere Informationen finden Sie unter Profile exportieren und importieren in der IGEL UMS Web App. → Um ein Profil zu löschen, klicken Sie auf Löschen. Wenn der Papierkorb aktiviert ist, wird das Profil dorthin verschoben, wo Sie es wiederherstellen oder dauerhaft löschen können. Weitere Informationen finden Sie unter So verwenden Sie den Papierkorb in der IGEL UMS Web App. |
|
2 |
Profil Informationen |
Für Profile zeigt das Informationspanel die Eigenschaften des ausgewählten Profils an, z.B. den Name, die Version, auf der es basiert (nur bei IGEL OS 11-Profile), usw. ID Profil-ID. Wenn mehreren Profilen ein Gerät auf derselben Ebene zugewiesen ist, hat das neuere Profil mit der höheren ID Vorrang. Weitere Informationen zur Priorisierung von Profilen finden Sie unter Wirkungsordnung von Profilen and Priorisierung von Profilen in der IGEL UMS . Verzeichnispfad Vollständiger Verzeichnispfad für das ausgewählte Profil. |
|
3 |
Aktivierte Einstellungen |
Zeigt alle Konfigurationseinstellungen an, die im ausgewählten Profil aktiviert sind. Key
→ Klicken Sie auf das i-Symbol, um den Tooltip zu öffnen. Anzeigename
Wert
→ Wenn ein Parameter einen Wert von einem Template Key erhält (siehe Template-Profile in der IGEL UMS), klicken Sie auf Einstellungen, die für neu erstellte Profile aktiviert oder geändert werden, werden in der UMS Web App unter Aktivierte Einstellungen nicht sofort, sondern nach der nächsten Neuindizierung angezeigt, die in diesem Fall in einem Intervall von einem Tag ausgeführt wird. |
|
Template-Key-Beziehung |
Zeigt alle Template Keys, die im Profil verwendet werden, siehe Template Profile in der IGEL UMS und So verwenden Sie Template Keys in Profilen. Template Key
Parameter
Template Expression
Beispiele für Template-Ausdrücke:
|
|
|
Enthaltene Dateien |
Zeigt alle Dateien, die dem ausgewählten Profil zugewiesen sind. Weitere Informationen zum Datei-Upload finden Sie unter Dateien in der IGEL UMS Web App hochladen und zuweisen. 
1: Hier können Sie schnell eine Datei zum Profil hinzufügen. → Geben Sie den Dateinamen ein und wählen Sie die Datei aus der Liste aus. 2: Filtert die dem Profil hinzugefügten Dateien anhand des eingegebenen Suchbegriffs. 3: Löst die ausgewählte Datei vom Profil. |
|
|
Zugewiesene Geräte |
Zeigt alle Geräte, denen das ausgewählte Profil zugewiesen ist. 
1: Hier können Sie das Profil schnell einem Gerät oder einem Geräteverzeichnis zuweisen. → Geben Sie den Namen des Geräts oder Geräteverzeichnisses ein und klicken Sie auf den Namen in der Liste. 2: Filtert die Geräte bzw. Geräteverzeichnisse, denen das Profil zugewiesen ist. Die Filterkriterien sind mit dem Operator AND verknüpft. → Klicken Sie auf 3: Löst das ausgewählte Gerät oder Geräteverzeichnis vom Profil. 4: Springt zum entsprechenden Geräteverzeichnis und zeigt alle zugewiesenen Objekte dafür an. 5: Springt zum entsprechenden Gerät und zeigt alle zugewiesenen Objekte dafür an. |
|
|
Apps |
Zeigt, welche Apps bzw. App-Versionen durch das ausgewählte OS 12-Profil konfiguriert werden. |

Datei Management Panel
|
1 |
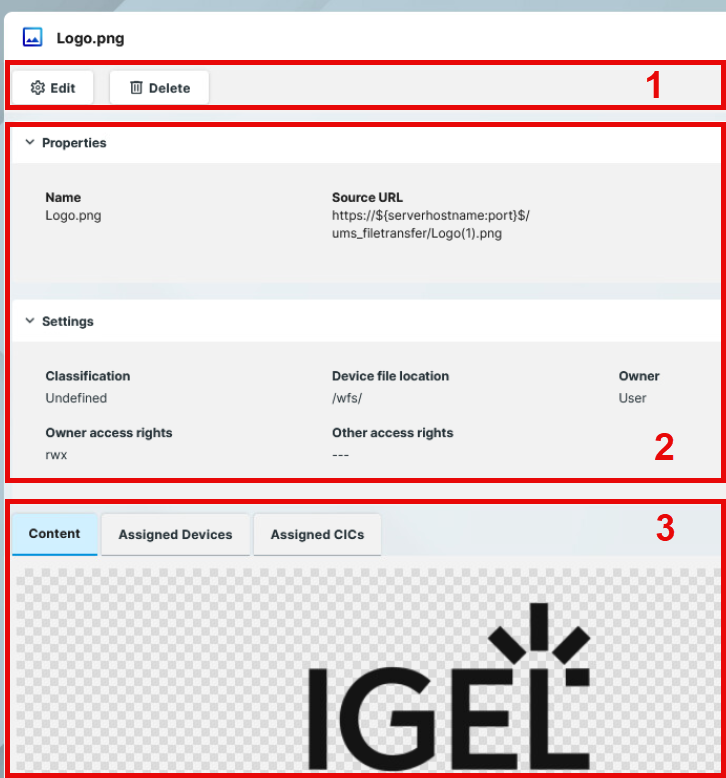
Aktionschaltflächen |
→ Um die Eigenschaften und Einstellungen der Datei zu bearbeiten, klicken Sie auf Bearbeiten. → Um eine Datei zu löschen, klicken Sie auf Löschen. Wenn der Papierkorb aktiviert ist, wird die Datei dorthin verschoben, wo Sie sie wiederherstellen oder dauerhaft löschen können. Weitere Informationen finden Sie unter So verwenden Sie den Papierkorb in der IGEL UMS Web App. |
|
2 |
Datei-Informationen |
Für Dateien zeigt das Informationspanel die Eigenschaften und Einstellungen der ausgewählten Datei an, z.B. ihren Namen oder die Source URL. Die Werte werden beim Hochladen der Datei definiert und können später bearbeitet werden. Weitere Informationen zu den Einstellungen finden Sie unter Dateien in der IGEL UMS Web App hochladen und zuweisen. Wenn Sie eine Datei mit einem bereits vorhandenen Dateinamen hochladen, wird der neue Dateiname nach dem Format {Dateiname}({n}) angepasst, wobei n angibt, wie viele Dateien mit demselben Namen existieren.
In der UMS Web App ist dies nur in der Source URL, nicht aber im Dateinamen sichtbar. |
|
3 |
Inhalt |
Zeigt eine Vorschau der über die UMS Web App hochgeladenen Dateien an, z.B. eine Bildvorschau oder den Inhalt eines Zertifikats. |
|
Zugewiesene Geräte |
Zeigt alle Geräte, denen die ausgewählte Datei zugewiesen ist. → Um die Datei schnell einem Gerät oder Geräteverzeichnis zuzuweisen, geben Sie den Namen des Geräts oder Geräteverzeichnisses ein und klicken Sie in der Liste auf den Namen. Weitere Informationen finden Sie unter Dateien in der IGEL UMS Web App hochladen und zuweisen. → Sie können die Geräte bzw. Geräteverzeichnisse filtern, denen die Datei zugewiesen ist. Die Filterkriterien sind mit dem Operator AND verknüpft. Klicken Sie auf → Trennen Sie das ausgewählte Gerät oder Geräteverzeichnis, indem Sie auf → Klicken Sie auf den Gerätenamen in der Liste, um zum entsprechenden Gerät zu springen und alle Zugewiesenen Objekte anzuzeigen. → Klicken Sie auf den Verzeichnisnamen, um zum entsprechenden Geräteverzeichnis zu springen und alle Zugewiesenen Objekte anzuzeigen. |
|
|
Zugewiesene CICs |
Zeigt alle Corporate Identity Customizations (CICs), denen die ausgewählte Datei zugewiesen ist. → Sie können die Liste der zugewiesenen CICs filtern. |
Corporate Identity Customizations
Mit Corporate Identity Customizations (CICs) in der UMS Web App können Sie die Benutzeroberfläche Ihrer IGEL OS-Geräte an das Corporate Design Ihres Unternehmens anpassen. Weitere Informationen finden Sie unter So verwenden Sie Corporate Identity Customizations in der IGEL UMS Web App.
|
1 |
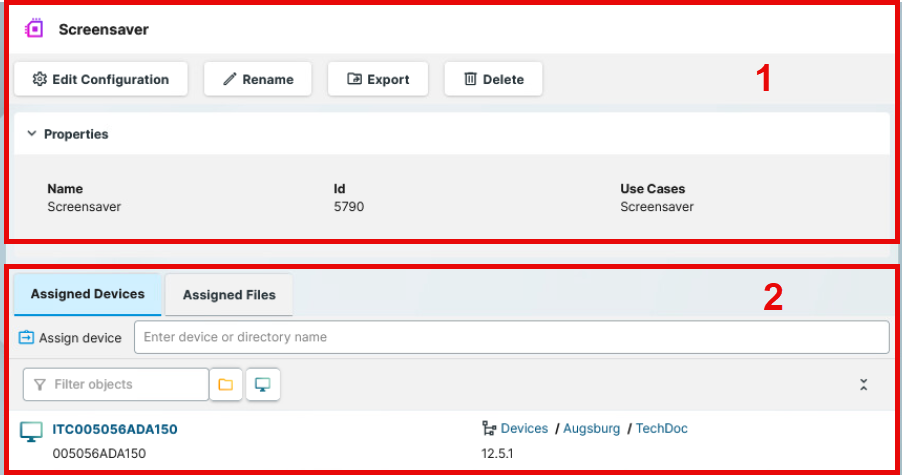
CIC-Informationen und Aktionsschaltflächen |
Das Informationspanel zeigt die Eigenschaften des ausgewählten CIC an, z.B. Name und Anwendungsfall, sowie alle verfügbaren Aktionsschaltflächen. → Klicken Sie auf Konfiguration bearbeiten, um das CIC zu konfigurieren. → Klicken Sie auf Umbenennen → Klicken Sie auf Exportieren, um das CIC zu exportieren. Weitere Informationen finden Sie unter So verwenden Sie Corporate Identity Customizations in der IGEL UMS Web App. → Klicken Sie auf Löschen, um das CIC zu entfernen. Wenn der Papierkorb aktiviert ist, wird das CIC dorthin verschoben, wo Sie es wiederherstellen oder dauerhaft löschen können. Weitere Informationen finden Sie unter So verwenden Sie den Papierkorb in der IGEL UMS Web App. |
|
2 |
Zugewiesene Geräte |
Zeigt alle Geräte, denen das ausgewählte CIC zugewiesen ist. → Um das CIC schnell einem Gerät oder Geräteverzeichnis zuzuweisen, geben Sie den Namen des Geräts oder Geräteverzeichnisses ein und klicken Sie in der Liste auf den Namen. Sie können CICs auch wie andere Objekte im Bereich Geräte zuweisen. Weitere Informationen zum Zuweisen von Objekten finden Sie unter So weisen Sie Objekte in der IGEL UMS Web App zu. 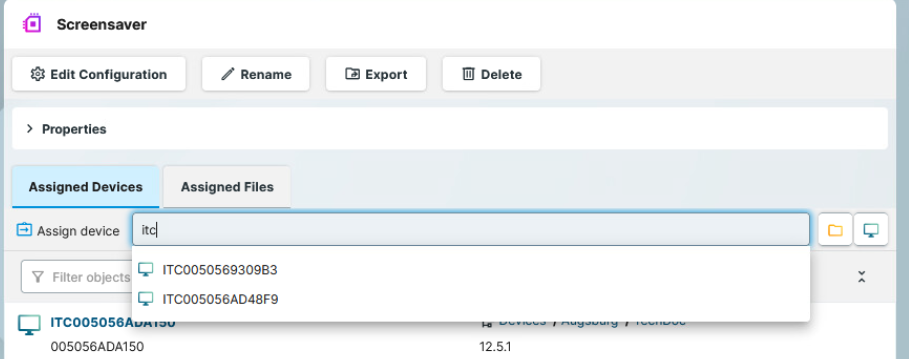
→ Sie können die Liste der zugewiesenen Geräte oder Geräteverzeichnisse filtern. Die Filterkriterien sind mit dem Operator AND verknüpft. Klicken Sie auf → Trennen Sie das ausgewählte Gerät oder Geräteverzeichnis, indem Sie auf → Klicken Sie auf den Gerätenamen in der Liste, um zum entsprechenden Gerät zu springen und alle Zugewiesenen Objekte dafür anzuzeigen. → Klicken Sie auf den Verzeichnisnamen, um zum entsprechenden Geräteverzeichnis zu springen und alle Zugewiesenen Objekte dafür anzuzeigen. |
|
Zugewiesene Dateien |
Zeigt eine Liste der im ausgewählten CIC verwendeten Dateien mit Größenangaben an. → Sie können die Liste der zugewiesenen Dateien filtern. |
