
Managing a container through the IGEL Universal Management Suite (UMS) Web App consists of two main stages:
-
First, you upload the container configuration file and assign it to the IGEL OS devices through a profile.
-
Then, you need to create a container profile and assign it to the IGEL OS devices as well.
As soon as at least one container was created, you can view and manage the container from the Managed Containers tab.
Before continuing with the below instructions, make sure you meet the requirements and completed the initial configurations as mentioned in Prerequisites for Running the IGEL Managed Containers App.
Preparing the Container Configuration File
Prerequisites
-
IMC uses a subset of the Compose specification as a configuration format for defining a single container. It expects that the configuration will only contain one service that will configure one container.
IMC currently does not support all Compose functionalities. For more information, see Unsupported Compose Features.
If the container requires network connectivity, communication with other applications, or access to USB peripherals such as a camera, you must define the required access and permissions in the container configuration file. For an example of how to forward a USB device into a container, see Example 2 below.
-
The container configuration file must be available on the local machine from which the administrator accesses the UMS Web App.
Before installing the IMC app on an IGEL OS device, the container storage needs to be configured. For more information see Configuring the Container Storage.
Uploading the Container Configuration File to the UMS Web App
-
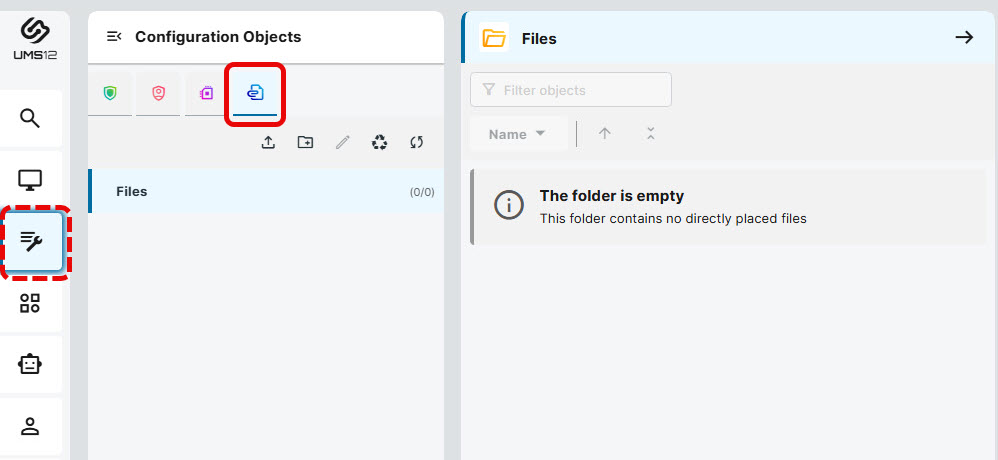
In the UMS Web App, go to Configuration and click Files.
-
Click Create new directory

-
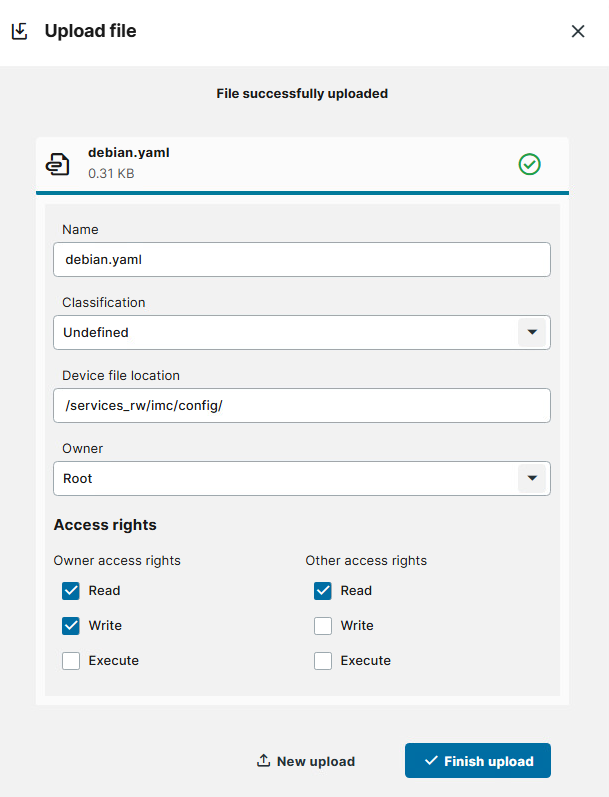
Click Upload file

-
Classification: Undefined
-
Device file location:
/services_rw/imc/config/ -
Owner: Root
-
Owner access rights:
-
Read
-
Write
-
-
Other access rights:
-
Read
-
-
-
Click Finish upload.
The container configuration file was uploaded to the UMS Web App.
Creating a Profile for the Container Configuration File
Profiles are used to transfer the container configuration file to the IGEL OS device. Follow the steps to create a profile and assign the container configuration file to it.
-
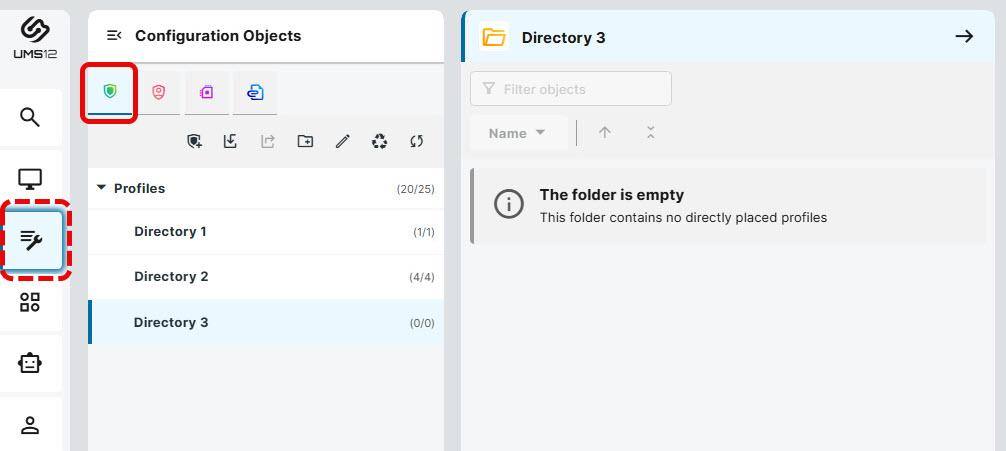
Open the UMS Web App, go to Configuration and click Profiles.
-
Click Create new profile

-
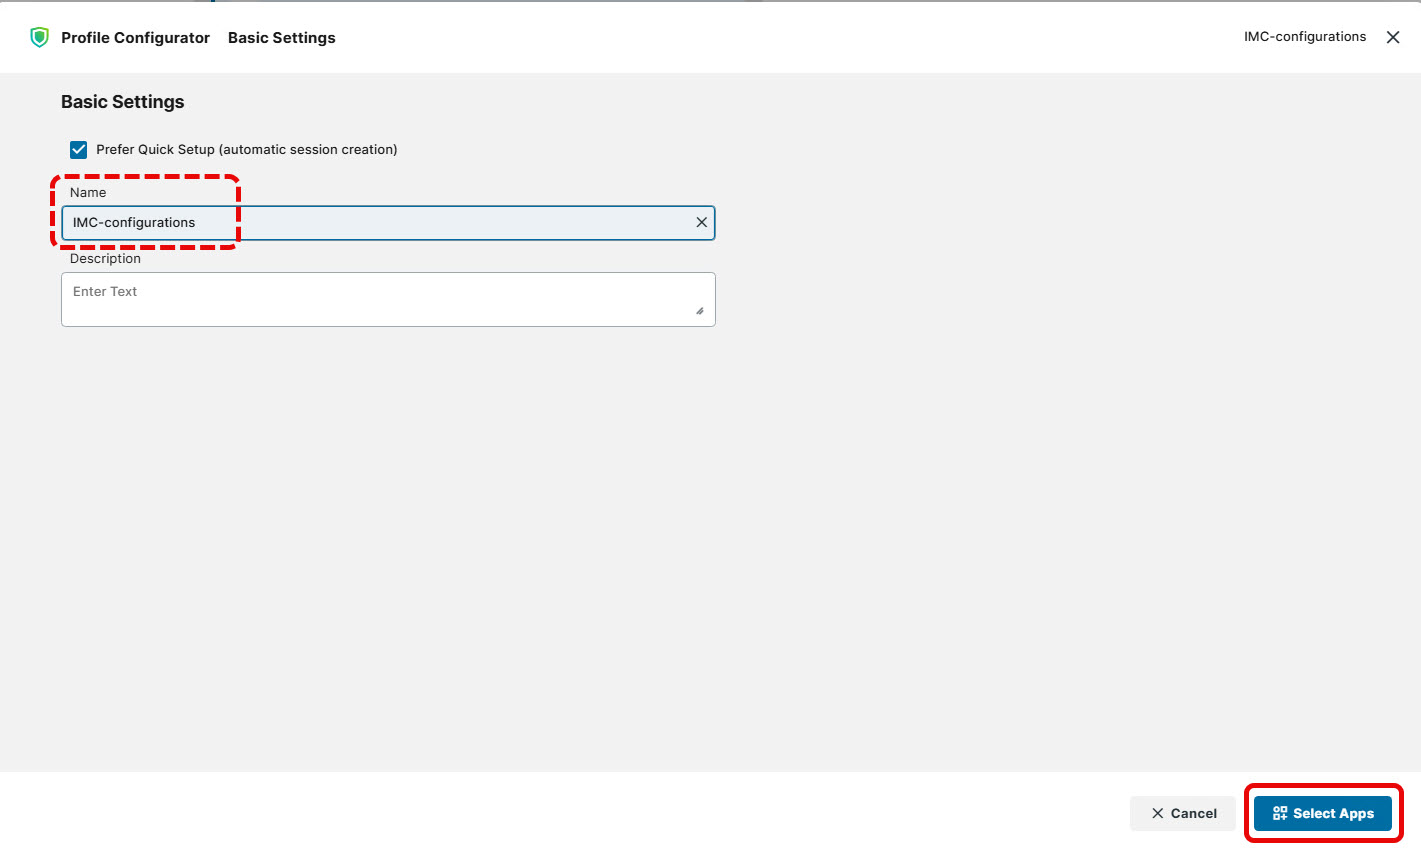
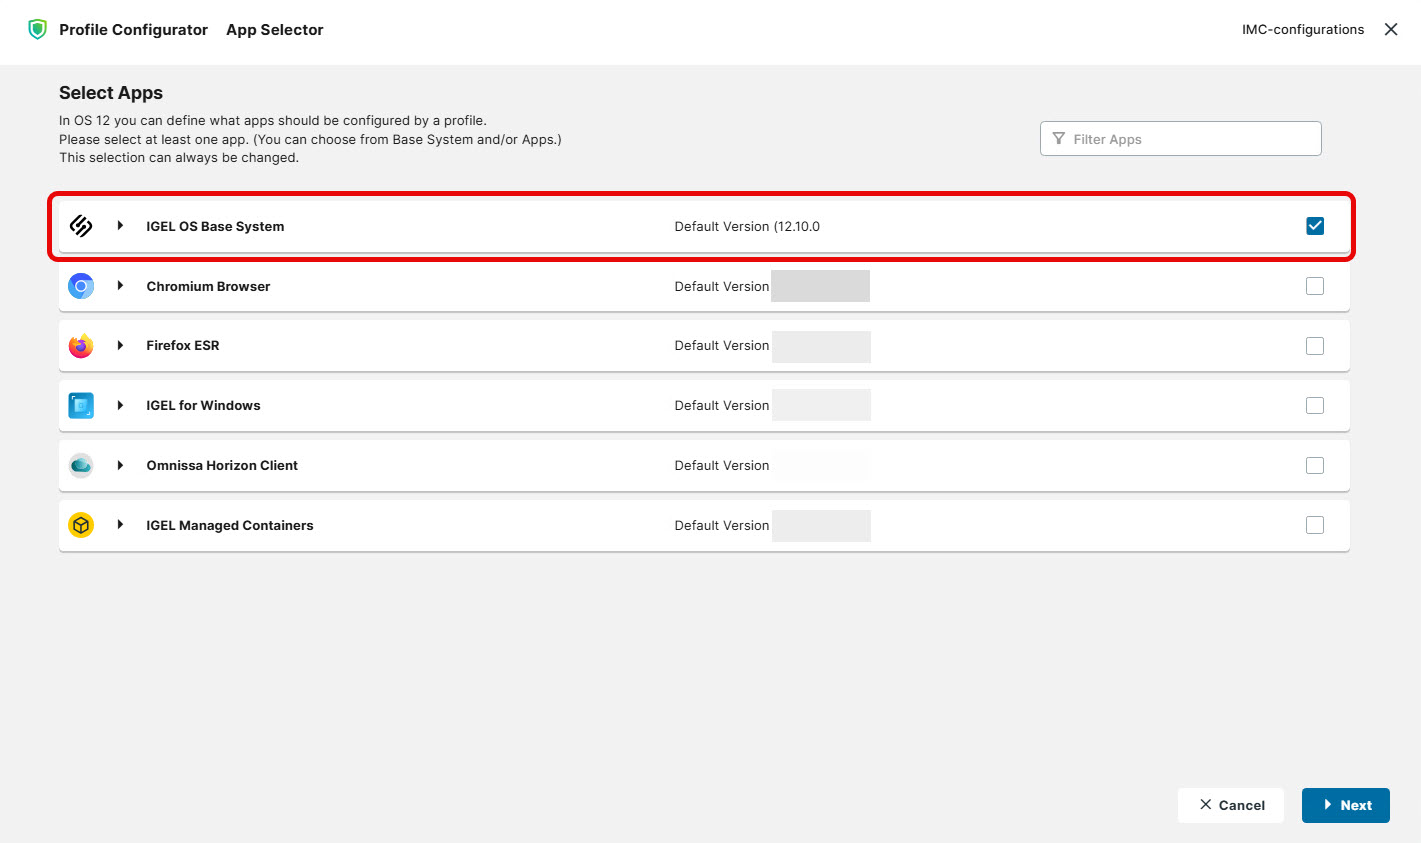
Name the profile, e.g. IMC-configurations, and click Select Apps.
-
Select the IGEL OS Base System app and click Next.
-
Close the profile configuration window without making any further changes.
-
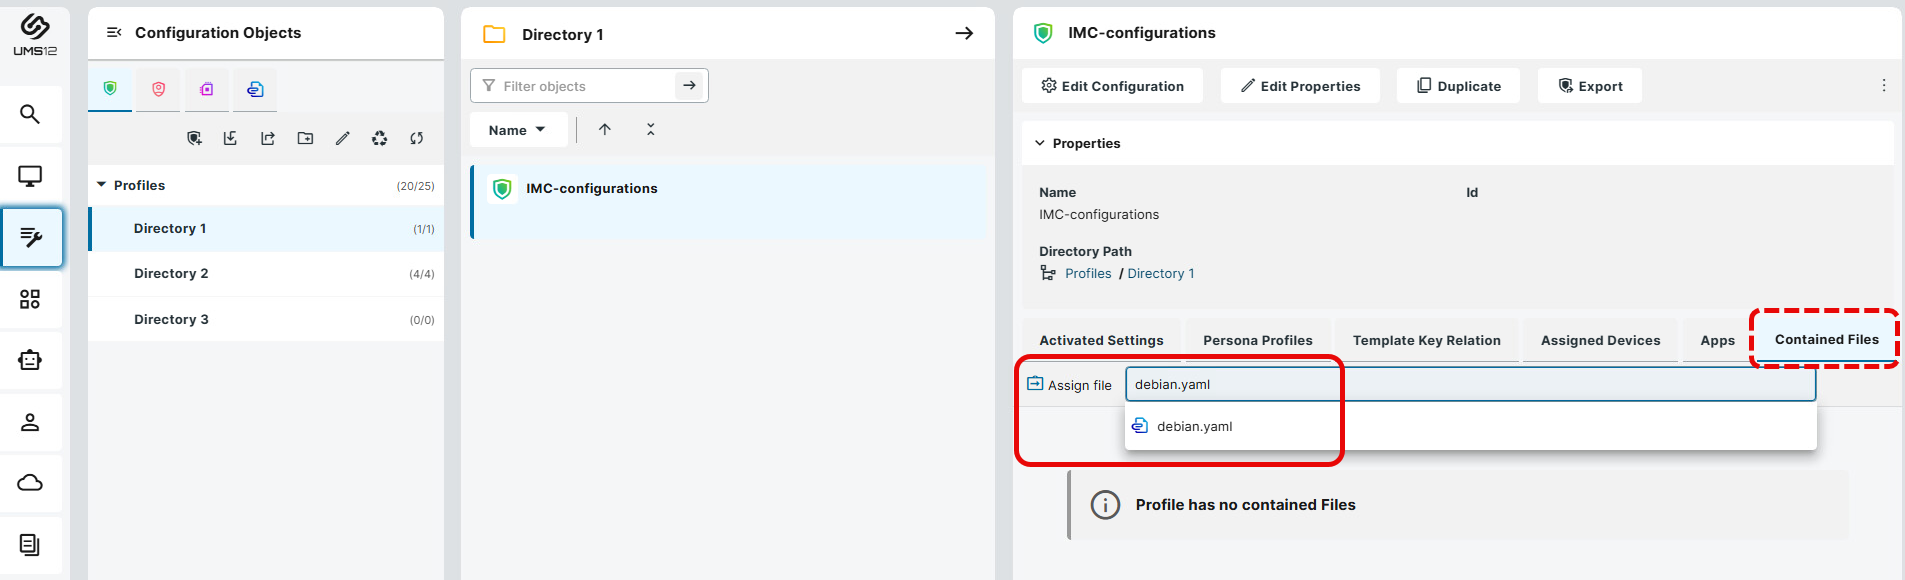
In the newly created profile, go to Contained Files and, in the Assign file search bar, enter the file name of the container configuration file. Once the entry with the same file name appears, select it.
-
In the confirmation dialog box that appears, click Yes.
The container configuration file has now been assigned to the profile.
Assigning the Profile for the Container Configuration File to the IGEL OS Device
Make sure that the IMC app is installed on the target IGEL OS device before assigning the container profile.
-
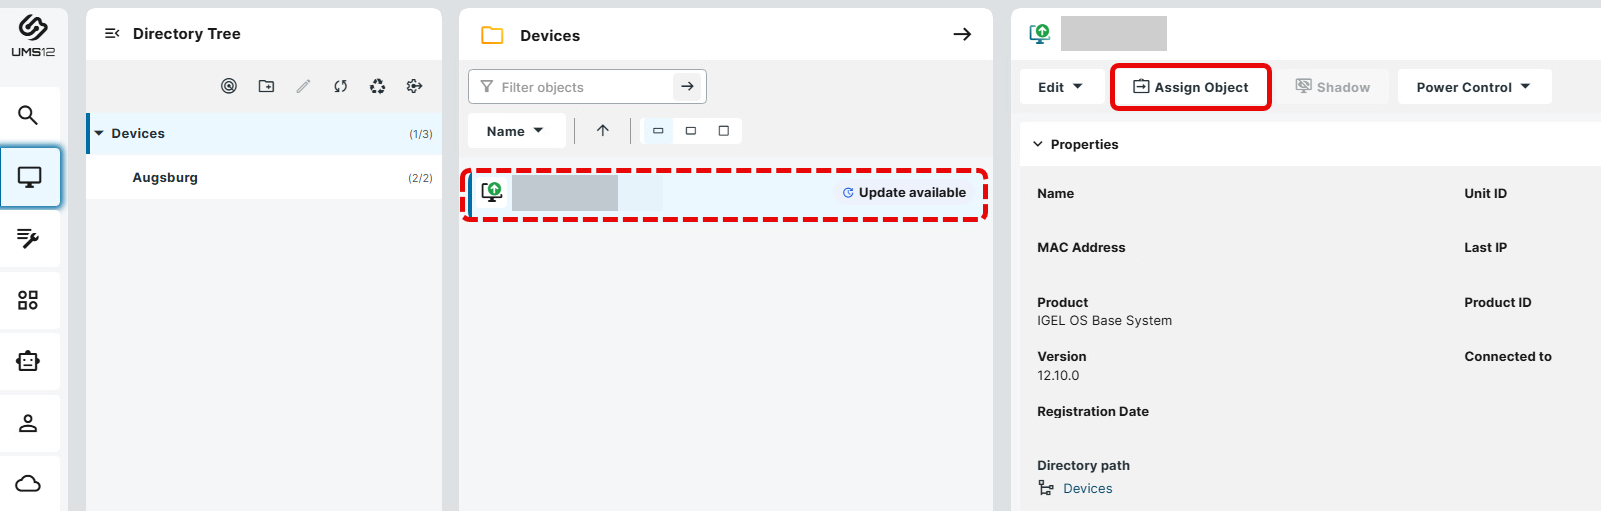
In the UMS Web App, go to Devices, select the device to which the container should be assigned to and click Assign object.
-
Assign the profile to the device and click Save and apply now.
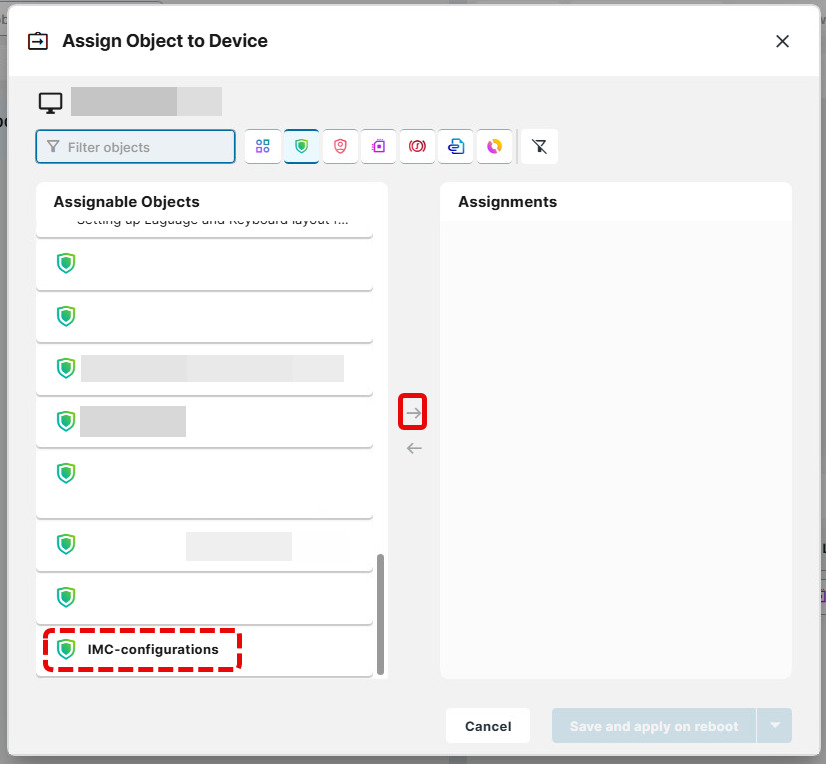
The container configuration file is transferred to the target IGEL OS device when the profile settings are applied.
Creating and Assigning the Container Profile in the IGEL UMS Web App
Creating the Container Profile in the IGEL UMS Web App
-
Open the UMS Web App, go to Configuration and click Profiles.
-
Click Create new profile
-
Name the profile and click Select Apps.
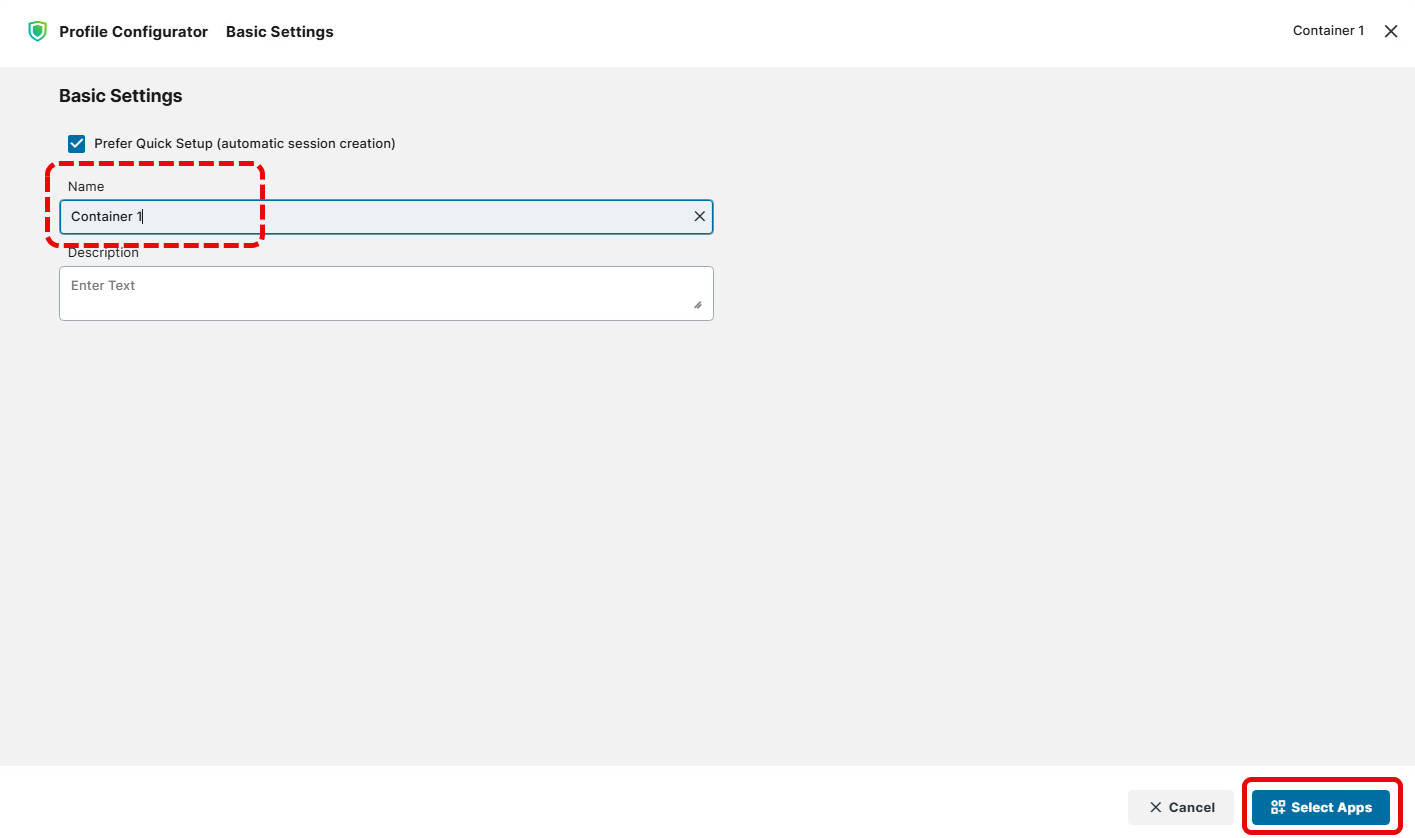
-
Select the IGEL Managed Containers app and click Next.
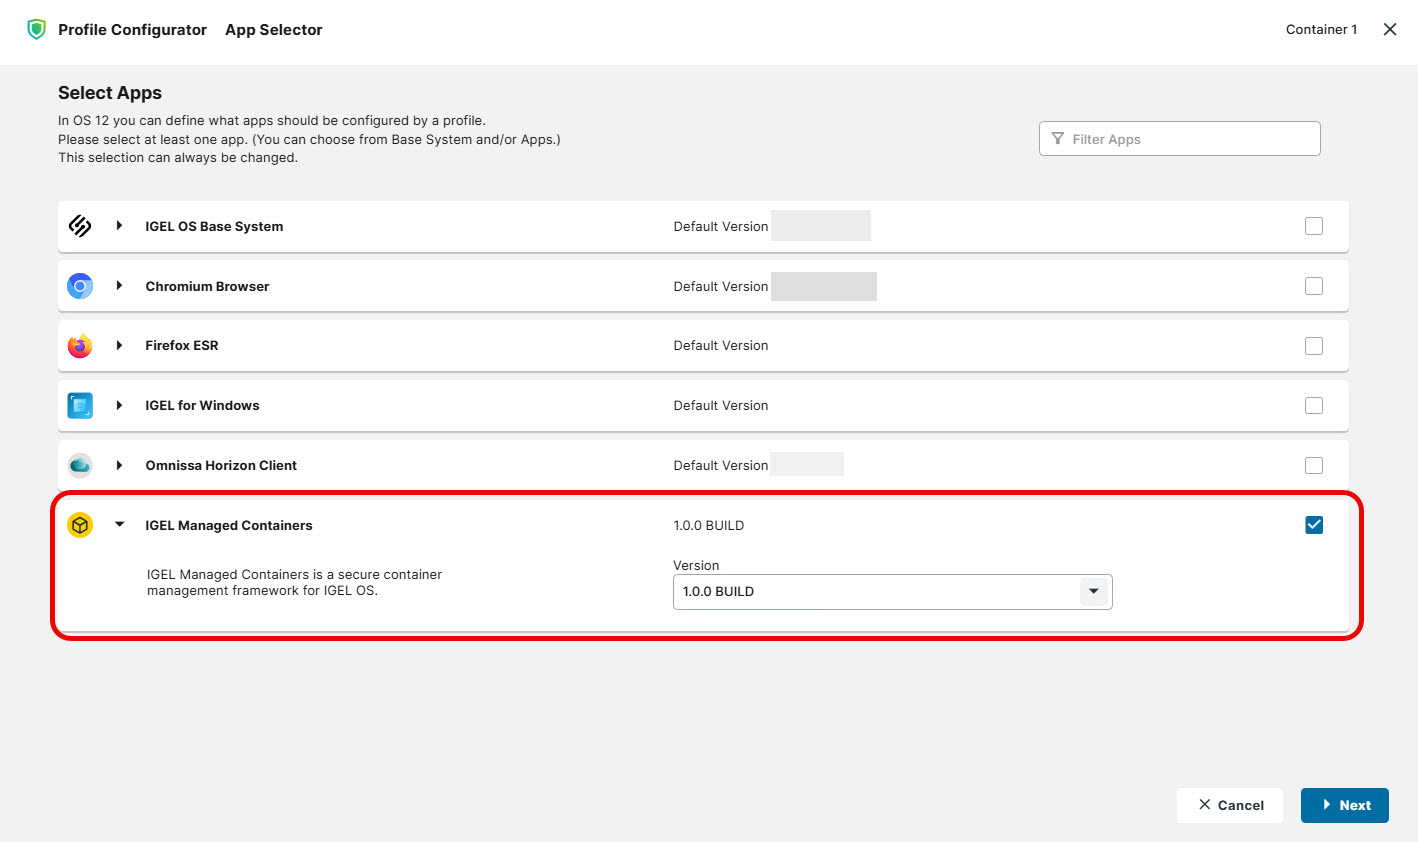
-
Go to Apps > IGEL Managed Containers > Containers and click Add item

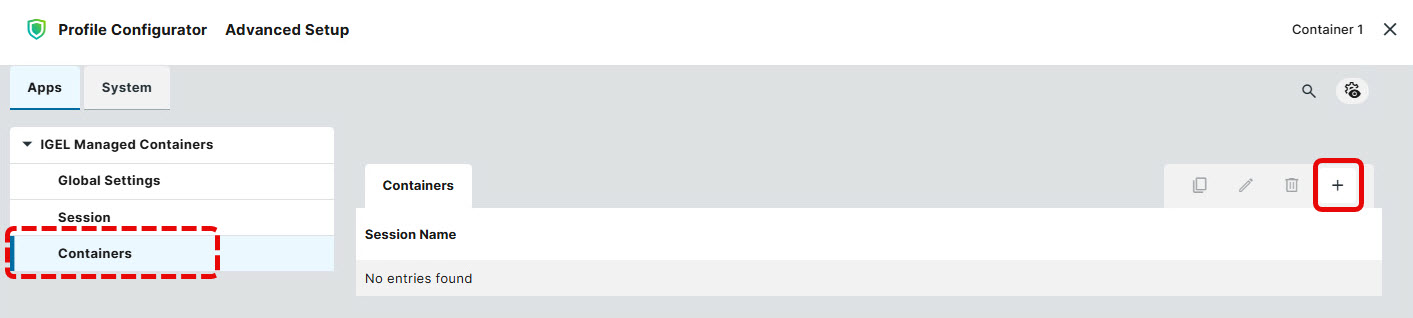
-
Name the container instance.
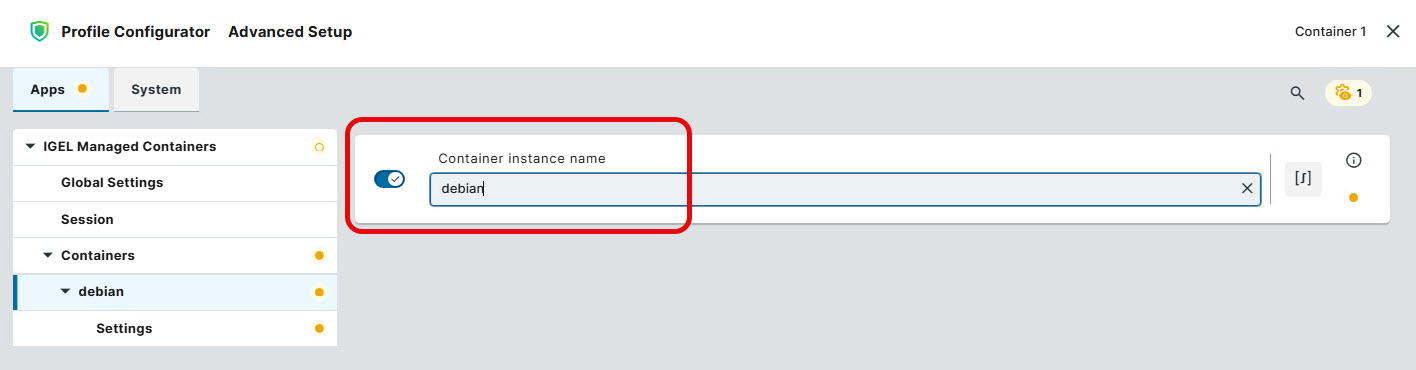
-
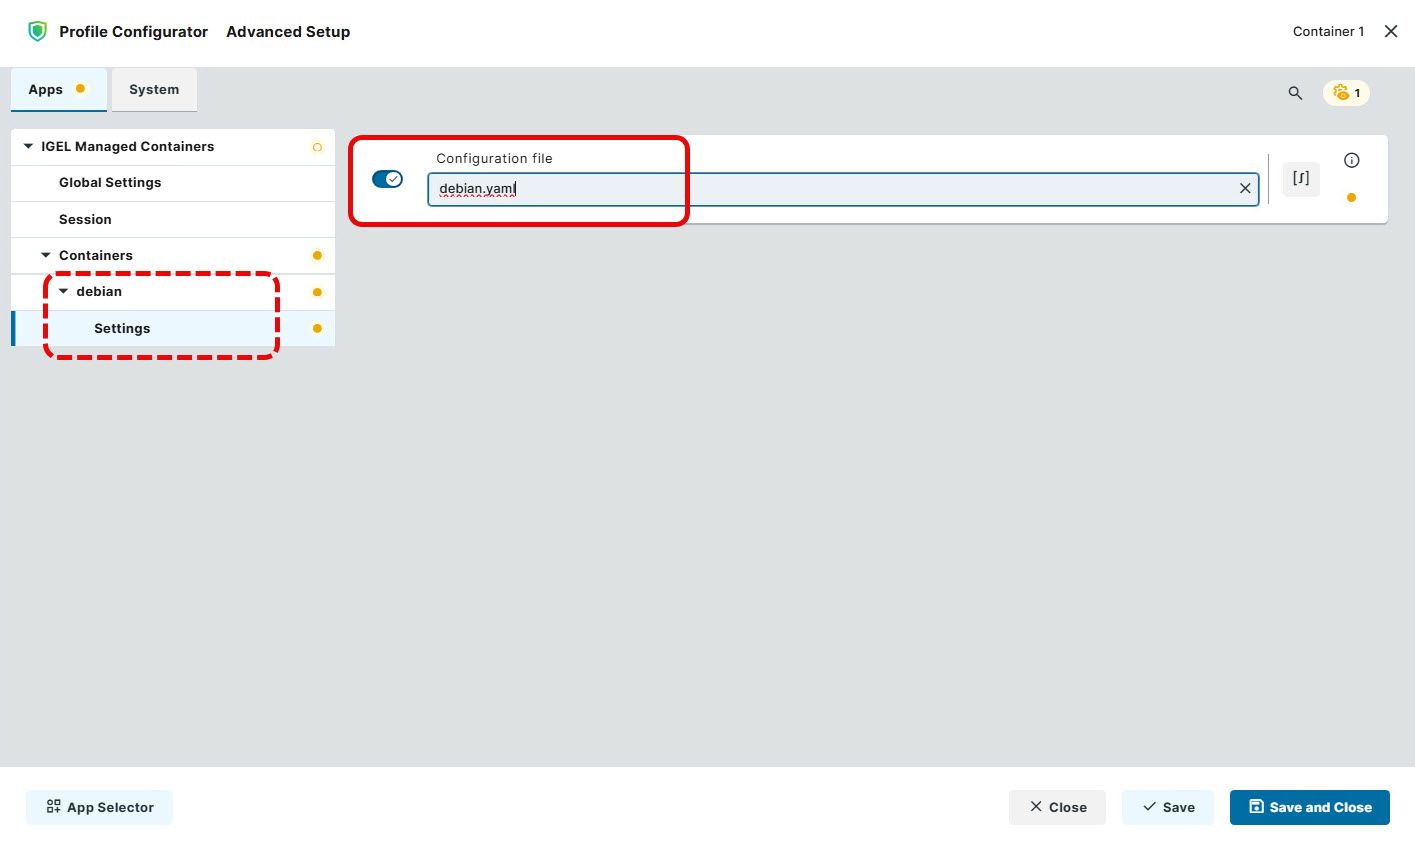
Click Settings, enter the name of the container configuration file which has been assigned to the IGEL OS device, and click Save and Close to create the profile.
Assigning the Profile to the IGEL OS Device
-
In the UMS Web App, go to Devices, select the device to which the container profile needs to be set to and click Assign Object.
-
Assign the profile to the device and click Save and apply now.
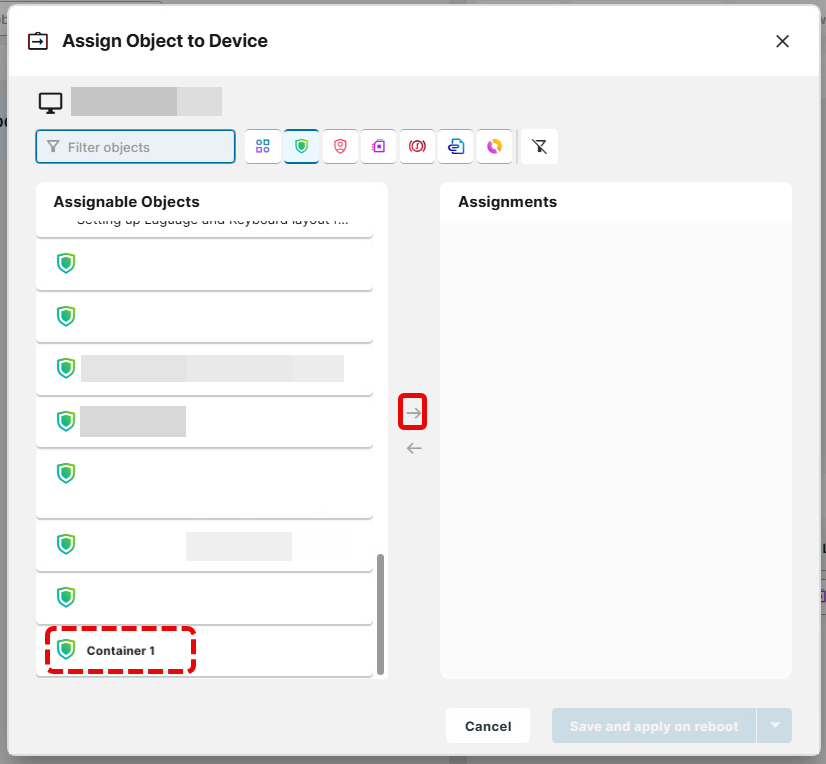
After the IGEL OS device applied the settings, the tab Managed Containers will appear on the device details page in the UMS Web App.
Managing Containers in the IGEL UMS Web App
When the target IGEL OS device received the container configuration file, restarted, and at least one container was created, a new tab labeled Managed Containers is added.
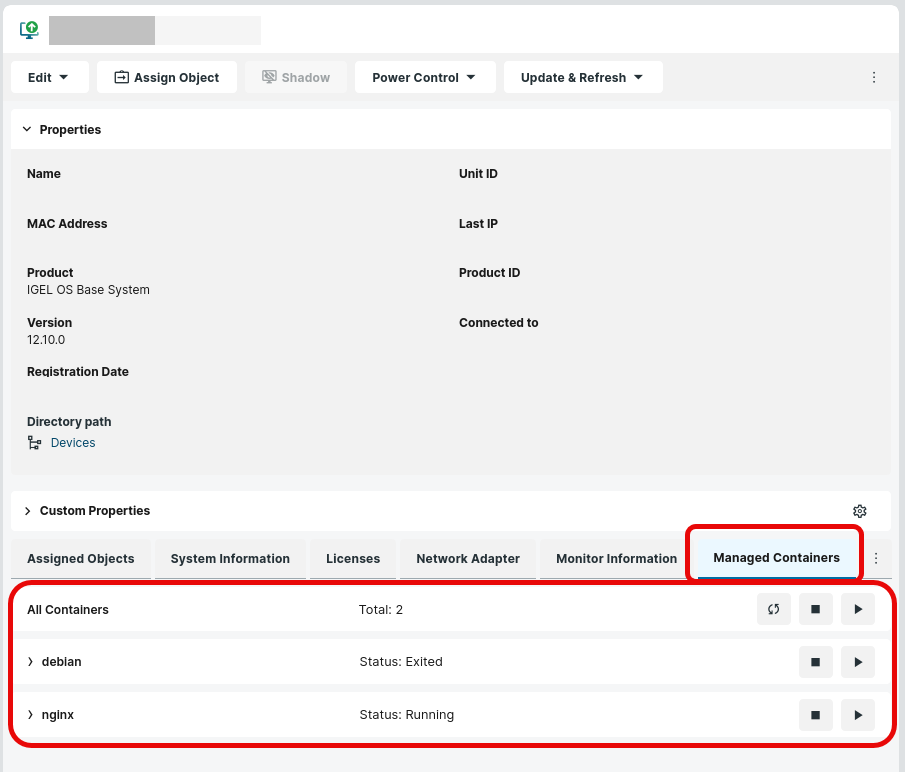
Click the refresh button 
The available possibilities of managing containers on IGEL OS devices are described below.
Starting Containers
To start running a container, click 


Clicking

Stopping Containers
To stop running a container, click 


Clicking

Updating Container Images
To update a container image, click 
