Exporting and Importing Profiles in the IGEL UMS Web App
In the IGEL Universal Management Suite (UMS), profiles can be exported from the database together with their directory structure. This can be helpful for backup or support purposes or when importing the profile data from one UMS installation to another.
Alternatively, device settings can be exported and imported later as a profile, see How to Export Device Settings as a Profile in the IGEL UMS Web App.
In the UMS Web App, only OS 12 profiles can be exported or imported. If you need to export / import OS 11 profiles, see Exporting and Importing Profiles.
Menu path: UMS Web App > Configuration > Export Profile / Import Profiles
Exporting Profiles
To export an individual profile, proceed as follows:
Under UMS Web App > Configuration, select the required profile.
Click Export Profile.
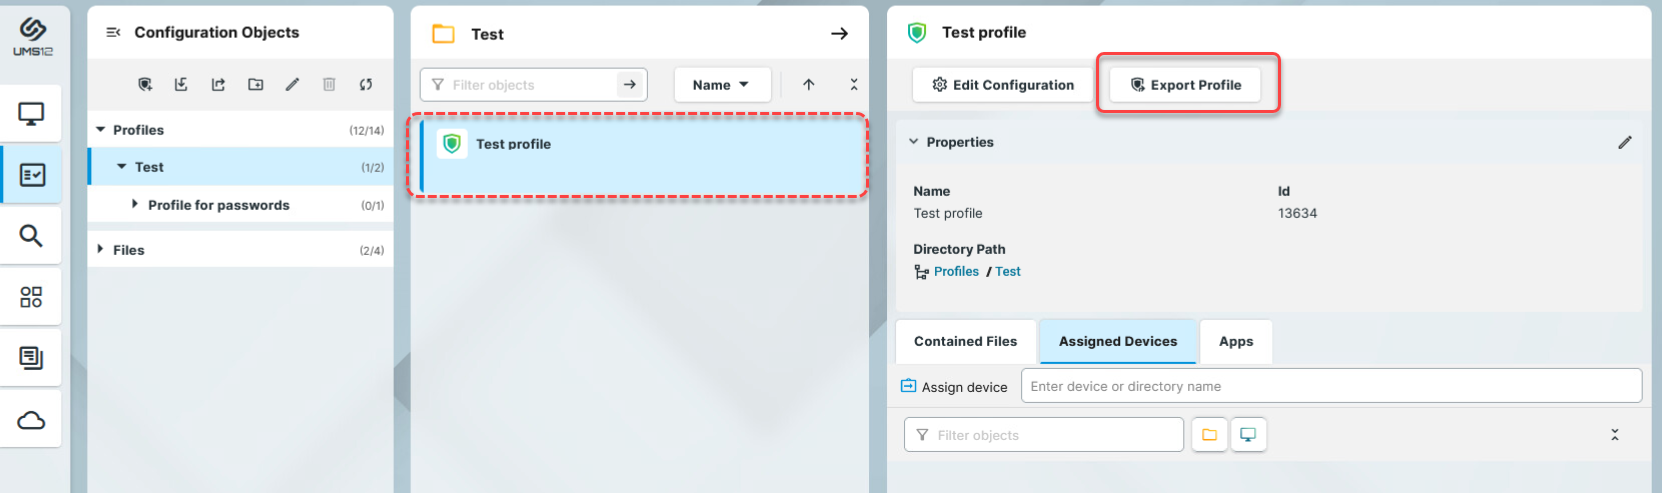
Specify the desired file name.
Confirm the export.
To export a number of profiles in one file, proceed as follows:
Under UMS Web App > Configuration, select the folder Profiles or the folder that contains the profiles you want to export.
Click Export Profile
 .
.
The Export Profiles window will open.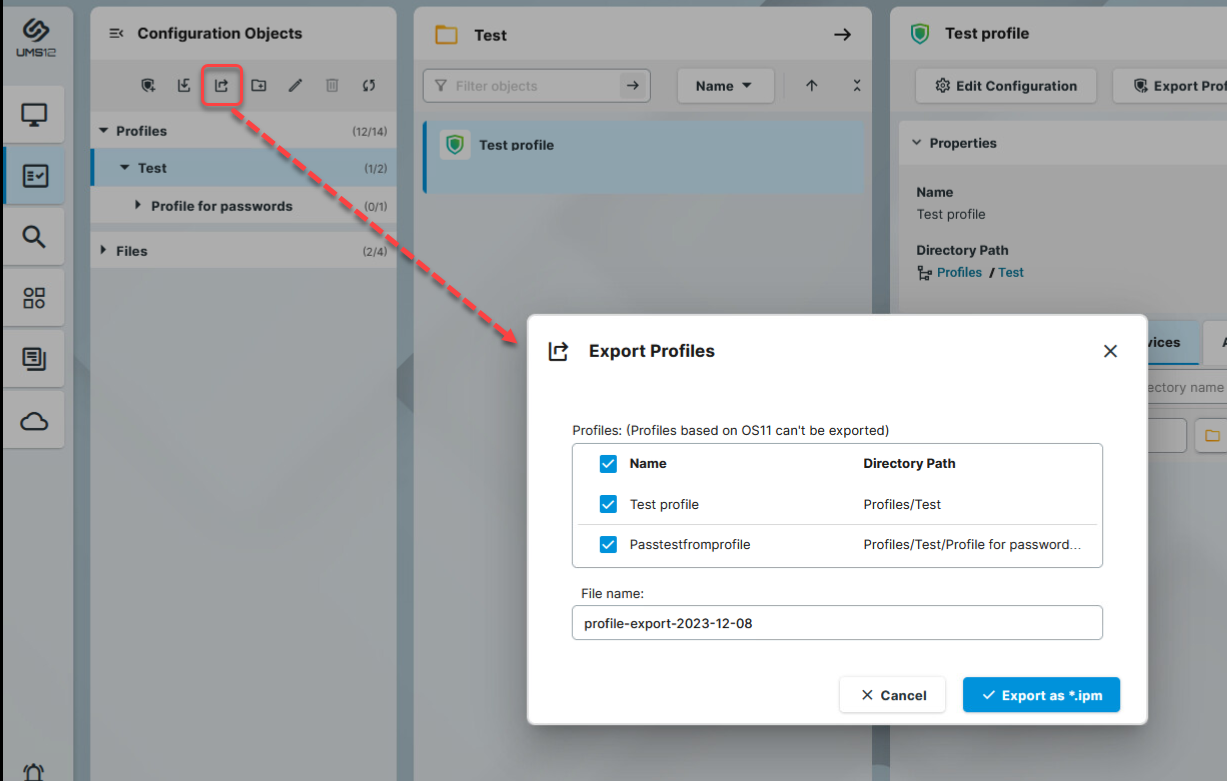
Select the profiles you want to export.
Specify the file name.
Confirm the export.
The exported profiles are saved as an .ipm file, which also includes the metadata of IGEL OS Apps the profiles are based on. Therefore, it is not necessary to additionally import the required apps / app versions from the IGEL App Portal (or from the UMS).
If the UMS to which you import the exported file has UMS as an Update Proxy feature activated but the fallback to the App Portal is disabled, you may nevertheless require the app binaries, see Configuring Global Settings for the Update of IGEL OS Apps.
You can now import the exported file as described below.
All passwords are excluded, i.e. replaced with a placeholder in the exported file. If you import the exported device settings later as a profile, no passwords will be included. You will have to set the passwords anew.
Importing Profiles
To import profiles, proceed as follows:
Under UMS Web App > Configuration, click Import Profiles
 .
.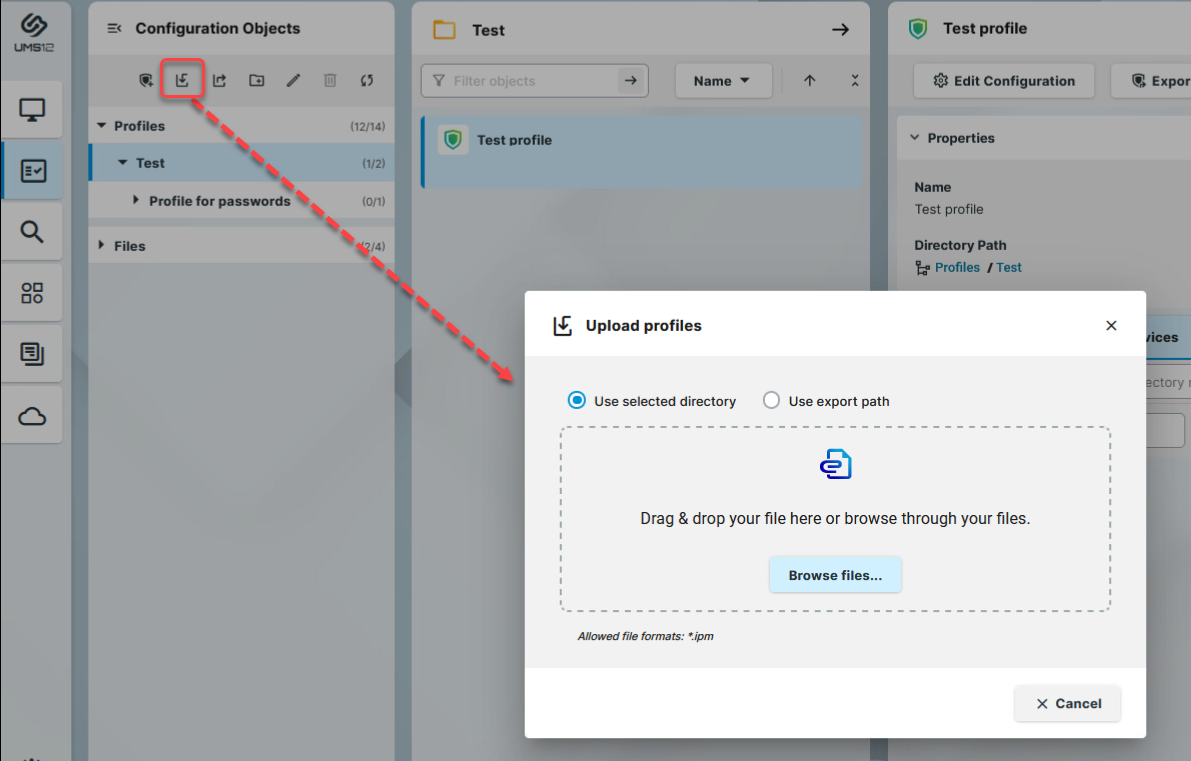
Select if the profile(s) should be placed in the highlighted directory or if the original directory path of the profile(s) should be retained.
Select the file containing your profile(s).
When the upload is complete, confirm the import.
The corresponding profiles will be imported to the UMS together with the metadata of IGEL OS Apps these profiles are configuring.
If required, you can now assign the profiles to your endpoint devices.
Profiles can be imported as priority profiles (and vice versa).