In the IGEL Universal Management Suite (UMS) Web App, you can grant users and user groups permissions (access rights) to configuration object directories. This article explains how to manage these permissions if you have access management rights.
For information on how to manage permissions in the UMS Console, see Object-Related Access Rights.
Object Permissions Basics
Object permissions control access to configuration objects such as files and profiles. Other permission types exist to manage administrative roles and access to management areas. For an overview on other types of permissions, see .
Key Principles
-
Deny overrides Allow
If a permission is explicitly denied, it takes precedence over any allowed setting. -
Not Set equals no permission granted, but modifiable
Permissions left as Not Set are not granted and can be overridden by either Allow or Deny. -
Directory-level permissions
In the UMS Web App, permissions can only be set at the object directory level (not per individual object), providing a clearer overview. -
Permissions are inherited downward:
-
from parent directories to subdirectories
-
from user groups to their members
-
Types of Access Rights
You can set the same rights as in the UMS Console, for example, Read and Write. For an overview, see Available Rights.
Permission Change Logs
You can find the change logs related to permission changes through the UMS Web App in Logging in the IGEL UMS Web App and Remote Security Logging.
Changing Object Permissions
Option 1 - Change Permissions in the User Management Area
In the User Management area, you can change object permissions by selecting a user or a group and clicking Change Permissions > Object.
Here, you can only set the permissions for the root nodes of the objects, that is, for all devices, all files, etc. and not for the directories.
Result on inheritance:
Files root node:
Files directory:
Option 2 - Change Permissions in the Configuration Area
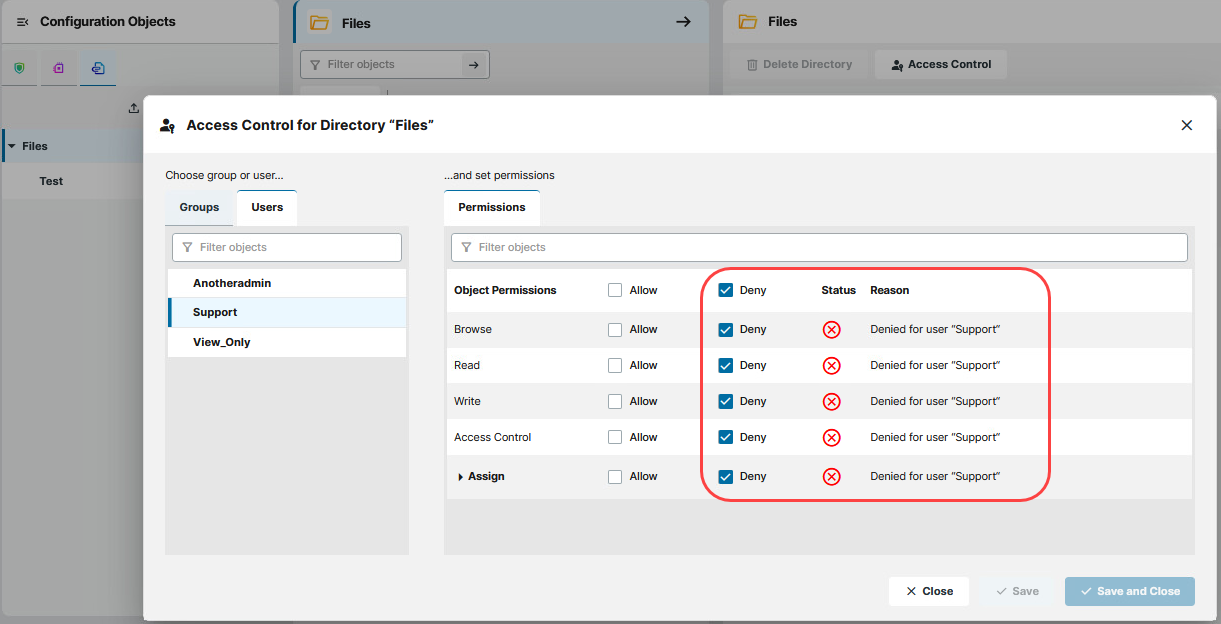
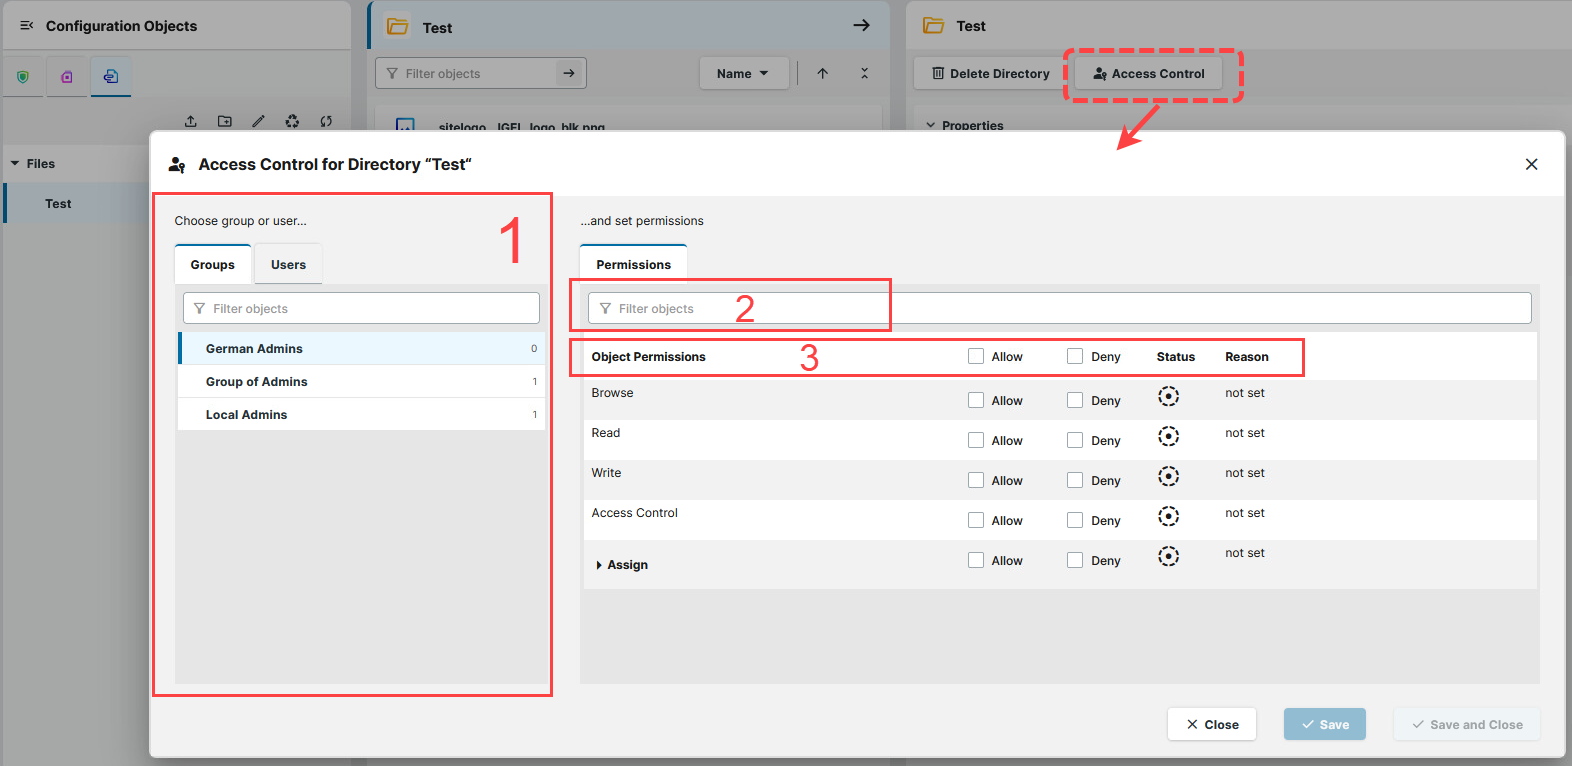
You can change the permissions of users related to an object by navigating to the object and clicking Access Control to open the Access Control dialog. For example, if you want to allow some users to read a file directory, navigate to the file directory and click Access Control. You will see the object name displayed in the title of the dialog.
You need to have the Access Control permission set to allowed, to see and change permissions of users and user groups for the selected object directory. As a user without allowed Access Control, you see a greyed-out dialog:
In the Access Control dialog, you can do the following:
-
On the left hand side, you can select the Groups or Users tab to browse the list of user groups or individual users. You can edit the permissions of a user or user group selected from the list. You can also filter for groups or users by their name.
-
Using the search bar, you can filter for permissions.
-
Using the top row, you can Allow or Deny all of the permissions. Associated permissions are automatically set together. Enabled permissions or denials relating to nodes affect all objects within the node.
Checking Object Permissions of Users
Option 1 - Check Permissions in the User Management Area
You can check on the root node permissions of users and groups, and the inheritance from groups to users.
For example:
Option 2 - Check Permissions in the Configuration Area
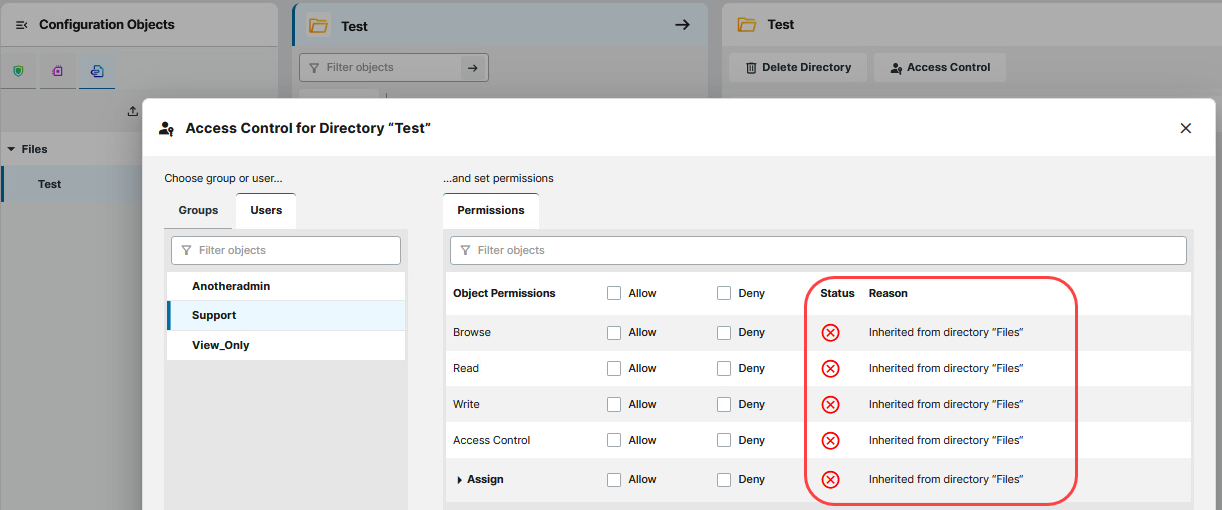
You can check the permissions of a user in the Access Control dialog of the selected object. The rules for determining rights are also explained here under Reason, e.g. whether the permission was granted directly or whether it is granted via a group or an inheritance within the tree structure through a directory. This is called Effective Rights in the UMS Console.
Example Configurations
Example 1 - Allowing View Only Permission
You have a group of users who should only be able to see all the files in the UMS Web App, but not edit them:
-
In the User Management area select a user group or create a user group and assign the selected users to this group as described in How to Create User Groups in the IGEL UMS Web App.
-
Go to the Object permissions tab and find Files in the list.
-
Set the Browse and Read permissions to Allow.
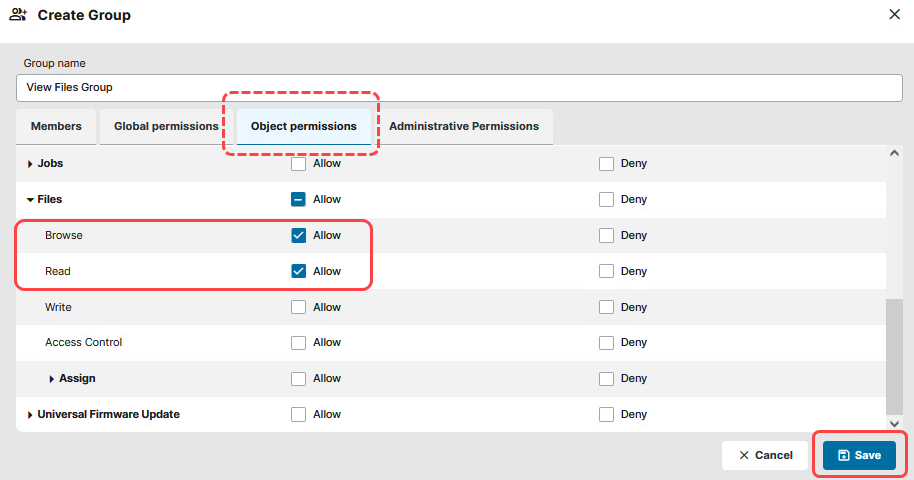
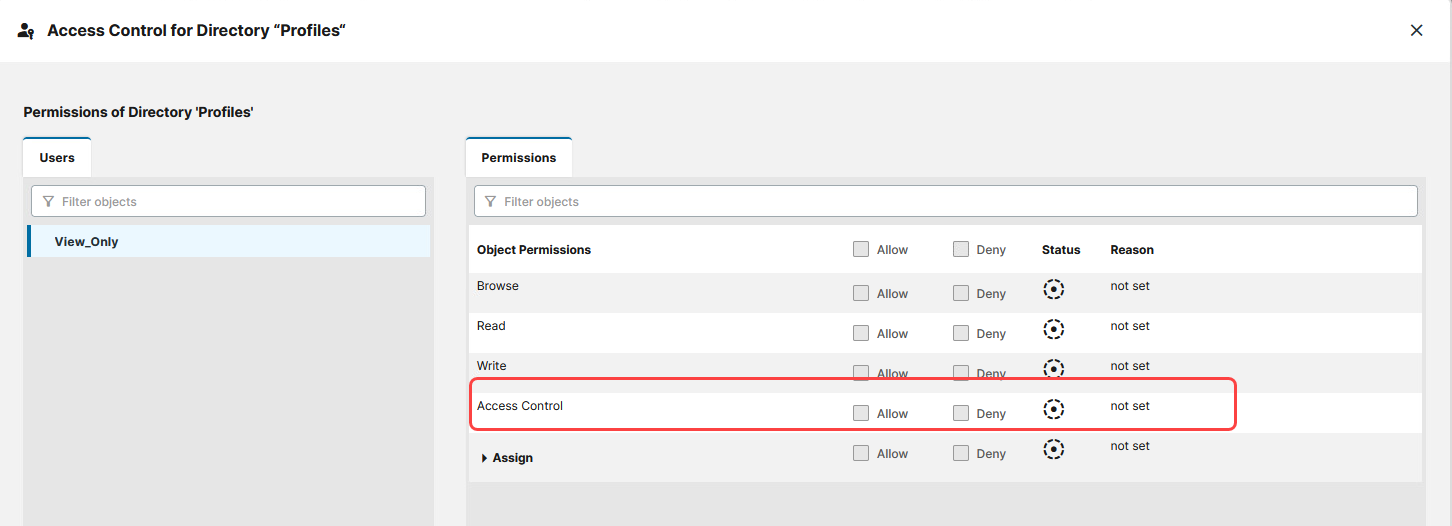
You can leave other permissions as Not set, so that they are not granted, but you have the option to later set those to Allow for the individual users. If you set other permissions to Deny, they will override Allow permissions of individual users.
-
Save the configuration.
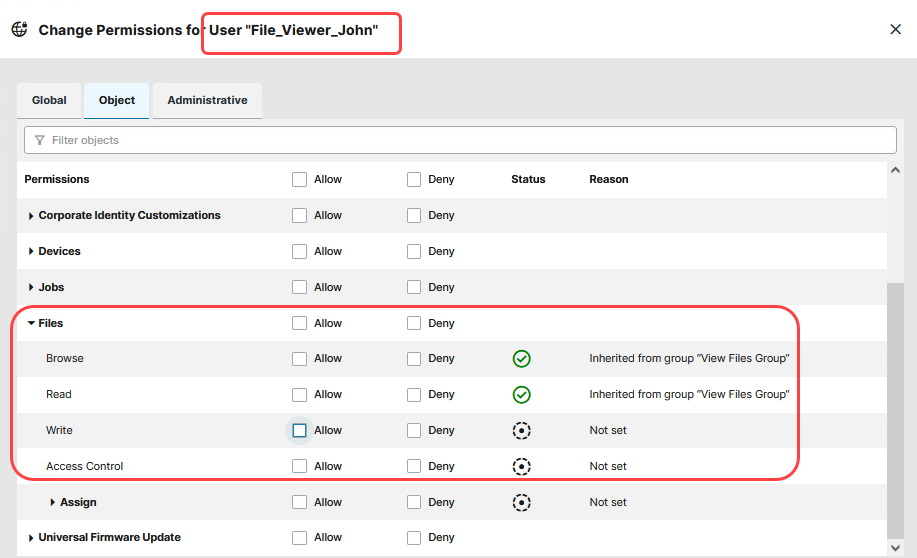
This way, you grant the browse and read rights for the root node of the Files, that is, for all files. The users of the group, for example, File_Viewer_John, will be able to see all files as the permission is inherited by all directories.
Example 2 - Inheritance of Permissions
You have a group of users who should have full access to all devices except for one device directory:
-
Under User Management > Groups, select the user group.
-
Set Device permissions to Allow.
-
Save the configuration.
-
Go to the device directory that should be restricted and click Access Control.
-
Under Groups, select the user group.
-
Set permissions to Deny.
-
Save the configuration.
You can check that the users of the group have the permissions allowed for all device folders due to inheritance but denied for the one folder due to direct settings.