
In this article, you learn how to configure and manage external storage servers to provide your virtual machine images and how to distribute the images to your target machines.
Currently, the following protocols are available:
-
WebDAV (HTTPS or HTTP)
-
SFTP
-
SMB (Windows file share)
Setting the Permissions in the UMS
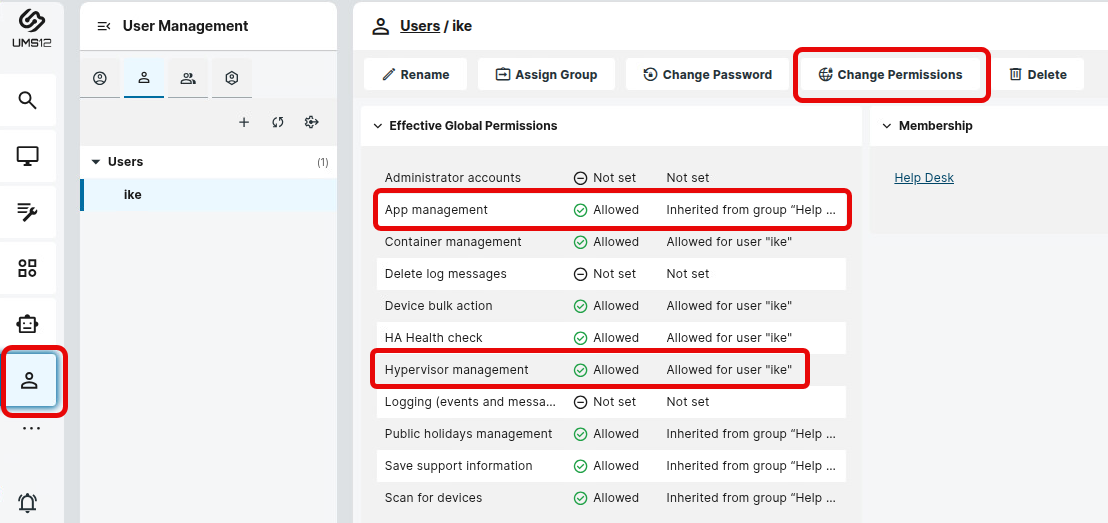
To manage your IGEL Managed Hypervisor environment, you need the relevant permissions in the UMS.
→ In the UMS Web App, go to the User Management area, select the user designated for IMH management and assign the following permissions:
-
-
App management
-
Hypervisor management
-
Deploying Your Image
To make a VM image available in a profile, the image’s status must be set to deployed.
-
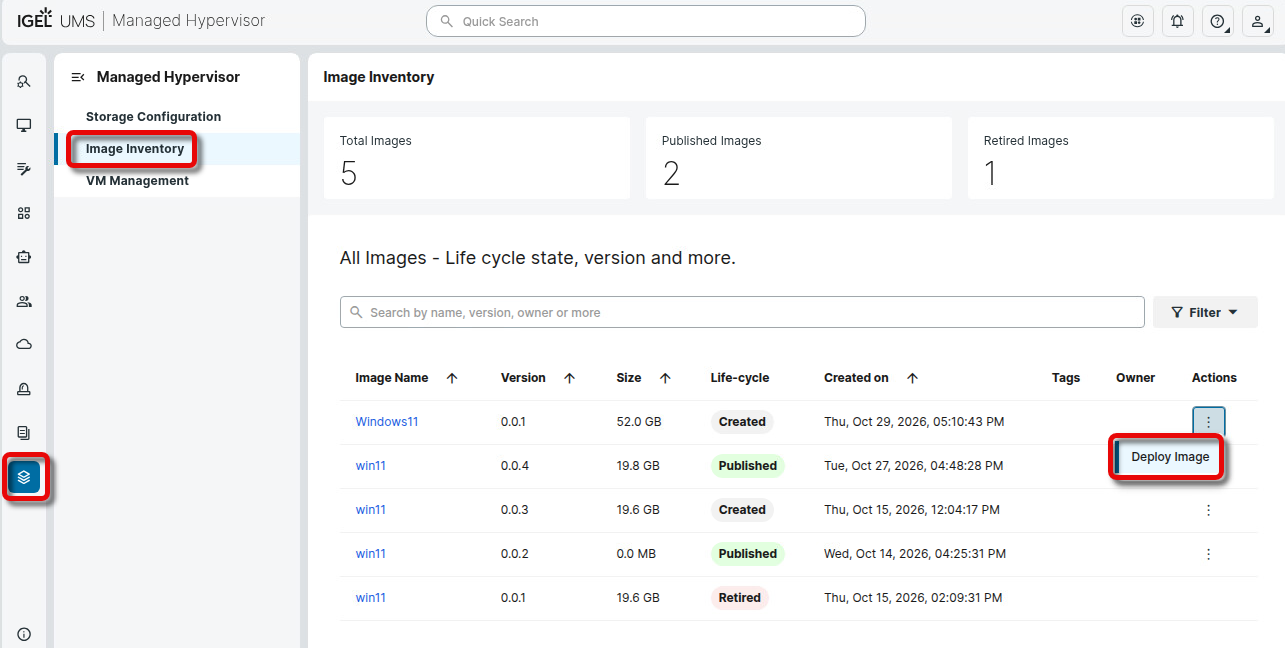
In the UMS Web App, go to IGEL MANAGED HYPERVISOR > Image Inventory and click Deploy Image.
Clicking Deploy does not trigger any action. The status deployed is only used for making the image available and for tracking purposes.
-
Confirm the dialog.
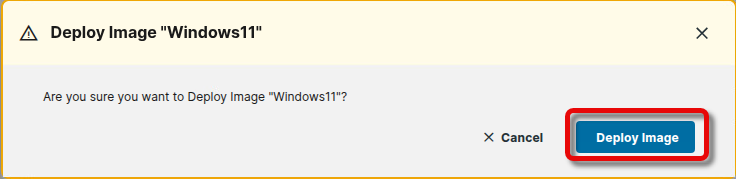
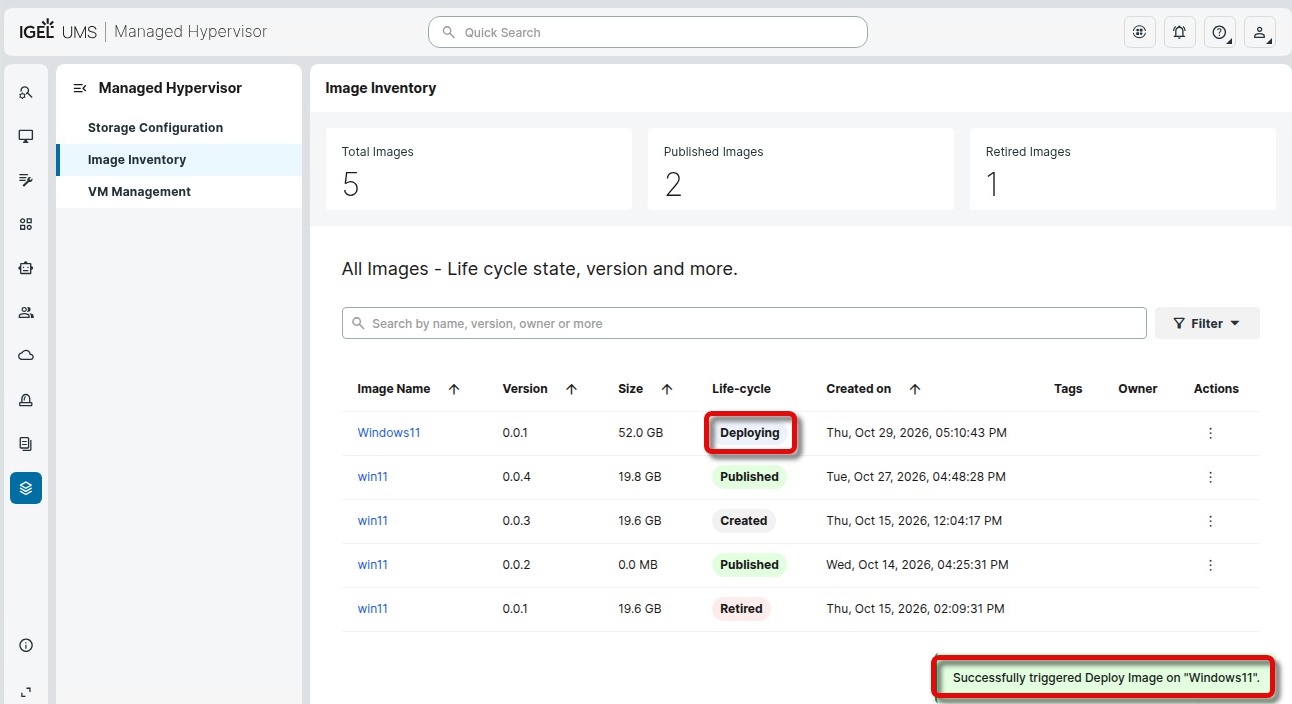
The image is deployed and can be assigned to a target machine via a UMS profile.
Configuring Storage
In this section, you provide the UMS with the access data for the storage server(s). This information will be used in the profiles that configure the virtual machines for the target endpoints.
-
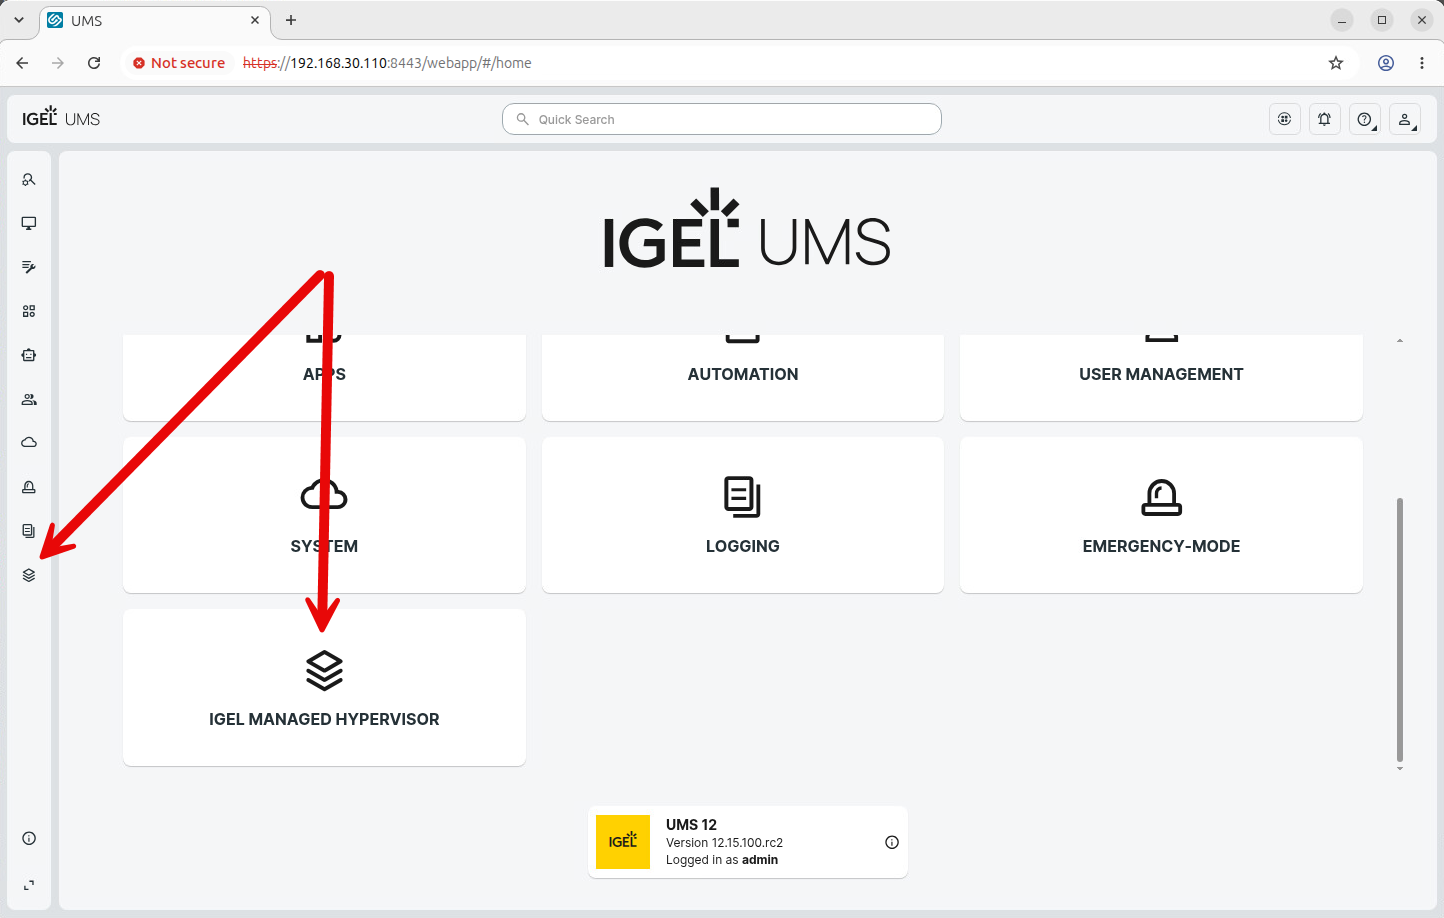
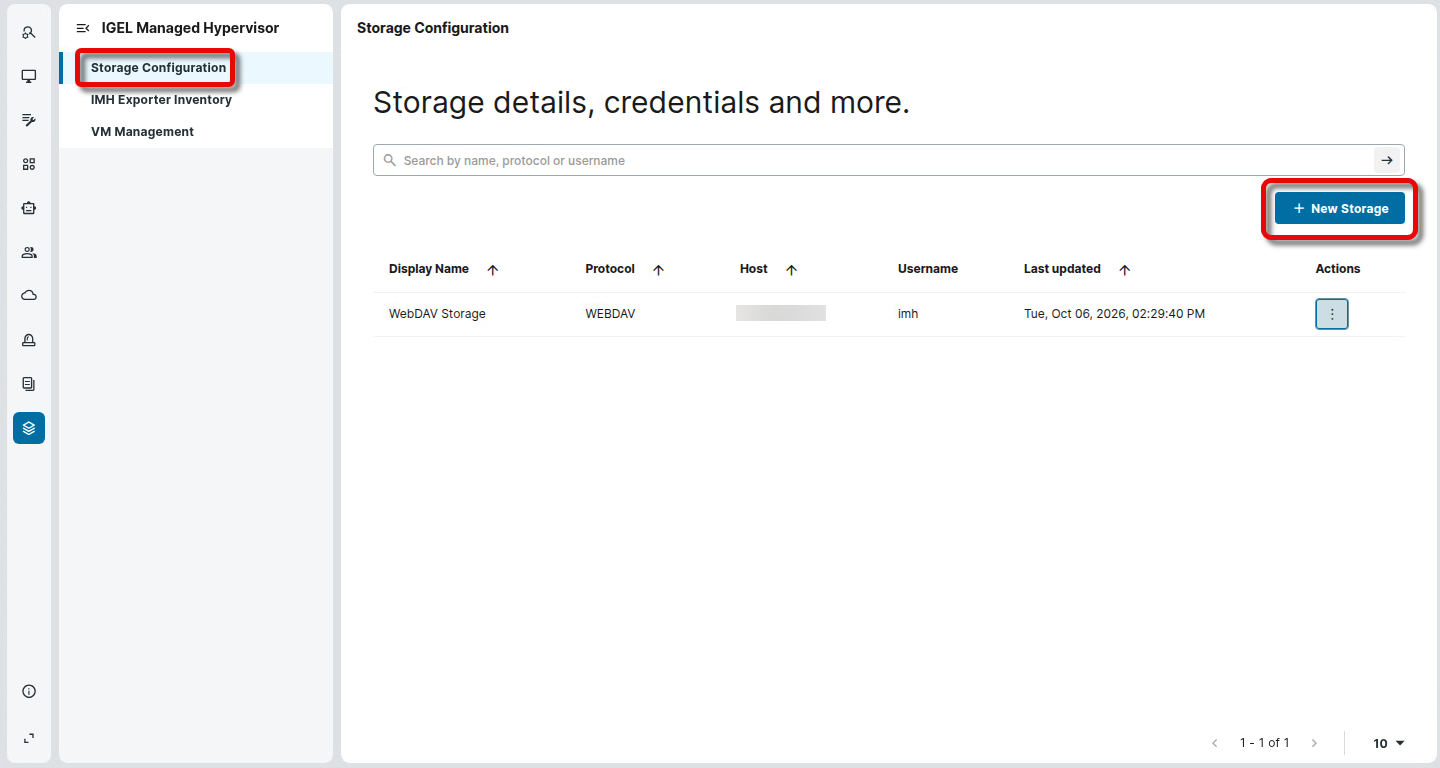
In the UMS Web App, go to IGEL MANAGED HYPERVISOR > Storage Configuration and click New Storage.
-
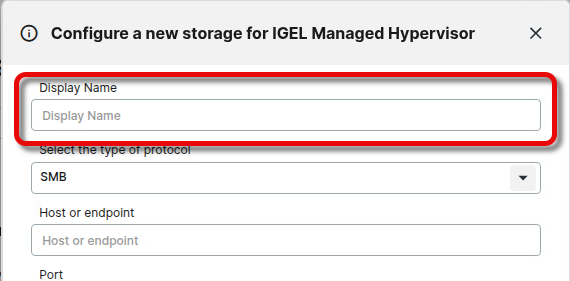
Under Display Name, define a name for this storage.
-
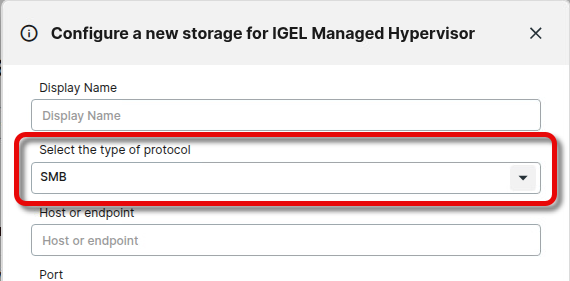
Under Select the type of protocol, select the protocol to be used for data transfer and provide the relevant data, then click Save.
-
-
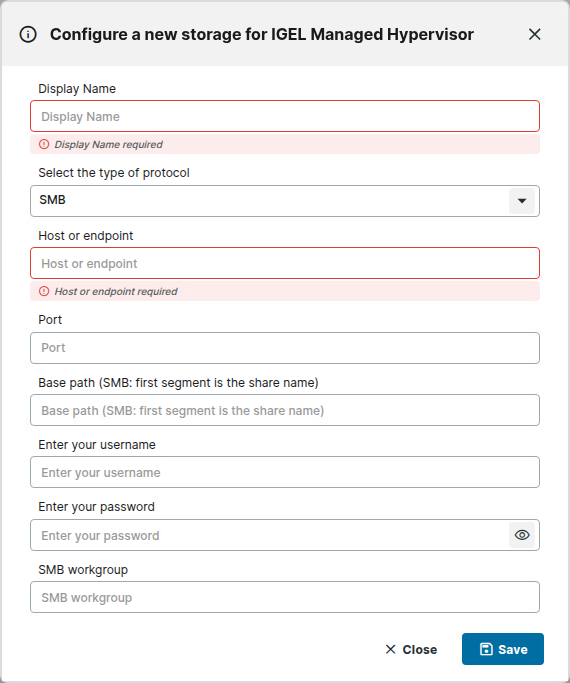
If you selected SMB (Windows network file share):
-
Host or endpoint: The hostname or IP address of the storage server
-
Port: The port on which the storage server receives data
-
Base path (SMB: first segment is the share name): The name of the shared folder in which the images are stored
-
Enter your username: The username for the shared folder
-
Enter your password: The password for the shared folder
-
SMB workgroup: The Windows domain (Active Directory) the account belongs to, if applicable. Leave blank for local/workgroup accounts.
-
-
-
-
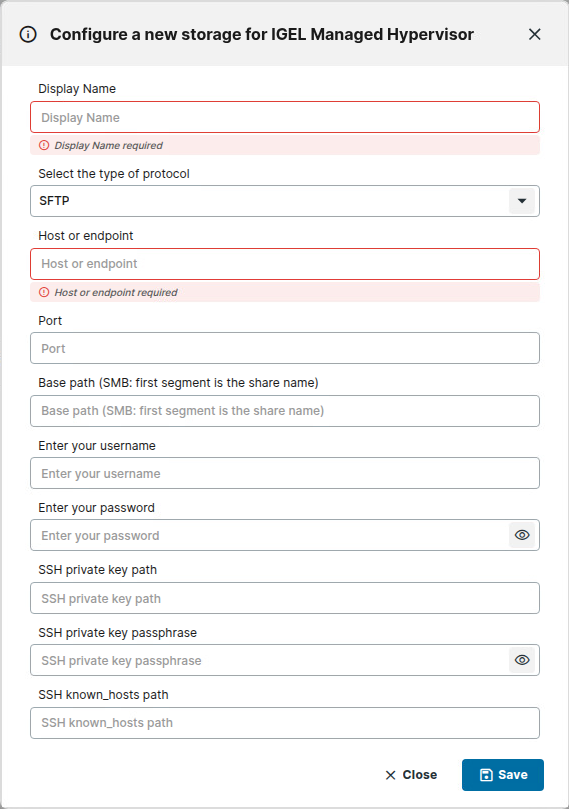
If you selected SFTP (SSH File Transfer Protocol):
-
Host or endpoint: The hostname or IP address of the storage server
-
Port: The port on which the storage server receives data
-
Base path (SMB: first segment is the share name): The path to the folder in which the images are stored
-
Enter your username: The username for the storage server
-
Enter your password: The password for the storage server
-
SSH private key path: Instead of a password, you can authenticate with an SSH private key file. The SSH private key file must be stored on the device; for details, see How to Assign Objects in the IGEL UMS Web App.
-
SSH private key passphrase: Only needed if your private key file is itself password-protected. If your key has no password, leave this field blank.
-
SSH known_hosts path: The
known_hostsfile must be stored on the device; for details, see How to Assign Objects in the IGEL UMS Web App.
-
-
-
-
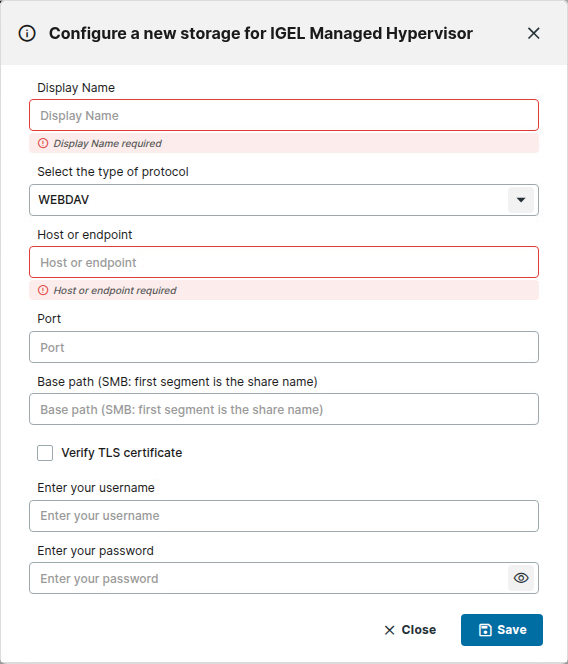
If you selected HTTPS or HTTP (WebDAV is used for file transfer):
-
Host or endpoint: The hostname or IP address of the storage server
-
Port: The port on which the storage server receives data
-
Base path (SMB: first segment is the share name): The path to the folder in which the images are stored
-
Verify TLS Certificate (if HTTPS is used): When enabled, the endpoint must present a valid, CA-trusted HTTPS certificate. If you are using a self-signed certificate, e.g., in a local test setup, disable this option. For anything but local test setups, a CA-trusted HTTPS certificate should be used, and the option should be enabled.
-
Enter your username: The username for the storage server
-
Enter your password: The password for the storage server
-
-
The new storage is listed under Storage Configuration.
In the current version, the connection to the storage server is not checked by the UMS. All data about the images is provided by the IMH Exporter.
Editing a Storage
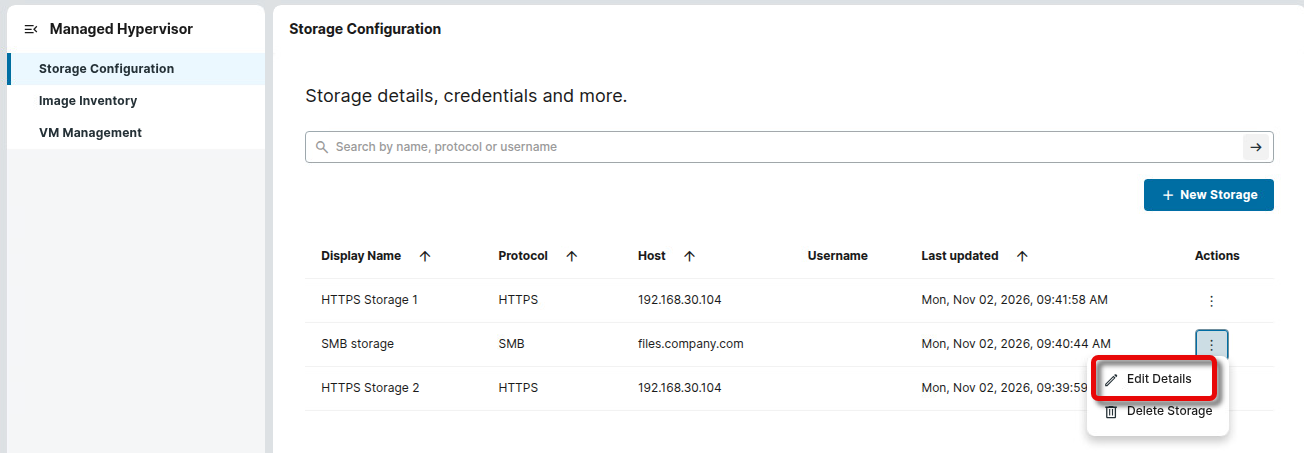
If the access data of a storage server has changed, you can edit the select the relevant settings accordingly.
To edit a storage:
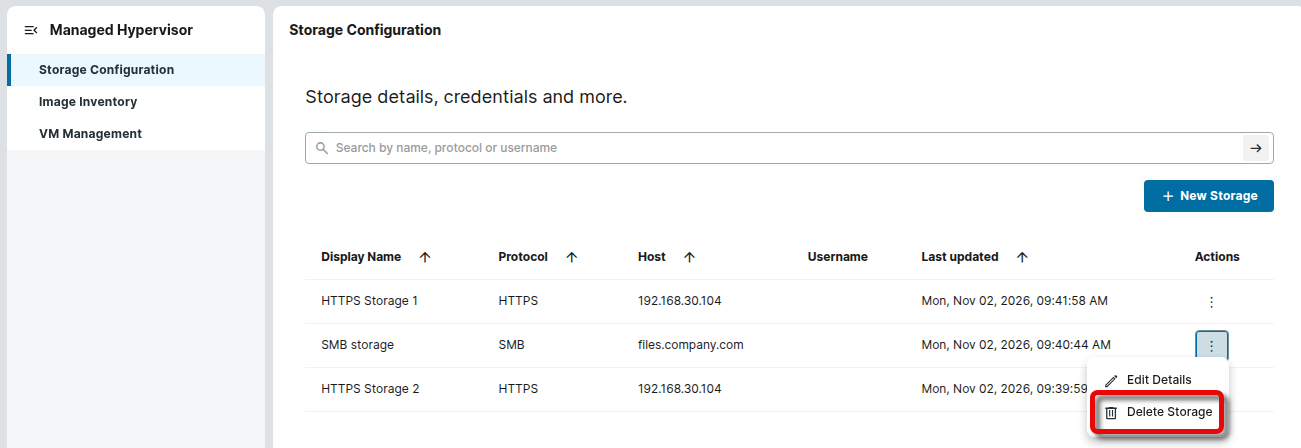
→ Open the context menu of the relevant storage server and select Edit Details. For a description of the details, see Configuring Storage.
Deleting a Storage from the UMS
If a storage server is no longer used, you can delete it from the UMS. This will not affect the storage server itself; only the configuration entry is deleted from the UMS.
Please note the following conditions for deleting a storage server from the UMS:
-
When a storage server is used in a profile for the first time, a 7-day grace period begins. During this period, you cannot delete the storage.
-
After the 7-day grace period, the storage can be deleted, but only if it is not currently used in a profile.
To delete a storage:
→ Open the context menu of the relevant storage server and select Delete Storage.
Configuring the Target Devices
-
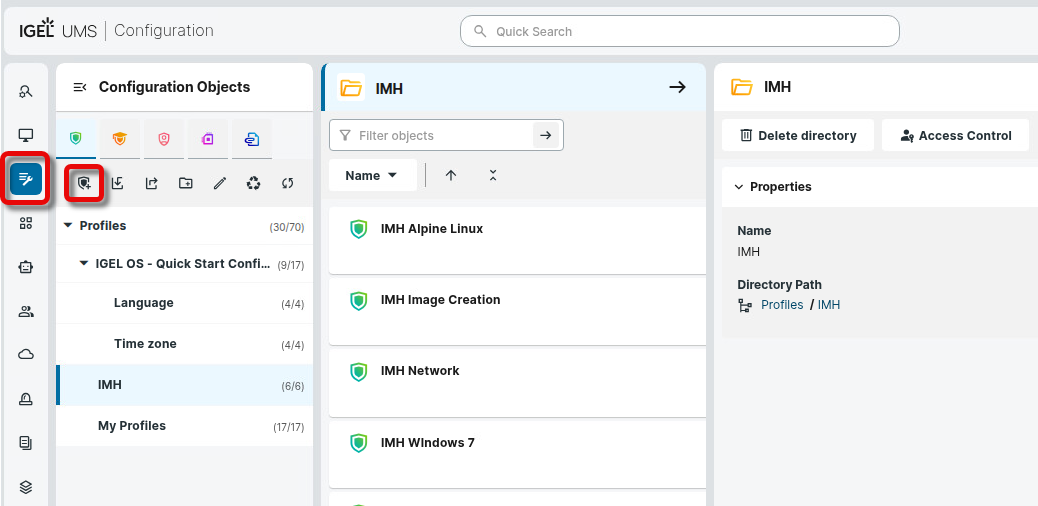
In the UMS Web Console, go to Profiles and create a new profile.
-
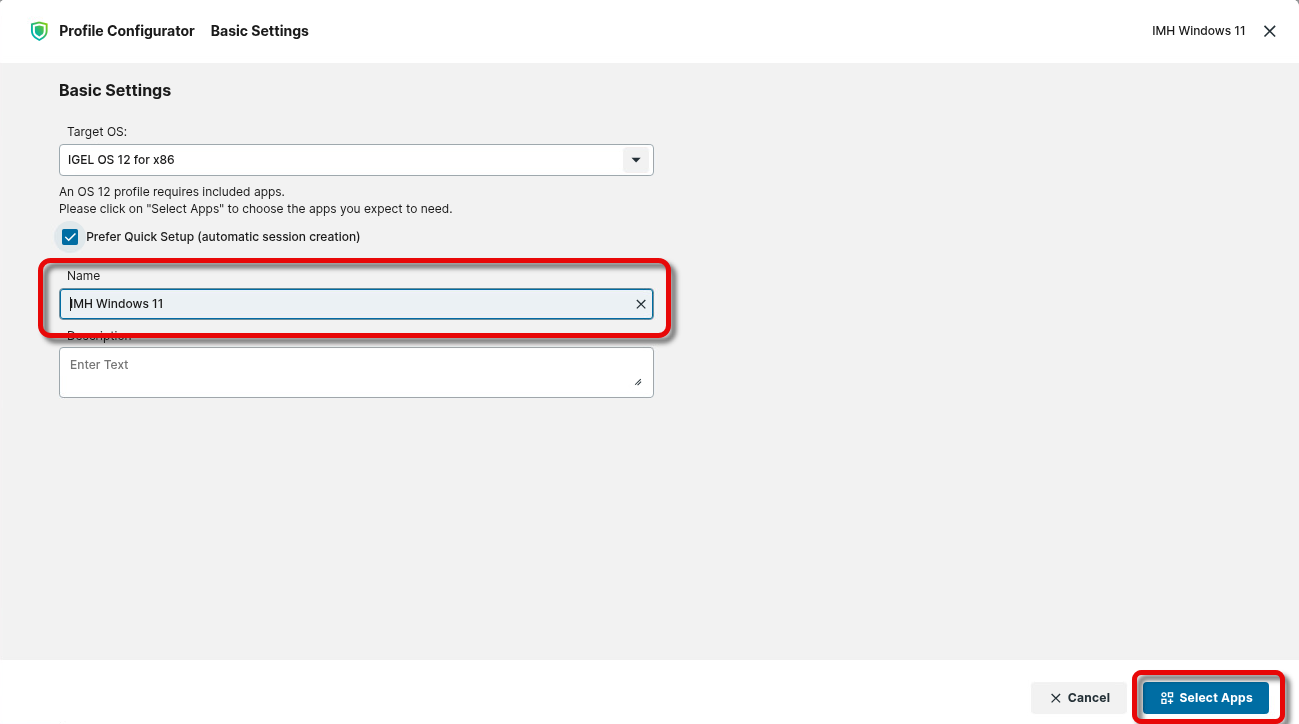
Provide a Name for the profile and click Select Apps.
-
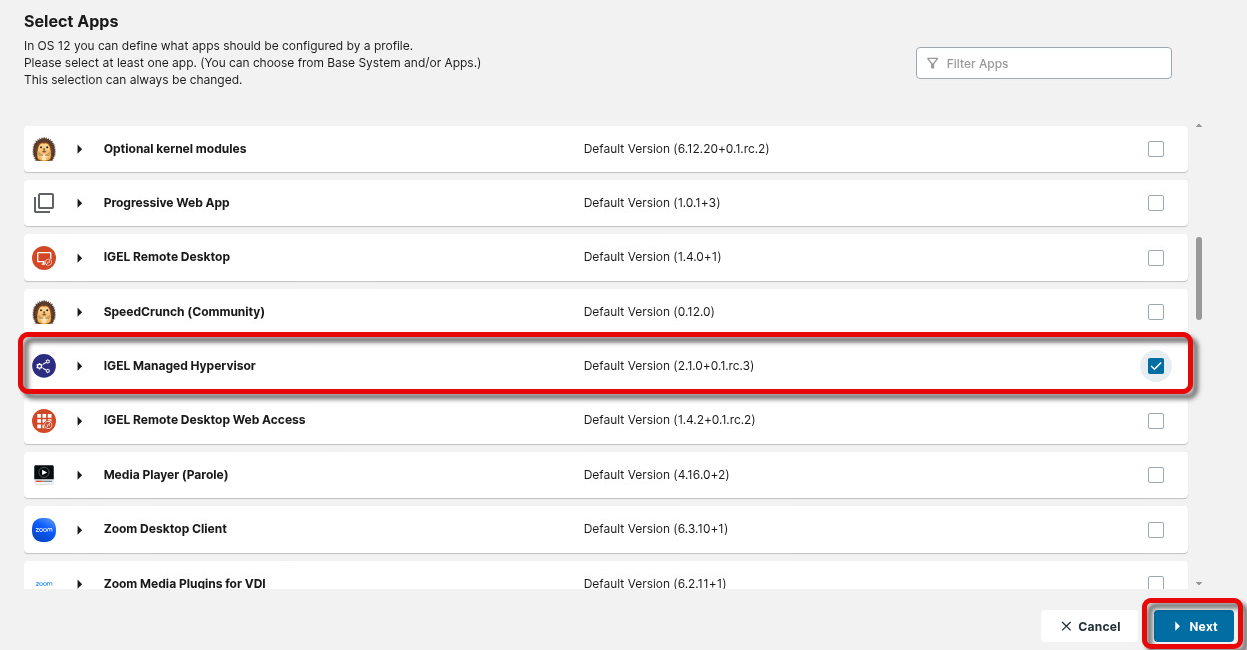
Select the app IGEL Managed Hypervisor and click Next.
-
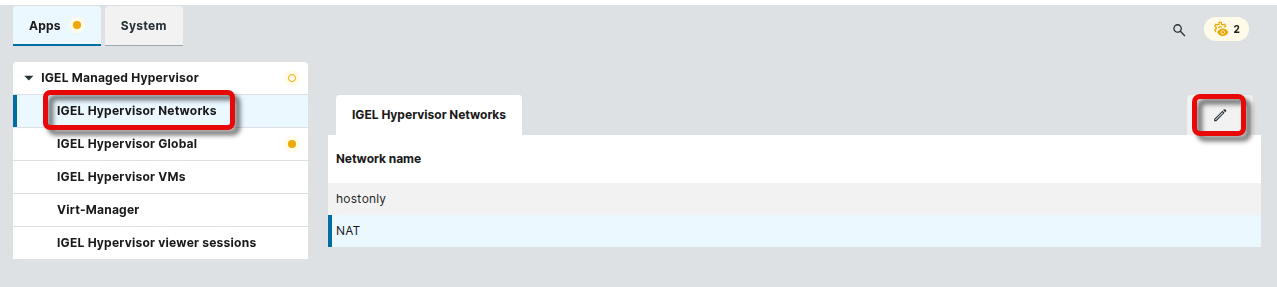
If you want to customize the network settings for your virtual machine, make the relevant changes under IGEL Hypervisor Networks.
-
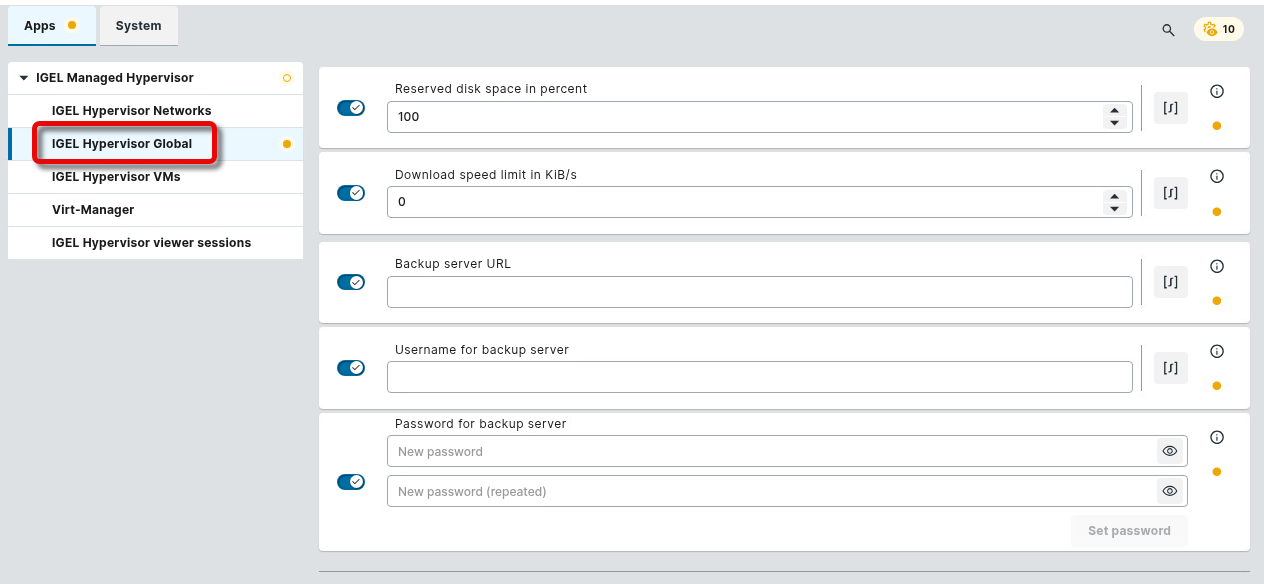
To change the disk space to be reserved for the virtual machine, set a download speed limit, or to configure backups for your virtual machines, make the relevant changes under IGEL Hypervisor Global.
-
-
Reserved disk space in percent: The percentage of free disk space that will be used by the virtual machine(s).
-
Backup server URL: The URL of the server where backups of your virtual machine are to be stored.
-
Username for backup server: The username for the backup server
-
Password for backup server: The password for the backup server
-
Verify TLS Certificate (only relevant if you are using HTTPS): When enabled, the endpoint must present a valid, CA-trusted HTTPS certificate. If you are using a self-signed certificate, e.g., in a local test setup, disable this option. For anything but local test setups, a CA-trusted HTTPS certificate should be used, and the option should be enabled.
-
Workgroup name for backup SFTP server (only relevant if you are using SMB): The Windows domain (Active Directory) the account belongs to, if applicable. Leave blank for local/workgroup accounts.
-
SSH private key path (only relevant if you are using SFTP): Instead of a password, you can authenticate with an SSH private key file.
-
SSH private key passphrase (only relevant if you are using SFTP): Only needed if your private key file is itself password-protected. If your key has no password, leave this field blank.
-
SSH known_hosts path (only relevant if you are using SFTP): Path to the SSH known_hosts file used to verify the identity of the SFTP backup server
-
-
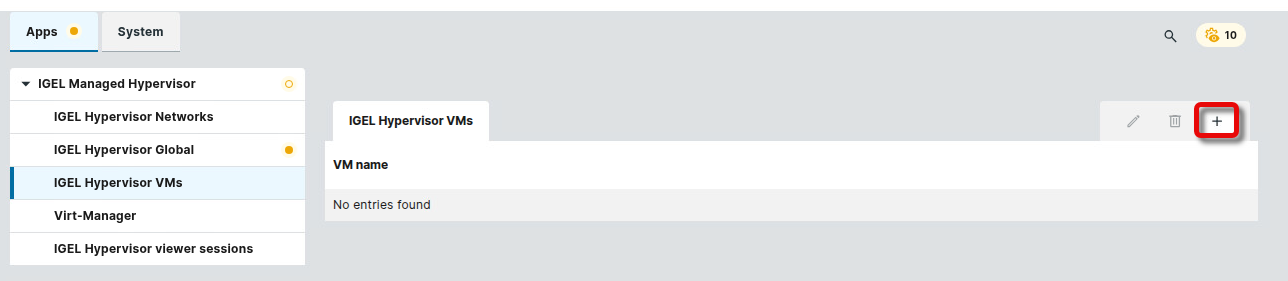
To configure the settings for your virtual machine, click

-
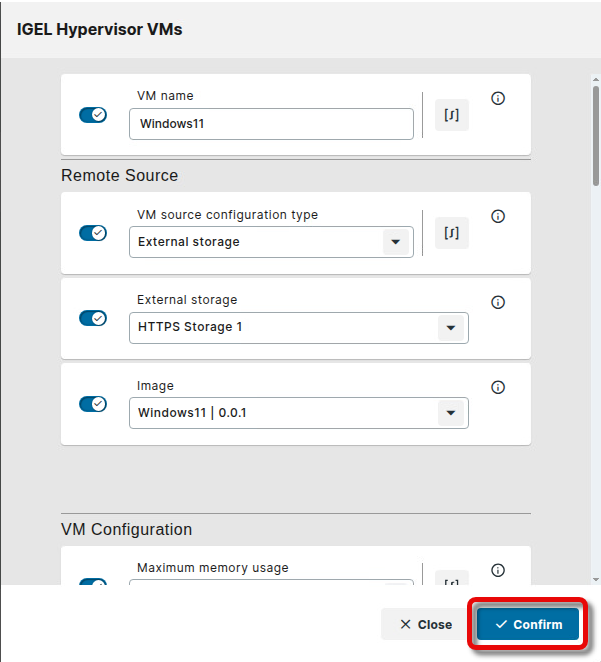
VM name: Enter a name for your virtual machine. Please note that no spaces are allowed.
-
VM source configuration type: Specifies whether the location of the image is one of the configured storage servers under IGEL MANAGED HYPERVISOR > Storage Configuration or is defined here.
-
Config URL: This option is for backward compatibility for IGEL Managed Hypervisor 2.0. The access data is defined here. For details, see Configuring Storage, step 3.
-
External Storage: Select the storage server that contains the desired image.
-
-
Image: Select the image for your virtual machine (Format: <IMAGE NAME> | <VERSION>). Backward compatibilty note: If you are running IGEL Managed Hypervisor 2.0, enter the name of the image (image name only, no versioning).
-
Maximum memory usage: The maximum memory (RAM) used by the virtual machine
-
Number of vCPUs: The number of virtual CPUs
-
Autostart: When enabled, the virtual machine will be started automatically
-
Disk Image is immutable: If enabled, changes in the virtual machine will be undone when it is restarted. This overrides the settings for Role as described in Exporting Your VM Image to a Server for Distribution, step 3.
-
Network source (virtual network 0 … 3): The following networks are supported on the target machines:
-
isolated: The network interface is deactivated in the virtual machine.
-
NAT: Network Address Translation (NAT) is used; the host machine translates the internal IP address of the virtual machine to its own IP address.
-
bridged: The network device specified in Network device used for this VM. Will be ignored for some pre-configured bridge devices is used.
-
hostonly: The preconfigured host-only bridge is used.
-
macvtap: The network device specified in Network device used for this VM. Will be ignored for some pre-configured bridge devices is used with the macvtap driver.
-
-
MAC address for virtual interface (virtual network 0 … 3): You can specify the MAC address of your virtual machine’s network interface. This is useful if the software in your virtual machine is licensed for a specific MAC address.
-
Network device (virtual network 0 … 3): Create a network interface by setting the Registry key network.interfaces.ethernet.device<NUMBER>.bridge (System tab > Registry > network > interfaces > ethernet > device<NUMBER>.bridge to own). Example: If the setting has been made for
device0, the network interface’s name will bebreth0. Enter the resulting name in this field. Please note that this will be ignored for some pre-configured bridge devices. -
Device model (virtual network 0 … 3): Select which emulated network card that will be presented to the guest machine
-
rtl8139
-
e1000e
-
virtio
-
-
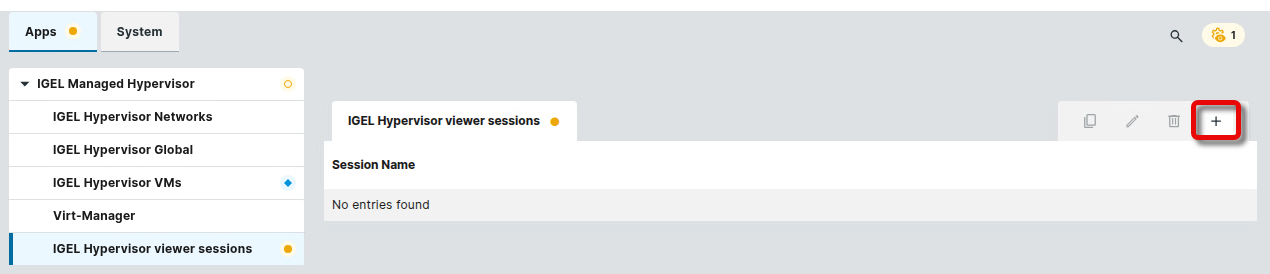
To create the start and stop options for your virtual machine, go to IGEL Hypervisor viewer sessions, and click
-
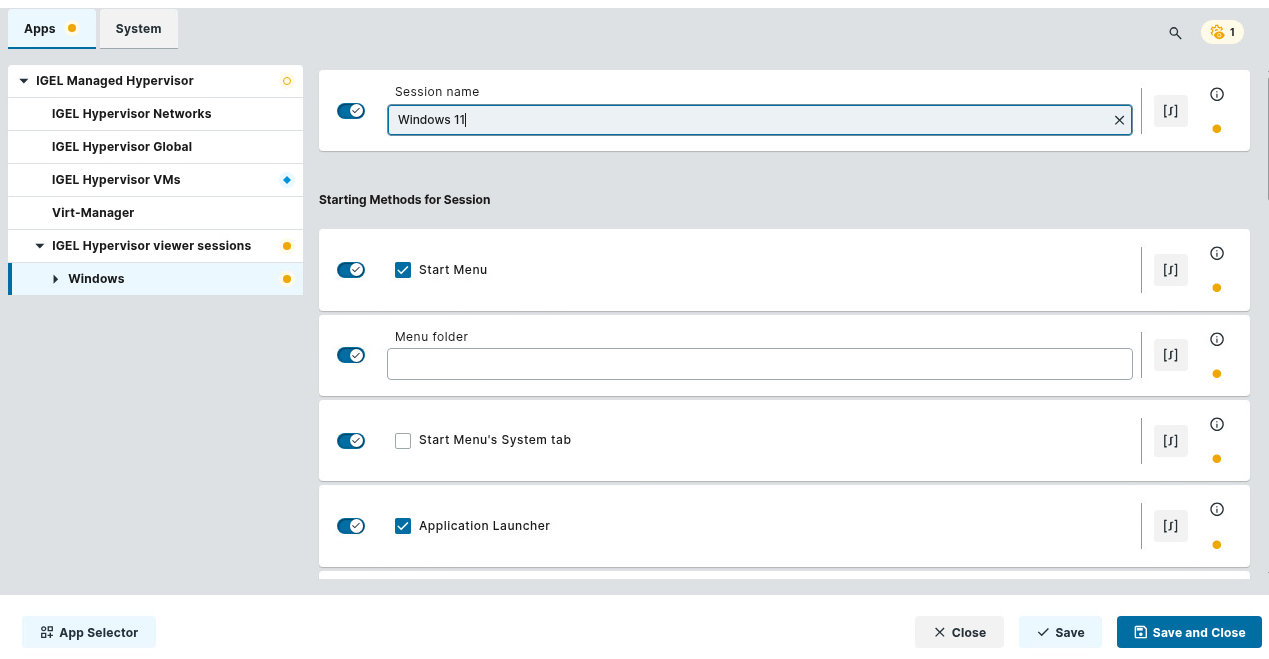
Enter a Session name and configure the start options according to your needs. For details on the start options, see Starting Methods for Apps .
-
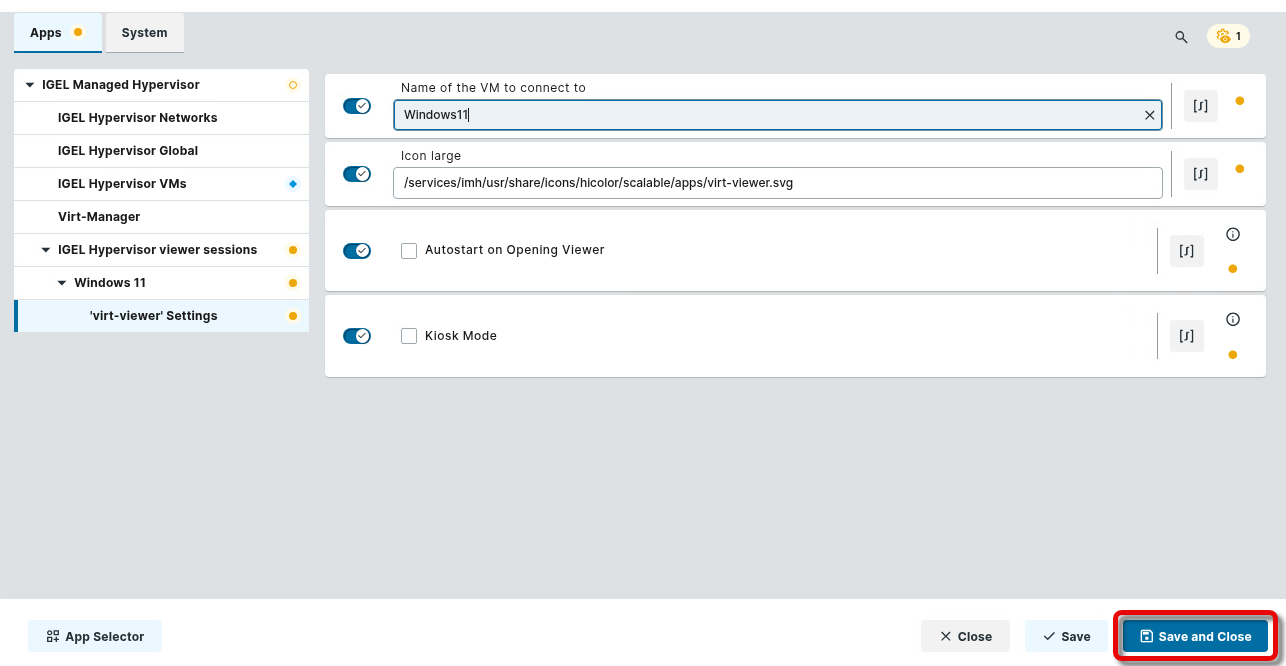
Go to ‘virt-viewer Settings’ and edit the data according to your needs:
-
-
Name of the VM to connect to: The name of the virtual machine you have created
-
Icon large: By default, a generic icon will be used as the start icon. You can add the path to a custom icon.
-
Autostart on opening viewer: If activated, the virtual machine will be started as soon as the viewer ist started.
-
Kiosk Mode: If enabled, the user views the virtual machine in full-screen mode with limited controls, allowing interaction only with the VM itself. The viewer automatically connects to the specified virtual machine on startup..
-
-
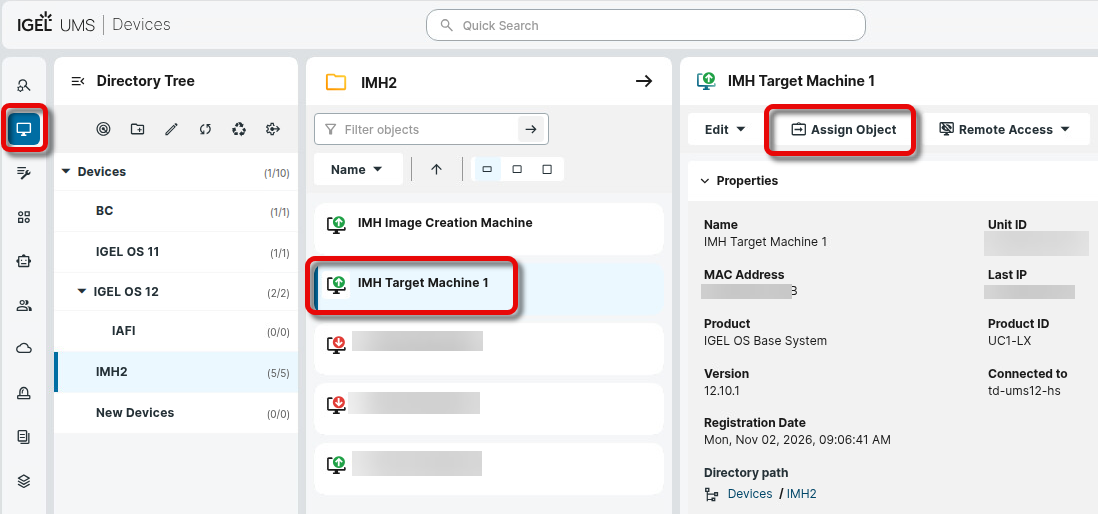
Go to Devices, select your target machine, and click Assign Object.
-
Find and select your profile and assign it to your device.
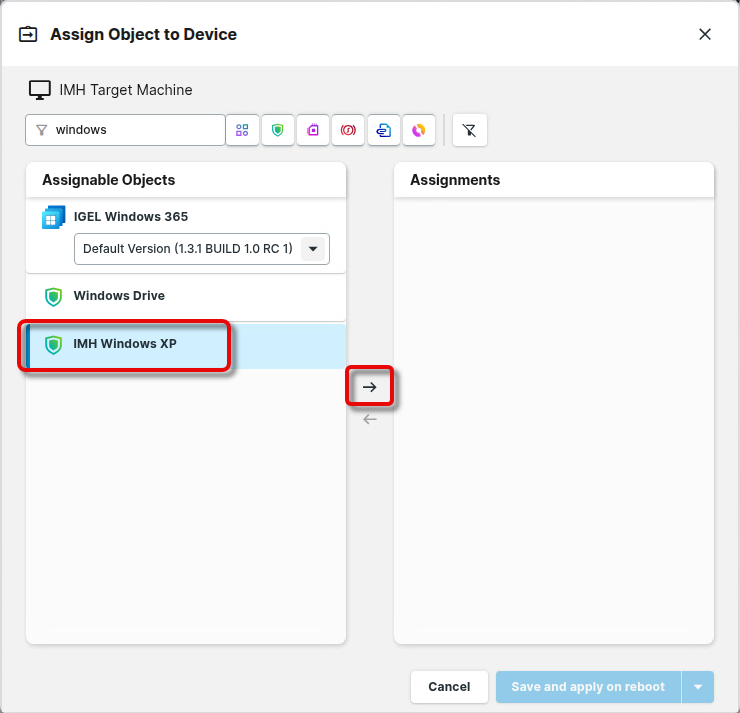
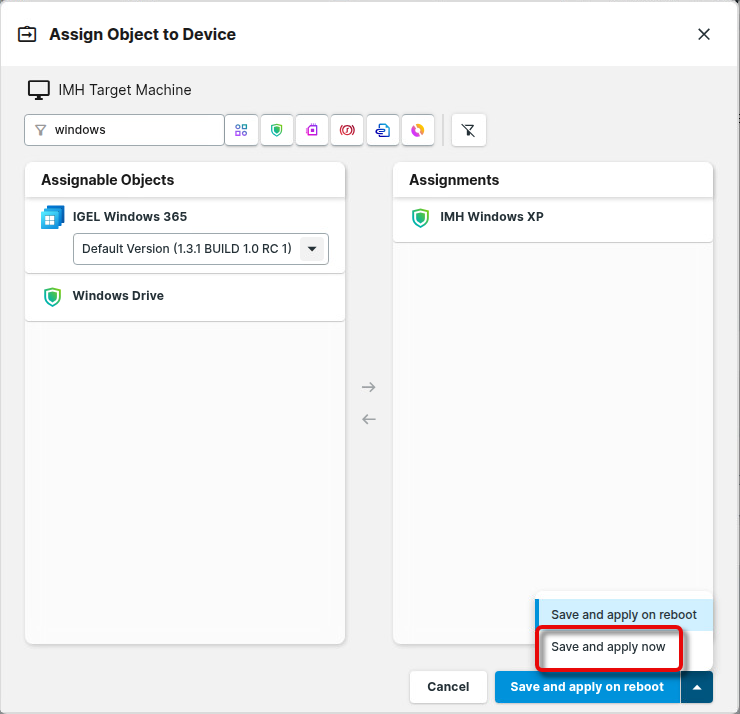
When the profile is applied, the device downloads and installs the IGEL Managed Hypervisor app. Afterward, it downloads the virtual machine from the repository. You can now access, start, and stop the virtual machine via the start icon.
For details on how the virtual machine can be managed from the UMS, see How to Manage Virtual Machines Running on IGEL OS 12 from the IGEL UMS Web App.
Troubleshooting
Failure in Pulling a License Prevents a Virtual Machine from Being Created
Issue
During the creation of a virtual machine, the licensing has failed. Retrying fails because the logical volume has already been created.
Workaround
-
Open a terminal, log in as root, and type
lvs. -
In the output, check for the name of your virtual machine as a disk (e.g.,
winxp_d0_kml_encr). -
If the unnecessary disk is listed in the output, use
lvremoveto delete it, e.g.lvremove igel/winxp_d0_kml_encr
After about 30 sec, the download will be retried.
→ Alternatively, you can remove the profile from the device and then reassign it.