Tray applications in IGEL OS 12 provide quick access to device settings such as Wi-Fi, display, sound, battery status, and UMS connectivity. From the system tray, users can quickly view system status, manage network connections, or adjust hardware settings without access to the IGEL Setup. This article provides an overview of tray apps and describes their functions in detail.
Tray Apps in This Article

The tray icons change dynamically to represent the current setup or status. If you hover over the icons, tooltips are displayed with further information.
|
Tray Icon |
Link to Section |
Purpose |
|---|---|---|
|
|
Set CPU power plan regulation and show battery information for the device and connected devices. |
|
|
|
Manage Bluetooth devices such as headsets, keyboards, and mice. |
|
|
|
Configure monitor layout, resolution, and other display settings. |
|
|
|
Change language settings for the keyboard and the user interface. |
|
|
|
Display and monitor the status of the wired Ethernet network connection. |
|
|
|
Connect to and manage mobile data networks using a WWAN modem or SIM card. |
|
|
|
Adjust mouse and touchpad behavior, such as speed, scrolling, and pointer settings. |
|
|
|
Connect to and monitor the VPN connection. |
|
|
|
View and manage configured printers and printer status. |
|
|
|
Select audio devices and control input/output volume settings. |
|
|
|
Display the device’s connection status and information for the IGEL Universal Management Suite (UMS). |
|
|
|
Connect to and manage wireless networks. |


Information for Administrators
-
The system tray and most of the tray apps are available to the users by default.
-
You can enable and disable the system tray and the tray apps under User Interface > Desktop > Taskbar Items. For details, see Taskbar Items in IGEL OS 12.
-
The access to tray apps on lockscreen is configured separately under User Interface > Desktop > Screenlock / Screensaver > Taskbar. For details, see Taskbar in Locked Screen in IGEL OS 12.
-
Some configurations available in the tray apps are connected to configurations in the IGEL Setup. For example, printer configurations applied through profiles cannot be modified through the tray app.
UMS Tray App
Access the Tray App
→ Open the UMS tray app by clicking the UMS tray icon. The icon is dynamic and represents the state of the connection as described below.
|
UMS Connection Status |
Taskbar Icon |
|---|---|
|
Connected |
|
|
Connecting |

|
|
Disconnected |
|
|
Unmanaged |
|
Get Information on the UMS Connection
→ Check basic information of the connected Universal Management Suite (UMS), like IP address and Hostname in the tray app.
Wi-Fi Tray App
Access the Tray App
→ Open the Wi-Fi tray app by clicking the Wi-Fi tray icon. The icon is dynamic and represents the state of the connection.
Automatic Network Scan
When you open the Wi‑Fi tray app, a search for available networks starts automatically. During the search, you can see a visual feedback of the ongoing scan and the list of available networks updates continuously. The search stops automatically after a few seconds and the list then remains unchanged until a new scan is triggered or the tray app is reopened.
-
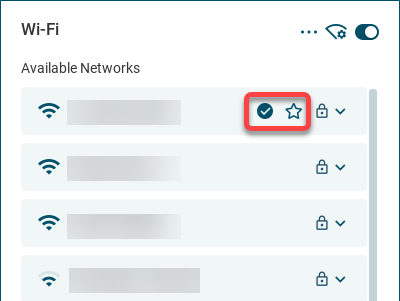
The connected network is shown at the top of the list. All other networks are listed in order of signal strength.
-
Previously configured networks are marked with a star icon.
-
The currently connected network is marked with a tick icon.
Action Icons
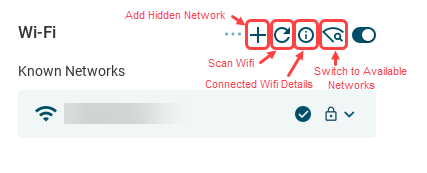
Using the icons at the top of the window, you can:
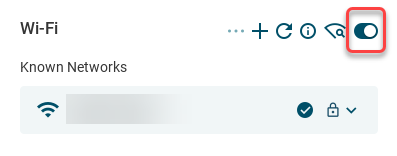
→ Use the toggle switch of the Wi-Fi tray app to turn Wi-Fi on and off.
→ Add a hidden network.
→ Scan for Wi-Fi networks to refresh the list of available networks.
→ Check the details of the connected network.
→ Switch between the Known Networks list and the Available Networks list.
If the Automatic switch of network connection parameter is enabled under Network > Common Settings, the toggle can get disabled. For more information, see Common Settings.
Connect to Available Wi-Fi Networks
If Network > Wireless > Wi-Fi Network > Show only managed wireless networks is enabled and applied to the device through a profile, users can only connect to networks under Known Networks.
To connect to a network:
Click for instructions...
-
Reopen the tray app or click the Scan Wi-Fi icon to refresh the list under Available Networks.
-
Click the network to be connected and provide the network key. You can already start typing with the search still ongoing.
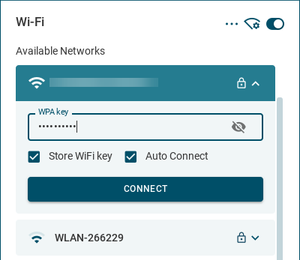
You can enable the Store WiFi key and Auto Connect parameters according to your needs.
For information on saving network credentials for Wi-Fi WPA Enterprise connections, see How to Configure the Permanent Storage of User-Provided Network Credentials (Wi-Fi and Ethernet).
-
Click Connect.
The Wi-Fi tray icon changes to show the active connection.
The configured network is listed in the Known Networks list.
The configured connections get listed in the IGEL Setup under Network > Wireless > Wi-Fi Networks. For more information, see Wi-Fi Networks. -
To disconnect from the connected network, click the network and click Disconnect.
Edit and Delete Known Networks
To edit or delete a network:
Click for instructions...
-
Switch to the Known Networks list.
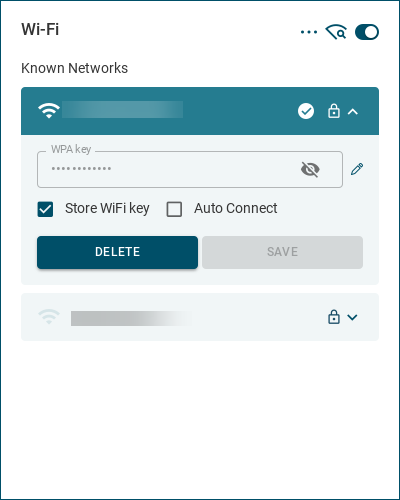
-
Click on the network to be edited or deleted.
You can enable the Store WiFi key and Auto Connect parameters according to your needs.
If you need to edit or delete Wi-Fi WPA Enterprise connections, you cannot do this via the above dialog. Use the IGEL Setup or the UMS profile, instead. -
Click Save to save the changed configuration or click Delete to remove the network from the list.
Connect to Hidden Networks
To connect to a hidden network:
Click for instructions...
-
Switch to the Known Networks list.
-
Click the Add Hidden Network icon at the top of the window.
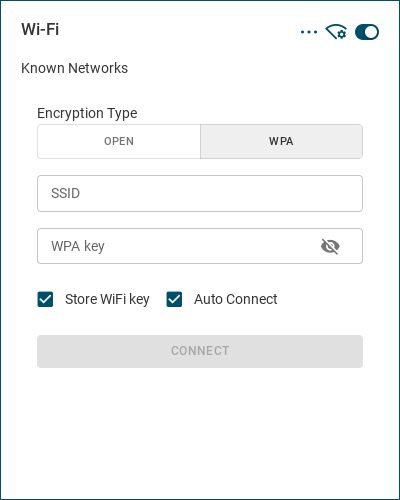
-
Set the Encryption Type, provide the SSID and the network key.
-
Click Connect.
The Wi-Fi tray icon changes to show the active connection.
The configured network is listed in the Available Networks list and in the Known Networks list.
The configured connections get listed in the IGEL Setup under Network > Wireless > Wi-Fi Networks. For more information, see Wi-Fi Networks.
-
To disconnect from the connected network, click on the network in the Available Networks list and click Disconnect.
LAN Tray App
Access the Tray App
→ Open the LAN tray app by clicking the LAN tray icon.
The tray icon is dynamic and represents the state of the connection as described below.
The state of the connection is determined by the network manager. The network manager periodically requests http://connectivity-check.ubuntu.com/ to check the connectivity.
|
LAN Status |
Taskbar Icon |
|---|---|
|
Connected |
|
|
No connection |
|
|
Connected, but no internet |

|
|
Connecting |

|
|
Disconnected by user |

|
|
Connection error |

|
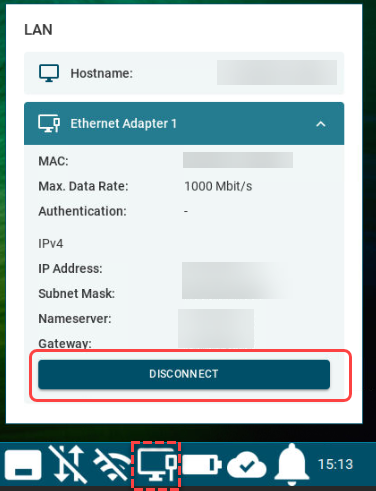
Manage LAN Connections
→ Select a network connection to see information on the network.
→ Use the buttons to connect to and disconnect from LAN networks.
The saving network credentials for Ethernet IEEE 802.1X connections requires further administration, see How to Configure the Permanent Storage of User-Provided Network Credentials (Wi-Fi and Ethernet).
Mobile Broadband Tray App
Access the Tray App
→ Open the tray app by clicking the mobile broadband tray icon. The tray icon is dynamic and represents the state of the connection:
|
MBB Connection Status |
Taskbar Icon |
|---|---|
|
Connected |
|
|
No connection |
|
|
SIM locked |

|
Starting from OS version 12.4.1, on devices supporting mobile broadband physical SIM and eSim as well, an automatic switch to the physical SIM slot is performed if eSim has no profile assigned.
Switch WWAN On and Off
→ Use the toggle to switch the WWAN connection off and on.
If the Automatic switch of network connection parameter is enabled under Network > Common Settings, the toggle can be disabled. For more information, see Common Settings.
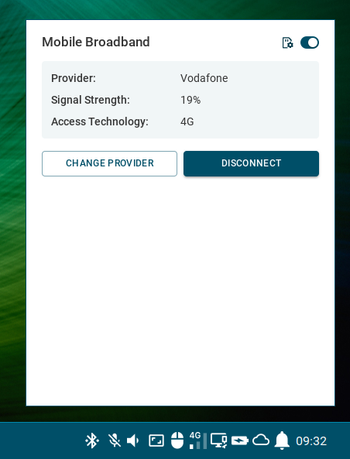
Get Information on Mobile Broadband Connection
The mobile broadband tray app displays details about the WWAN network connection, like the network Provider and the Signal Strength, and provides an option to easily connect / disconnect and configure networks.
Configure the WWAN Network
→ Click SIM Details to display the details and to configure the settings that are enabled for the tray app.

Click for details on configuration..
You can set which configurations are available in the tray up under Network > Mobile Broadband. For details, see Mobile Broadband in IGEL OS 12.
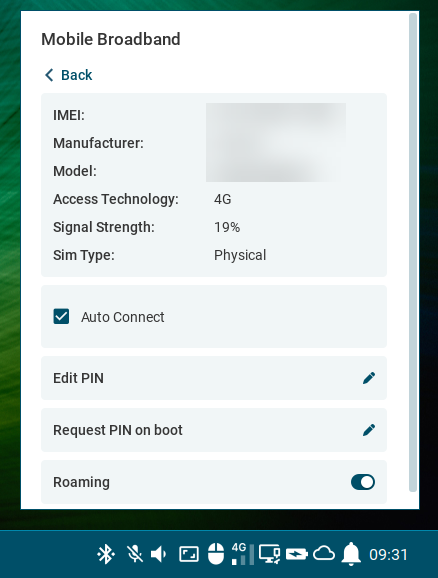
You can configure the following:
-
Auto Connect
☑ The mobile internet connection is established automatically. (Default)
-
Edit PIN
Change the PIN of the SIM card. -
Request PIN on boot
Set if PIN needs to be provided at startup. -
Roaming
Use the toggle to enable/disable the connection to roaming networks.
Edit the Network Provider
→ Click Change Provider to edit the network provider information.
Click for details on configuration...
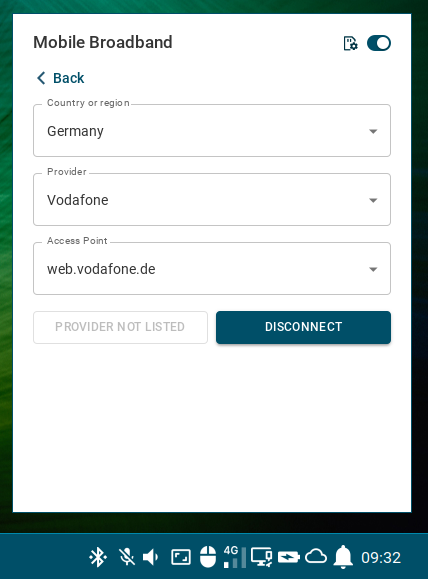
You can configure the following:
-
Country or region
Country or region of the service provider. -
Provider
Your mobile network connection provider. -
Access Point
APN (Access Point Name) for your network connection. If you do not know the APN, ask your mobile communications operator for it.
Display Tray App
Automatic Display Profile
When the endpoint device is connected to different environments, such as when the user switches between different workplaces, it will attempt to store each monitor setup.
Access the Tray App
→ Open the display tray app by clicking the tray icon: 
The icon is dynamic in multi-monitor environments and represents the configured Multiple Display Mode.
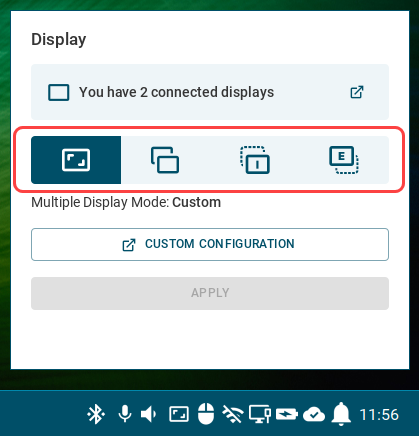
The basic window opens with different content for single display and multiple display setups.
Manage a Single Display
If you have a single display, you have the following configuration options:
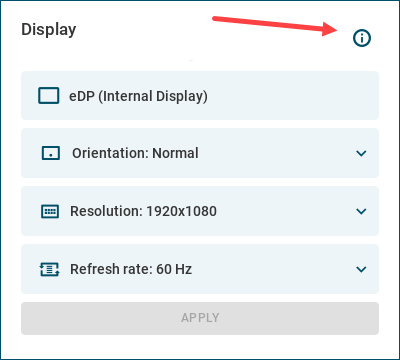
→ Click the info icon to display device information.
→ Set Orientation, Resolution and Refresh rate for the single display.
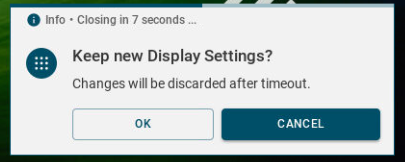
After clicking Apply, you need to confirm keeping the changes before timeout. After the timeout, settings revert to the previous configuration.
Change the Multiple Display Mode
→ Change the Multiple Display Mode by clicking the icons. The currently selected mode is shown under the icons.
Temporary Effect
The Multiple Display Mode option in the basic window can be used to quickly change the display setting temporarily. After reboot or suspend, the Multiple Display Mode will reset to the default Custom.
If you want display configurations to be persistent, select Custom as Multiple Display Mode and click Custom Configuration to change the settings in the display configuration window.
To apply the changes you made, click Apply in the bottom right corner. After clicking Apply, you need to confirm keeping the changes in a dialog. After the timeout, settings revert to the previous configuration.
Access the Custom Configuration Window
→ Click the You have X connected displays or the Custom Configuration button to open the display configuration window.
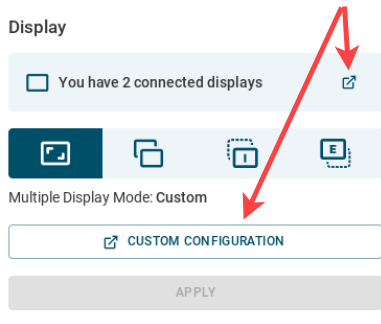
Display information is always available in the display configuration window, but configuration is only possible if you select Custom as Multiple Display Mode.
Configure the Displays in the Display Configuration Window
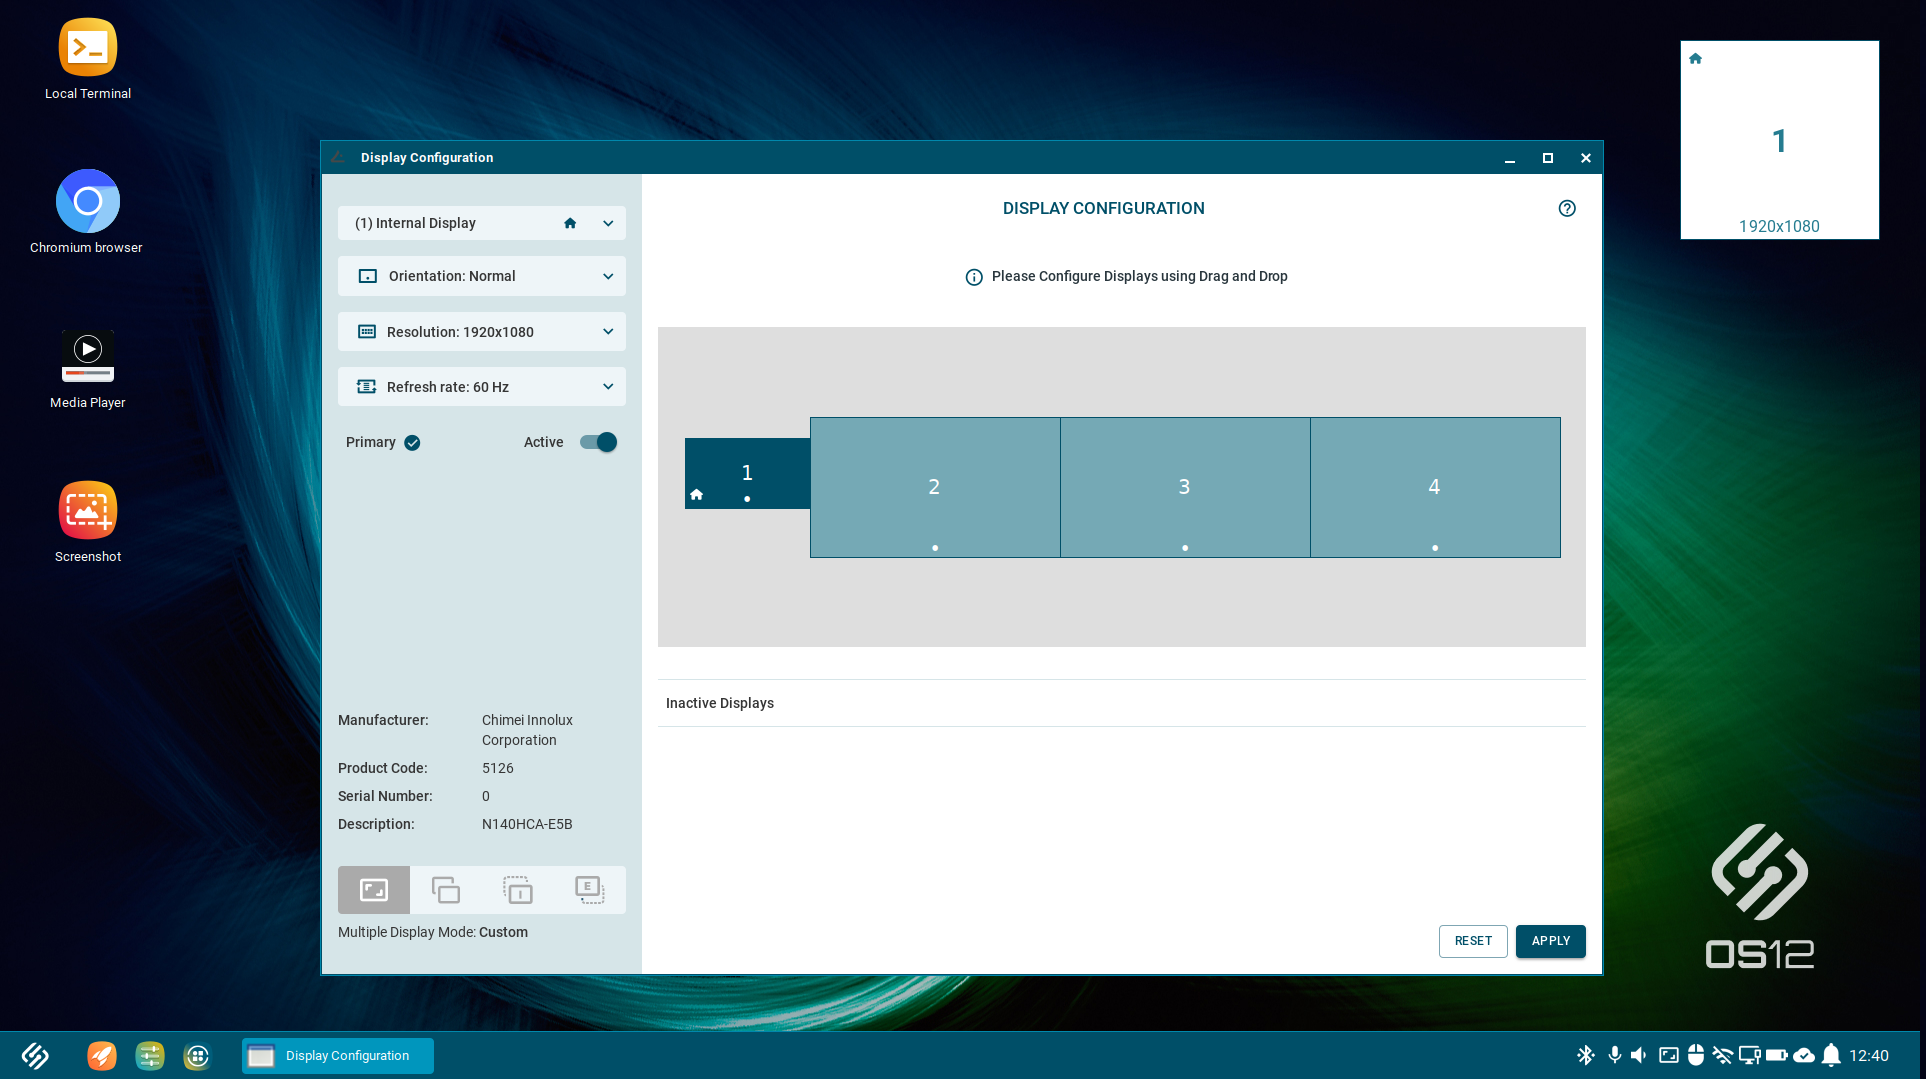
Display information is always available in the display configuration window, but configuration is only possible if Custom display mode is applied in the basic window. You can see the selected mode in the bottom left corner.
To apply the changes you made, click Apply in the bottom right corner. After clicking Apply, you need to confirm keeping the changes in a dialog. After the timeout, settings revert to the previous configuration.
Click for a detailed description of the available actions...
Landing Page
→ Click Reset to restore the last saved configurations.
→ Click the info icon to display information on Hardware Limitations for the device. This information is needed for the configuration, because you cannot create display layouts which exceed the given maximum resolution or number of connected displays.
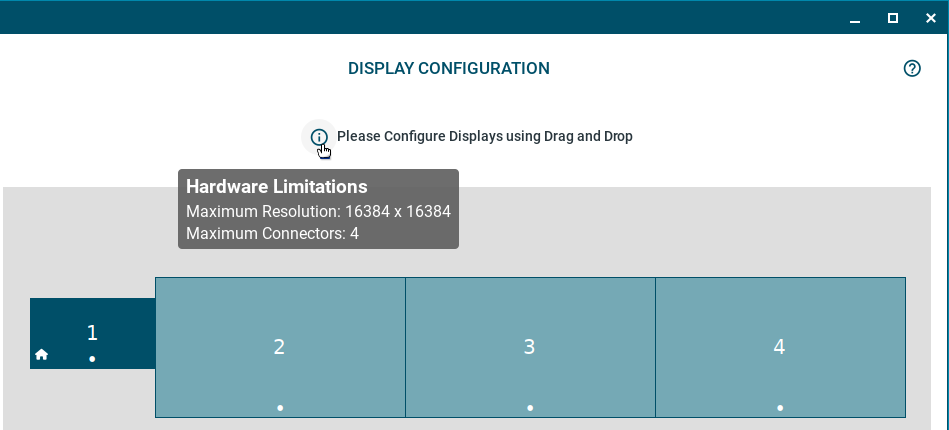
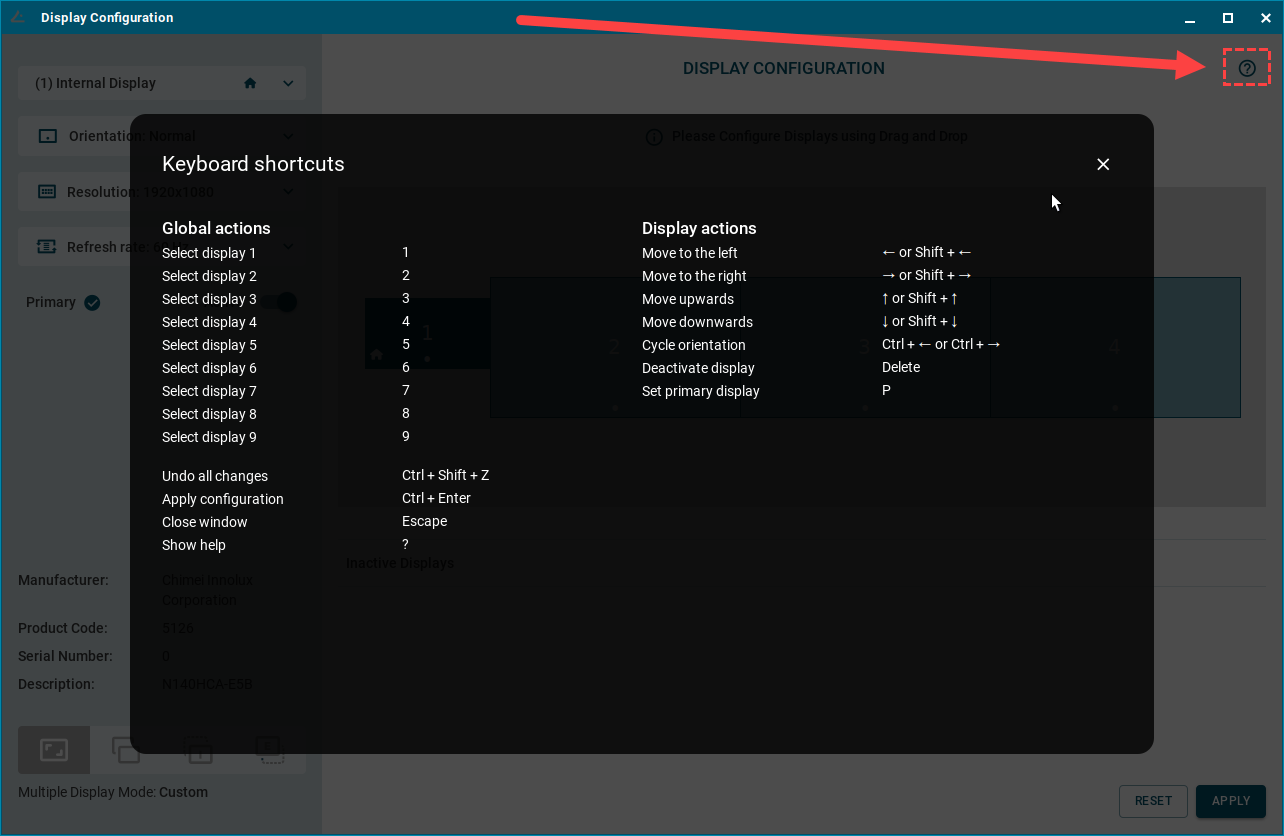
→ Click the question mark icon to display the Keyboard shortcuts that you can use for display configuration.
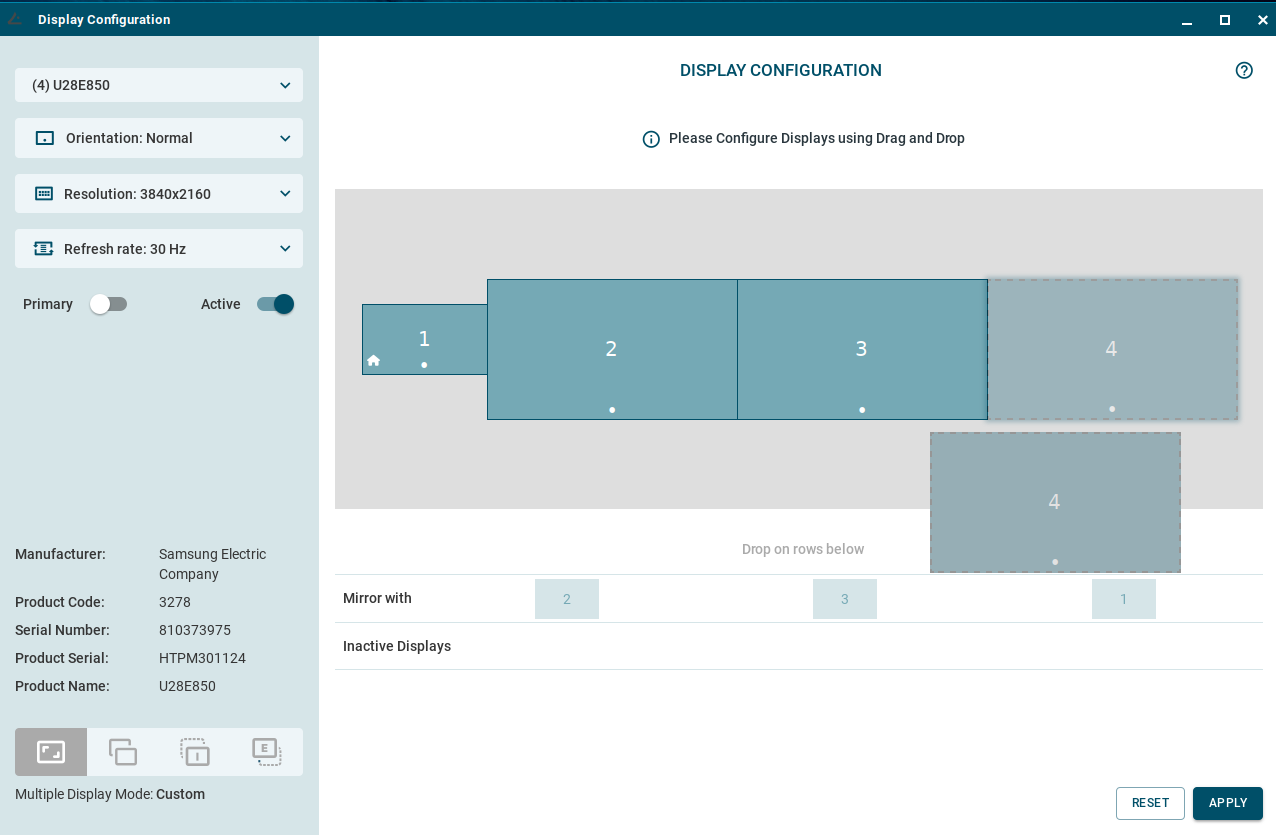
Left Hand Panel
→ Select a display from the dropdown at the top, or by clicking the display in the Layout Area, to configure the display and to see the details of the selected display at the bottom of the panel.
You can also select by typing the display identification number shown in the Layout Area.
You can use the parameters to configure the following:
-
Orientation
-
Resolution
-
Refresh rate
-
Primary toggle
Activate if you would like to make the selected display the primary display. The primary display is marked with a house icon. Only one display can be primary; if a display is marked as primary, the existing primary becomes non-primary. -
Active toggle
Use the toggle to activate/deactivate the selected display. You cannot deactivate all the displays, at least one display must remain active.
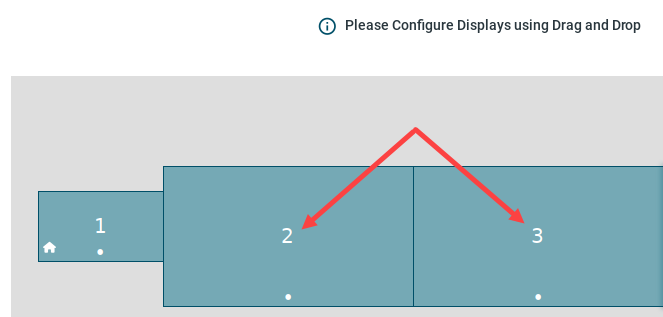
Drag and Drop Panel
Here you can:
-
Select a display by clicking on it.
-
Edit the layout of the displays by drag and drop.
-
Deactivate displays by moving them to the Inactive Displays row.
-
Activate displays by moving from Inactive Displays to the Layout Area.
-
Create mirror groups by moving displays together in the Mirror with row.
-
Unmirror displays by moving from Mirror Group row to Layout Area.

Mouse & Touchpad Tray App
Access the Tray App
→ Open the tray app by clicking the tray icon.
The icon is dynamic and represents the detected device:
-
If a mouse is detected, the following icon is shown:

-
If a touchpad is detected, or both a mouse and a touchpad are detected, the following icon is shown:

Configure the Mouse in the Mouse & Touchpad Tray App
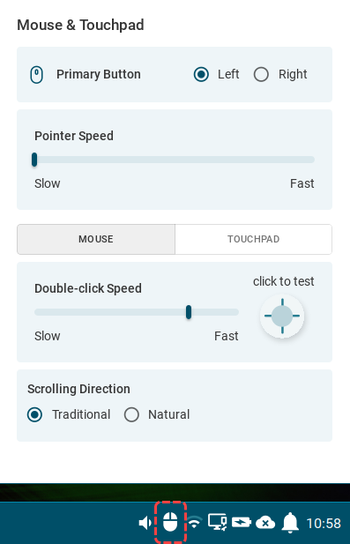
You can use the mouse & touchpad tray app to configure the following mouse settings for the detected device:
Configure the Touchpad in the Mouse & Touchpad Tray App
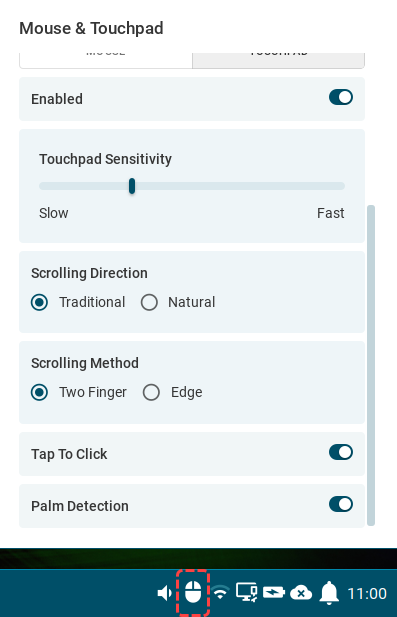
You can use the mouse & touchpad tray app to configure the following touchpad settings for the detected device:
Battery Tray App
Accessing the Tray App
→ Open the tray app by clicking the battery tray icon.
The icon is dynamic and represents the state of the battery:
-
When the battery is charging, the following icon is shown:

-
When the battery is discharging, the following icon is shown:

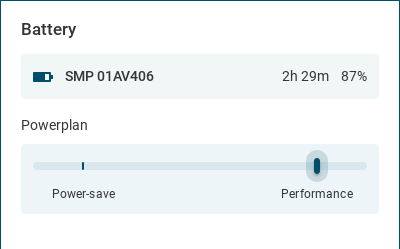
Get Battery Information
The battery tray app shows information for all available batteries, including multiple internal batteries and batteries of connected bluetooth devices.
Change the Powerplan
You can set the CPU power plan regulation under Powerplan.
The CPU power plan is set for the current mode in use (AC or Battery). The CPU power plan can be set for all modes under System > Power Options > System. For the description of the power plans, see System Power Options in IGEL OS 12.
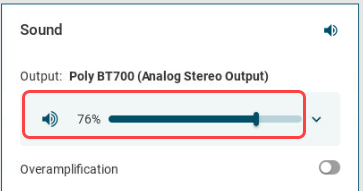
Sound Tray App
Access the Tray App
→ Open the sound tray app by clicking the following icons: 

When the devices are muted the icons change accordingly to: ![]()
![]()
Manage Audio Devices
→ Use the dropdown menu to select which output/input device is to be used.
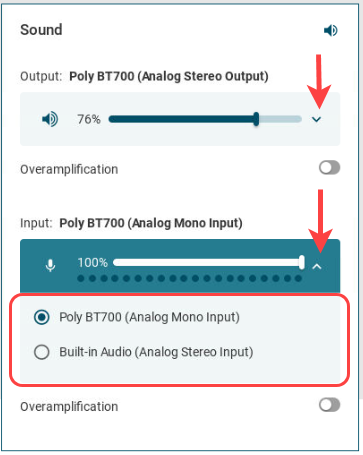
→ Set the volume for the selected output/input device using the slider.
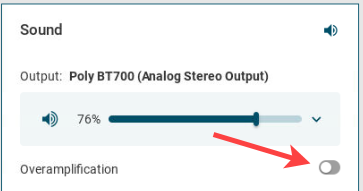
→ Enable/disable overamplification. If the overamplification parameters are set by your administrator under Devices > Audio > Options, you cannot change the setting from the tray app.
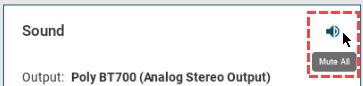
→ Use the Mute All button to mute all the output devices.
Bluetooth Tray App
Access the Tray App
→ Open the B
luetooth tray app by clicking the tray icon: ![]()
Switch Bluetooth On and Off
→ Use the toggle button at the top to switch Bluetooth on and off.
Connect a Bluetooth Device
-
Go to the Available Devices view by clicking the button in the top right corner:

-
Select a device from the list of devices that are available to connect and click Connect. If the device needs a PIN for the pairing process, it will be displayed above the Connect button during the connect process.
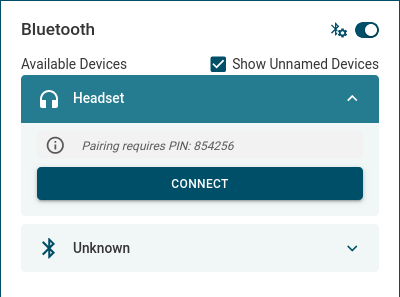
-
Some bluetooth devices have no names assigned to them. If you enable Show Unnamed Devices, you can see these devices in the list with their MAC address displayed.
The tray app is constantly scanning for available devices as long as the dialog is open.
Manage Connected Bluetooth Devices
-
Go to the Paired Devices view by clicking the button in the top right corner:

-
Select a device from the list and click Connect, Disconnect or Unpair.
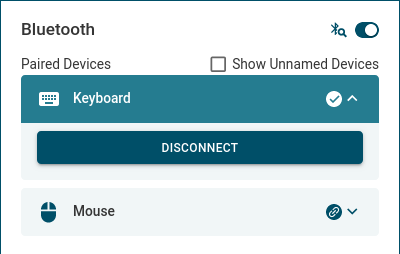
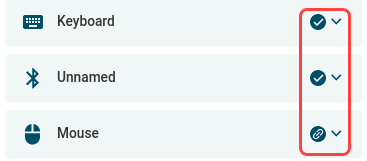
The status of the devices is marked next to the drop-down arrow. The connected devices are marked with a tick. The paired devices are marked with the link icon.
Printer Tray App
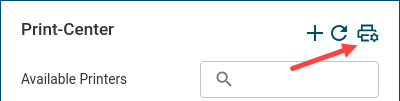
Access the Tray App
→ Open the printer tray app by clicking the tray icon: ![]()
Connect a New Printer
-
Go to the Available Printers view by clicking the button in the top right corner:
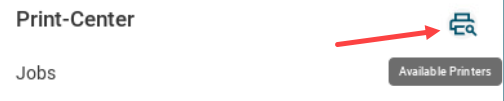
-
Here, you have two options to connect a printer.
-
Option 1: You can add a printer by clicking +. Provide the configurations of the printer and click Connect.
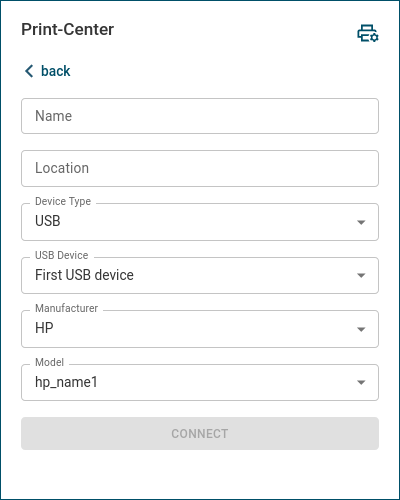
The configuration options change according to the selected Device Type. You have the following options to set as connection type:-
USB
-
TCP
-
IPP
-
Parallel
-
Serial
-
-
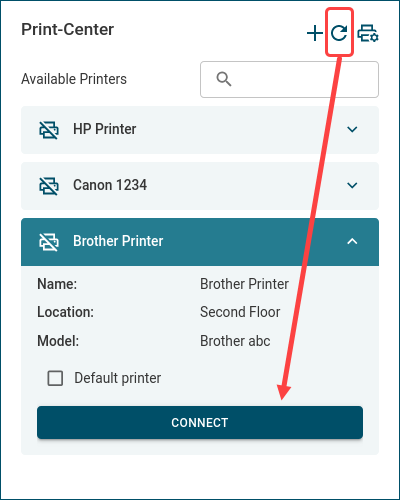
Option 2: You can scan the network for printers, by clicking the scan button. Then, select a printer and click Connect.
-
Manage Connected Printers
-
Go to the Connected Printers view by clicking the button in the top right corner:
-
Select a printer under Connected Printers.
You can use the Search bar, to search in the list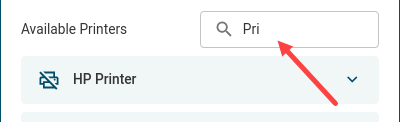
-
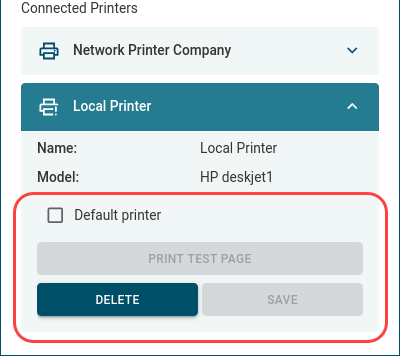
Here you can:
-
print a test page from the selected printer
-
delete the selected printer
-
set the selected printer as default printer and save
-
Only one default printer can be set (i.e. setting a printer to default means that an existing one loses this property.) If there is a default printer set by the admin, the user cannot set another printer as default.
If a printer is set by your administrator, you cannot delete or modify it. But you can still print a test page.
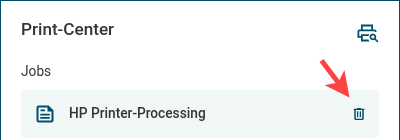
Manage Printing Jobs
Under Jobs, you can see the list of printer jobs with status info (like Processing, Pending, Aborted). When an error occurs, the error messages are displayed under the job.
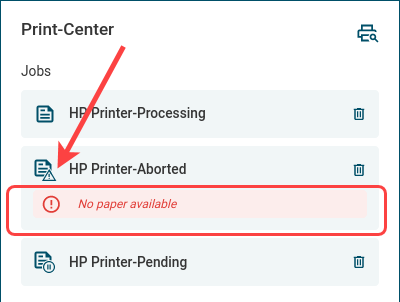
→ Use the trash icon to cancel a printer job.
OpenConnect VPN Tray App
Access the Tray App
→ Open the OpenConnect VPN tray app by clicking the icon.
Get Information of VPN Connection
You can find the status information of the VPN connection under More Details. The status is also shown in the displayed tray icon ![]()
Disconnect from VPN
You can click Disconnect to disconnect from the OpenConnect VPN connection.
For more information on the OpenConnect VPN App, see OpenConnect VPN.
Language & Keyboard Layout Tray App
Access the Tray App
→ Open the language & keyboard tray app by clicking the tray icon with the keyboard layout abbreviation. The abbreviation represents the in-use keyboard layout. For example: ![]()
Change System Language
-
Select a language from the dropdown under Display Language and click Change Language.
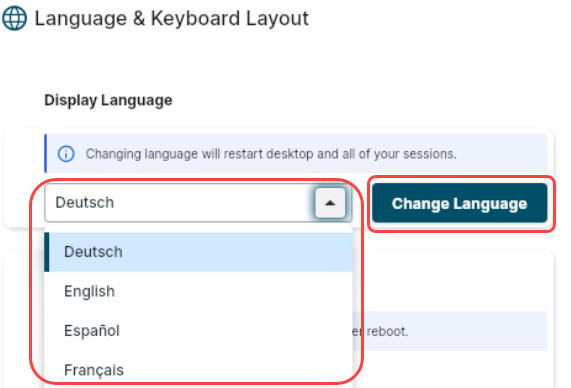
-
Confirm to apply the changes.
The changing of the language restarts the desktop and the running sessions.
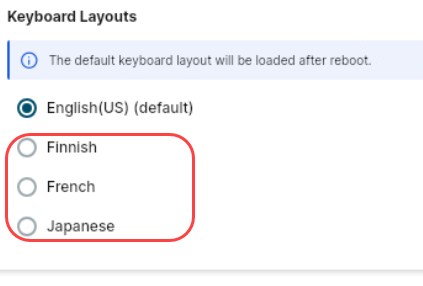
Change Keyboard Layout
→ To change the keyboard layout select one of the available Keyboard Layouts. The available layouts are defined centrally by the UMS through the applied profiles.
You can see the keyboard layout abbreviation change in the taskbar accordingly.
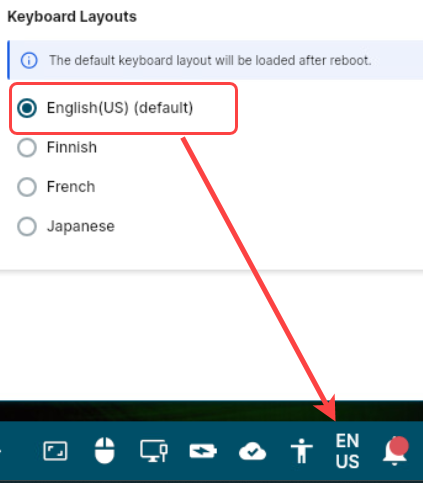
After reboot, the keyboard layout reverts to the default keyboard layout. The default keyboard layout is the configured through a profile under User Interface > Input > Keyboard.
The selectable keyboard layouts can be added through profiles as additional keyboard layouts under User Interface > Input > Additional Keyboard Layouts.
Configure the Language & Keyboard Layout Tray App
The following configurations can be applied through profiles:
-
enable/disable the tray app with the option Show keyboard layout switcher in taskbar under Language Settings in IGEL OS 12.
-
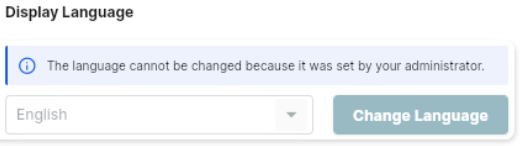
enable/disable the display language change with the option Show language setting together with keyboard layout in tray-app under Language Settings in IGEL OS 12.
If the Language is configured under User Interface > Input > Language, it cannot be changed using the tray app. If you want to enable users to set the system language, make sure to set this back to default. Otherwise, they will see the following message.